We may earn revenue from the products available on this page and participate in affiliate programs. Learn More ›
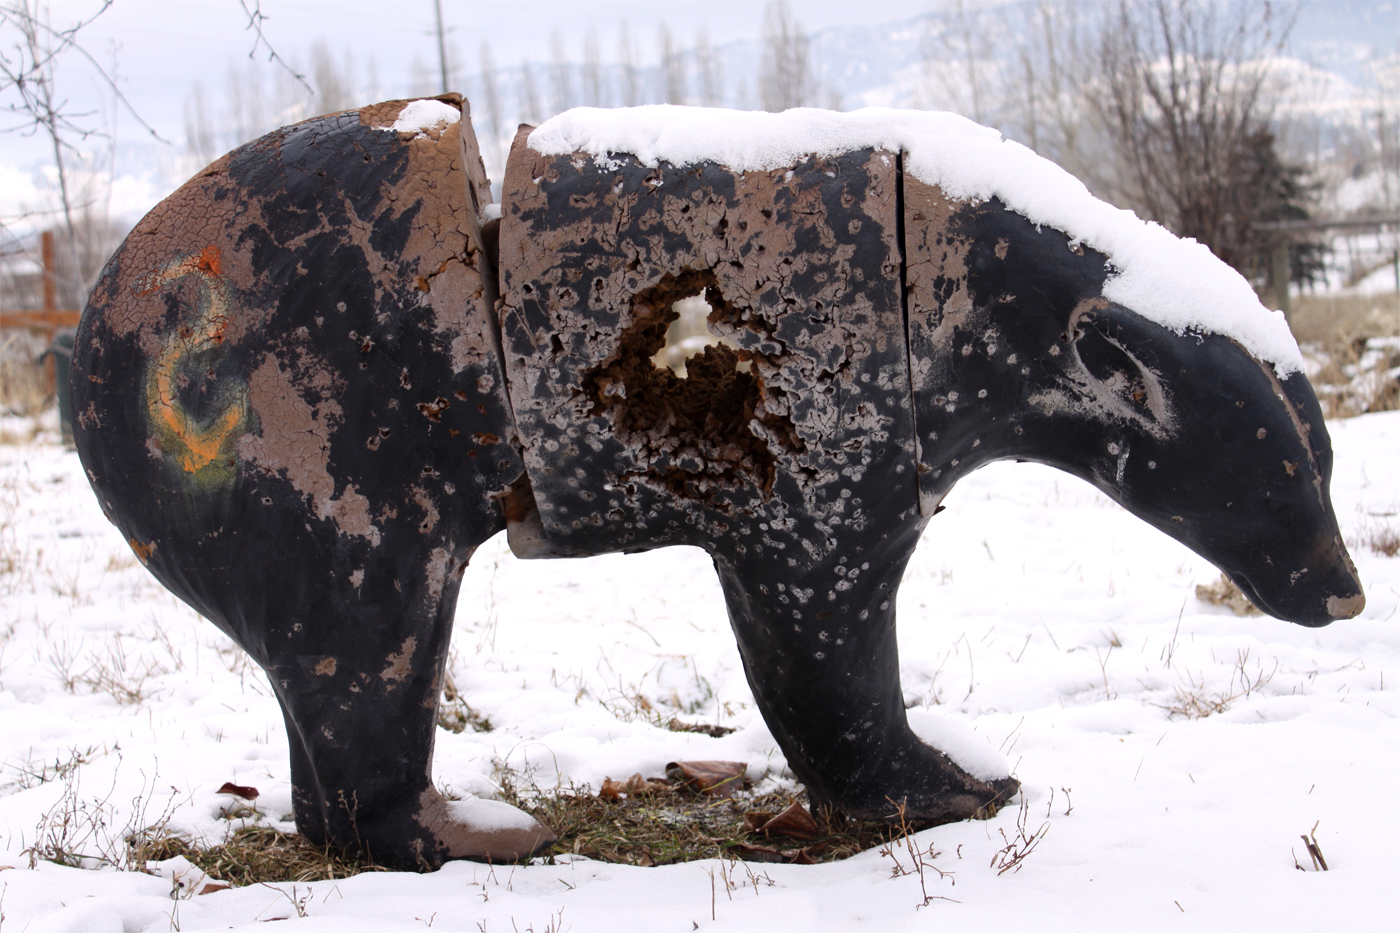
That old sun-beaten 3D target in your backyard with a fist-size hole through it doesn’t have to be donated to the landfill. Instead, revitalize it for about $6 bucks.
Materials
1 can insulation foam sealant
20′ self adhesive dry wall joint tape
20′ duct tape
1 can spray paint
Tools: one piece of cardboard, one wood rasp
Step 1
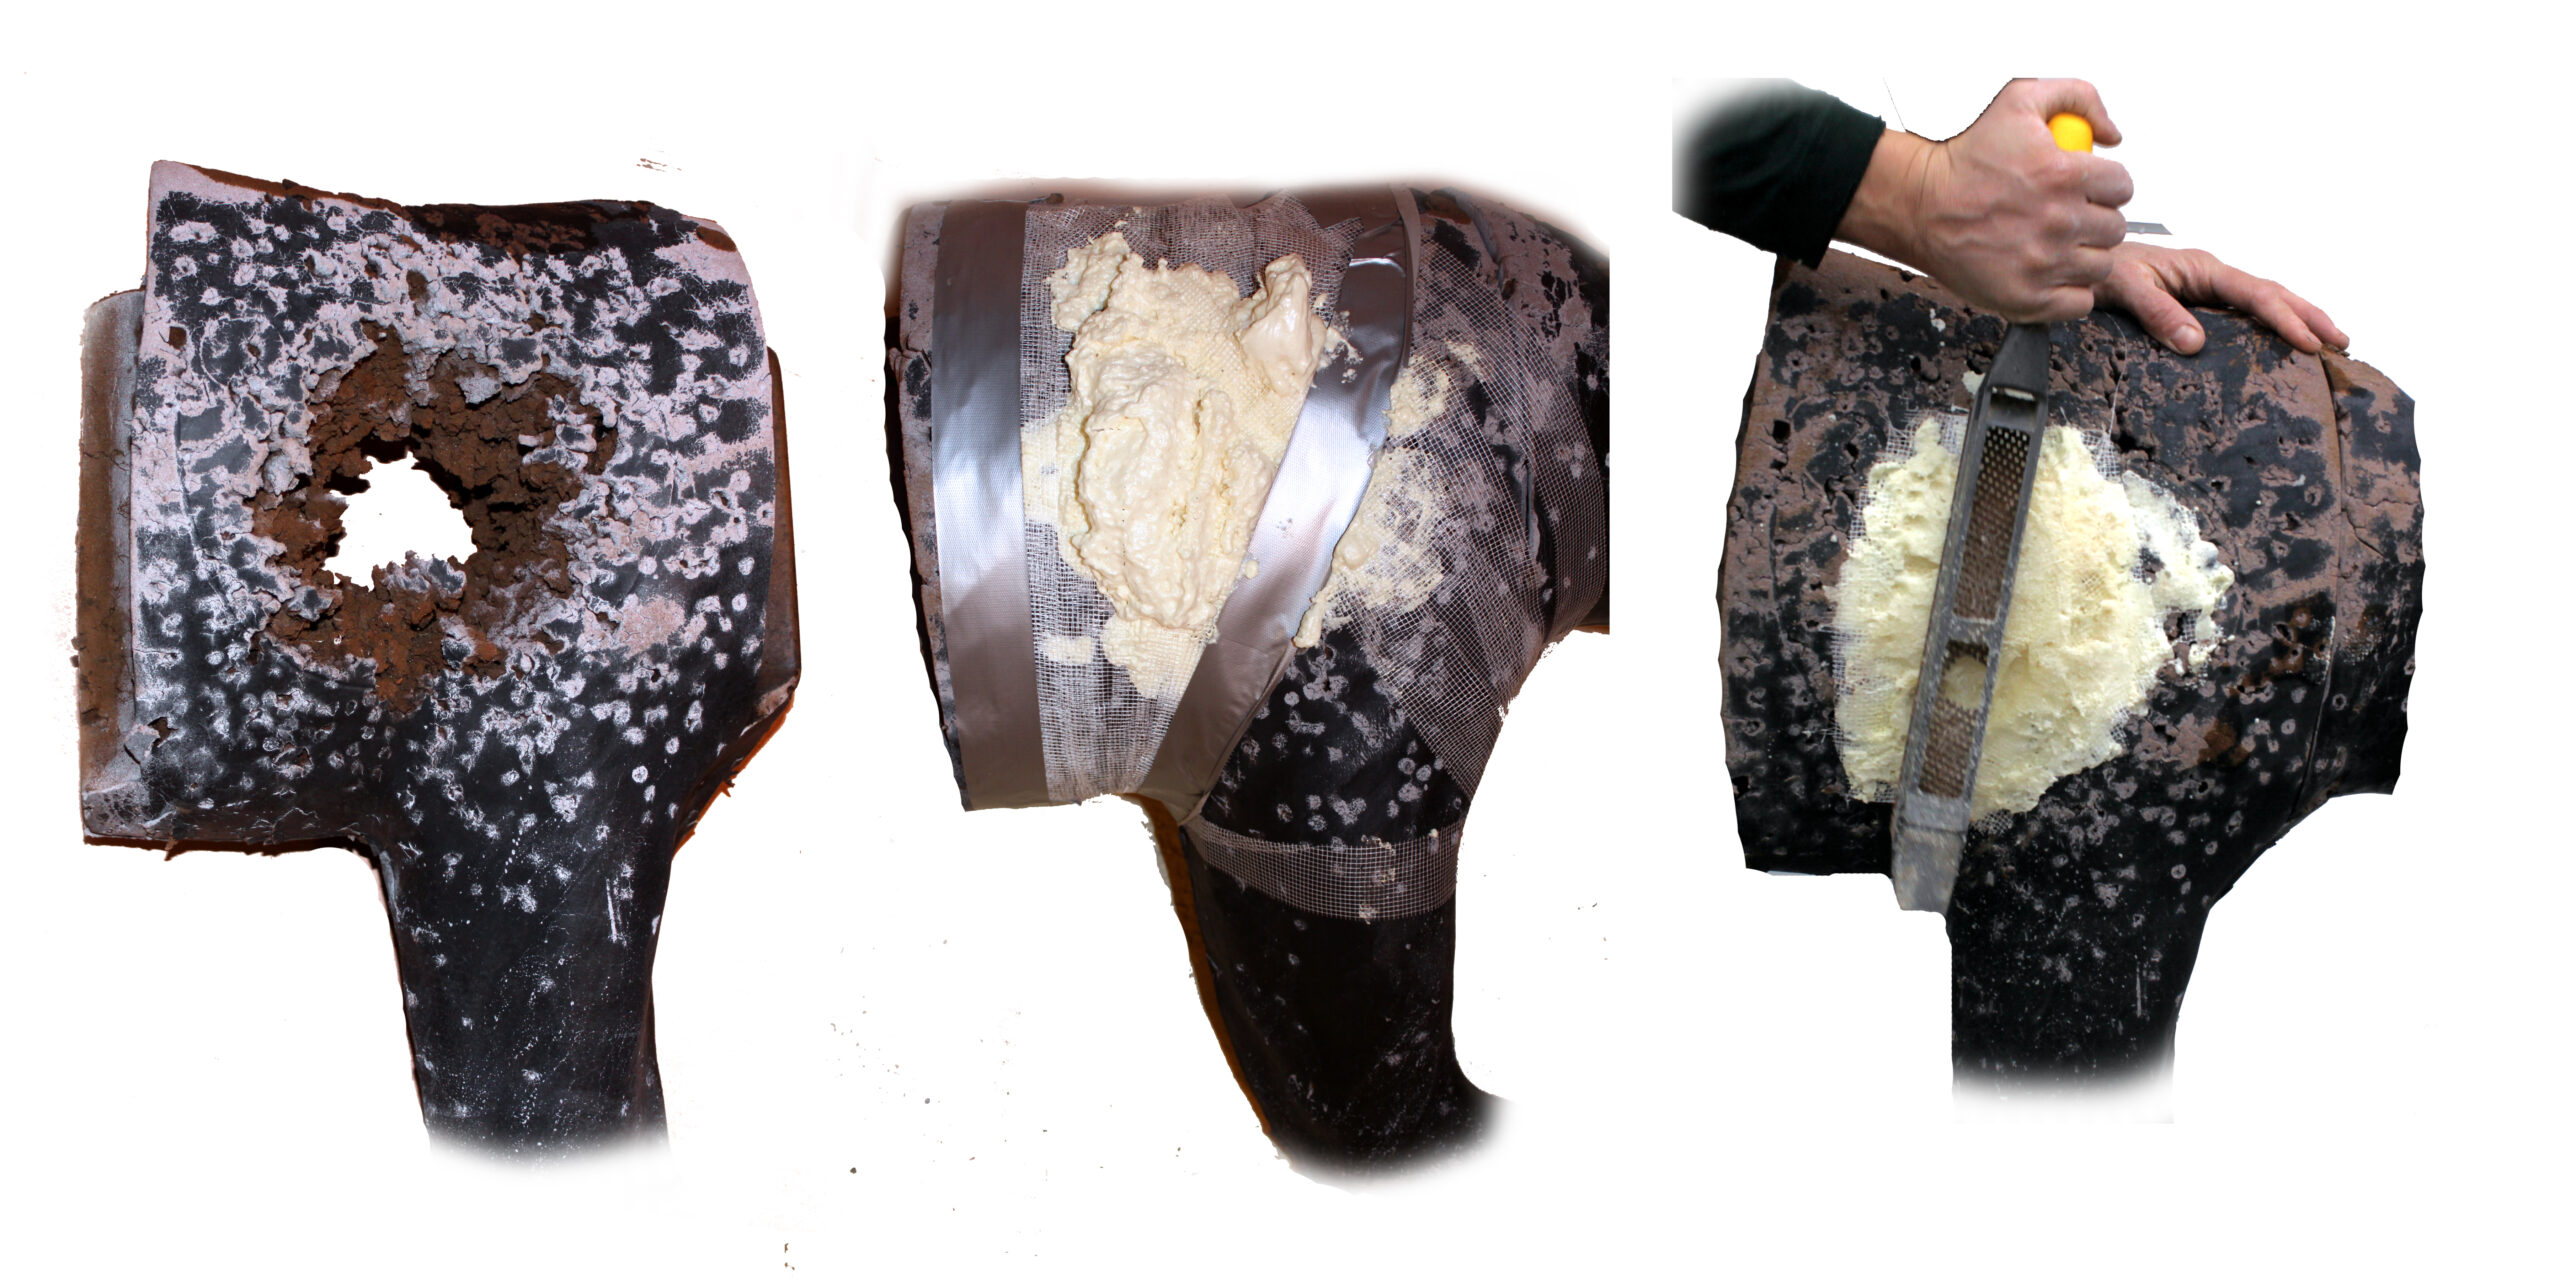
Wrap the target with self-adhesive drywall joint tape, leaving enough of an opening on one side to fit the tip of the sealant can nozzle into. Make sure it’s wrapped tightly and secure the edges with duct tape. If the hole is really big, try filling in the edges to create a base to build upon before wrapping.
Step 2
Fill the hole with the sealant by covering the inside edges and slowly letting it build up. Remember that the foam will expand a lot and there’s no need to overdo it. It’s important to fill in all the little gaps and holes if you want a perfectly smooth target upon completion.
The best insulation foam sealant to use for target repair is the kind made for filling small gaps and cracks. The type designed for large gaps is not dense enough to adequately stop arrows.
Step 3
Once the target is filled, add another wrap of the mesh tape to completely enclose the repaired area. The foam will expand and push out through the mesh tape, but that’s what it’s supposed to do.
Step 4
Remove the excess foam by gently scraping with a piece of cardboard. If you don’t, the foam will expand well beyond the mesh and you’ll need to cut the excess off prior to step 5.
Step 5
After 24 hours, the foam will be dry and ready to shape. A wood rasp will make quick work of the exterior spray foam insulation that leaked out through the mesh. Remove the material until it is shaped like the original target. Do the rasping outside; dust particles are inevitable during this step.
Step 6
Spray paint will make the target look as good as new and can be another element of fun for kids. Blend the colors in as well as you’d like or get creative, making a zebra-striped bear or a tiger-striped deer. Skip this step for even greater cost savings.
Over time, the repair will wear out just as the original target did. But with routine maintenance, adding a little foam as needed, the target will remain in tip-top shape for years.
Target Care Tips
1. Rubbing bar soap on the first 5 inches of your arrow shaft will cause less damage on the target and make it easier to pull your arrows out.
2. Keeping your targets out of the direct sunlight will increase their usable life. Bring them inside or cover them if you won’t be shooting them for extended periods.
3. Use the whole target by shooting into the rump or neck during practice sessions and avoid wearing out the ribcage.
Want more tips and projects to save you cash in the outdoors? Click here.
Got your own DIY tips to share? Email us at howto@outdoorlife.com.