
We may earn revenue from the products available on this page and participate in affiliate programs. Learn More ›
Take a page out of the history of the Old West and craft your next rifle case from a wool blanket. The next time you step onto the range or into hunting camp, your rifle will have the coolest ride around. (Note: These cases are most suited to iron sighted firearms – lever guns, long rifles, shotguns, and so on.)
What You Need
Wool blanket
T-pins
Pencil
Scissors
Heavy nylon thread
Sewing machine or semi-large sewing needle
Embroidery thread
Leather string
Step 1
If you don’t have a wool blanket to spare, eBay and military surplus supply stores are good places to find one. Make sure it’s at least 12 inches longer than the gun you intend to store in it. If you need to wash the blanket, do so by hand in warm water in the bathtub, or on a gentle cycle in your washer. Don’t use hot water and don’t throw it in the dryer afterward. Just hang it over a clothesline to air dry.
Step 2
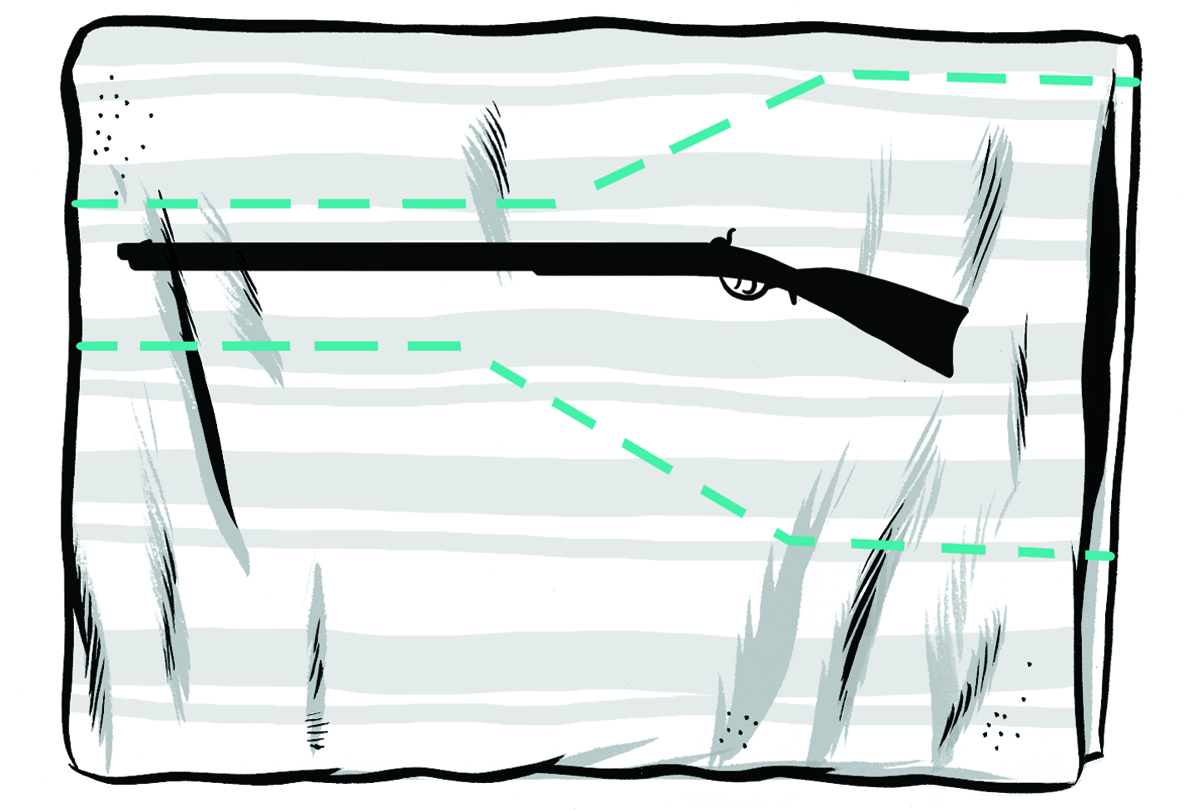
Once your blanket is clean and dry, spread it out and decide how to orient your rifle case. Lay your rifle on the blanket and fold the blanket over the rifle so that it covers it completely, plus at least two inches extra. The open edge should be toward the lower side where the trigger guard is. That’s where you’ll sew your seam.
Use heavy T-pins to pin the case into shape along the length of the rifle. Use a pencil to draw your outline, staying two inches away from the firearm. Don’t follow the gun’s contours perfectly; instead streamline your case so that your gun will slide in and out with ease.
Across the muzzle end, mark a half-inch seam allowance instead of two inches. At the butt end, extend the case ten to twelve inches, keeping your layout lines clean and straight. This long end will fold over the butt of the rifle, creating a closure.
Step 3
Cut out your case. Slide the rifle out and, using a sharp pair of scissors, follow your pencil lines to cut out the pinned-together case. Make your cuts nice and clean.
Step 4
The easiest way to sew your blanket together is on a sewing machine, using heavy nylon thread. Make sure that the seam is heavily pinned or the top layer of wool will “crawl” along ahead of the sewing foot. It should go without saying, but don’t sew the end shut. Leave the last three inches of the seam along the long side unsewn at the butt end for a nice look.
If you sew your case by hand use the same heavy nylon thread and a semi-large needle. Make sure that you make small stitches not more than a quarter inch long. Reinforce both ends of your seam with extra stitching.
Step 5
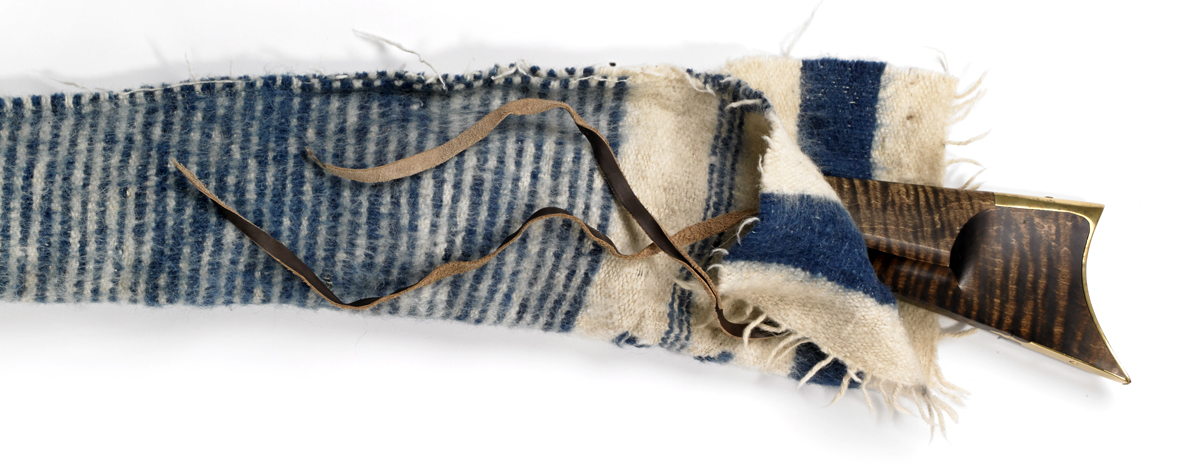
After sewing, you can either leave the rough edge out or turn the case inside out. Turning will put the seam on the inside for a more finished look. It’s also a good idea to bind the edges of the mouth of the case with heavy embroidery thread so that they don’t fray. Use a whipstitch, or any fancy stitch that will prevent the wool along the edge from unraveling.
(It’s worth mentioning at this point that there are lots of upgrades you can apply. Line your case with canvas to make a smooth and durable interior. Add leather fringing into the seam, or sew the edge with fancy stitching or braiding to add class and style. You can make antler buttons for the tie string to wrap around for the closure. And so on.)
Step 6
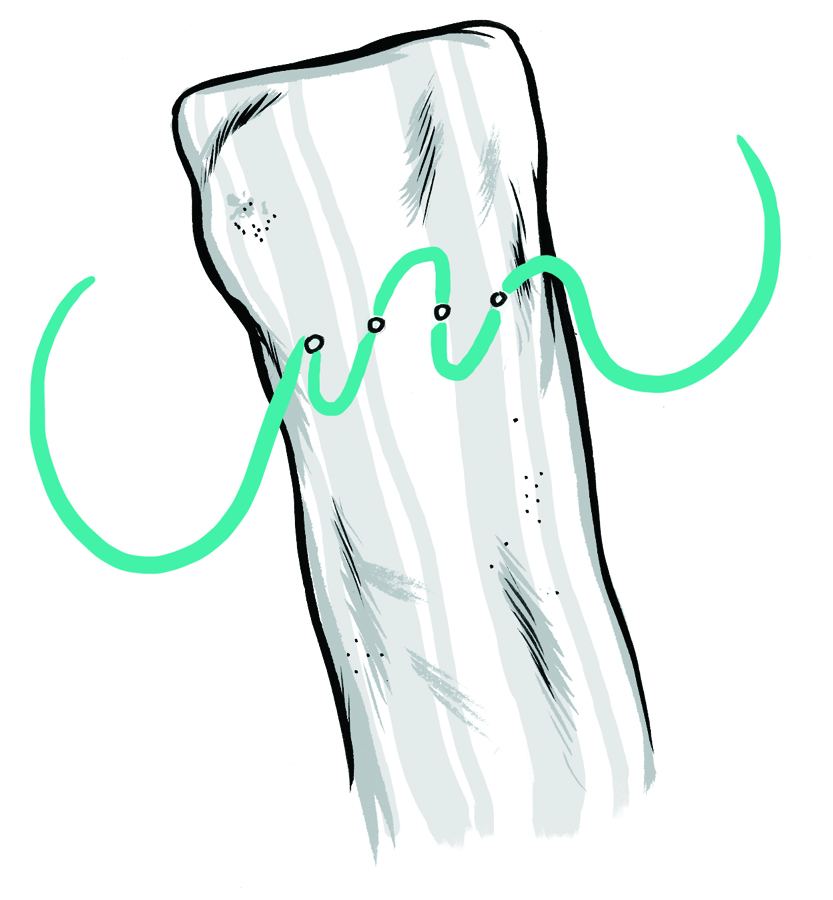
The last step is to sew a closure tie onto your case. I like leather for this. A semi-soft leather string about a quarter-inch wide is great. A long leather bootlace also works.
Trim the end of your leather string to a point. Then take an awl and poke four holes in one side of your case about half an inch apart and in a straight line. They should be about four inches from the open end of your case and parallel with the opening. Make the holes just big enough to thread your leather string through them in a running stitch, leaving a foot or two of string on each side of the stitching.
Want more tips and projects to save you cash in the outdoors? Click here.
Got your own DIY tips to share? Email us at howto@outdoorlife.com.