We may earn revenue from the products available on this page and participate in affiliate programs. Learn More ›
Okay, maggots, listen up. Big game firearms seasons are right around the corner and you are in pathetic shape. Pathetic!
But I’m going to take mercy on your slimy souls and turn you from bullet-spraying morons into deer slaying Carlos Hathcocks no matter what it takes.
So here is the first post in a series of weekly drills you can do to live up to the promise of “one shot, one kill” this season.
Preseason Shooting Drills Week 2: How to Really Zero Your Rifle
Any strong structure requires a solid foundation and that’s just as true with rifle marksmanship as it is with architecture, so that’s where we’ll begin.
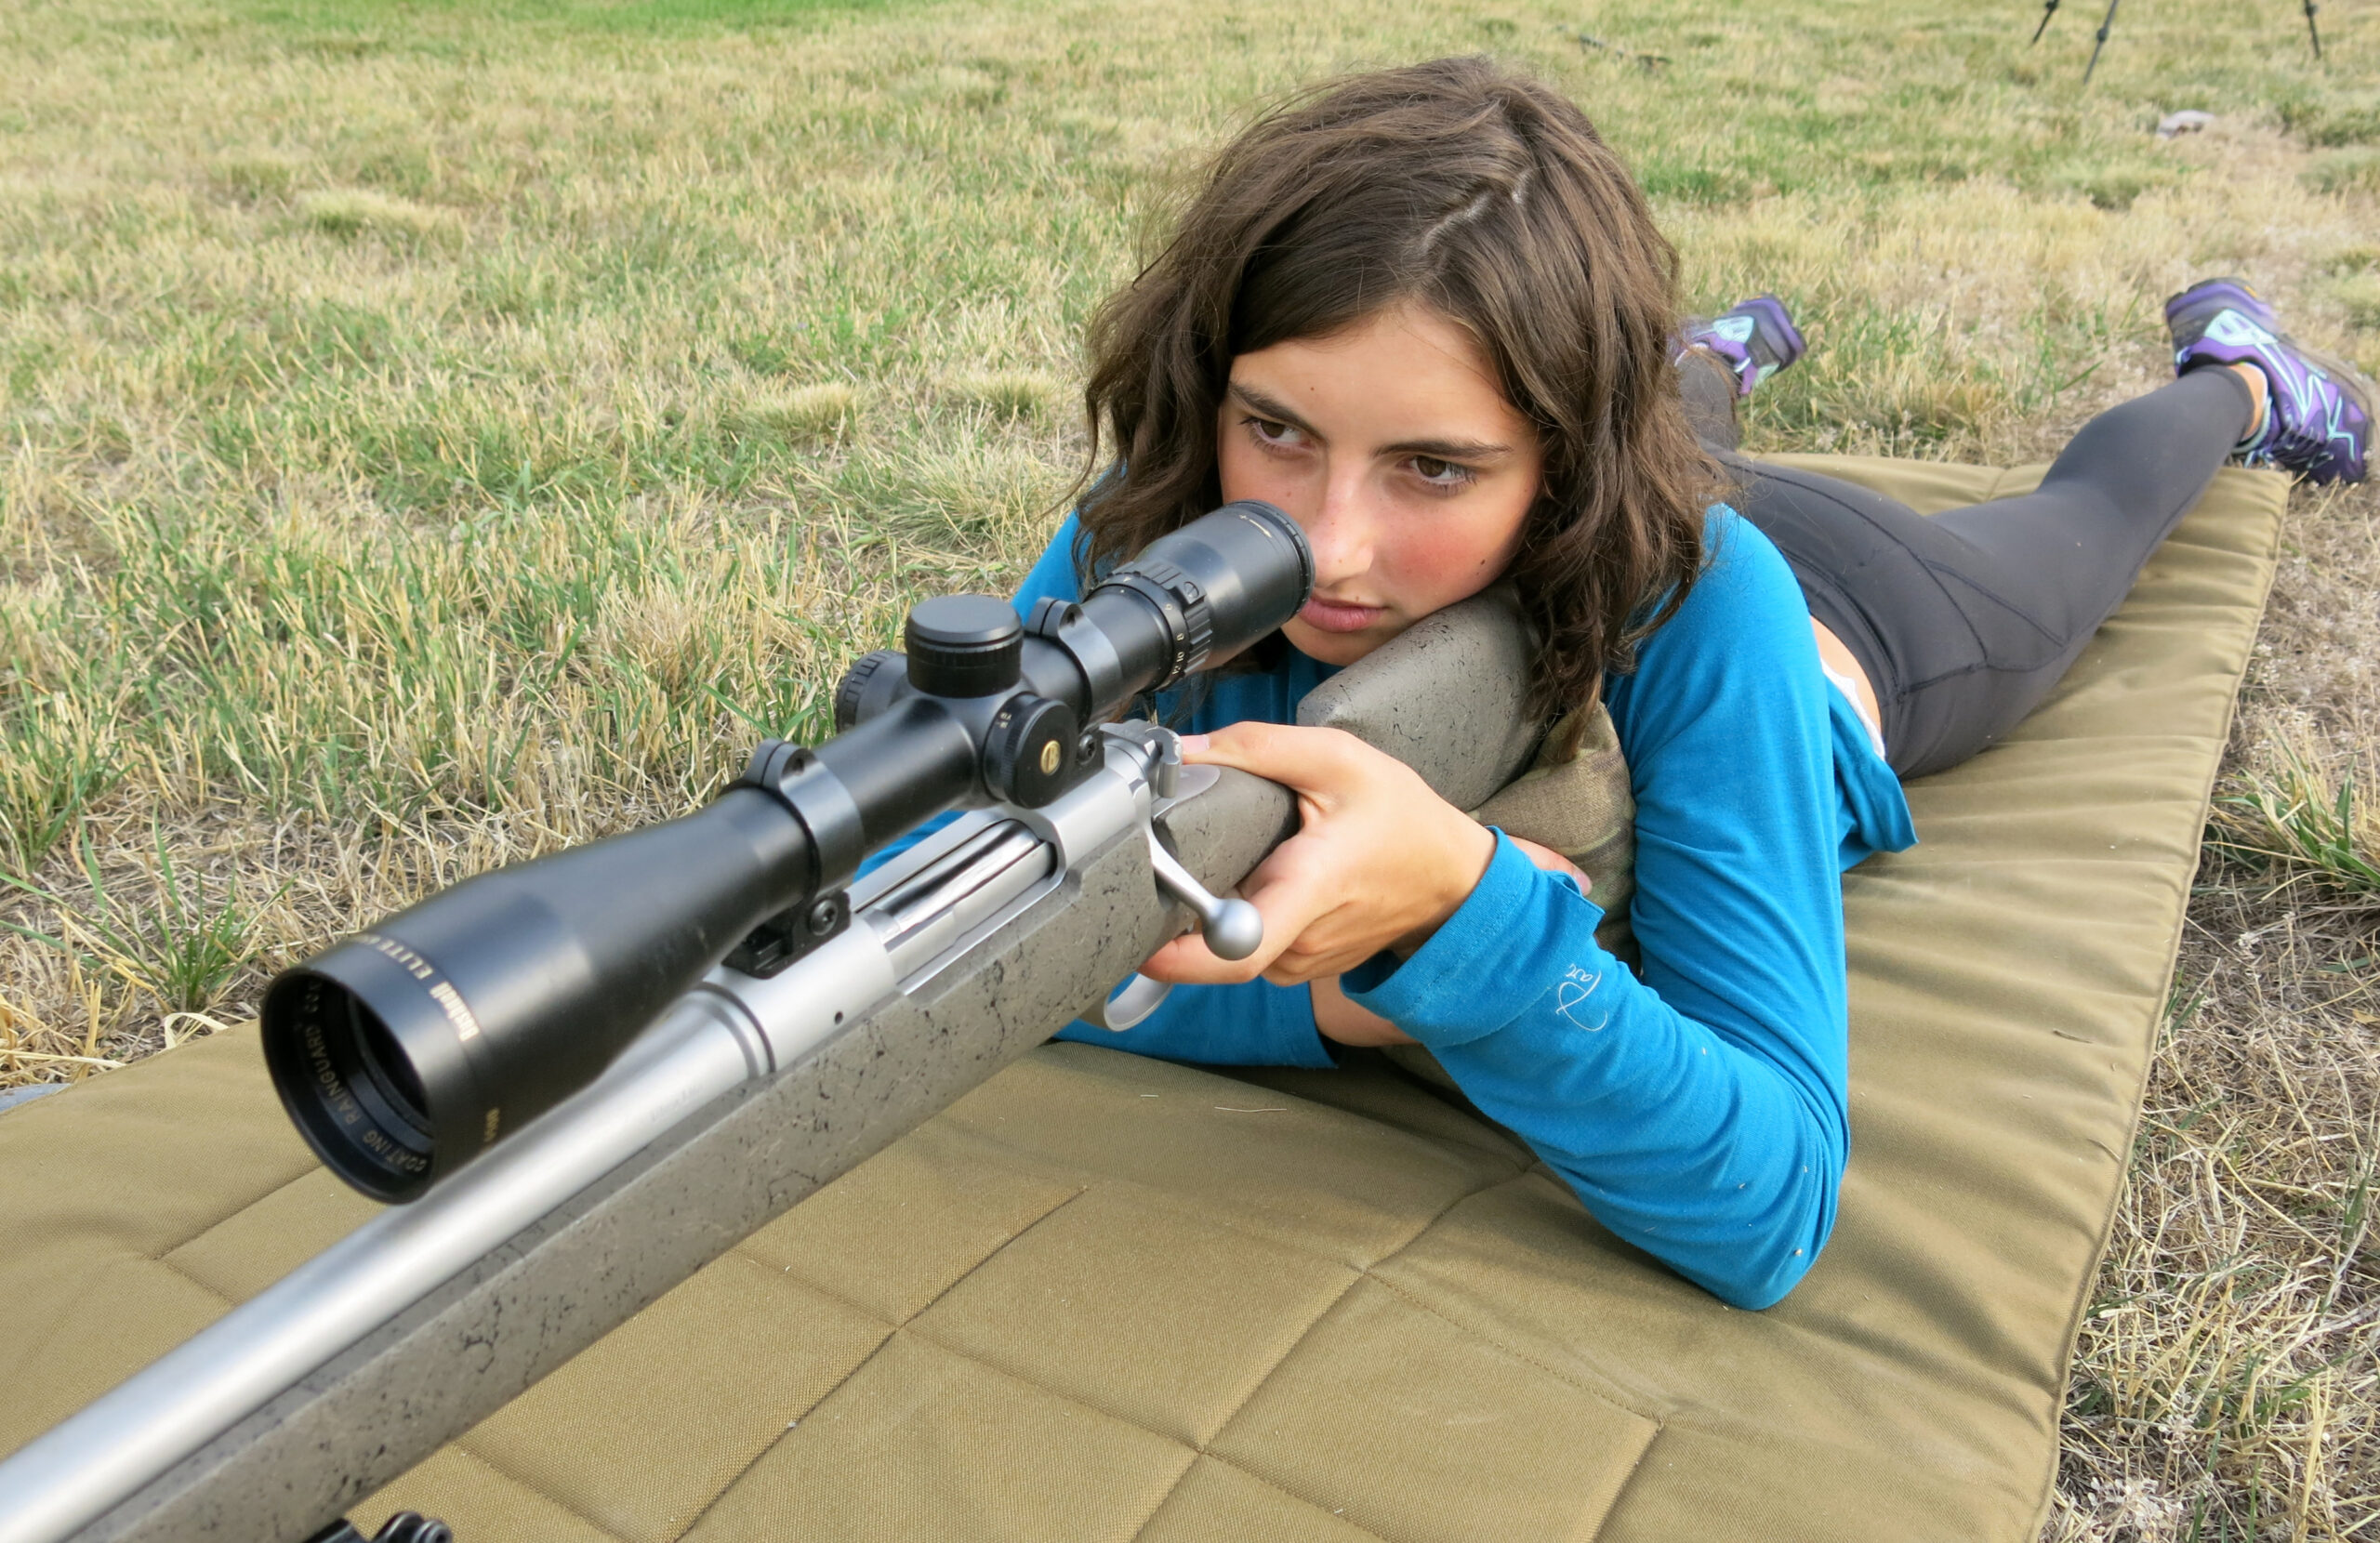
This first week we’ll focus on dry firing skills to get your form in shape. Take turns dry firing from the prone, sitting, and kneeling positions. There are multiple variations for each position, but they all have key elements in common.
1. Be relaxed
Any good shooting position is a relaxed position, free of muscle tension. If you’ve set up correctly, your crosshairs should be drifting right around your target. Doing this means you’ve established correct Natural Point of Aim (NPA).
To check your NPA, get into position and get your sights on target. Close your eyes, take a deep breath and then open them. If your crosshairs haven’t moved, your NPA is solid. If not, make minor adjustments to your position and recheck your NPA.
2. Avoid bone-on-bone
While building your shooting position you want to avoid bone-on-bone contact. This is especially relevant while shooting from the seated or kneeling stance. Don’t place your bony elbow on top of your bony kneecap. Instead, scoot your elbows forward so that your kneecaps are pressing into your arms in the fleshy bit between your elbow and triceps.
3. Line everything up
Rifles are heavy. So it is critical that your bones and not your muscles are supporting that weight. Whether shooting prone, kneeling or off-hand, your support elbow (and in the case of kneeling your knee as well) should be positioned right underneath that weight so that an imaginary line going from the rifle directly into the ground passes through the elbow.
While shooting prone, you also want your shoulders square behind the rifle so that a line drawn between your shoulders is at 90 degrees to the rifle. This allows the rifle to recoil straight back into your body and will improve accuracy and keep your sights on target.
4. Key on the trigger
A perfect shooting position is for naught if your trigger control is sloppy. You want to have the pad of your finger lined up perfectly straight across the face of the trigger and control the muscles in your hand so that you’re moving the trigger in a straight line toward the rear of the rifle. Really focus on putting even pressure on the trigger—you don’t want your finger to push or pull the trigger to the side when shooting.
Practice these principals with an empty gun and dry fire to your heart’s content. Next week, we talk about how to properly zero your rifle.
Week 1: Dry Fire Drills
Week 2: How to Really Zero Your Rifle
Week 3: Rapid Fire Drills
****Week 4: One Dot Drill