

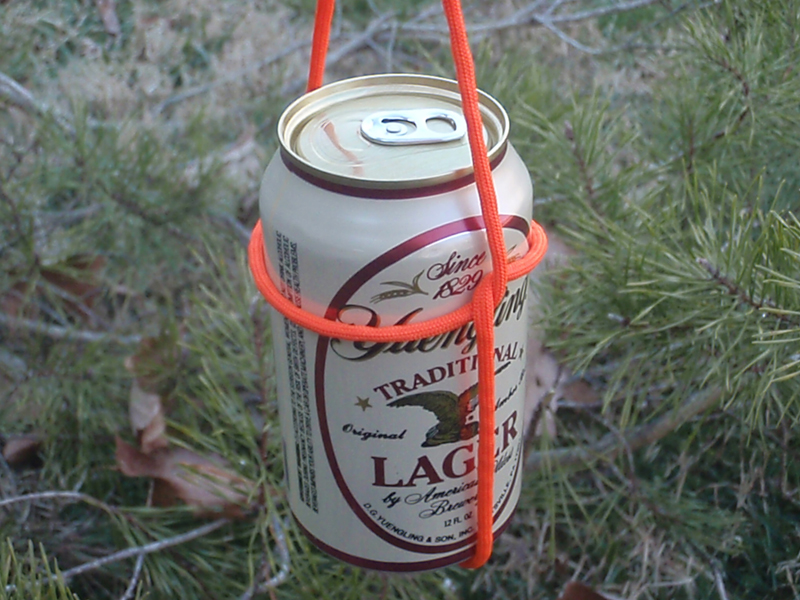
We may earn revenue from the products available on this page and participate in affiliate programs. Learn More ›
Knowing how to tie a knot has always been one of those key outdoor skills that the inexperienced take for granted. The experienced outdoorsman, however, has had enough success and failure to know that there are right and wrong knots for certain jobs.
But first, it helps to know a few strange terms. Put it simply, a knot is some kind of fastening or splice made by intertwining one or more ropes or some other flexible material. After tightening a knot, it should hold on its own. A hitch is a little bit different. It’s like a knot, but it generally involves another object like a stick, a post, a ring, or occasionally another rope. Properly tied, hitches can hold their place, or they may be able to slide, depending on the hitch you choose. A lashing is like a hitch, but slightly more complex. Lashings involve the use of a rope or similar material to secure two or more objects together. To grossly oversimplify all this, the knot is just rope fastened together; the hitch is a rope fastened to an object; and a lashing is a rope fastening multiple objects together.
A good knot can save lives when you’re dealing with a survival situation, performing first aid, and when working over heights or water. But, you have to know how to tie it. So make sure you know what to do with your rope the next time you head into the wild by learning these 20 essential knots.
1. The Square Knot
The square knot is a classic for connecting lines and tying knots. Whether you are tying two ropes together to make a longer rope, or you are tying up a bundle of firewood to carry, the square knot is a winner. It’s much more secure and stable than its cousin the granny knot, which everyone is probably familiar with as part of tying their shoes.
How to Tie a Square Knot:
1. You can tie a solid square knot by lapping one rope right over left, then underneath the other, and then tying the same again in the reverse direction—left over right and then underneath.
2. You’ll know you did it right when the working end and standing end of each rope is side by side (not making a “cross” like a granny knot). Read our full guide on how to tie a square knot, here.
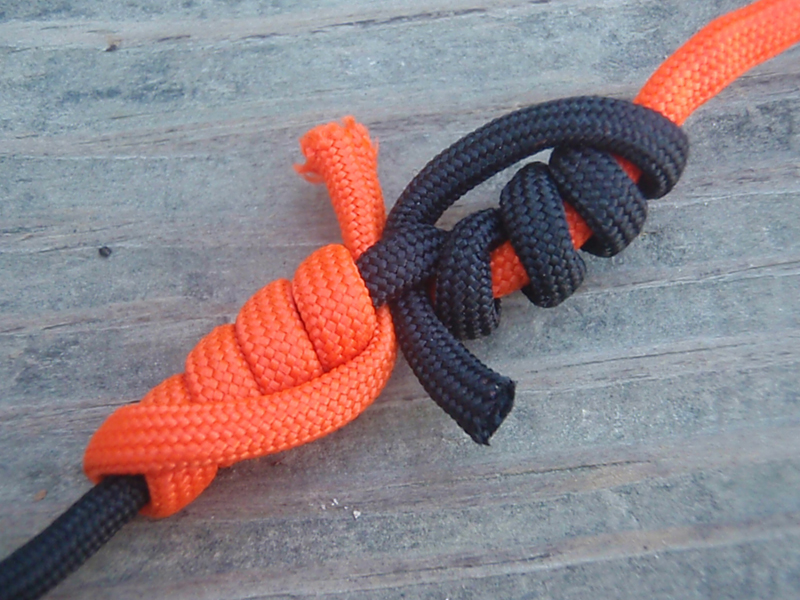
2. The Clove Hitch
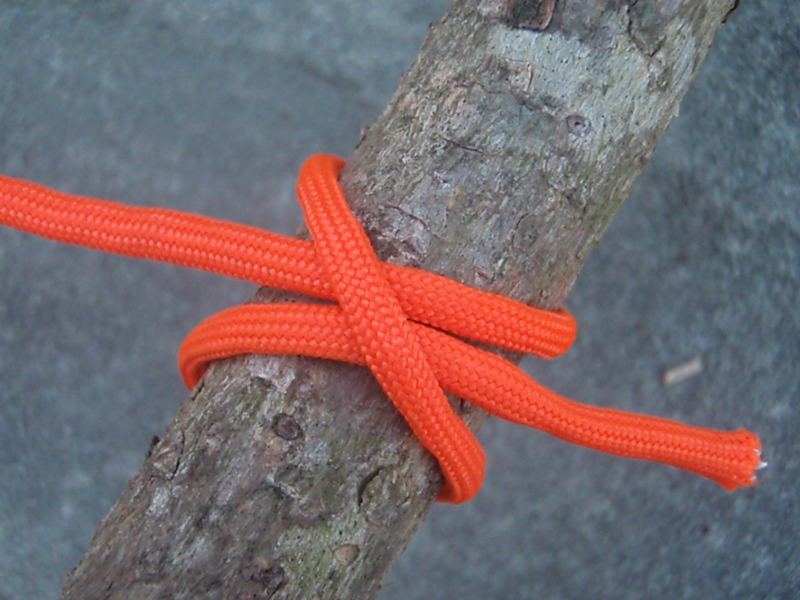
The clove hitch is an old tie with many outdoor uses. This ancient connection has been used successfully by people since the early 1500s, as shown in old paintings. Today’s uses for the clove hitch cover a wide range of activities, especially for boaters, campers and for use with outdoor vehicles.
Its primary benefit is for securing a line to a round object or anchor, like a line from a tree limb to a camp lantern, or when hanging a boat fender from a boat railing. It also can be adjusted easily to lengthen or shorten a line as needed. It can be adjusted from either line ends of the hitch.
Tent support poles, fence posts, and trees are all serviceable anchors for a line tied with a clove hitch. The knot is used by outdoorsmen securing lines to truck or ATV railings and rings.
While a clove hitch can be tied to a square or odd-shaped railing or post, it’s most useful and secure when drawn tight around a rounded pole, post, railing, even a push pole when a boat line is tethered to it for anchoring a skiff in shallow water.
A clove hitch may slip a bit when under heavy load with stout lines. So, tying a large Hatteras fishing boat to a dock mooring post is not the best use for a clove hitch. Further, fine-diameter lines also can be a bit difficult to loosen a clove hitch.
But the clove hitch has stood the test of time for generations of outdoorsmen, because it’s simple to make, easy to adjust and untie, and holds well for most purposes. It can be made one-handed, but that takes skillful practice.
How to Tie a Clove Hitch
1. Wrap the line end once completely around the pole, post or piling to be secured, winding the line end under the standing line.
2. Now wrap the line end a second time around the pole or post, this time working the line end over the standing line and close to the pole, then back under the wrap just made around the pole.
3. Pull slowly on both line ends, and the hitch tightens. A clove hitch can be loosened by working its tight lines toward the anchor pole or post. It can then be adjusted to lengthen an end or to move the hitch along a pole or piling. —B.M.
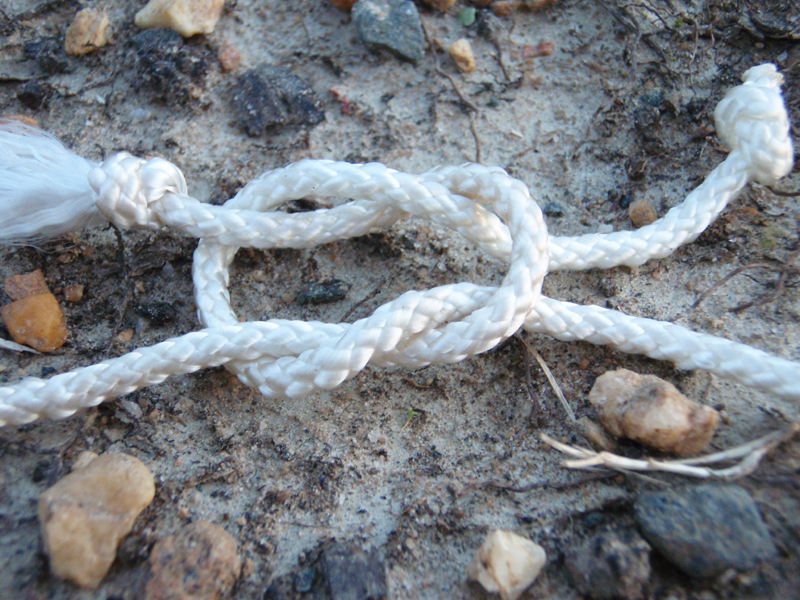
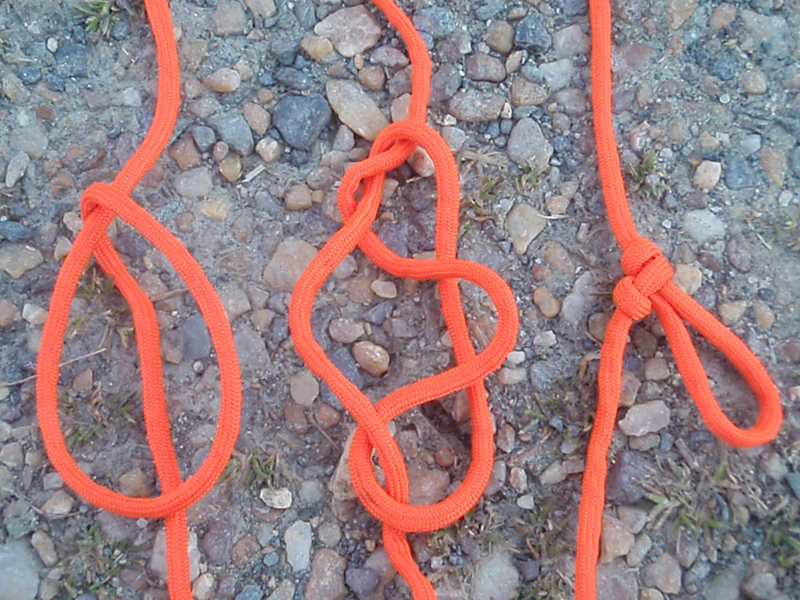
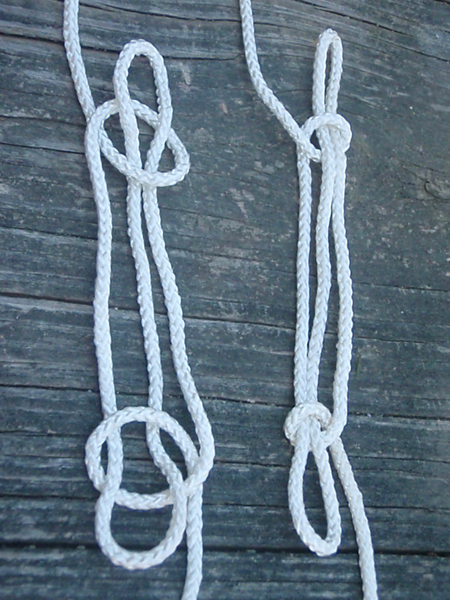
3. The Bowline
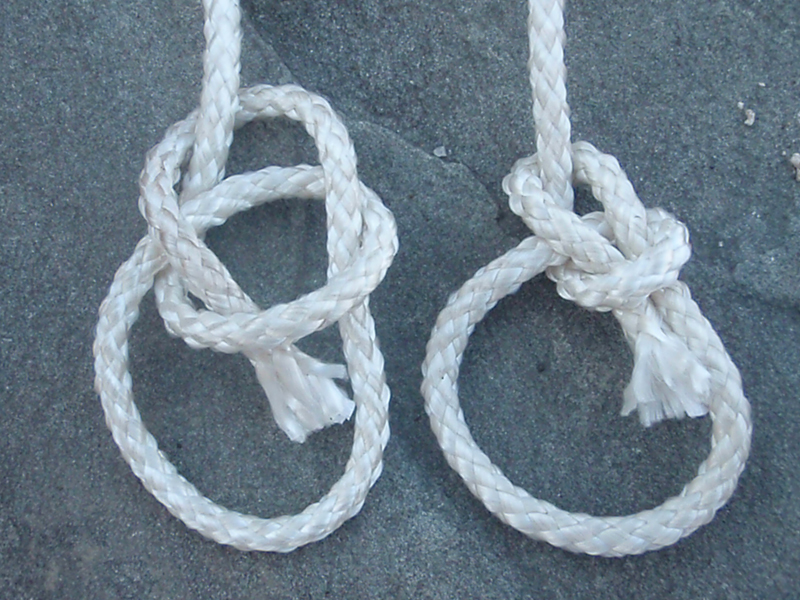
This is known as the “king of knots,” simply because it’s one of the best for many uses, plus it can be untied rather easily. It’s a bread-and-butter Scouting knot because it has so many woodcraft and outdoor uses. The bowline is an ancient knot. Some folks say it harkens back to the era of wooden ships.
The bowline essentially forms a secure, non-slip loop. It maintains its strength and non-slip form even when wet and under heavy load. A properly tied bowline will not tighten its loop size. This makes it especially valuable for emergency outdoor use, such as attaching a rope to a harness, a heavy line to a fixed object, or with a large loop around a person for rescue.
The bowline can be tied to connect a line to a ring, such as a backpack loop, tent grommet hole, or around a dock piling or similar object. In fishing, it’s serviceable in securing hooks, swivels, and sinkers.
Creating two bowlines in two separate line ends can be used to link the two lines securely. It’s better than most other connecting knots because Bowlines can be untied, allowing simple disjoining of lines, or releasing a line from a ring, tent peg, etc.
The bowline is easy to form, and even can be made one handed. For tying one-handed: tie the bowline in the rope end, while holding the line load with the standing part of the rope in the opposite hand. It takes practice to do it one-handed, but it’s worthwhile to learn.
There are at least a couple ways to tie the bowline. The following method is the easiest, and it makes it simple to understand how to tie it by laying a line flat on a level surface like a table, dock or truck bed.
It’s wise to learn to tie a bowline by using it to form a loop in a line end. Once this basic knot is mastered, other applications for a bowline can be practiced and perfected.
How to Tie a Bowline Knot

1. In the standing line create a bend or loop far back from the line end. It helps forming the knot by laying the loop parallel to the standing line, with the line end coming under the bend formed in the standing line.
2. Now place the bend or loop over the standing line and pull the standing line through the loop several inches, forming another bend or loop.
3. Now insert the line end through the loop just formed, then back over itself.
4. Hold the line end and the bottom line of the loop, while slowly pulling on the standing line. Read our full guide on how to tie a bowline knot here. —B.M.
4. The Figure Eight
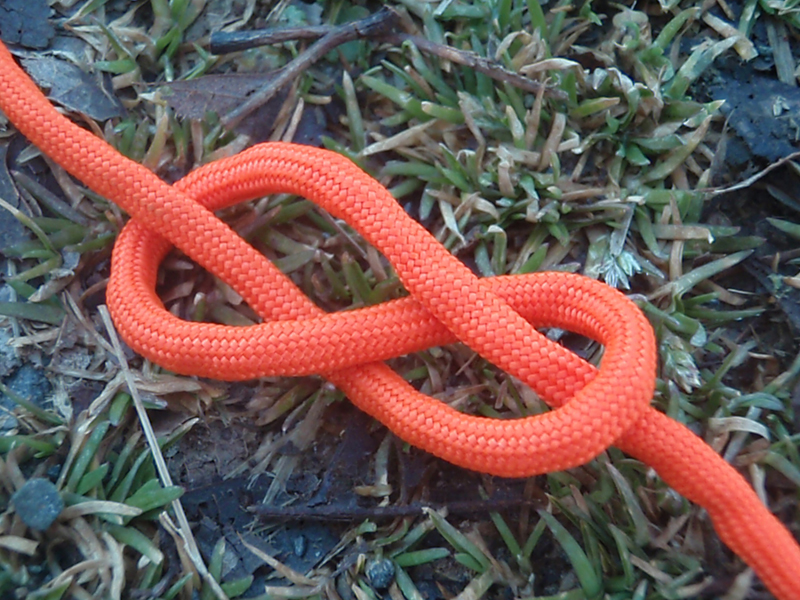
The figure eight knot creates a stopper wherever you need one on a rope, though the steps are the same for several other knots, as well.
How to Tie the Figure Eight:
1. To tie a figure eight, also known as a Flemish bend, simply pass the free end of a line over itself to form a loop.
2. Continue under and around the line, and finish the knot by passing the working end down through the original loop.
5. The Double Sheet Bend

Connecting two lines of differing materials or sizes is a common requirement. Boaters, campers, hikers, and anglers all need to do this at times, and the double sheet bend is a fast method to accomplish it.
The double sheet bend won’t slip with differing line types or materials, making it much better than other commonly used connecting knots, such as the reef knot.
The double sheet bend is an improved version of the old standard sheet bend, which is still used by many folks, and is one of the benchmarks of outdoor craft for millions of Scouts. The more advanced double sheet bend is versatile, simple to tie, and with heavier lines can be loosened and untied without much trouble.
It’s commonly employed for hanging hammocks, and some net makers even use the double sheet bend in web construction. The double sheet bend also can be used when connecting two lines for some towing situations. If a longer line must be fastened for one boat hauling another, or when pulling a stuck vehicle out of the mud, the double sheet bend is valuable.
Lengthening a main line on a cast net for deep-water netting is another use for a double sheet bend.
It should be noted that the double sheet bend is most reliable when it’s under a consistent load, meaning that steady tension is on both line ends. Be sure a double sheet bend is made with both line tag ends long—several inches is not too much with a stout line.
How to Tie a Double Sheet Bend
1. With the thicker rope, double its end back on itself, creating a “bend” or “U” in the line. Be sure to allow plenty of line to work with. With the thinner line, pass its end under and through the bend or loop just made with the thicker line.
2. Next wrap the finer line around the two sides of the thicker line that formed the bend or loop made in step 1. Then run the finer line end under itself.
3. Wrap the thinner line around the thicker line a second time, working the finer line end under itself and back toward the loop. This second turn around the loop with the finer line makes this a double sheet bend. This is a more secure connection than a standard sheet bend, especially with heavy loads,
4. Slowly tighten both long ends of each line, which “locks” a double sheet bend, making a reliable connection for outdoor use.
Constant tension on both ends of the connected lines keeps the double sheet bend snug. If given slack, it can be untied, which is why long tag ends in the large and fine lines is advised. —B.M.
6. Two Half Hitches
You can use two half hitches to secure a line to trees or poles, or to secure the line to itself like you would tying a trucker’s hitch. A half hitch is fairly easy to tie, and I use it often to tie tarps up for shelters, or to hang up hammocks.
How to Tie Two Half Hitches:
1. After you wrap the rope around the standing end and through the inside of the loop created to make the first half hitch, wrap around the line the same way again to make the second half hitch.
2. Pull it tight and you should have two half hitches, one seated next to the other. If you want added insurance, you can tie an overhand knot with the tag end of the line to keep the two half hitches from slipping.
7. The Taut-Line Hitch
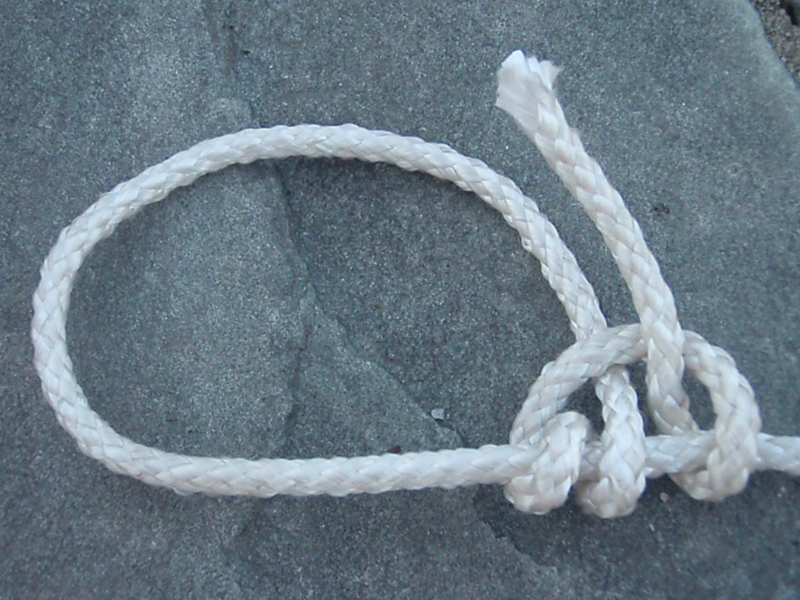
Boy Scouts have been using this superb adjustable loop knot for generations. Even when it’s used under extreme tension, a taut-line hitch can be adjusted to lengthen or shorten a line. This makes it valuable to anglers securing boats to docks, especially in saltwater where tide changes can mandate quick and easy line adjustments.
It’s best tied with lines having a rough feel, like fiber rope or textured lines. It may slip slightly when used with slick-surface lines.
The taut-line hitch works well for campers modifying tent lines to anchor pegs. It can even be used for locking aircraft to ground anchors. It’s an excellent way to tie down gear in a truck bed, or to secure decoy bags snugly inside a boat running across water. The taut-line is such a basic and trusted connection that space shuttle astronauts used it to fix the Hubble Telescope during a repair mission.
How to Tie a Taut-Line Hitch

1. Wrap the line end around whatever will be anchored, such as a dock post, tent support rope, or grommet ring. Bring the line end back around parallel to the main line and pass the end through the loop just formed.
2. Make another turn with the line end through the formed loop, allowing for plenty of line to make the connection.
3. Now tie a half-hitch with the line end onto the main line on the opposite side of the formed loop.
4. To lock the hitch securely, slowly pull on the working line end and main line, which snugs it tight. Sliding the hitch wraps adjusts the loop size, altering the main line length without untying the knot. —B.M.
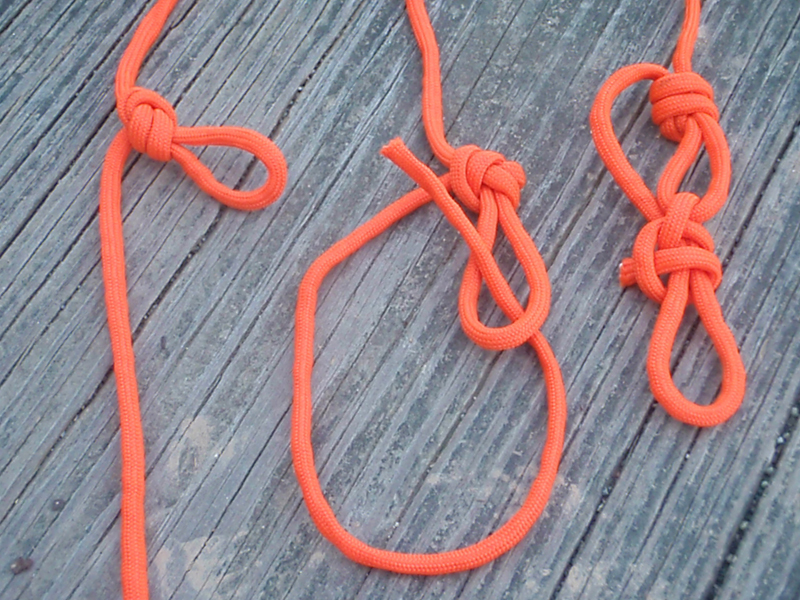
8. The Fisherman’s Knot
True to its name, the fisherman’s knot, is pretty much only good for using with fishing line.
How to Tie a Fisherman’s Knot:
1. Pass the free end of the line through or around the object to be secured, for example, through the eye of a fishhook.
2. Then, wrap the free end of the line around the other side of the line about five or six times.
3. Pass the free end of the line through the triangular opening next to the object being secured, and then pass the free end of the line through the large loop you just created by going through the small triangle. If you are tying this one with fishing line, spit on the line before tightening to lubricate it so that the friction does not cause heat damage to the line. Tighten the knot, trim off any extra line and enjoy your day fishing.
9. The Water Knot
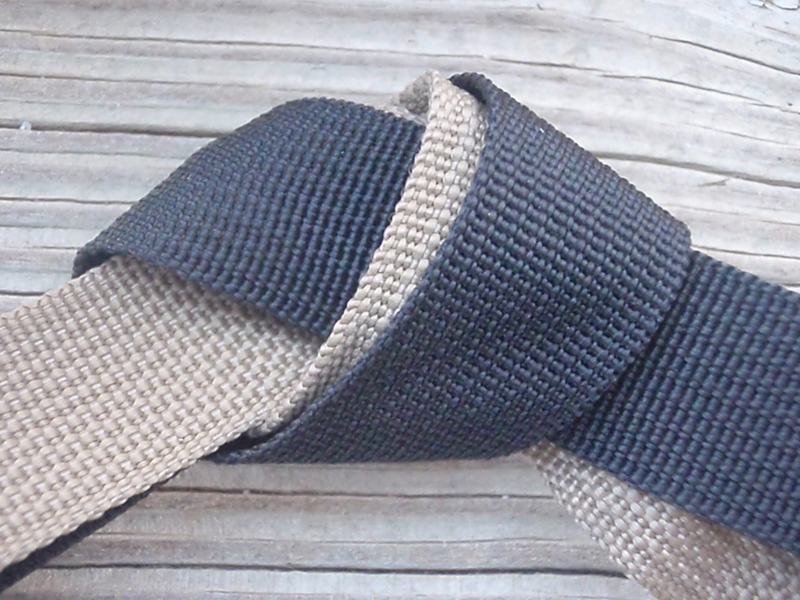
The water knot safely secures webbing, flat belts, and most types of straps together.
How to Tie a Water Knot:
1. To tie the water knot, start with a loose overhand knot in the end of one strap.
2. Pass the other strap in the opposite direction so it mirrors the route of the overhand knot on the first strap. Take the ends of the two straps and pull the knot tight. That’s it—it’s very simple and very strong.
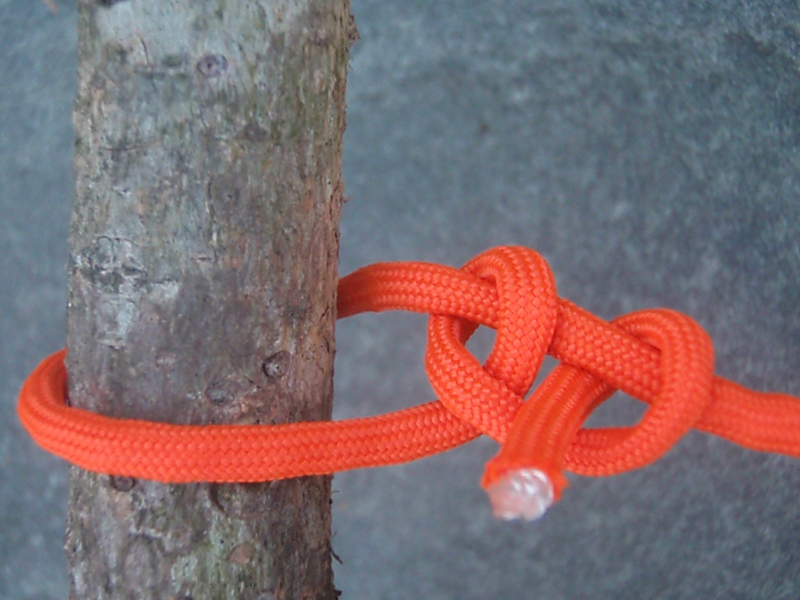
10. The Rolling Hitch
The rolling hitch adds a leg to an existing line. This hitch is the basic knot behind a taut-line hitch, but it can be added to any existing line. The rolling hitch was often used historically to hook more dogs to a dog sled main line.
How to Tie a Rolling Hitch:
1. Wrap the free end of one rope around the main rope to create a half hitch.
2. Make a second half hitch and then wrap over the entire knot to finish with a final half hitch to the other side from your starting place.
11. The Prusik Knot
The Prusik knot creates a loop that can be used as an ascender or decender. This “slide and grip” knot can also be handy for adding a loop to a rope when neither end of the rope is free.
How to Tie a Prusik Knot

1. To tie a Prusik, you’ll need a short rope and a separate long rope. Tie a loop in the short rope that is secured with a solid knot like a square knot.
2. Now, wrap the loop around the long rope three times, making certain that each wrap lies flat against the long rope.
3. Pass the loop of short rope under itself and pull it tight. As long as there is weight on the loop, the Prusik will grip the long rope. You can also slide the Prusik up or down the long rope by taking the weight off the loop and pushing the wraps up or down the long rope.
12. The Timber Hitch
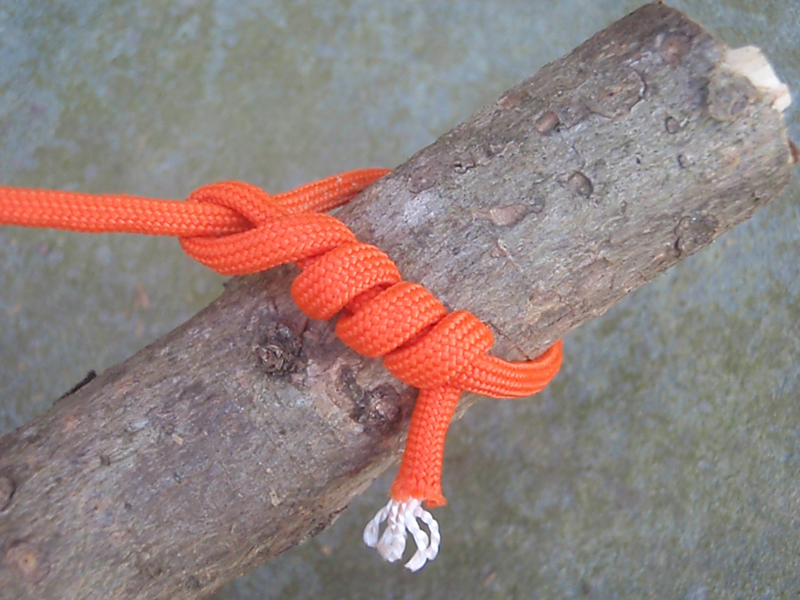
The timber hitch secures a rope to an object for hauling or to act as a support.
How to Tie a Timber Hitch
1. To create a timber hitch, all you need to do is run the free end of the rope around the object, like a log, that you intend to pull.
2. Then wrap the tag end of the rope around the inside of the loop you created four or five times.
3. After you tighten the timber hitch so the four or five wraps are tight against the object, the constant tension will keep the hitch seated.
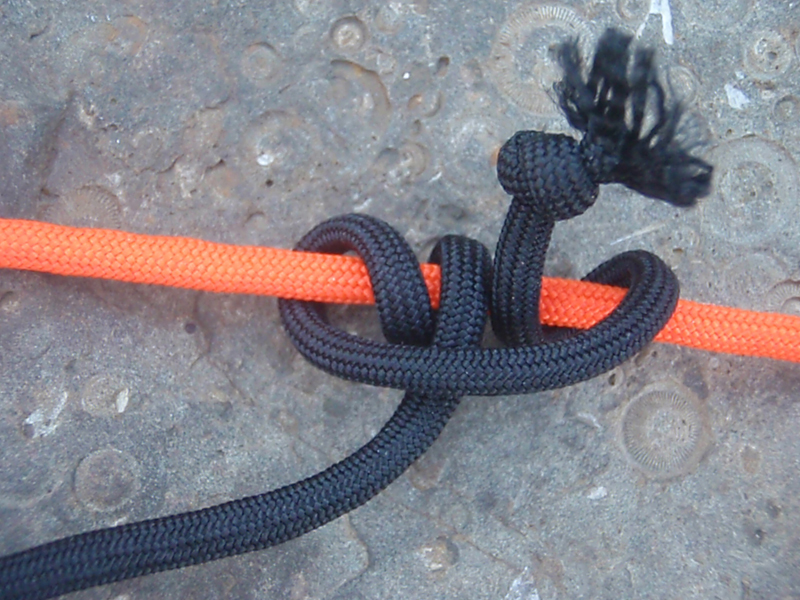
13. The Blood Knot
This little gem of a knot is used on fishing line to secure two lines together (mends a broken line or attaches leaders and tippets).
How to Tie a Blood Knot:

1. You’ll start the blood knot by overlapping the two lines, and wrapping one free end around the other line five or six times.
2. Pass the free end between the two lines.
3. Wrap the other line the same number of times (five or six), and tuck the free end back between the two lines in the opposite direction of the other free end of the line. If using fishing line, spit on it to reduce friction damage.
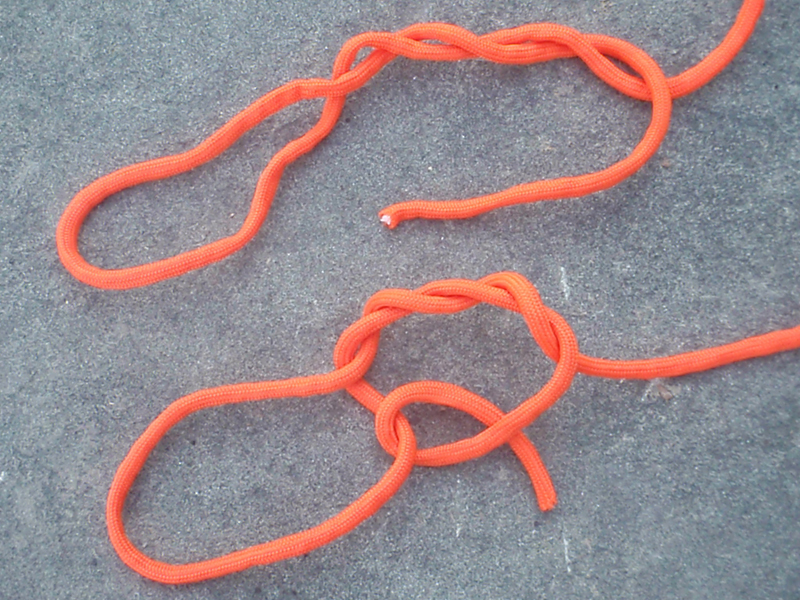
14. The Man Harness
This crafty knot allows you to put a loop in a line anywhere along the length of a rope when neither end of the line is free to tie a loop—and you didn’t hear it from me, but a man harness is great for cheating at tug of war.
How to Tie a Man Harness:
1. Gather some slack in the line and make a loop so part of the line runs through the middle of the loop.
2. Grab the side of the loop and pull it through the gap between the line in the middle and the other side of the loop.
3. Pull the new loop tight, and then pull the line to cinch the man harness knot. This knot can slip if there isn’t constant tension on the newly created loop, so keep something in the loop to hold it.
15. The Carrick Bend
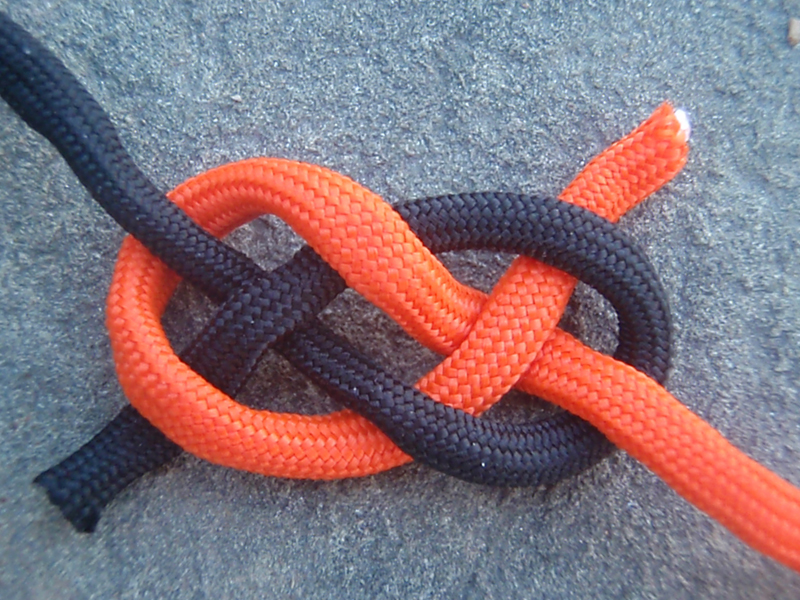
This square knot alternate joins two ropes together securely, and is easier to untie than a square knot.
How to Tie a Carrick Bend:
1. To tie the Carrick bend, form a loop with the free end of one rope.
2. Pass the other rope’s free end under the first loop, and then over then under as seen in the picture.
3. Thread the free end across the loop passing under itself, and pull on both standing ends to tighten.
16. The Trucker’s Hitch
You don’t have to be a truck driver to have a use for this rugged hitch. The unique feature of the trucker’s hitch is it gives you a unique mechanical advantage for tightening up a line. While tying this hitch is a little complex, it’s worth the trouble if you need to tighten lines as much as possible before securing them—I use it all the time to tie down tarps or secure shifting payloads.
How to Tie a Trucker’s Hitch:
1. Start off by tying a figure eight knot with a loop of the line.
2. Then pass the free end of the line around or through whatever you’re attaching the rope to, before passing the line through the loop.
3. Next, pull the working end tight, and secure the free end with two half hitches, just below the loop.
17. The Barrel Hitch
The barrel hitch has been used in sailing and construction work for centuries. It allows you to secure a bucket, barrel or other cylindrical object to lift it in a well-balanced position.
How to Tie a Barrel Hitch:
1. Place your barrel or other object to be lifted on top of your rope.
2. Then tie an overhand knot across the top of the barrel.
3. Open up the overhand knot until it wraps around the top sides of the barrel. Tie the ends of the rope together with a square knot and then then lift. This knot makes a fine bucket handle when the wire handle breaks off.
SAFETY WARNING: For safety and stability while hoisting barrels, the rope around the barrel needs to be high above the center of gravity on the barrel, but pose no danger of slipping off the top of the barrel. FYI, beer has an excellent center of gravity.
18. The Sheepshank
This knot seems half magic trick, half practical knot, but it shortens a line without cutting the line. This knot keeps our long ropes in one piece, despite our miscalculations in the field. I will use this one on bear bags, when the line is too long, but I don’t want to cut it.
How to Tie a Sheepshank:
1. To tie a sheepshank, fold the rope to the new length you need.
2. Create a half hitch in one end of the continuing rope, and drop it over the nearby loop.
3. Make a half hitch in the other standing end, drop it over its adjacent loop, and then tighten the whole thing slowly.
19. The Tripod Lashing
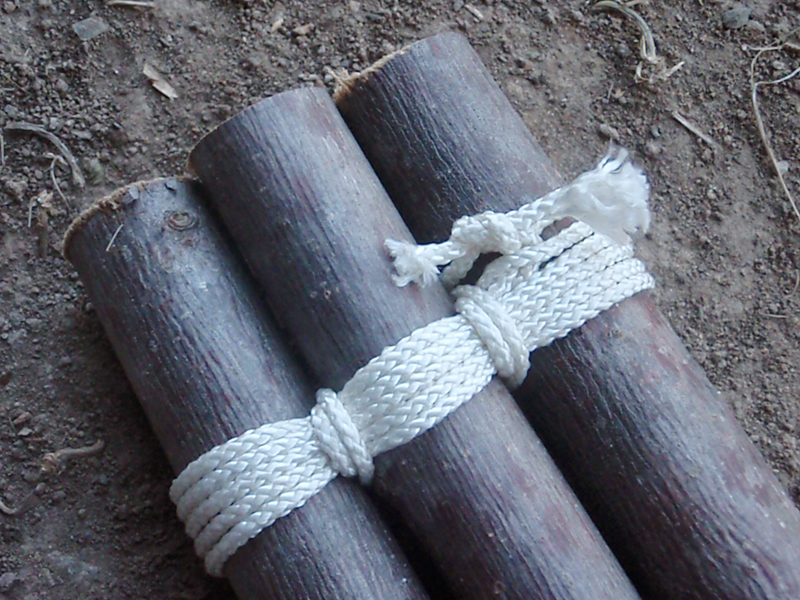
The tripod lashing is commonly used for shelters and to support camp items, like a cooking pot over a fire.
How to Tie a Tripod Lashing:
1. Start by collecting three poles that of almost identical length and thickness and lay them on the ground side-by-side.
3. Tie a clove hitch to one of the end poles, and then wrap around all of the poles four, five, or six times.
4. Now, wrap line between the poles–twice between each one–working back toward the original knot or hitch you tied.
5. Finish the lashing by tying the tag end of the line to the tag end of your original knot. Spread the legs of the tripod and use it in your camp for something handy.
20. The Square Lashing
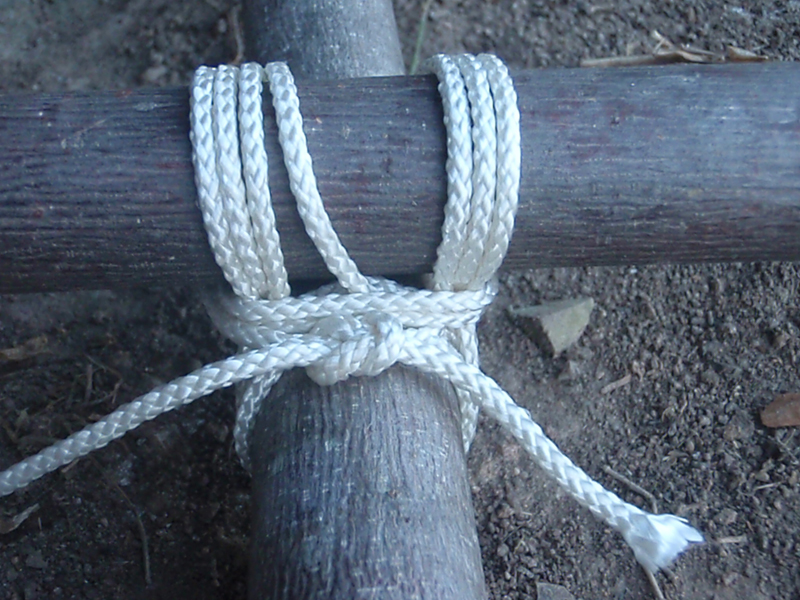
The square lashing has been used to build everything from camp chairs to towers and bridges – but you can also use it to secure two poles together.
Read Next: How to Tie a Fishing Knot
How to Tie a Square Lashing:
1. Tie a clove hitch to one of the poles, near the place where the two poles cross.
2. Then wrap your line around the junction of the two poles, going under the lower pole and over the top pole.
3. Spiral outward with these wraps five or six times. Next, wrap between the poles, biting onto the previous wrappings to tighten them.
4. Finally, use a square knot to tie the free end of the rope to the free end from the clove hitch that started this whole lashing. Easy, right?
21. The Cleat Hitch

The cleat hitch is a very fast method of securing a boat line to a dock cleat. It’s also useful for holding gear to a truck bed cleat. It can be used whenever a line is tied to a cleat-type anchor.
The benefit of the cleat hitch is it can be made in seconds, it holds securely, and can be untied in a flash.
How to Tie a Cleat Hitch
1. Start by wrapping the line end from the object to be secured around the cleat base, then back over the top of the cleat in the opposite direction.
2. Now wrap the working line under and around the opposite end or “horn” of the cleat, coming back over the top of the cleat.
3. Now form a half-hitch loop in the working line and slip the hitch loop over the opposing “horn” cleat end.
4. Pull tight on the working line. Another half hitch loop or two can be made around the cleat “horns” for added security.