We may earn revenue from the products available on this page and participate in affiliate programs. Learn More ›

I’ve never met a hunter who thought he was a lousy shot. I suspect every one of us fancies himself a bit of a modern-day Davy Crockett, and while some among our ranks deserve the title “marksman,” the hard truth is that many don’t.
The good news is that top-flight instruction has never been easier to come by, particularly with the proliferation of long range shooting schools, most of which have been strongly influenced by modern sniper techniques. Every hunter could benefit from this instruction, regardless of skill level, and you might be surprised at how much crossover there is between shooting at hostage scenario targets and going after a trophy mule deer.
Not only will sniper school improve your skills and judgment––these classes, which you’ll see photos of in this story, have certainly helped mine––but it will also show you the limits of what you can do under practical field conditions, which is the very least we owe to the game we hunt and cherish.
This gallery explains exactly how snipers shoot and how you can use their techniques for hunting.
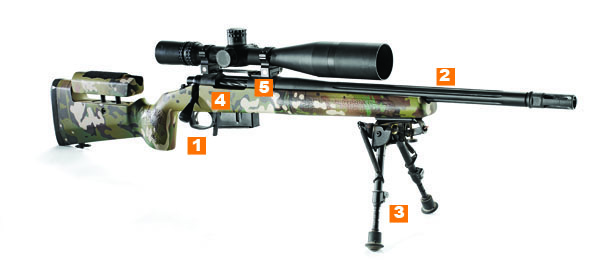
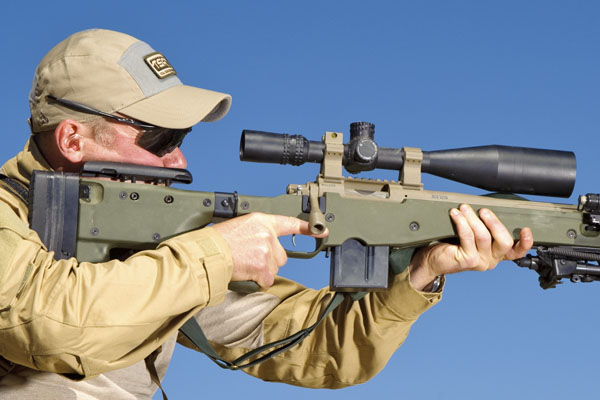
A Long-Range Hunter
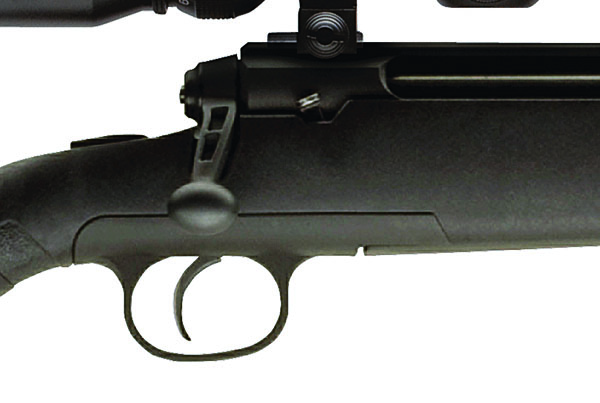
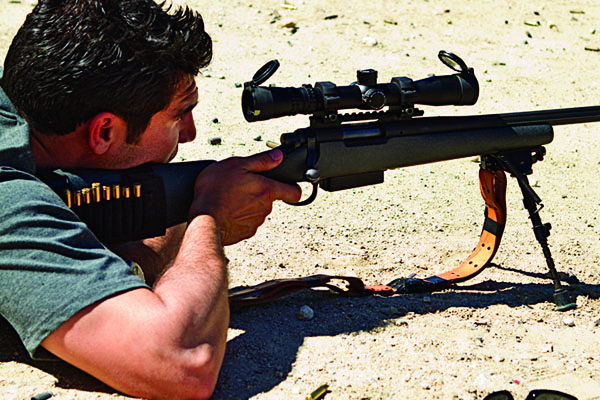
A proper rifle for long-range hunting needs to incorporate a number of features that distinguish it from a regular carry rifle. It has to provide a solid–meaning heavy–shooting platform. Both the length of pull and comb height should adjust to ensure proper fit to the shooter. The stock geometry needs to favor a prone position. It requires components of the highest quality–with machining and construction to match–to make it accurate. And it needs to be tough enough to withstand the rigors of the field and still deliver outstanding performance.
Little wonder, then, that “tactical”-style rifles, like the one pictured here by the gifted gunmaker George Gardner, are catching on with more hunters. Expensive? Yes. Drop-dead reliable and accurate? That’s what you pay for.
- The oversize bolt handle gives more grip surface and additional leverage for follow-up shots.
- Precise inletting allows for perfect mating between the receiver and the bedding surface in the stock. The heavier-contour barrel is free-floated for accuracy.
- A good bipod, like the one from Harris pictured here, is essential for maximizing accuracy when you’re shooting prone.
- This rifle is chambered in .308, which is at the top of the list when it comes to accurate cartridges for big game.
- The Picatinny rail has 20 MOA built into it to give the scope more elevation for long-range shots and to keep the crosshairs closer to the center of the optic, which is where the scope is most clear.
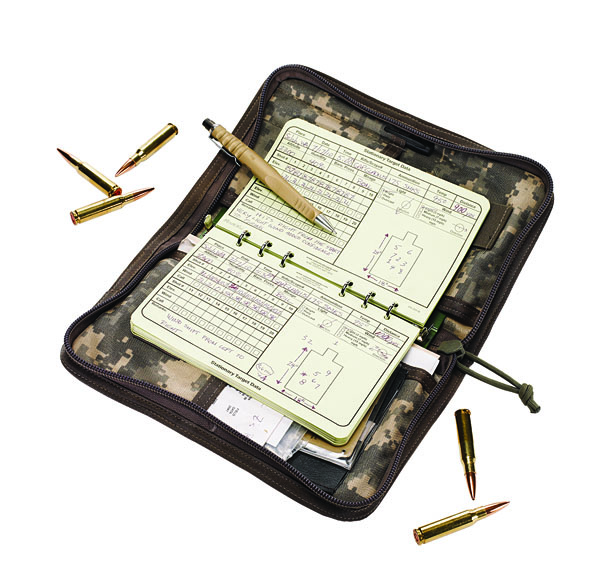
Keeping a Shooting Log
A detailed rifle log is a must for precision long-range shooting. Over time, this will reveal your rifle’s quirks and foibles–as well as your own–and will yield invaluable data to make you more accurate. By recording every–and I mean every–shot, you will, for instance, soon learn exactly what your rifle does from a cold barrel, which will take the guesswork out of that long-range shot on the opening day of deer season.
A log also gets you into the habit of calling your shots before you verify their impact, a skill that will make you a better marksman and improve your technique. It will also help you figure out when your rifle needs maintenance.
For a detailed account of how to use a shooting log and to print out a log for free, see “Log It.
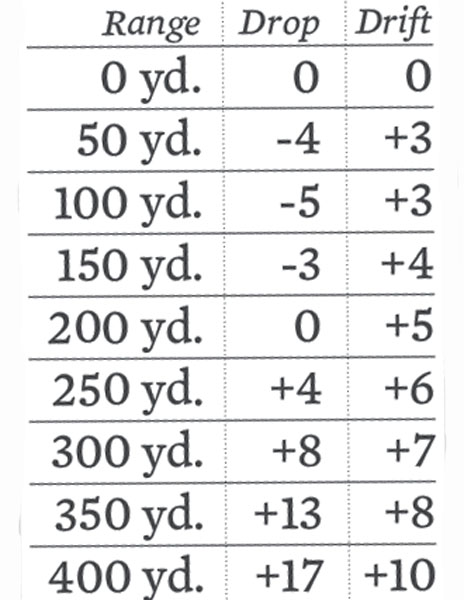
Making a Trajectory Card
If you’re still using the ballistics info on the side of your ammo box to determine your rifle’s trajectory, punch yourself in the face hard–twice–and mend your ways by doing the following.
- Select a load for your rifle that is both accurate and uses an appropriate bullet, chronograph it and use one of the free online ballistics calculators to estimate the trajectory.
- Spend some serious range time fine-tuning the data to create a flash card that shows exactly how much you need to come up (or down) from your initial zero by shooting at various known distances.
- Write down the data (aka come-ups or come-downs) in clicks, not inches, making a weatherproof copy to keep with you at all times.
Picking a Scope
If you’re going to get serious about shooting at long ranges with targets at unknown distances, your scope needs to be up to the task. That means target-style elevation and windage turrets that are easy to operate under shooting conditions, and a focus knob that allows adjustments for parallax. (How often should you adjust for parallax? With every shot.)
For range estimation and accurate holdover, I’ve come to prefer a mil-dot reticle. Once mastered, it is amazingly effective. Likewise, get a scope that adjusts in 0.1 mil increments. Lastly, a reticle in the front focal plane lets you use the reticle’s holdover marks at any magnification you choose.
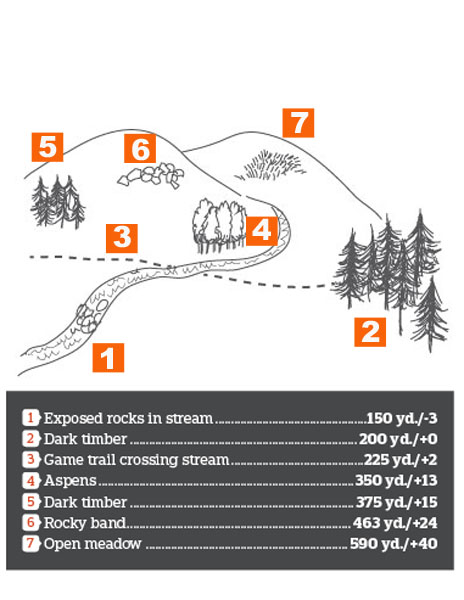
Making a Range Diagram
It’s like art class with a gun. When you settle into a shooting position, one of the first things you should do is break out your rangefinder and determine distances to various landmarks where an animal might appear and make a rough sketch of the terrain for reference.
Numbering the landmarks is a good idea when you’re hunting with a partner, so you can both zero in on an animal that much faster.
Squares of cardboard cut to fit in a cargo pocket work well for this purpose. They are much tougher than regular paper and are already camo-brown.
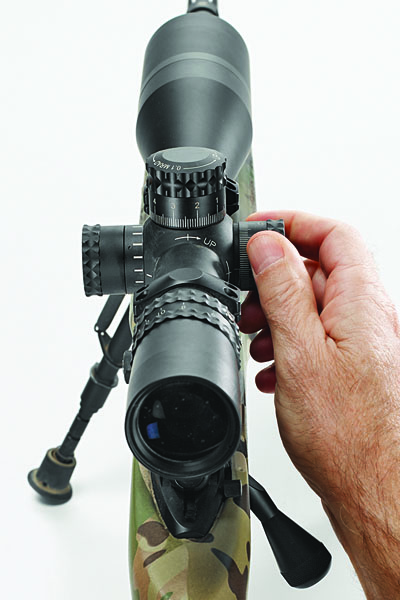
Push/Pull Dialing
When the time comes to adjust the crosshairs on your rifle, seconds count, so it pays to learn to dial in windage or elevation corrections quickly, without lifting your head from the stock and losing view of the target. For a right-handed shooter, pushing forward with the thumb on the knobs, rotating them clockwise, will move the point of impact down or to the left, while pulling on the turrets moves them up or to the right. Memorize this “push/pull” method to dial in faster.
Trigger Control
The trigger finger needs to be able to operate independently from the rest of the hand, going through the trigger pull (or “press,” as some call it) without any other part of the hand moving. This can, and should, be practiced through dry-firing and even without a gun.
The goal is to keep your sights steady and on target during that deliberate motion, and the only way that will happen is if your finger comes straight back with even pressure across the face of the trigger blade. Follow-through is essential–keep your finger pressed on that trigger until the gun stops moving after recoil.
Getting the Right Grip
With the butt of the rifle firmly in the pocket of your shoulder, grip the rifle with your trigger hand as follows: The middle and ring finger should wrap lightly around the stock, high enough on the grip so that your trigger finger extends naturally toward the trigger. The thumb should exert no pressure at all on the stock. You can either drape it lightly over the back of the stock or lay it alongside the grip so that it isn’t in
contact with the rifle.
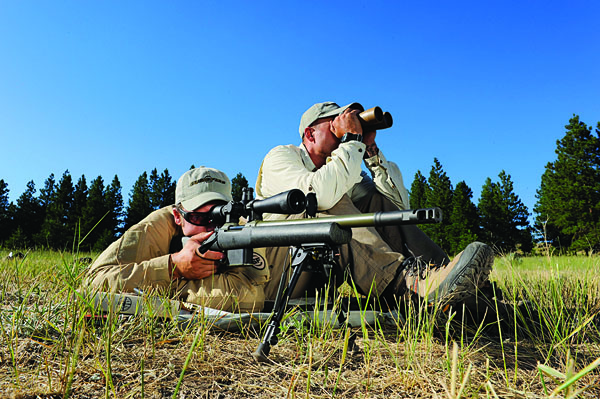
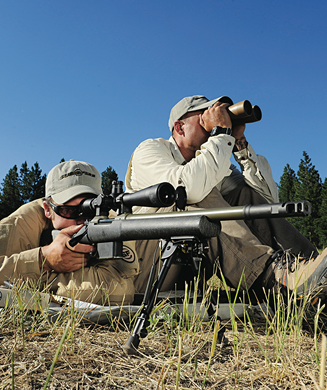
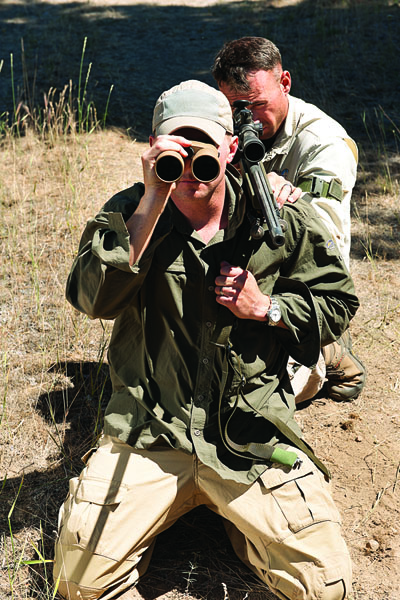
Calling Shots
A spotter can accurately call his partner’s shots by looking for the vapor trail left by the bullet as it travels toward the target. To do this, the spotter should get a crisp image of the target while looking through his optic and then dial back so that the target is slightly blurry and the foreground–which is the space the bullet will traverse–is in focus. Also watch for telltale dust in the event of a miss.
Using Mil-Dots/ Estimating Range
The “mils” in a mil-dot scope refer to milliradians, which is a measurement of angle. If you picture a mil as an ice cream cone, with the tip originating at the shooter’s eye and an open end that gets ever wider the farther out it goes, you get the idea. So if the mouth of our imaginary cone is 1 mil in diameter, making it 3.6 inches across at 100 yards, it would grow to 36 inches at 1,000 yards.
Learning the principle behind mils (see illustrations), coupled with some homework on your part, can yield remarkable benefits to your shooting.
For instance, mils allow you to hold over (or hold off) a target without the need to adjust your scope turrets for elevation and windage. With a come-up at 375 yards of 15 clicks, for example, you can hold the crosshairs 1.5 mils high on the target for a direct hit.
It takes time, but once you master it, the mil-dot system is lethal and fast.
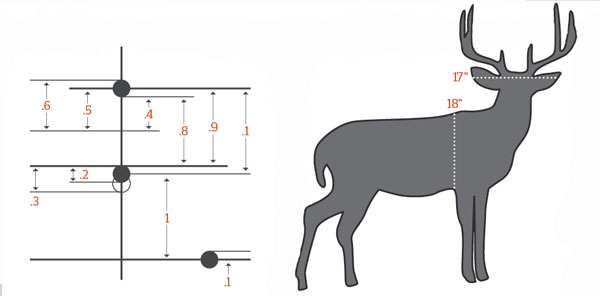
1. Measure in Mils
The first step is to learn how to measure objects, like the depth of a deer’s body, down to a tenth of a mil. The figures in the chart show how to bracket an object to get a precise measurement. If we know the size of the object, we can quickly calculate its range using a relatively simple math equation: Size of the target in yards multiplied by 1,000 and divided by its size in mils equals the range in yards.
2. Range Your Buck
Likewise, if we know that the large-bodied bucks where we hunt are typically 18 inches deep in the chest, we can pre-determine the mil values for different ranges. In this case, at 350 yards those 18 inches would measure 1.4 mils; at 400 yards, 1.25 mils; at 500 yards, 1 mil; and at 600 yards, 0.8 mil. With this knowledge at hand, you can quickly find out if a buck is in range.
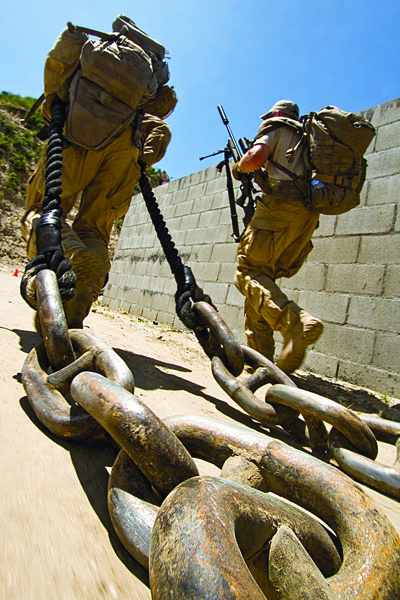
Settling Breath
What’s the most difficult shot to make? I’d submit that it is right after you’ve run the final 50 yards to get into position before your animal disappears into the brush–a scenario I think most hunters have experienced. (Though dragging the 180-pound “clanks” pictured here during a timed shooting drill wasn’t a picnic, either.)
With your lungs working like a bellows and your heart pounding for all it’s worth, do what biathletes do to settle down before shooting. Take three deep controlled breaths, in through the nose and out through the mouth. This will lower your heart rate and steady your aim.
As you get ready to shoot, let the air out of your lungs, pausing at the bottom of your breathing cycle. In this relaxed state, you have about seven seconds to shoot before the lack of oxygen affects your vision and induces muscle tremors. If you can’t manage the shot in this time, don’t force it–you’ll only miss. Take three more deep breaths to reset and try again.
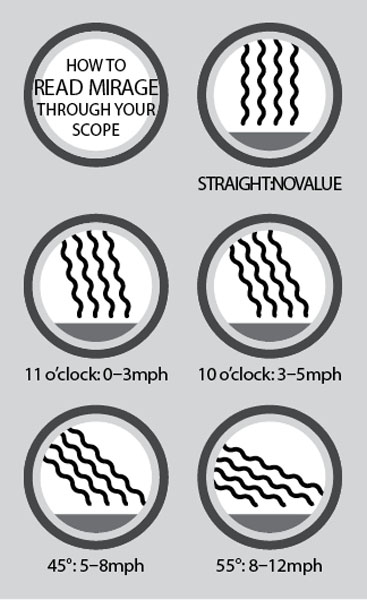
Estimating Wind/Mirage
If there is an art to long-range shooting, it’s reading the wind. There are some helpful rules of thumb to use when observing the effect of wind on the environment around us. (See “Shooting the Breeze,” June/July 2010.) By looking at how much the vegetation around us is moving, we can make an educated guess about the speed and, under many circumstances, the direction of the wind.
Another useful tool is to observe mirage, which occurs when reflected heat bends light rays, creating visual distortion. When looking through a scope or binocular, mirage can be used to estimate wind speeds up to about 15 mph. (See illustrations.) Wind faster than that flattens mirage.
You need to know both the speed and direction of the wind to make an accurate adjustment for your point of impact. Wind drift figures are based on a “full-value” condition, which is when the wind is blowing at 90 degrees to the target.
The more the wind blows in parallel to the shooter’s line of sight, the less the wind will affect bullet flight. (Wind coming in at a 45-degree angle from any direction is roughly a 3⁄4-value wind, meaning a full-value drift of 10 inches would translate to 7.5 inches of actual wind drift.)
Only time spent shooting under field conditions will hone these skills, but developing them is essential to shooting mastery.
The Ethics of Long Shots on Game
Even if we have the skills to make 1,000-yard shots on targets, do we have any business shooting big game at those ranges? The answer is no, for many reasons.
Shooting at extended ranges is fun because each shot is a puzzle that needs to be solved, the complexity of which increases exponentially the farther out we attempt to go.
Subtle Factors
At extreme ranges we need to add barometric pressure, relative humidity, our elevation and other elements into the equation–to say nothing of judging the wind over that entire distance.
Then there’s the unpredictability of the target. It takes a 168-grain bullet from a .300 Win. Mag. a full second to travel 750 yards, during which an animal can move, turning even the best placed shot into a horrible wounding miss.
Ranging
Slight errors in range estimation can also have disastrous results. Take the vaunted .338 Lapua, the darling of so many long-range shooters right now. From 800 to 900 yards, a 250-grain bullet from the .338 plunges 56 inches, which doesn’t offer much leeway when you’re attempting to strike the vitals of a deer.
As the trajectory of our bullets plummet at long ranges, so does their killing power, making even well placed hits dicey. Bullets don’t expand well after shedding so much velocity, and can pencil through their target without the tissue destruction we seek.
As hunters, it is our sacred obligation to kill game swiftly and surely, and if we cannot manage this, to pass on the opportunity. As much as I enjoy shooting at long range, the measure of a hunter isn’t over-the-horizon marksmanship but rather the ability to stalk close, and then closer still, to get in range for an ethical kill.
How Far?
So what is the outer limit? There is no pat answer, but once you get to 400 yards and beyond, you have to start asking yourself some tough questions about your shot. At the very least, you need to account for bullet drop, and soon thereafter an ever-growing list of variables.
The bottom line is that big game should never be used for target practice.
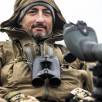
Glassing Effectively
The trick to glassing is to do it in a deliberate, unrushed manner. When you settle on a spot, keep your binocular still and look all around the area in view. Once your scan is complete, shift the bino up (or over) to glass the adjoining ground. Make your circles slightly overlap, as the extreme edges in a binocular are often out of focus. This way you’ll be less likely to overlook that bedded buck.
Also make a habit of looking for bits of an animal–the symmetrical spread of ears or the head, the white patch from a mule deer’s rump, the glint off an antler–rather than the whole body. You’ll spot more game this way.
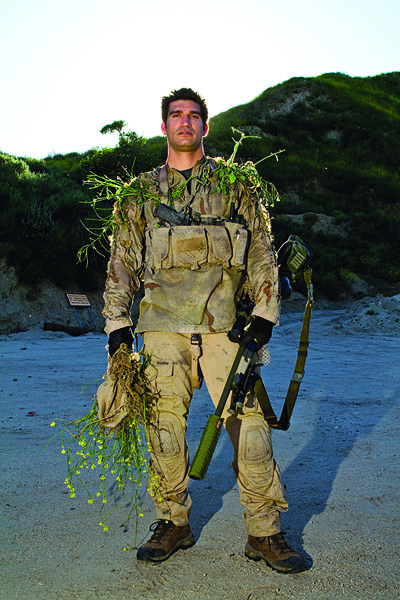
Making a Ghillie Suit
An effective ghillie suit doesn’t need to make you look like the Swamp Thing. The key is to use a few pieces of vegetation from the area you’re hunting to break up the head/shoulder silhouette, which screams “predator.” Make sure a good portion of the vegetation extends forward in front of the face and that the leaves are oriented as they are in nature, with their tops facing up and the lighter undersides down.
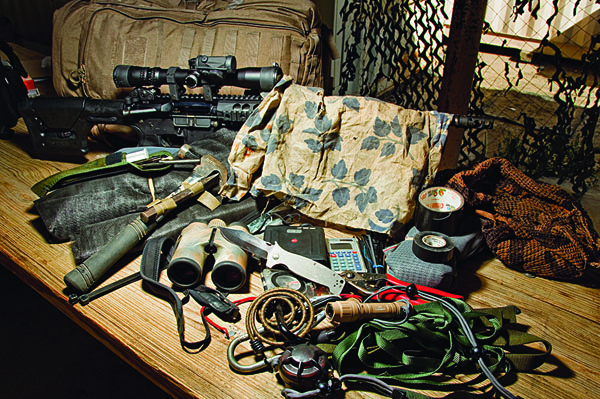
What Does a Navy SEAL Sniper Carry in His Pack?
Most of the items in my SEAL instructor’s pack, which he carried in Iraq and Afghanistan, look like they came off the shelves of a Home Depot. Which, in fact, they did.
- His pack was geared toward urban sniping, but most of these items are applicable to hunting as well. His kit contained:
- Bundles of lightweight camo netting in various shades to create a portable blind or hide.
- A handful of zip ties to secure the material to limbs and trees. Lengths of 1-inch nylon webbing and 550 paracord, for the same purpose. (The webbing, when looped as a sling over a high tree branch or around a tree trunk, makes for a stable rifle rest.)
- A couple of carabiners.
- A sock full of rice for a rear rifle bag. And finally, some more standard gear: knife, binocular, laser rangefinder, duct tape, electrical tape, compass, toilet paper, gun oil and a gun-cleaning kit.
The thermite and smoke grenades he carries in combat are optional for elk camp.
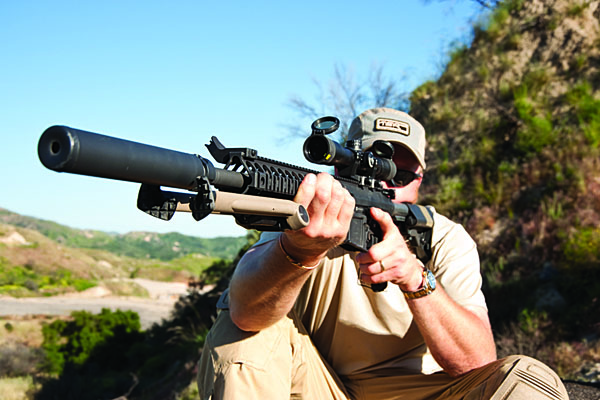
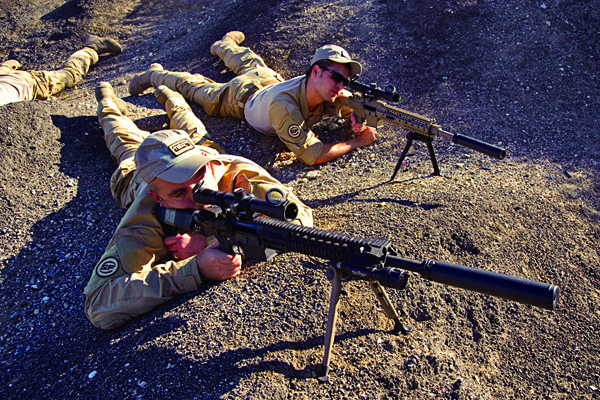
Suppressors for Hunting
By my rough count, you can legally hunt animals with suppressors in more than 20 of our glorious United States–though you’d be hard-pressed to figure this out if you tried reading through the state game regs. The secrecy (dare I say, silence?) surrounding this topic is baffling (sorry), given that states should be loudly encouraging the practice for the health and safety of all shooters, as is done in Europe and other parts of the world.
The term “silencer” is a misnomer, as the devices do not produce silence. They merely quiet the report of the gun to the point that severe hearing damage is avoided, while reducing recoil and muzzle blast at the same time.
A suppressor might also buy you an additional shot at an animal. Because the sound made by the sonic boom of the bullet radiates nearly perpendicularly off the projectile, it is nearly impossible to tell where the shot is coming from as it passes by.
Should you invest in a suppressor, don’t bargain-hunt. Go with a top-quality maker such as SureFire, whose products will deliver a lifetime of service.
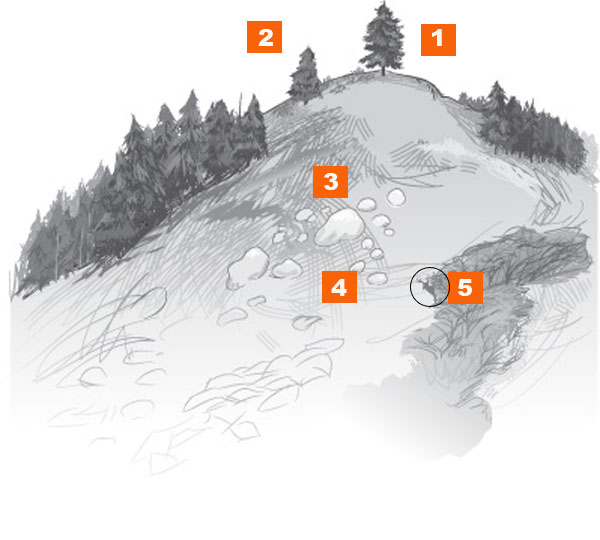
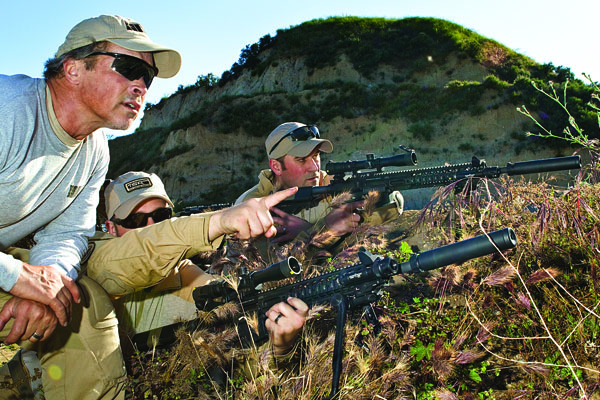
Talking Sniper
“See that deer?” “Where?” “Behind the bush.” “The green bush?” And so starts the verbal tango (though perhaps I should say “tangle”) when hunting partners attempt to point out a spotted animal.
A simpler method is one used by sniper/spotter teams: Start with an unmistakable landmark, in this case a lone tree at the peak of the mountain. Ask whether your partner sees it. Once he says “yes,” walk him to the next landmark, with directions and distances, leading his eyes to the hidden buck. In this case, it would progress as follows.
- “See the lone tree at the top of the mountain?” “Yes.”
- “See the tree fifty yards to the left? Go to the midpoint between the trees.” “Got it.”
- “Drop straight down the mountain a hundred yards to the large boulder.” “Got it.”
- “Go sixty yards from five o’clock to the last small boulder in the field.” “Got it.”
- “The deer is twenty-five yards away at three o’clock, just inside the edge of the brush.” “I see him.”
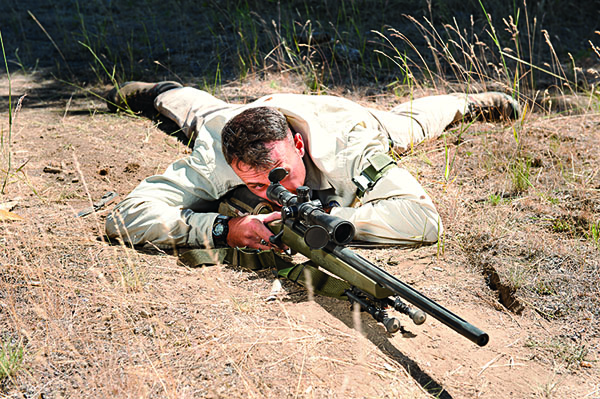
Solid Position #1
Prone
The closer you can get to Mother Earth, the steadier your shooting position will be, which is the great advantage of shooting prone.
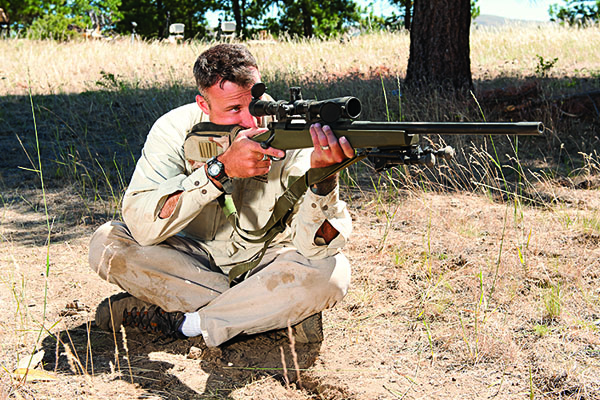
Solid Position #2
Sitting
Facing the target at a 45-degree angle with feet crossed, legs relaxed and elbows in front of knees creates a solid position.
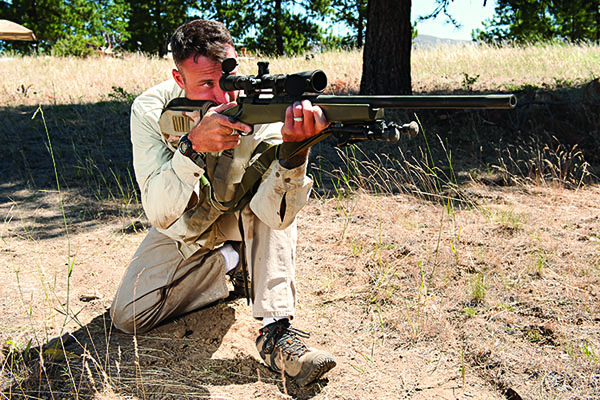
Solid Position #3
Kneeling
Kneeling is quick and steady. Rest your butt on your rear heel and keep your front shin perpendicular to the ground.
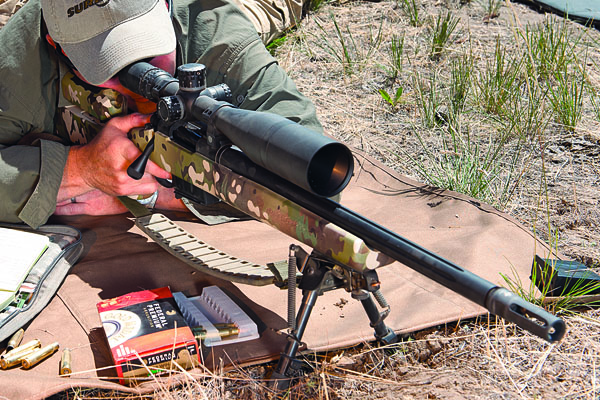
Using a Bipod
You never want any part of a rifle in contact with a hard surface when shooting. Hard-on-hard always diminishes accuracy. This goes for shooting off a bipod as well–you don’t want the feet resting on an unyielding surface. (This includes your shooting mat.)
If necessary, use a knife to scrape a shallow trench 1 to 2 inches deep in the ground to set the bipod in. The loosened soil will cushion the feet and help brace the legs at the same time.
When shooting prone, you should also push forward with your toes with enough pressure to “lock” the bipod into the same position with each shot. This gives the consistency needed to make long-range hits.
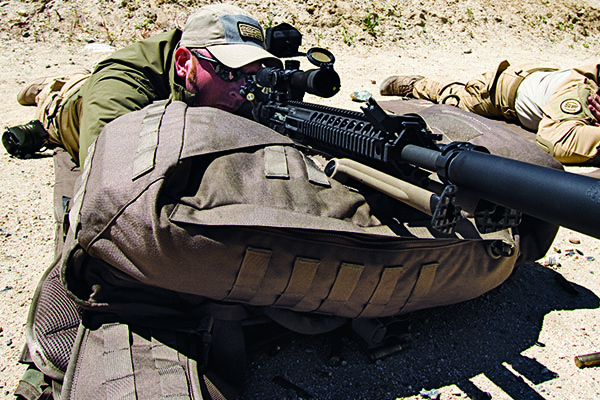
Creating a rest
A backpack makes for an excellent rest, giving you the “hard-on-soft” mating between rifle and rest that’s critical for accurate shooting. Similarly, you want a soft shooting bag supporting the rear of the stock, which is used to fine-tune the elevation of a shot by squeezing it off with your hand. You can make an excellent rear bag for next to nothing out of a heavy wool or synthetic sock that is partially filled with small plastic pellets. It weighs mere ounces. Just tie off the end, adjusting the amount of fill as needed, and carry it in a pocket.
Shooting From Awkward Positions
Most shooting instructors I’ve worked with are a bit sadistic, and Scott Reitz, a 30-year veteran of the LAPD who now runs International Tactical Training Seminars in California, seemed to fit the mold when he insisted my fellow classmates and I engage targets while prone on wildly lumpy ground. Or while crouching under barricades my six-year-old couldn’t squeeze through. But he’s right–in the real world you rarely get to shoot under ideal conditions, and learning how to make the most of what you’ve got and still get off steady, well-aimed shots is critical.
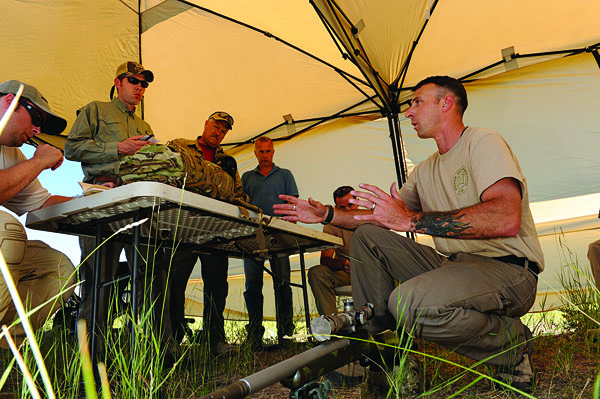
Last Commandment: Get Thee Some Instruction
Precision shooting requires a blend of mental and physical skills, all of which need to be honed and maintained in order to achieve peak results. Even something as simple as properly fitting your rifle so that
its comb height, the scope’s eye relief and the stock’s length of pull are all correct should occur under the guidance of a knowledgeable instructor.
So after you’ve invested your 401(k) in a tack-driving .308, spend the time, effort and money to go to a reputable school for instruction. I heartily recommend ITTS, mentioned above, along with schools such as Gunsite and Central Cascade Precision, all of which have top-notch instructors who will be able to elevate your shooting skills to new heights.
For more long-range shooting articles click the links below:
Sniper School Lessons Part 1
Sniper School Lessons Part 2
Sniper School: Master the Trigger
Sniper School: The 1-Mile Shot