Guns Rifles Precision Rifles

Sniper School Part 2

Alex Robinson Avatar

We may earn revenue from the products available on this page and participate in affiliate programs. Learn More

httpswww.outdoorlife.comsitesoutdoorlife.comfilesimport2014importImage2011photo1001321579_1.jpg
After four days of sniper school I had seen my fair share of mud, snow and rain. But I also took away some invaluable knowledge about shooting rifles. Here's what I learned and how it applies to real-life hunting scenarios. Editor's note: Part 1 of this story was posted early and can be found at the end of the gallery.
httpswww.outdoorlife.comsitesoutdoorlife.comfilesimport2013images201103_1a_0.jpg
Here's Rifles Only shooting instructor Jacob Bynum lobbing a shot at an 18 by 24-inch steel target that is 1,800 yards away (40 yards past the 1-mile mark). Believe it or not, Bynum center-punched the man-sized steel plate with his second shot.
httpswww.outdoorlife.comsitesoutdoorlife.comfilesimport2014importImage2011photo1001321579_1b.jpg
With the scope already dialed, it was my turn to take a crack at it. A trained spotter called shots for me and I connected on my third round, holding just off the left shoulder for the wind. Before this I would have thought a 1-mile shot was impossible. Read the full story on the 1-mile shot here.
httpswww.outdoorlife.comsitesoutdoorlife.comfilesimport2013images201103_1c_0.jpg
But once the scope is doped, taking a 1,800-yard shot isn't all that much different than taking a 400-yard shot, except that mistakes get multiplied. It's a little bit like driving a car at 50 mph compared to driving a car at 150 mph, small adjustments make a big difference. For me it really came down to three simple, but incredibly important points: breathing, natural point of aim and trigger pull. A shooter who has mastered these three concepts can do incredible things with a rifle.
httpswww.outdoorlife.comsitesoutdoorlife.comfilesimport2014importImage2011photo1001321579_1d.jpg
Some tips on pulling the trigger
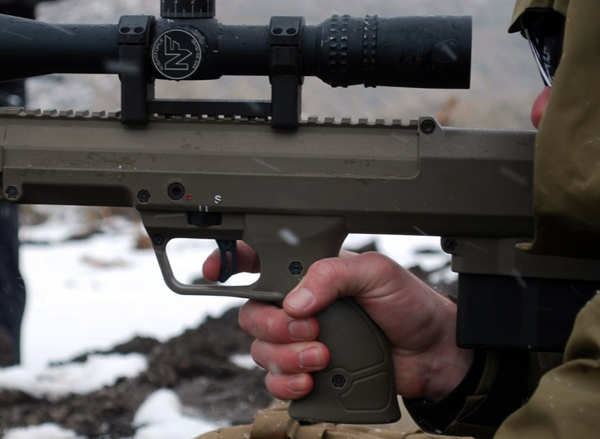
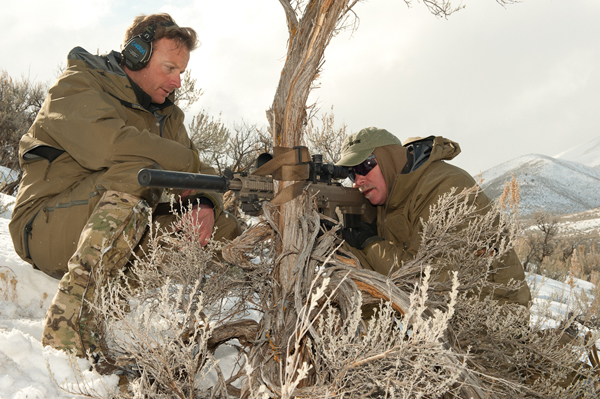
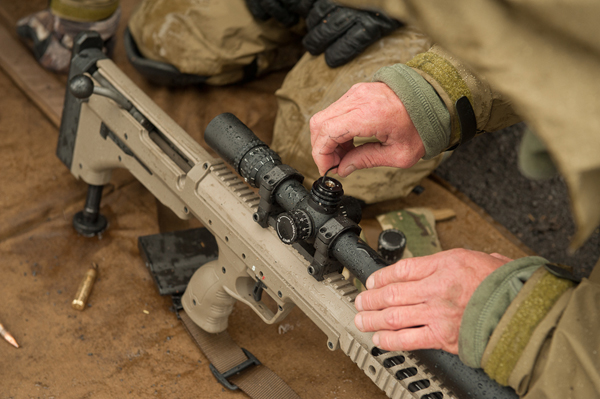
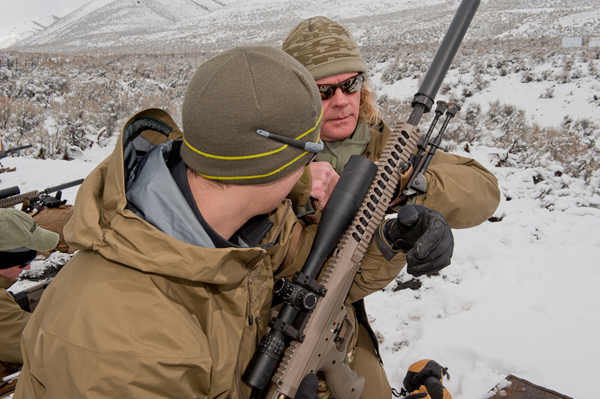
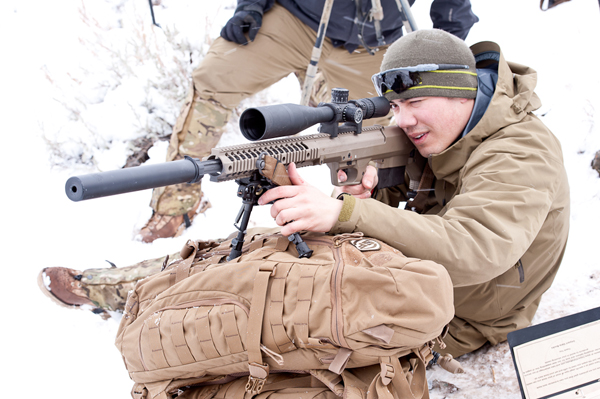
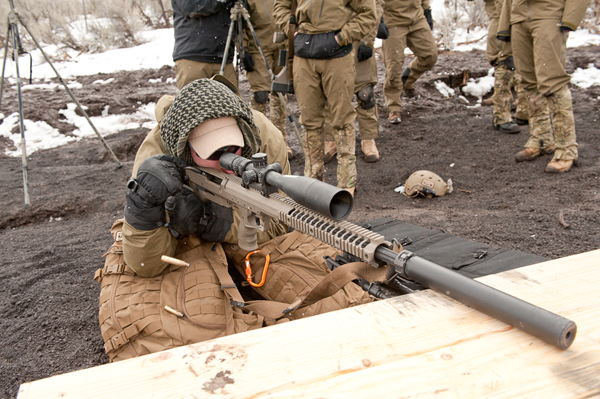
Your finger should be pointing perpendicular to the direction you're aiming, not curled in or angled out. Pull the trigger straight back, don't jack it to the left or right, because that will push your bullet left or right downrange. Don't slap the trigger and stay on it after the shot (think of follow through on a golf swing). Get to know your trigger, don't let it surprise you when the gun goes off. They tell new shooters the rifle firing should be a surprise (this is to prevent flinching) but an experienced shooter should know exactly when the gun will fire. Master these points by dry firing your gun.
httpswww.outdoorlife.comsitesoutdoorlife.comfilesimport2014importImage2011photo1001321579_1e.jpg
Some tips on breathing
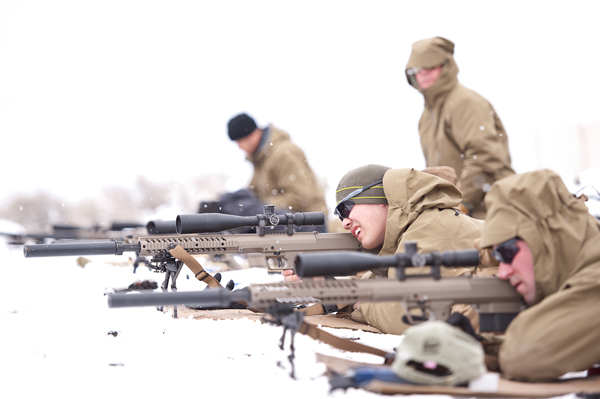
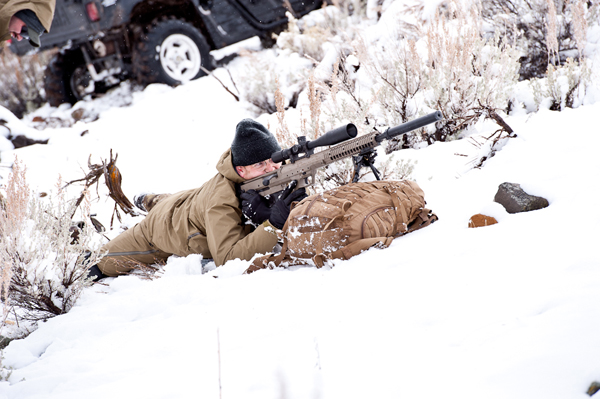
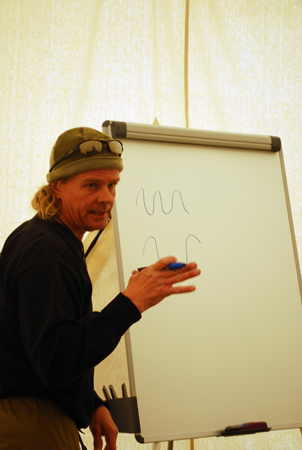
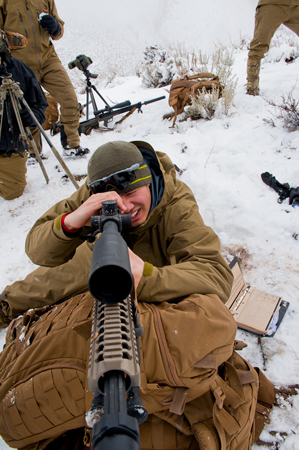
As you breathe and look through the scope you'll notice your crosshairs moving up and down with your breath. Take one deep breath and then look through your scope. You want to shoot at the bottom of your normal breathing cycle (when you have let out all of your air). Don't hold your breath. If you start breathing heavy and can't smoothly get to the bottom of your cycle back off, take another deep breath and try again. I get excited every time I get behind the rifle. Like Pavlov's dog I instinctually expect something good to happen, but instead of drooling I start breathing heavy. I overcame this by simply looking through the scope with the gun unloaded and just sat there breathing (and thinking about breathing). This sounds stupid but it actually worked.
httpswww.outdoorlife.comsitesoutdoorlife.comfilesimport2014importImage2011photo1001321579_1f.jpg
Some tips on natural point of aim
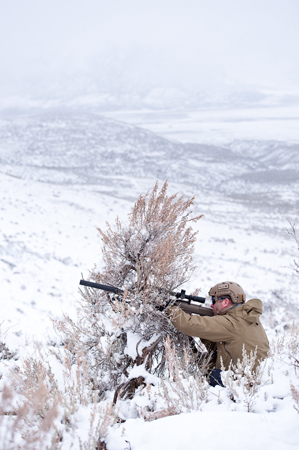
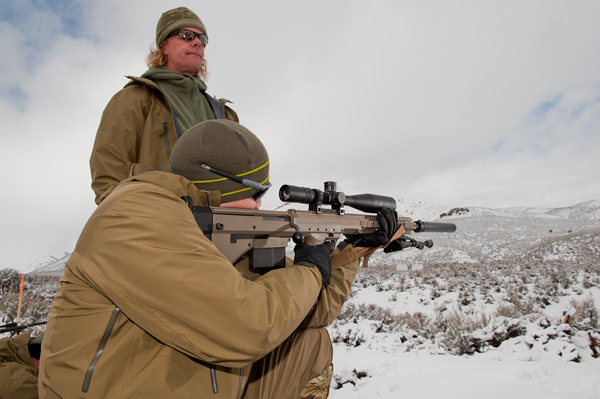
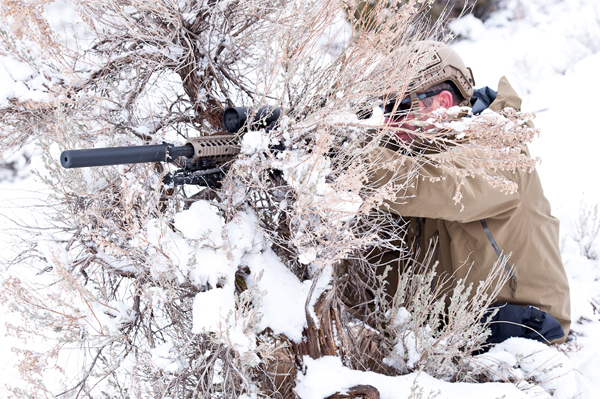
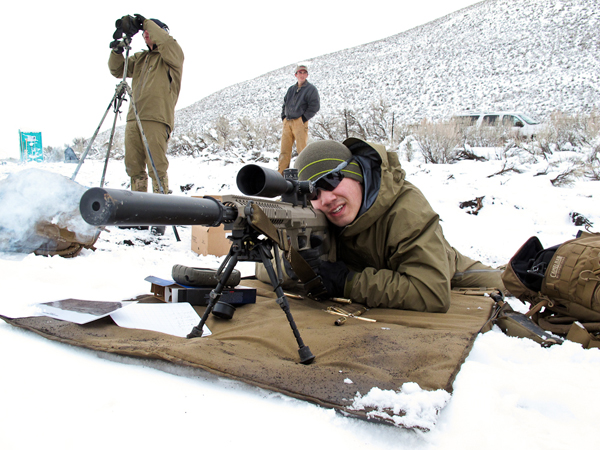
Natural point of aim is where your body will point the gun without your brain telling you where to point it. Here's how to find it: get into shooting position and put your crosshairs on the target. Now close your eyes for a few seconds and relax with the gun still to your shoulder. Now open your eye and look through the scope. If your crosshairs have drifted off the target then you weren't at your natural point of aim. Reposition yourself and try it again until the crosshairs are still on target when you open your eyes.
httpswww.outdoorlife.comsitesoutdoorlife.comfilesimport2014importImage2011photo1001321579_1g.jpg
Hanging out at the range lobbing rounds thousands of yards would have been way to easy for this trip. So on day three we drove to Ogden Utah to climb the Via Feratta at Waterfall Canyon.
httpswww.outdoorlife.comsitesoutdoorlife.comfilesimport2013images201103_2__DSC6733_0.jpg
We quickly found out how Waterfall Canyon earned its name (that's a giant frozen waterfall behind us if you're wondering). But what is Via Feratta all about …
httpswww.outdoorlife.comsitesoutdoorlife.comfilesimport2013images201103_3_DSC6740_0.jpg
We'd have to hike for half an hour through the snow to find out.
httpswww.outdoorlife.comsitesoutdoorlife.comfilesimport2013images201103_3a_IMG_0652_0.jpg
Via Feratta is Italian for "road with irons." It's a climbing system of iron rungs and cables that started with the Italian Mountain Infantry in World War I. The Italians used rungs and cables to climb across the Dolomite mountains to gain position against enemy Austrian soldiers. We would do the same thing, but instead of shooting at Austrian soldiers we shot at steel targets across the canyon.
httpswww.outdoorlife.comsitesoutdoorlife.comfilesimport2014importImage2011photo1001321579_4IMG_0708-Edit.jpg
We carefully made our way up the slippery cliffs with guns and packs strapped on our backs.
httpswww.outdoorlife.comsitesoutdoorlife.comfilesimport2013images201103_5_IMG_0664-Edit_0.jpg
We wore climbing harnesses that attached to cables and our guides promised us that the farthest we could fall at any given time was about 12 feet. I decided early on that I was not interested in testing that figure.
httpswww.outdoorlife.comsitesoutdoorlife.comfilesimport2013images201103_6IMG_0729_0.jpg
It took us about three hours to reach the top of the canyon. In the summer time it takes about 40 minutes.
httpswww.outdoorlife.comsitesoutdoorlife.comfilesimport2014importImage2011photo1001321579_7DSC_2953.jpg
Lunch was a frozen energy bar. It tasted about as good as it looks.
httpswww.outdoorlife.comsitesoutdoorlife.comfilesimport2014importImage2011photo1001321579_8_DSC6785.jpg
But at the top was the big payoff. How many opportunities do you get to shoot down a canyon?
httpswww.outdoorlife.comsitesoutdoorlife.comfilesimport2013images201103_9_DSC6797-2_0.jpg
The shot wasn't especially tricky. It was about 240 yards at a 45-degree angle. But there are some extra things to consider when taking shots like this.
httpswww.outdoorlife.comsitesoutdoorlife.comfilesimport2014importImage2011photo1001321579_10_DSC6815-2.jpg
First, make sure your barrel is clear. Since your scope sits a few inches above your barrel, it's possible to get a clear sight picture even though your muzzel is pointing into a rock. It's hard to hit your target if you shoot into a rock.
httpswww.outdoorlife.comsitesoutdoorlife.comfilesimport2013images201103_11_DSC6821-2_0.jpg
Take the angle into account when you dope your scope. For both high angle and low angle shots your bullet will drop less than if you were shooting flat. This is because less gravity pulls on the bullet while it is in flight when you are taking an angled shot.
httpswww.outdoorlife.comsitesoutdoorlife.comfilesimport2014importImage2011photo1001321579_12__DSC6828-2.jpg
Most of the time it's going to be impossible to shoot from the prone position if you're shooting at extreme angles (but if you can, do it). Because of this, your body won't be able to get straight behind the rifle, which is the most stable position, according to Bynum. But don't angle yourself off to onside. Sit, kneel or stand directly behind your gun, not leaning off to the side.
httpswww.outdoorlife.comsitesoutdoorlife.comfilesimport2013images201103_13_DSC6845_0.jpg
httpswww.outdoorlife.comsitesoutdoorlife.comfilesimport2013images201103_14IMG_0754-Edit_0.jpg
Shooting instructor Cody Carrol was a guru when it came to figuring out shooting positions on the fly. By simply propping a backpack behind you or sticking a sandbag under a knee or elbow you can turn a wobbly rest in to a rock solid one. The biggest takeaway I got from Cody: make sure your joints are supported.
httpswww.outdoorlife.comsitesoutdoorlife.comfilesimport2014importImage2011photo1001321579_15_DSC7378.jpg
Here are a few of the shooting positions we utilized. Check out how the sling is tied to the tree.
httpswww.outdoorlife.comsitesoutdoorlife.comfilesimport2013images201103_16_DSC6289_0.jpg
httpswww.outdoorlife.comsitesoutdoorlife.comfilesimport2013images201103_17_DSC6294_0.jpg
httpswww.outdoorlife.comsitesoutdoorlife.comfilesimport2013images201103_18_DSC6251_0.jpg
Shooting with a suppressor made this position more feasible.
httpswww.outdoorlife.comsitesoutdoorlife.comfilesimport2014importImage2011photo1001321579_19_DSC6263.jpg
httpswww.outdoorlife.comsitesoutdoorlife.comfilesimport2013images201103_20_DSC6846_0.jpg
When we were out of shells, we booked it back down the canyon.
httpswww.outdoorlife.comsitesoutdoorlife.comfilesimport2013images201103_21_DSC6862-2_0.jpg
That's the city of Ogden in the background. (As a side note, we were shooting on private property and had it cleared with the Ogden police. A few of the local SWAT team snipers even tagged along for the trip).
httpswww.outdoorlife.comsitesoutdoorlife.comfilesimport2013images201103_22IMG_0758_0.jpg
We made it out just as the sun was setting.
httpswww.outdoorlife.comsitesoutdoorlife.comfilesimport2013images201103_23_DSC3604_0.jpg
httpswww.outdoorlife.comsitesoutdoorlife.comfilesimport2014importImage2011photo10013215791_127.jpg
SNIPER SCHOOL PART 1
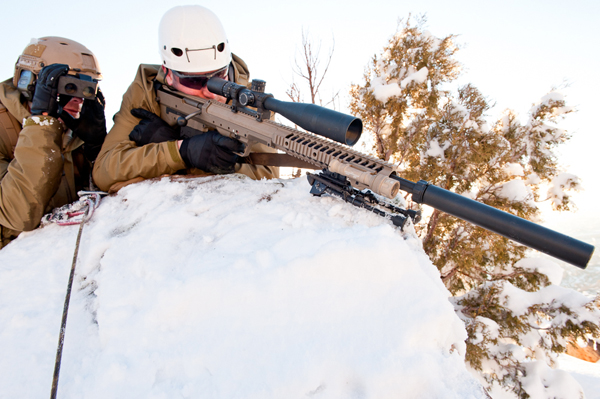
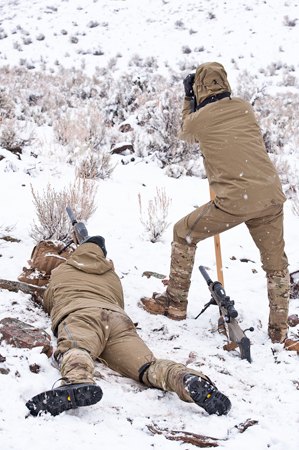
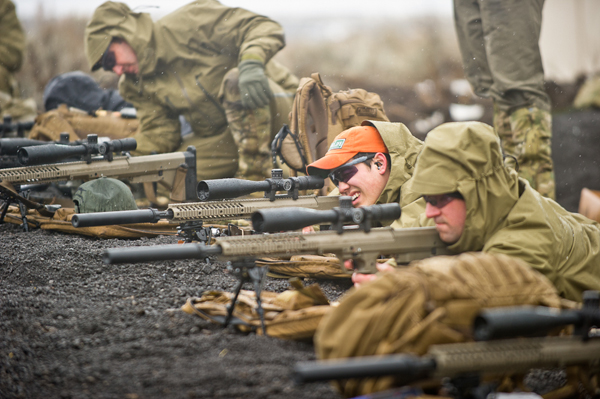
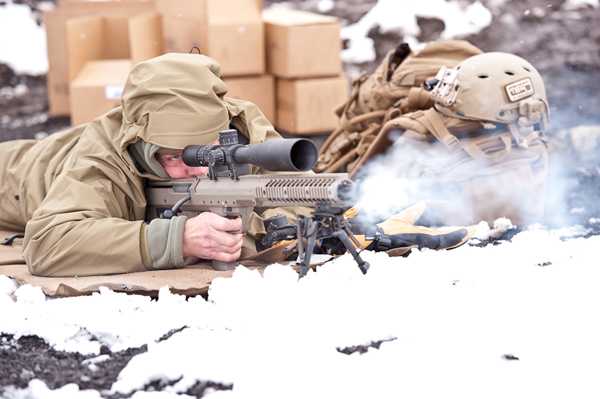
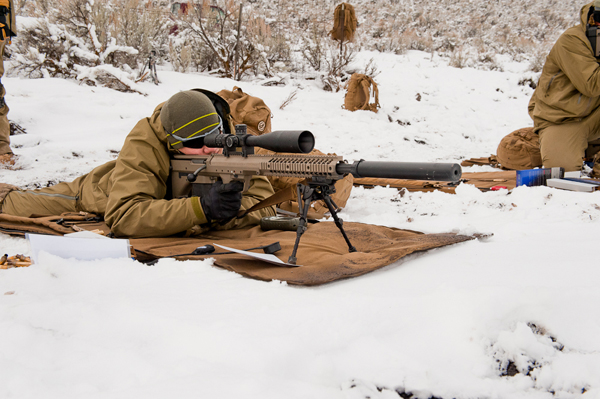
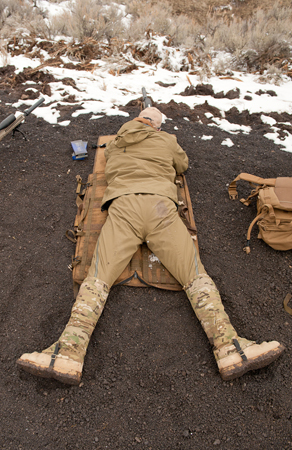
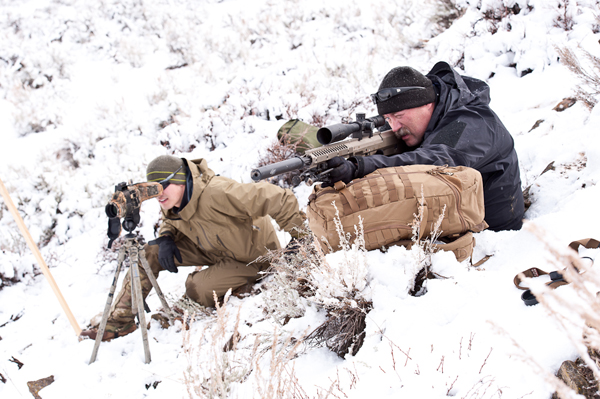
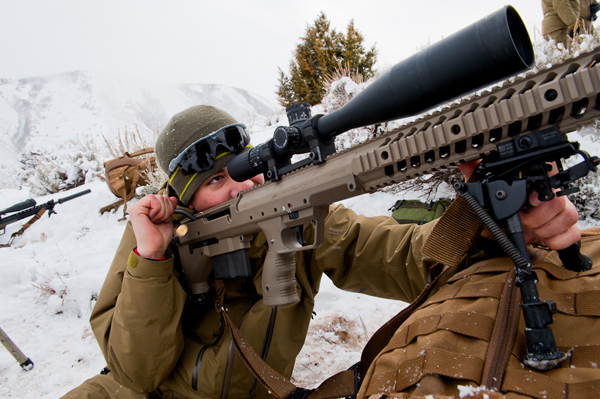
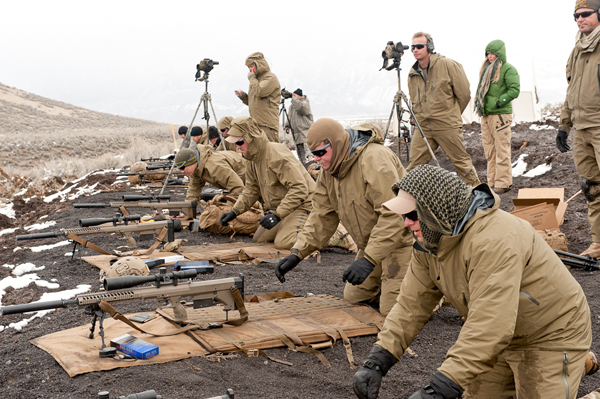
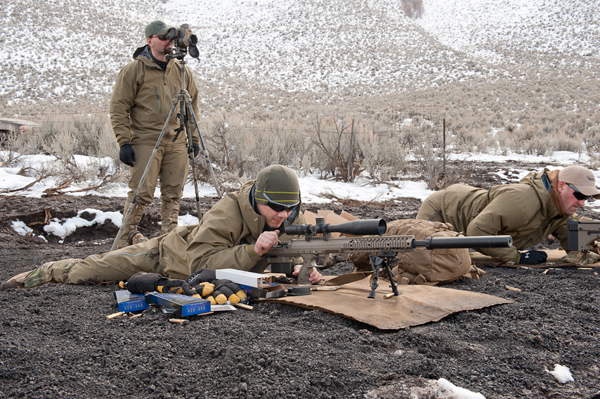
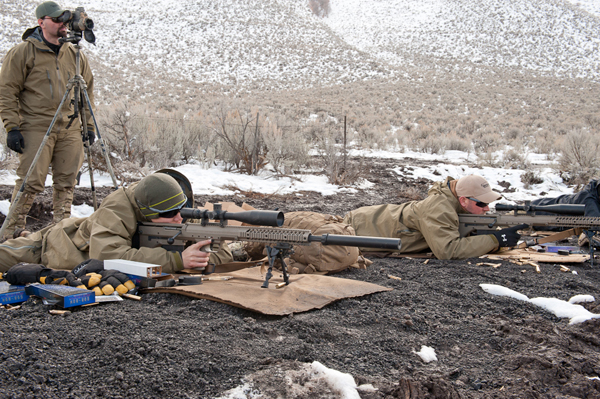
I had just fired my first round on day one of sniper school when the instructor came over to me. "Son, you need to start breathing or you're going to pass out," he said. It was the easiest task we would have to do all week: shoot five rounds into a 100-yard target from the prone position. I was already overexcited and shaky. I had been training and waiting for this trip for weeks and now that I was finally behind the rifle, anticipation took over. Was it possible to give yourself buck fever while shooting at a paper target? I guess I would find out. Photos by: Sean Utley, Derek McDonald and Alex Robinson
httpswww.outdoorlife.comsitesoutdoorlife.comfilesimport2014importImage2011photo10013215792_124.jpg
Myself and a handful of other gun writers flew to a rifle training course called Sniper Country in Utah where we would test our gear, shooting skills and perseverance. The event was sponsored by SureFire and from the start Derek McDonald, the company's VP of marketing, called it Operation Winter Fury. It lived up to its name.
httpswww.outdoorlife.comsitesoutdoorlife.comfilesimport2014importImage2011photo10013215793x_8.jpg
Our head shooting instructor was Jacob Bynum from the Rifles Only shooting school. This man could talk about guns and shooting for days straight … and he did.
httpswww.outdoorlife.comsitesoutdoorlife.comfilesimport2014importImage2011photo10013215794x_7.jpg
Our second instructor was Cody Carrol, a Marine who teaches classes in shooting, wilderness survival and tracking. As you can probably guess, he knows a thing or two about how to shoot a rifle.
httpswww.outdoorlife.comsitesoutdoorlife.comfilesimport2014importImage2011photo10013215795_119.jpg
On day one, after an in-depth safety instruction, we zeroed our guns. We were shooting Nightforce 3.5-15X50 scopes with a mil-dot reticle.
httpswww.outdoorlife.comsitesoutdoorlife.comfilesimport2014importImage2011photo10013215796_110.jpg
Which brings us to our first sniper school lesson: the mil does not stand for millimeters or military but rather milliradians, which is simply the measurement of an angle. The large hashes on the crosshairs you see here are mils and the small ones are half mils. At 100 yards a mil equates to about 3.6 inches and you can multiply this out to about 36 inches at 1,000 yards. On the scope, .1 mil equals one click. So to move up one mil you crank the scope 10 clicks.
httpswww.outdoorlife.comsitesoutdoorlife.comfilesimport2014importImage2011photo10013215796a_1.jpg
Believe it or not, this system requires you to do virtually no math. On the first day we zeroed at 100 yards and then shot at 100-yard increments out to 600 hundred yards. For each distance we wrote down how many clicks we moved the scope up for future reference. For example, this quick cheat sheet (hit enlarge photo) let me know that in order to hit a target at 300 yards I would dial up 13 clicks or 1.3 mils (remember 1 click equals .1 mils). Or if there was no time to adjust the scope I could easily hold 1.3 mils high.
httpswww.outdoorlife.comsitesoutdoorlife.comfilesimport2014importImage2011photo10013215797_119.jpg
You can practice this exact exercise at your local shooting range. Once you have your cheat sheet filled out, tape it to your rifle stock.
httpswww.outdoorlife.comsitesoutdoorlife.comfilesimport2013images2011038_27.jpg
One of the most basic principles we practiced was getting straight with the rifle, not angled off to one side. According to Bynum, the rifle should run parallel to your spine when you're shooting from the prone position.
httpswww.outdoorlife.comsitesoutdoorlife.comfilesimport2013images2011039_25.jpg
We also practiced from the kneeling position. In every case it's better to have bone to bone contact so the gun is supported by your skeletal structure and not your muscles (in the next photo you'll see how my elbow is resting on my knee). This is because bone is more stable than muscle, which gets tired and shaky quickly.
httpswww.outdoorlife.comsitesoutdoorlife.comfilesimport2014importImage2011photo100132157910_115.jpg
In fact, the only muscle that should really be flexing is your right bicep (vice versa if you are a southpaw) holding the gun into your shoulder. Let all of your other muscles relax.
httpswww.outdoorlife.comsitesoutdoorlife.comfilesimport2014importImage2011photo100132157910a_0.jpg
This includes relaxing your face (which I am clearly not doing here). Some of the best advice I got from Bynum was to think of yourself as a piece of meat after you pull the trigger. Be calm, relaxed, almost dead, just like a big piece of steak. Doing so will keep you from flinching or pulling your head off of the gun. It sounds simple, but it takes some serious mental practice to convince yourself that you are nothing more than a chunk of ribeye.
httpswww.outdoorlife.comsitesoutdoorlife.comfilesimport2014importImage2011photo100132157911_109.jpg
One trick I learned while shooting in improvised positions was to grab a piece of your jacket with the four fingers on your left had and then wrap your hand around the stock and grip it with your thumb. This holds the gun much steadier than if you held it at the forearm and ensures that it sits tight against your shoulder (see how my left hand is placed on my right arm in this photo).
httpswww.outdoorlife.comsitesoutdoorlife.comfilesimport2014importImage2011photo100132157912_110.jpg
This range card allowed us to know exactly how far the targets were. Notice there is one out at 1,800 yards (we'll get to that later).
httpswww.outdoorlife.comsitesoutdoorlife.comfilesimport2014importImage2011photo100132157912a_0.jpg
This is what we were looking for: silver silhouette targets placed along the hillside. There was no sound more satisfying than the hollow "clang" my bullet made after flying into one of these steel plates.
httpswww.outdoorlife.comsitesoutdoorlife.comfilesimport2014importImage2011photo100132157913_106.jpg
After lighting up targets at the "Known Distance Range" we headed up into the hills to shoot at targets of unknown distance. In teams of two we hiked up a ridge and stopped at different stations to glass for targets that were setup along the opposite ridge out to 600 yards.
httpswww.outdoorlife.comsitesoutdoorlife.comfilesimport2013images20110314_18.jpg
My partner was Brent Wheat, a freelance gun writer and police officer from Indiana. He was a better of a shot than I was, but I had an easier time finding the targets and hiking the hills … we made a good team.
httpswww.outdoorlife.comsitesoutdoorlife.comfilesimport2014importImage2011photo100132157915_96.jpg
The spotter's job is just as important as the shooter's. The spotter is in charge of ranging the targets, calling shots and wind. As Brent shot I would watch for trace to see where his bullet hit. I would then instruct him where to hold on his next shot …
httpswww.outdoorlife.comsitesoutdoorlife.comfilesimport2013images20110316_18.jpg
… and he would do the same for me when I was behind the gun.
httpswww.outdoorlife.comsitesoutdoorlife.comfilesimport2014importImage2011photo100132157917_88.jpg
The basics that we learned on the range, like not taking your head off the gun to work the bolt, became even more important during our shoot on the ridge. In real life sniping, taking your head off the the gun to "turkey peek" could mean giving up your position and have some lead fly in your direction. In hunting it means you'll lose the animal in your scope and potentially miss out on a follow up shot.
httpswww.outdoorlife.comsitesoutdoorlife.comfilesimport2014importImage2011photo100132157918_84.jpg
So how did we go about hitting a target 600 yards away across a ridge?
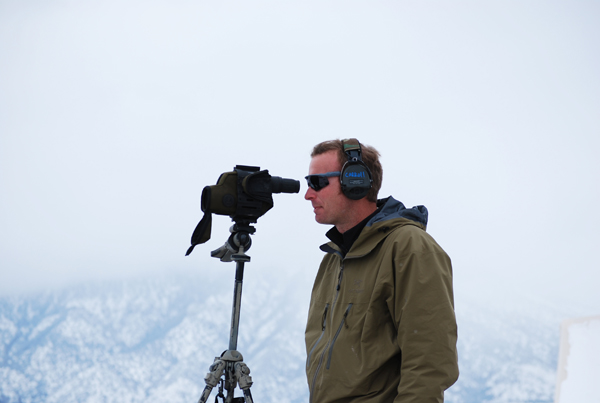
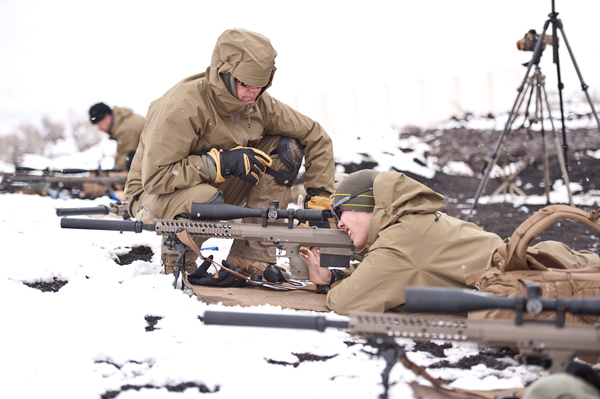
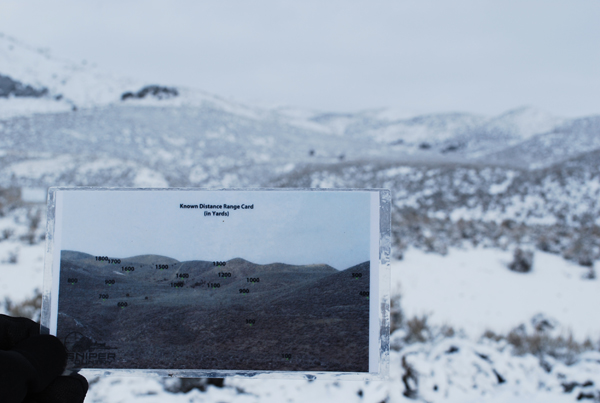
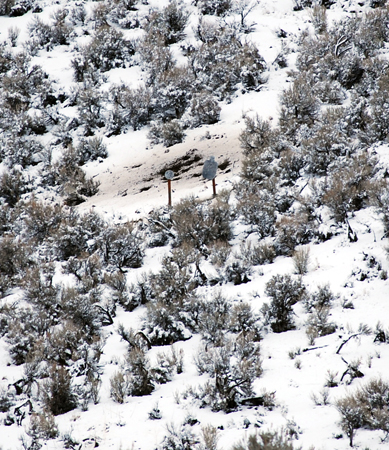
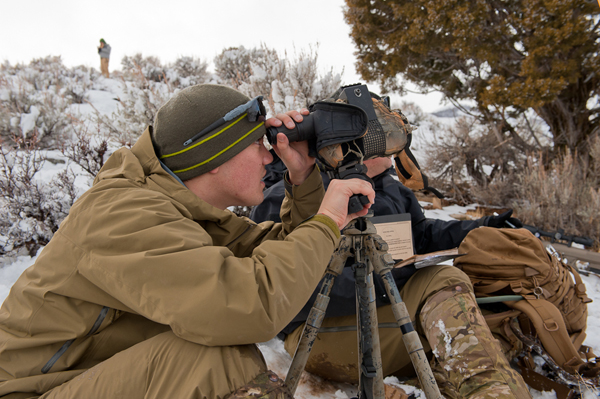
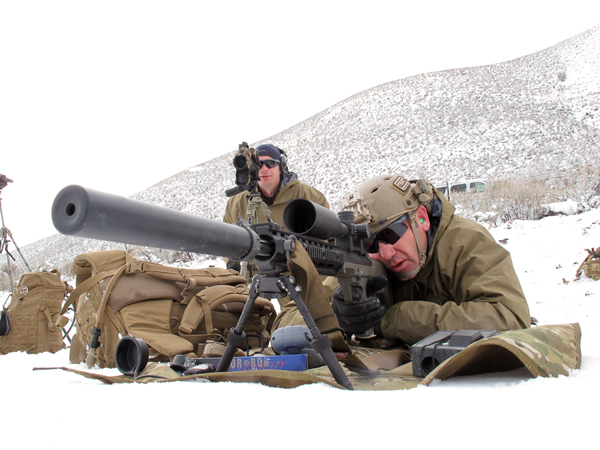
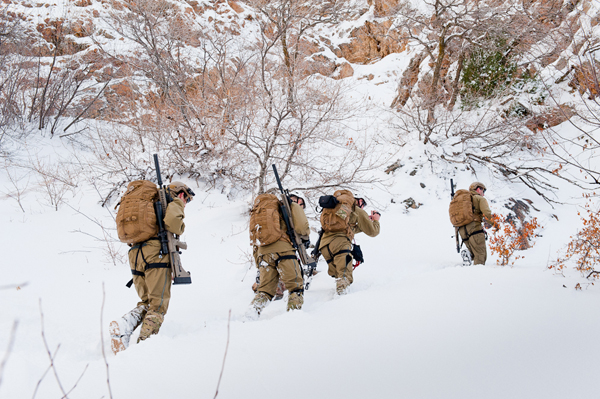
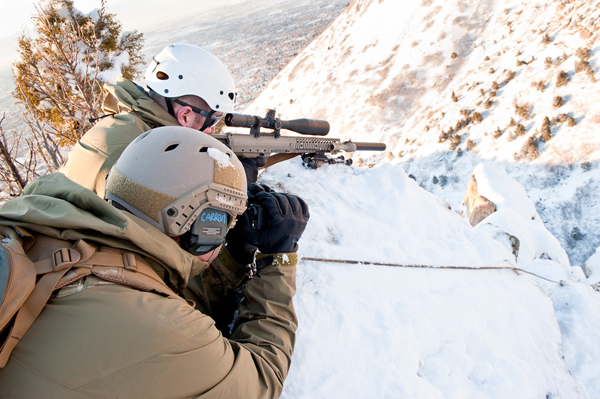
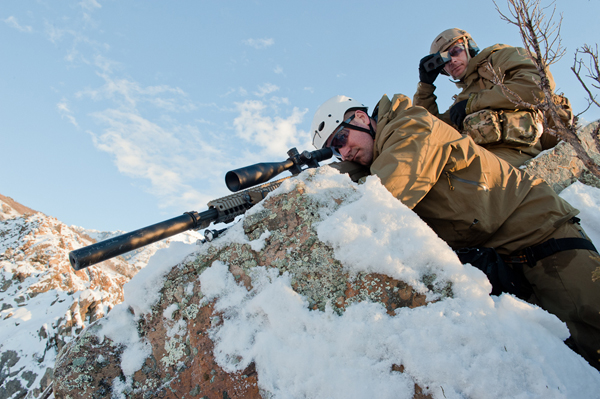
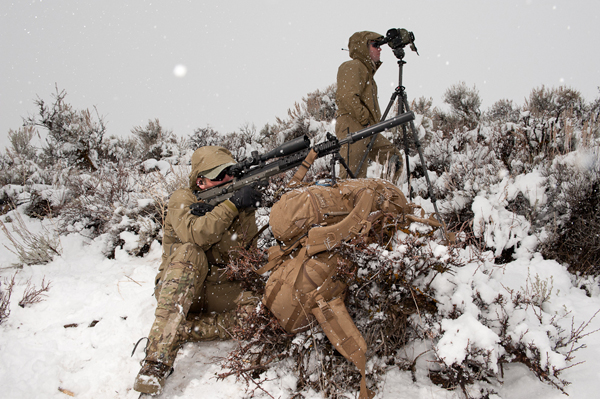
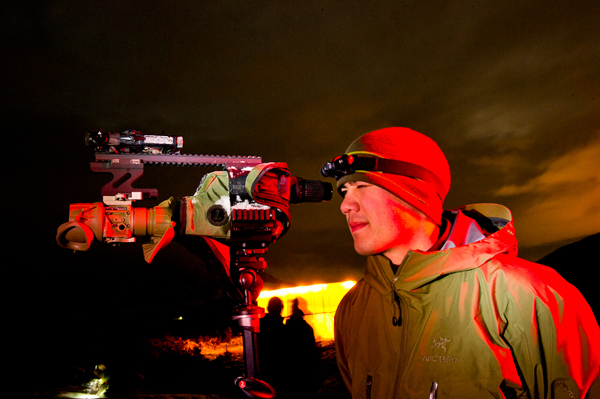
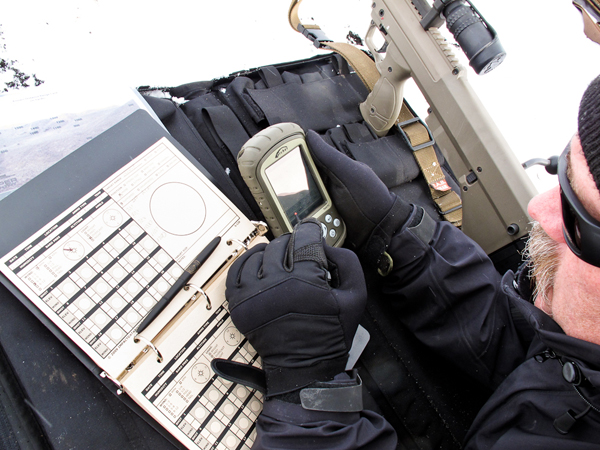
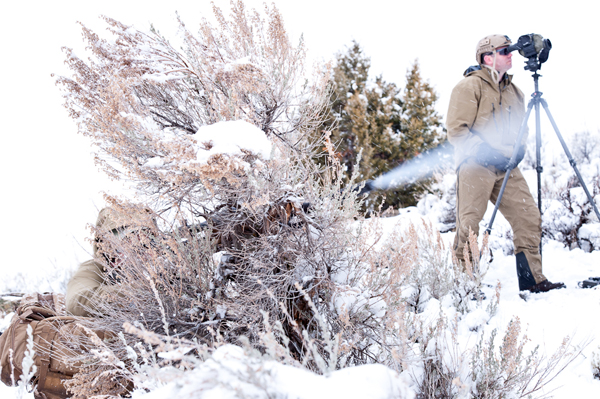
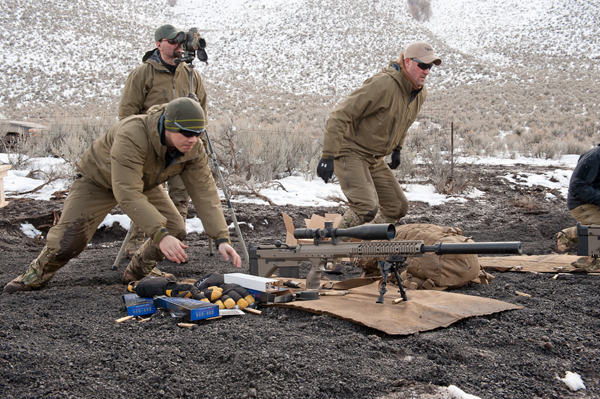
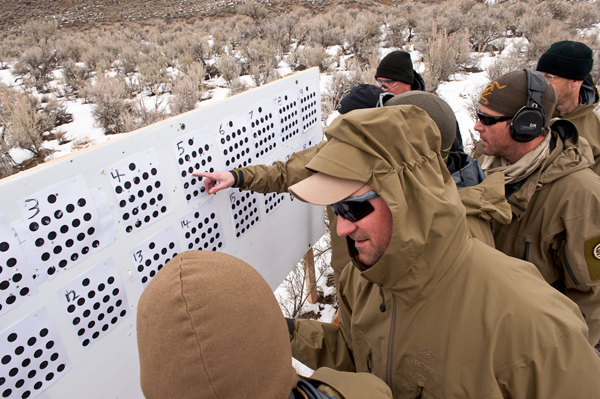
1) Find the target with patience and a good spotting scope
httpswww.outdoorlife.comsitesoutdoorlife.comfilesimport2014importImage2011photo100132157919_80.jpg
2) Hit it with a laser rangefinder (we zapped each target three times to make sure we had the correct range and weren't hitting a branch or bush near the target). Even a mistake of 30 yards can mean a miss or wound when you're shooting long range.
httpswww.outdoorlife.comsitesoutdoorlife.comfilesimport2014importImage2011photo100132157921_73.jpg
3) Then we either consulted our cheat sheet or or plugged the range into this small computer that calculated how we should dope the scope. The cheat sheet was way quicker, but the computer took into account wind and elevation, which made it a bit more accurate.
httpswww.outdoorlife.comsitesoutdoorlife.comfilesimport2013images20110322x_2.jpg
4) Dope (or adjust) the scope and shoot
httpswww.outdoorlife.comsitesoutdoorlife.comfilesimport2013images20110323_17.jpg
5) Watch for trace to see where the bullet hits and either call for a different hold or shoot again. 6) Move on to the next target
httpswww.outdoorlife.comsitesoutdoorlife.comfilesimport2013images20110324_11.jpg
The exercise tied back directly to hunting. However in a real life hunting situation there would probably no be time to punch ranges and wind speeds into a computer. There is also little likelihood of a good follow-up shot or multiple targets at one time. This is why most people advocate for not taking shots at game from farther than 400 yards (and even that is a stretch in most field scenarios).
httpswww.outdoorlife.comsitesoutdoorlife.comfilesimport2013images20110325x_2.jpg
It helps to be in decent shape for shooting exercises like this. The quicker you can catch your breath and slow your heart beat, the quicker and more accurately you'll be able to shoot (this translates to hunting too).
httpswww.outdoorlife.comsitesoutdoorlife.comfilesimport2014importImage2011photo100132157929_30.jpg
On day two we started a dot drill exercise. It was a timed exercise where we started standing next to our rifles and then dove behind them at the call of "gun!" From there the shooting began.
httpswww.outdoorlife.comsitesoutdoorlife.comfilesimport2014importImage2011photo100132157929a_0.jpg
We shot this target at 100 yards in five different rounds. You have a set amount of time to shoot out each row of the target (for example 30 seconds to shoot out the dots on row 2). Then you reload get up and get ready for the next round.
httpswww.outdoorlife.comsitesoutdoorlife.comfilesimport2014importImage2011photo100132157930_28.jpg
The times you designate to shoot each row of dots don't really matter, so you can set this drill up to match your own ability.
httpswww.outdoorlife.comsitesoutdoorlife.comfilesimport2014importImage2011photo100132157931_21.jpg
What's important is that the drill forces you to shoot quickly and efficiently. Any flaws in your shooting are soon exposed (I had trouble shooting at the bottom of my breathing cycle which caused me to shoot either high or low). This is a great drill to set up with a partner at your local shooting range. You can easily find these targets online and print them from your home computer.
httpswww.outdoorlife.comsitesoutdoorlife.comfilesimport2013images20110332_6.jpg
The drill also teaches you recoil management and how to stay on the target after the shot.
httpswww.outdoorlife.comsitesoutdoorlife.comfilesimport2013images20110333_4.jpg
All of us could use more practice with this drill.
httpswww.outdoorlife.comsitesoutdoorlife.comfilesimport2014importImage2011photo100132157935_19.jpg
In the next exercise Bynum taught us about shooting with the barrel resting on a hard surface. Resting your barrel on a hard surface, like say the handrail of your treestand, disrupts the barrel's harmonics. When you fire a rifle the barrel vibrates a bit like a tuning fork. When you rest it against a hard surface this ruins that natural motion.
httpswww.outdoorlife.comsitesoutdoorlife.comfilesimport2013images20110336_4.jpg
In our case resting the barrel on a bench caused shots to hit 5 to 8 inches high at 100 yards. However, resting the forearm of your rifle on a hard surface and shooting will not ruin your shot since most rifles have free floating barrels.
httpswww.outdoorlife.comsitesoutdoorlife.comfilesimport2013images20110337_4.jpg
httpswww.outdoorlife.comsitesoutdoorlife.comfilesimport2014importImage2011photo100132157938_11.jpg
A quick note on the gear … The cans you see attached to the barrels of all the rifles are made by SureFire. I had never shot with a suppressor before, but I was suprised to see just how much they cut down on noise and muzzle flash. We all wore ear plugs as a precautionary measure, but after four days of shooting there wasn't a single ringing ear in the group. The gun I shot was a Desert Tactical SRS in .338 Lapua. Although I did have a nice bruise on my shoulder after four days of non-stop shooting, the recoil was definately manageable and the gun was a forgiving shooter.
httpswww.outdoorlife.comsitesoutdoorlife.comfilesimport2014importImage2011photo100132157939_12.jpg
To see part 2 of Sniper School come back to outdoorlife.com on Thursday.

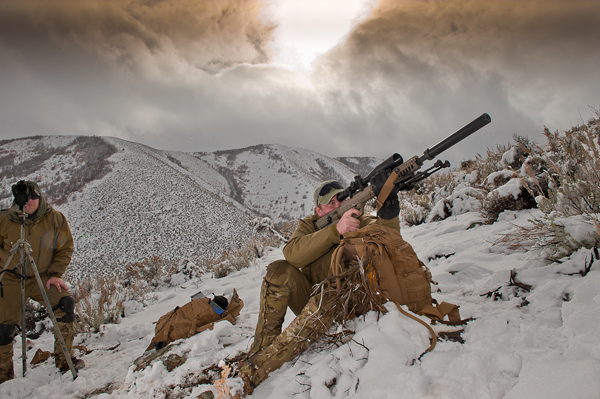
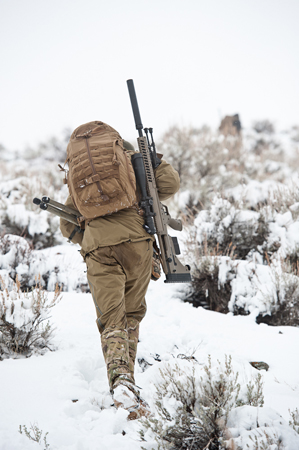
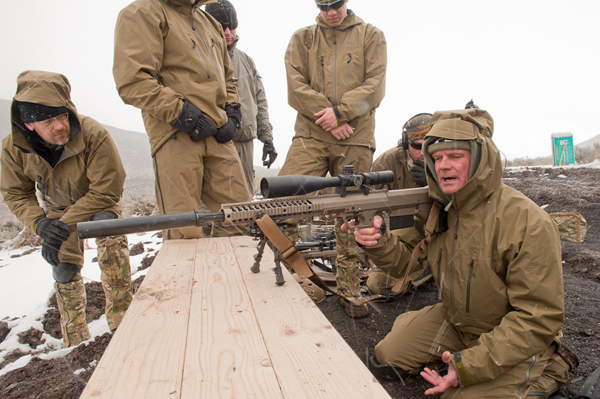
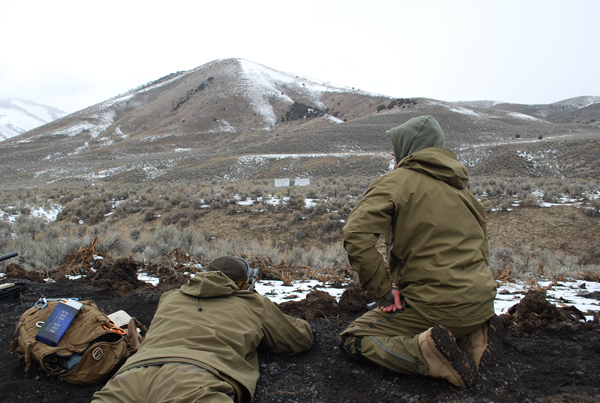
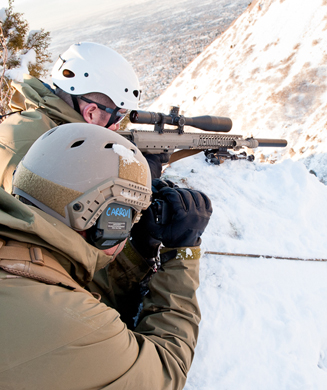
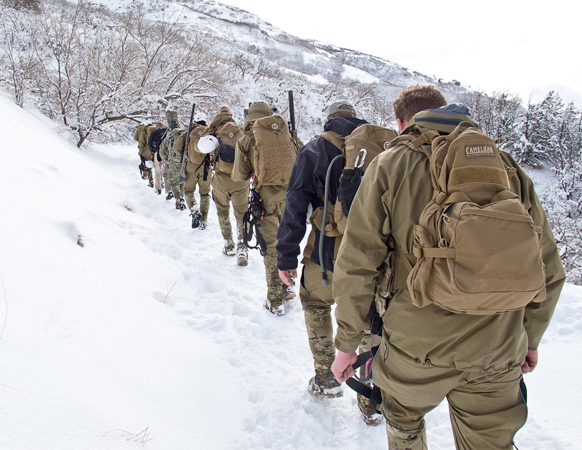
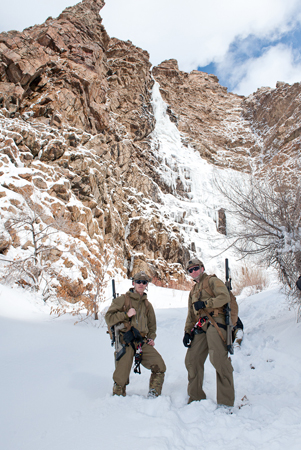
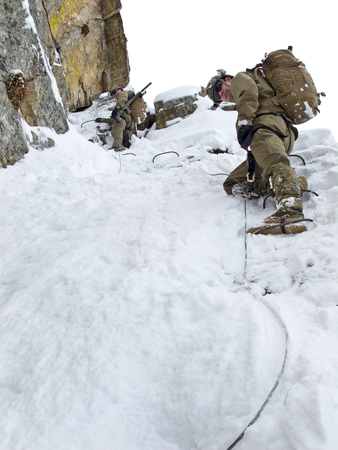
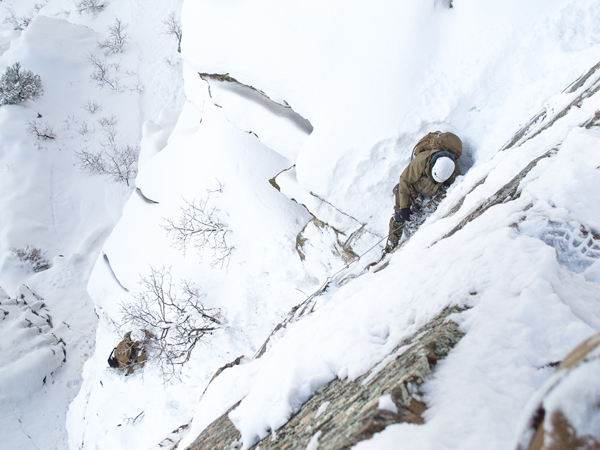
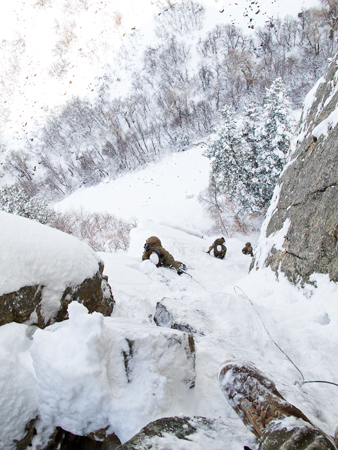
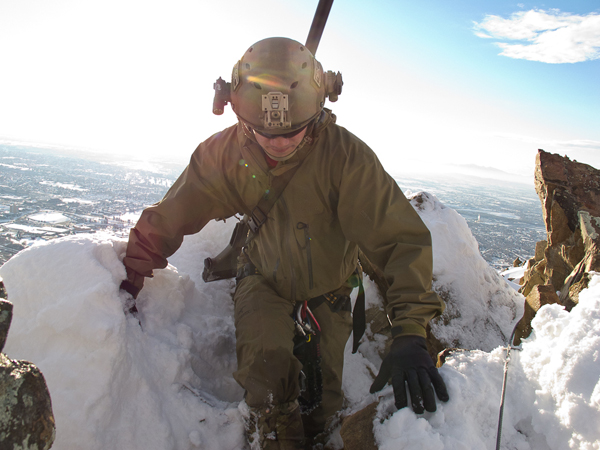
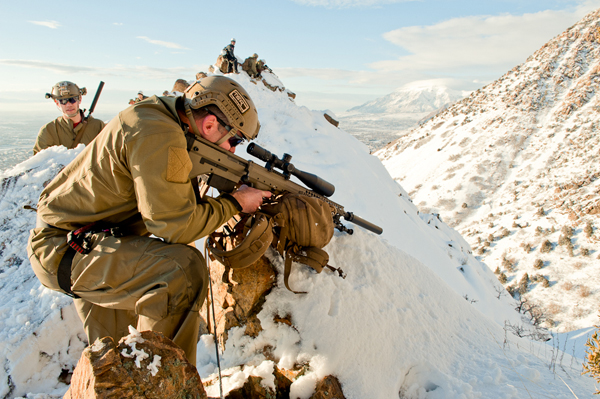
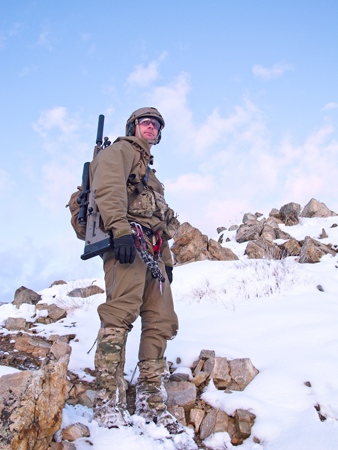
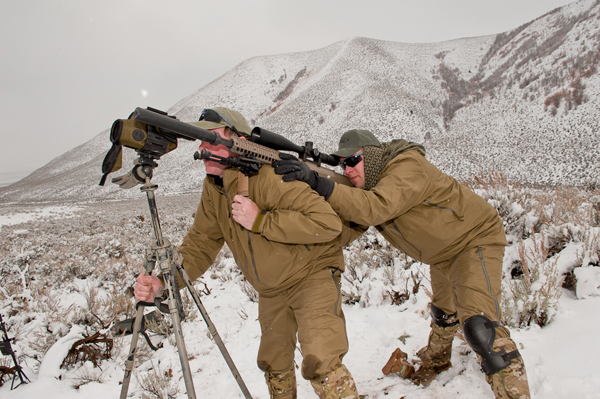
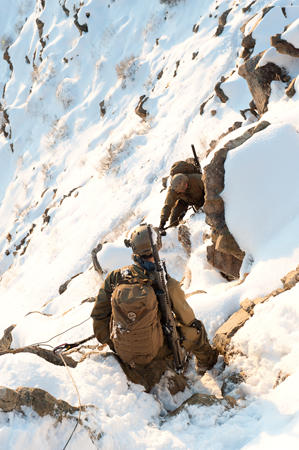
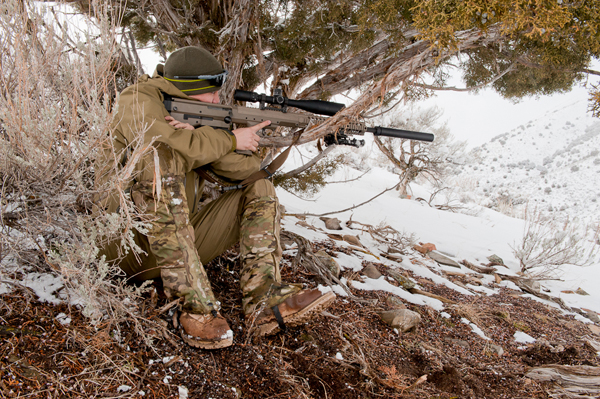
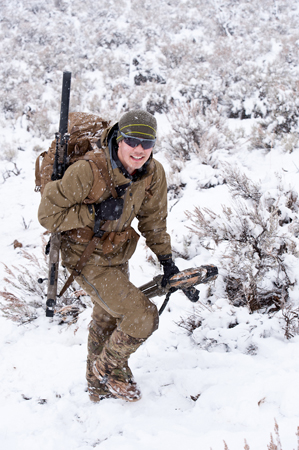
The second half of sniper school had me scaling a canyon wall and taking high-angle shots. Take the shooting tips I learned with you into the field.