As you recover from your annual Independence Day cookout and reflect on how this country was founded, give this bit of history some thought. Your tradition of having a barbecue cookout reaches back a lot farther than 1776. And did you know that your barbecue has more in common with pirates than it does with the American Revolution?
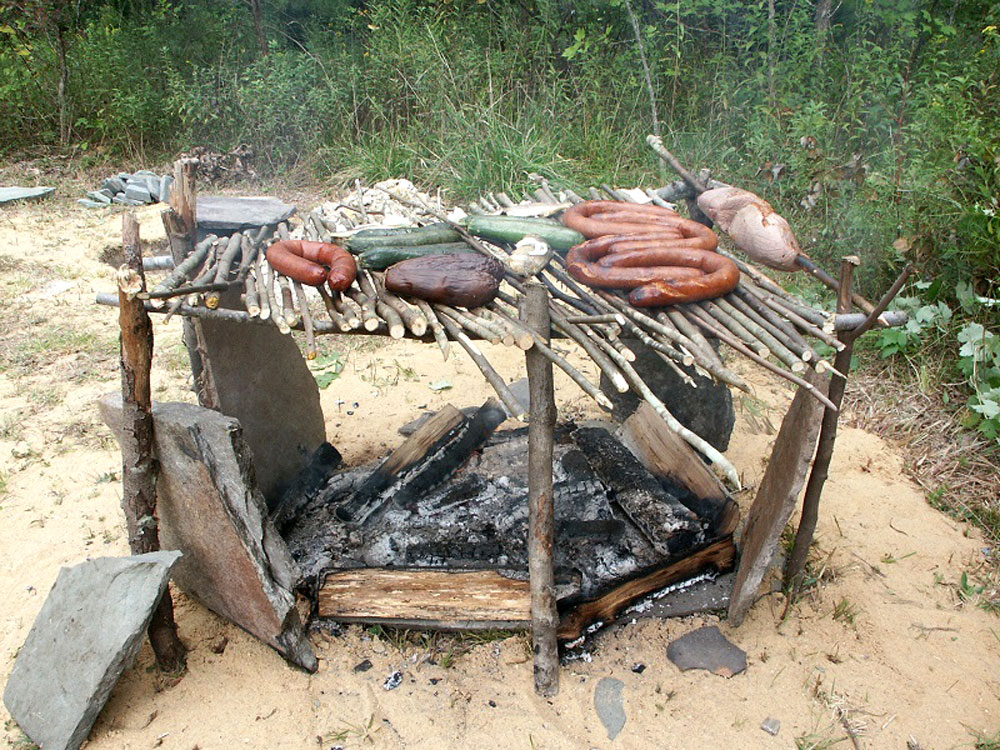
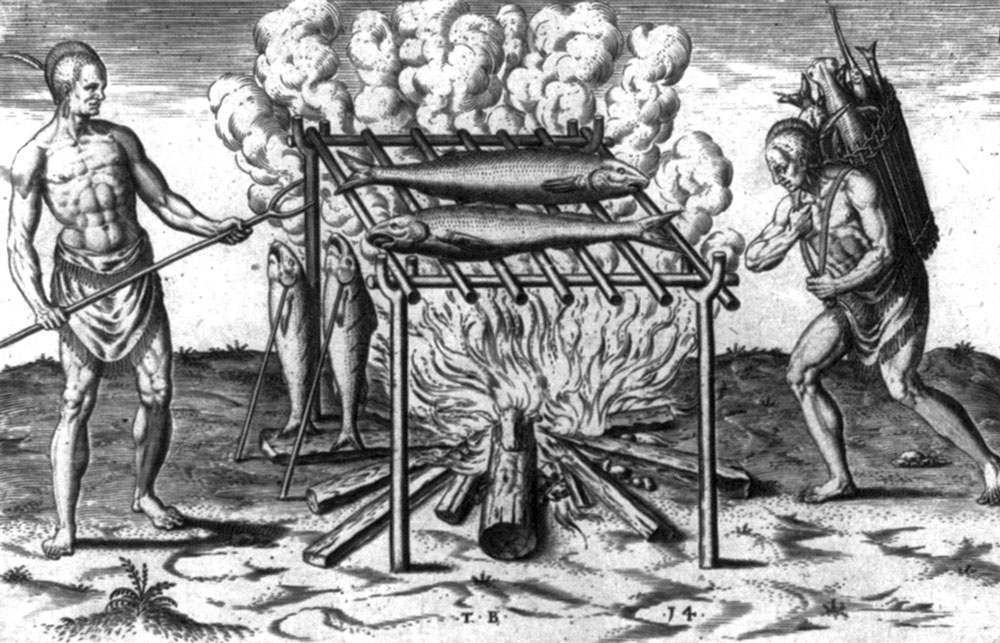
If you were a sailor (or pirate, or a conquistador) in the Caribbean in the 1600’s, you would have likely encountered the Arawakan Indians throughout the West Indies. In this warm and humid climate, meat and fish had to be cooked or dried quickly to prevent spoiling—and the native people had an efficient system of preservation. Animal foods were cooked, dried, or smoked on a rack of fresh-cut sticks over a bed of coals or a fire. In the Arawak language Taino, this cooking technique was called barbacòa. Through decades of misspellings and mispronunciations, the word eventually morphed into the lip-smacking word we use today: barbecue. These wooden racks aren’t just the source to the word barbecue. The English word buccaneer comes from the word boucan, which refers to the wooden framework for meat drying and cooking. It turns out some rough characters made their living by preserving meat on boucan racks to sell to passing ships, and occasionally they would take one of these ships. So in short order, the word buccaneer (originally, meaning jerky maker) became synonymous with the word pirate.
To build your own “boucan” for traditional “barbacòa”, cut some green, non-toxic saplings or branches to create the stakes and rack. Cut four stakes, one yard long, each with a side branch at the end. Carve a point on the end that doesn’t fork, and drive these into the ground, about 8-10 inches deep. Set two stout green wooden poles in the forks, and lay a rack of green sticks perpendicular to the poles. Maintain a nice bed of coals and low flames under the rack to grill your meats and vegetables to perfection. I love roasting sweet corn this way, just as people have for centuries. I’ve learned a lot about greenwood grills over the years, mostly from accidents and mistakes. Now you can take advantage of that experience and save yourself some trouble.
When cooking with this grill, it’s best to:
Have a good bed of coals fed with hardwoods if possible.
Watch where the smoke goes, this shows you where your heat is going too, and place your food accordingly. Place it in the smoke for more heat, near the smoke for less heat.
Prop up flat stones against the legs of your grill to keep them from burning.
Make a small, smoky fire to slow cook and smoke your food, giving it a great flavor.
Use only green, non-toxic wood for the grill sticks.
Leave the bark on the green sticks to keep the pieces from drying out and catching fire.
Avoid grill sticks that are sticky or crusted with pitch or resin, like pine, spruce, and fir.
Skewer several pieces together, when cooking small items, so that nothing falls through the grill.
Don’t panic when your grill sticks start to burn (not “if” they start to burn, but “when”). Move the food away from a burning stick and try to blow out the flames. If that doesn’t work, carefully pull the burning stick out and toss it in the fire. Replace with a new fresh-cut stick.
Support a sagging grill with an extra forked stick or stake propping it up underneath.
Don’t let the flames get tall enough to reach the underside of the grill sticks, especially if they are covered in grease. This is a sure way to light the whole rack on fire.
Ever cooked your dinner this way? Please let us know by leaving a comment. Hope you all had a good 4th of July!