Your everyday local thunderstorm, or a full-fledged grid-down disaster, can leave your home cut off from your normal utilities and way of life. This can have your favorite frozen foods melting into mush – and leave you without a way to cook. That is, unless you have some backups in place. A basic propane or charcoal grill can save the day, for a while. But what happens when you run out of fuel? If you get the gear and learn the tricks to do the following emergency cooking procedures, you should be ready for anything.
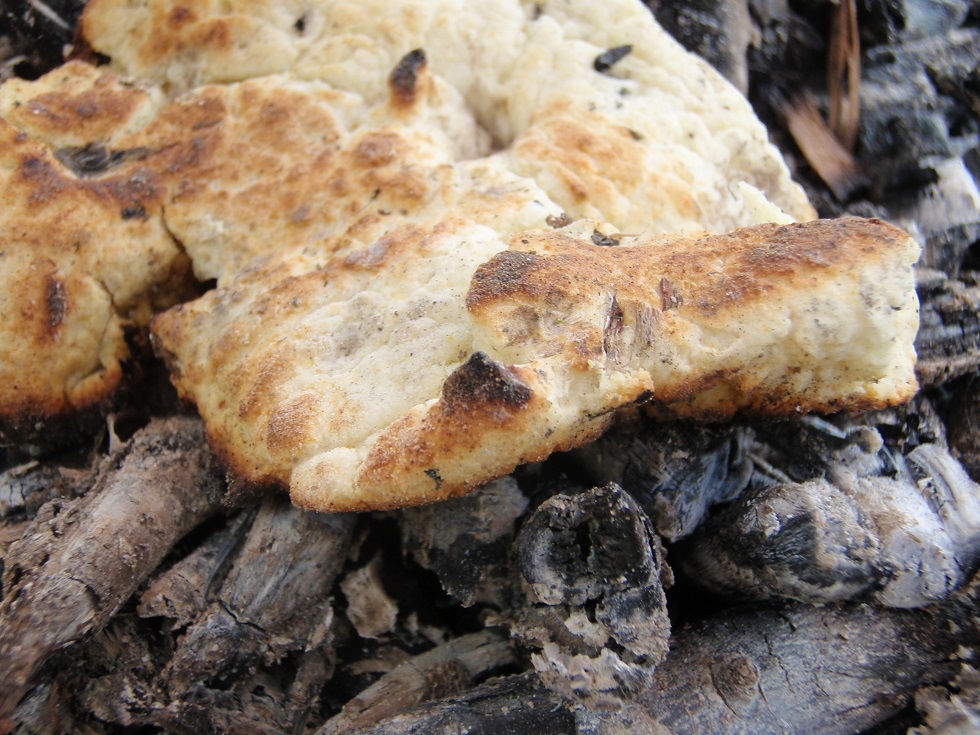
8. Make Ash Cakes
Out of bread? No oven to cook in? The coals of a campfire can bake up some tasty bread—if you have the secret ingredient to make your dough. When I started experimenting with camp breads years ago, I naturally turned to classic outdoor texts to find the recipes for bannock, damper, hard tack and every other kind of camp bread and trail biscuits you’ve heard about. The recipes themselves were simple enough. But these simple ingredients didn’t leave much room for error, and usually yielded something closer to ceramics than a biscuit. After a few more fiascos, I finally stumbled upon pancake mix. The “just add water” complete pancake mix was the bread recipe that I had been hoping to find. It both tastes good, and it cooks quickly. Just add enough water to make a dry dough, pat out little “cookie” shaped patties, and toss them in the coals. Watch it closely as it starts to fluff up. You’ll cook it about one or two minutes on one side, depending on the heat of the coals. When it becomes rigid (like a little flat biscuit), and the very bottom edge begins to brown – use a stick to flip the cake over and cook it for another 30 to 60 seconds. Dust off the ashes and enjoy.
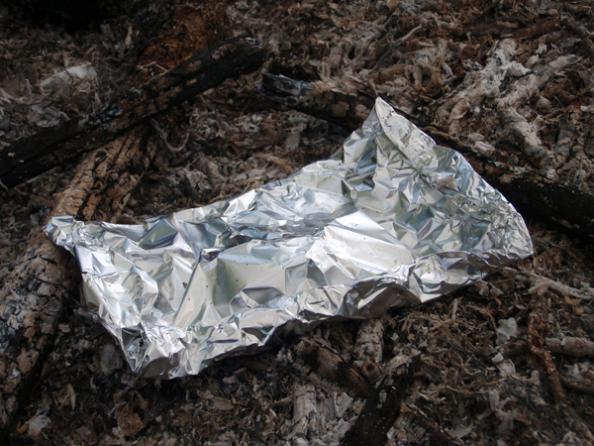
7. Cooking with Foil
A simple sheet of foil can become an oven, broiler, frying pan and many other vehicles for cooking—all you need is some food and a cooking fire. This is a big step up from baking your food directly in the ashes or coals of a fire, and foil pouches can make some great tasting meals over a bed of coals. Here are some tips:
— Use heavy duty foil, if it’s available.
—Fold packets up tightly if you’d like to keep the steam in.
—Leave a gap in the package if you need some steam to escape.
—Place the packet on a dying coal bed, not one that is too hot or filled with flames.
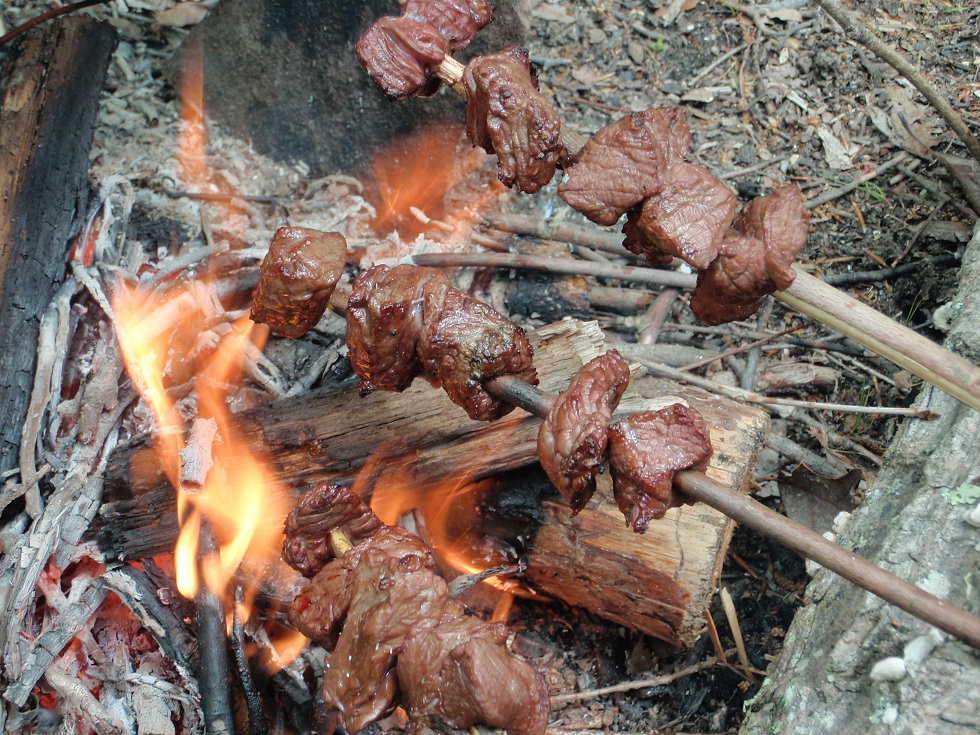
6. Roasting with Spits and Skewers
Spits and skewers are a great way to roast small or medium cuts of meat, while grills are ideal for cooking larger chunks and even heavy roasts. Metal or fresh-cut “green” wood skewers and spits are one of the easiest methods of cooking directly over a fire. Cooking directly over the fire with skewers, spits and grills can give you a much better result than just placing food directly on a bed of coals, and it gives you greater control of fire temperatures as you can build up or tone down the fire. You can also control the height of the food from the fire to determine the cooking temperature and time. A small, smoky fire can also slow cook and smoke foods giving them a great smoky flavor.
Tips for cooking directly over a fire with wood skewers, spits and grills:
—The fire should have a good bed of coals and be fed with hardwoods if possible.
— Softwoods burn quickly and some resinous ones like pine make harsh, unpleasant tasting smoke.
—The wooden skewers, spits and grills must be green, non-toxic wood. If the wood is dead it will burn up and drop the food. Metal skewers and spits should be non-toxic metal. Never use galvanized metal over a fire or in direct contact with food.
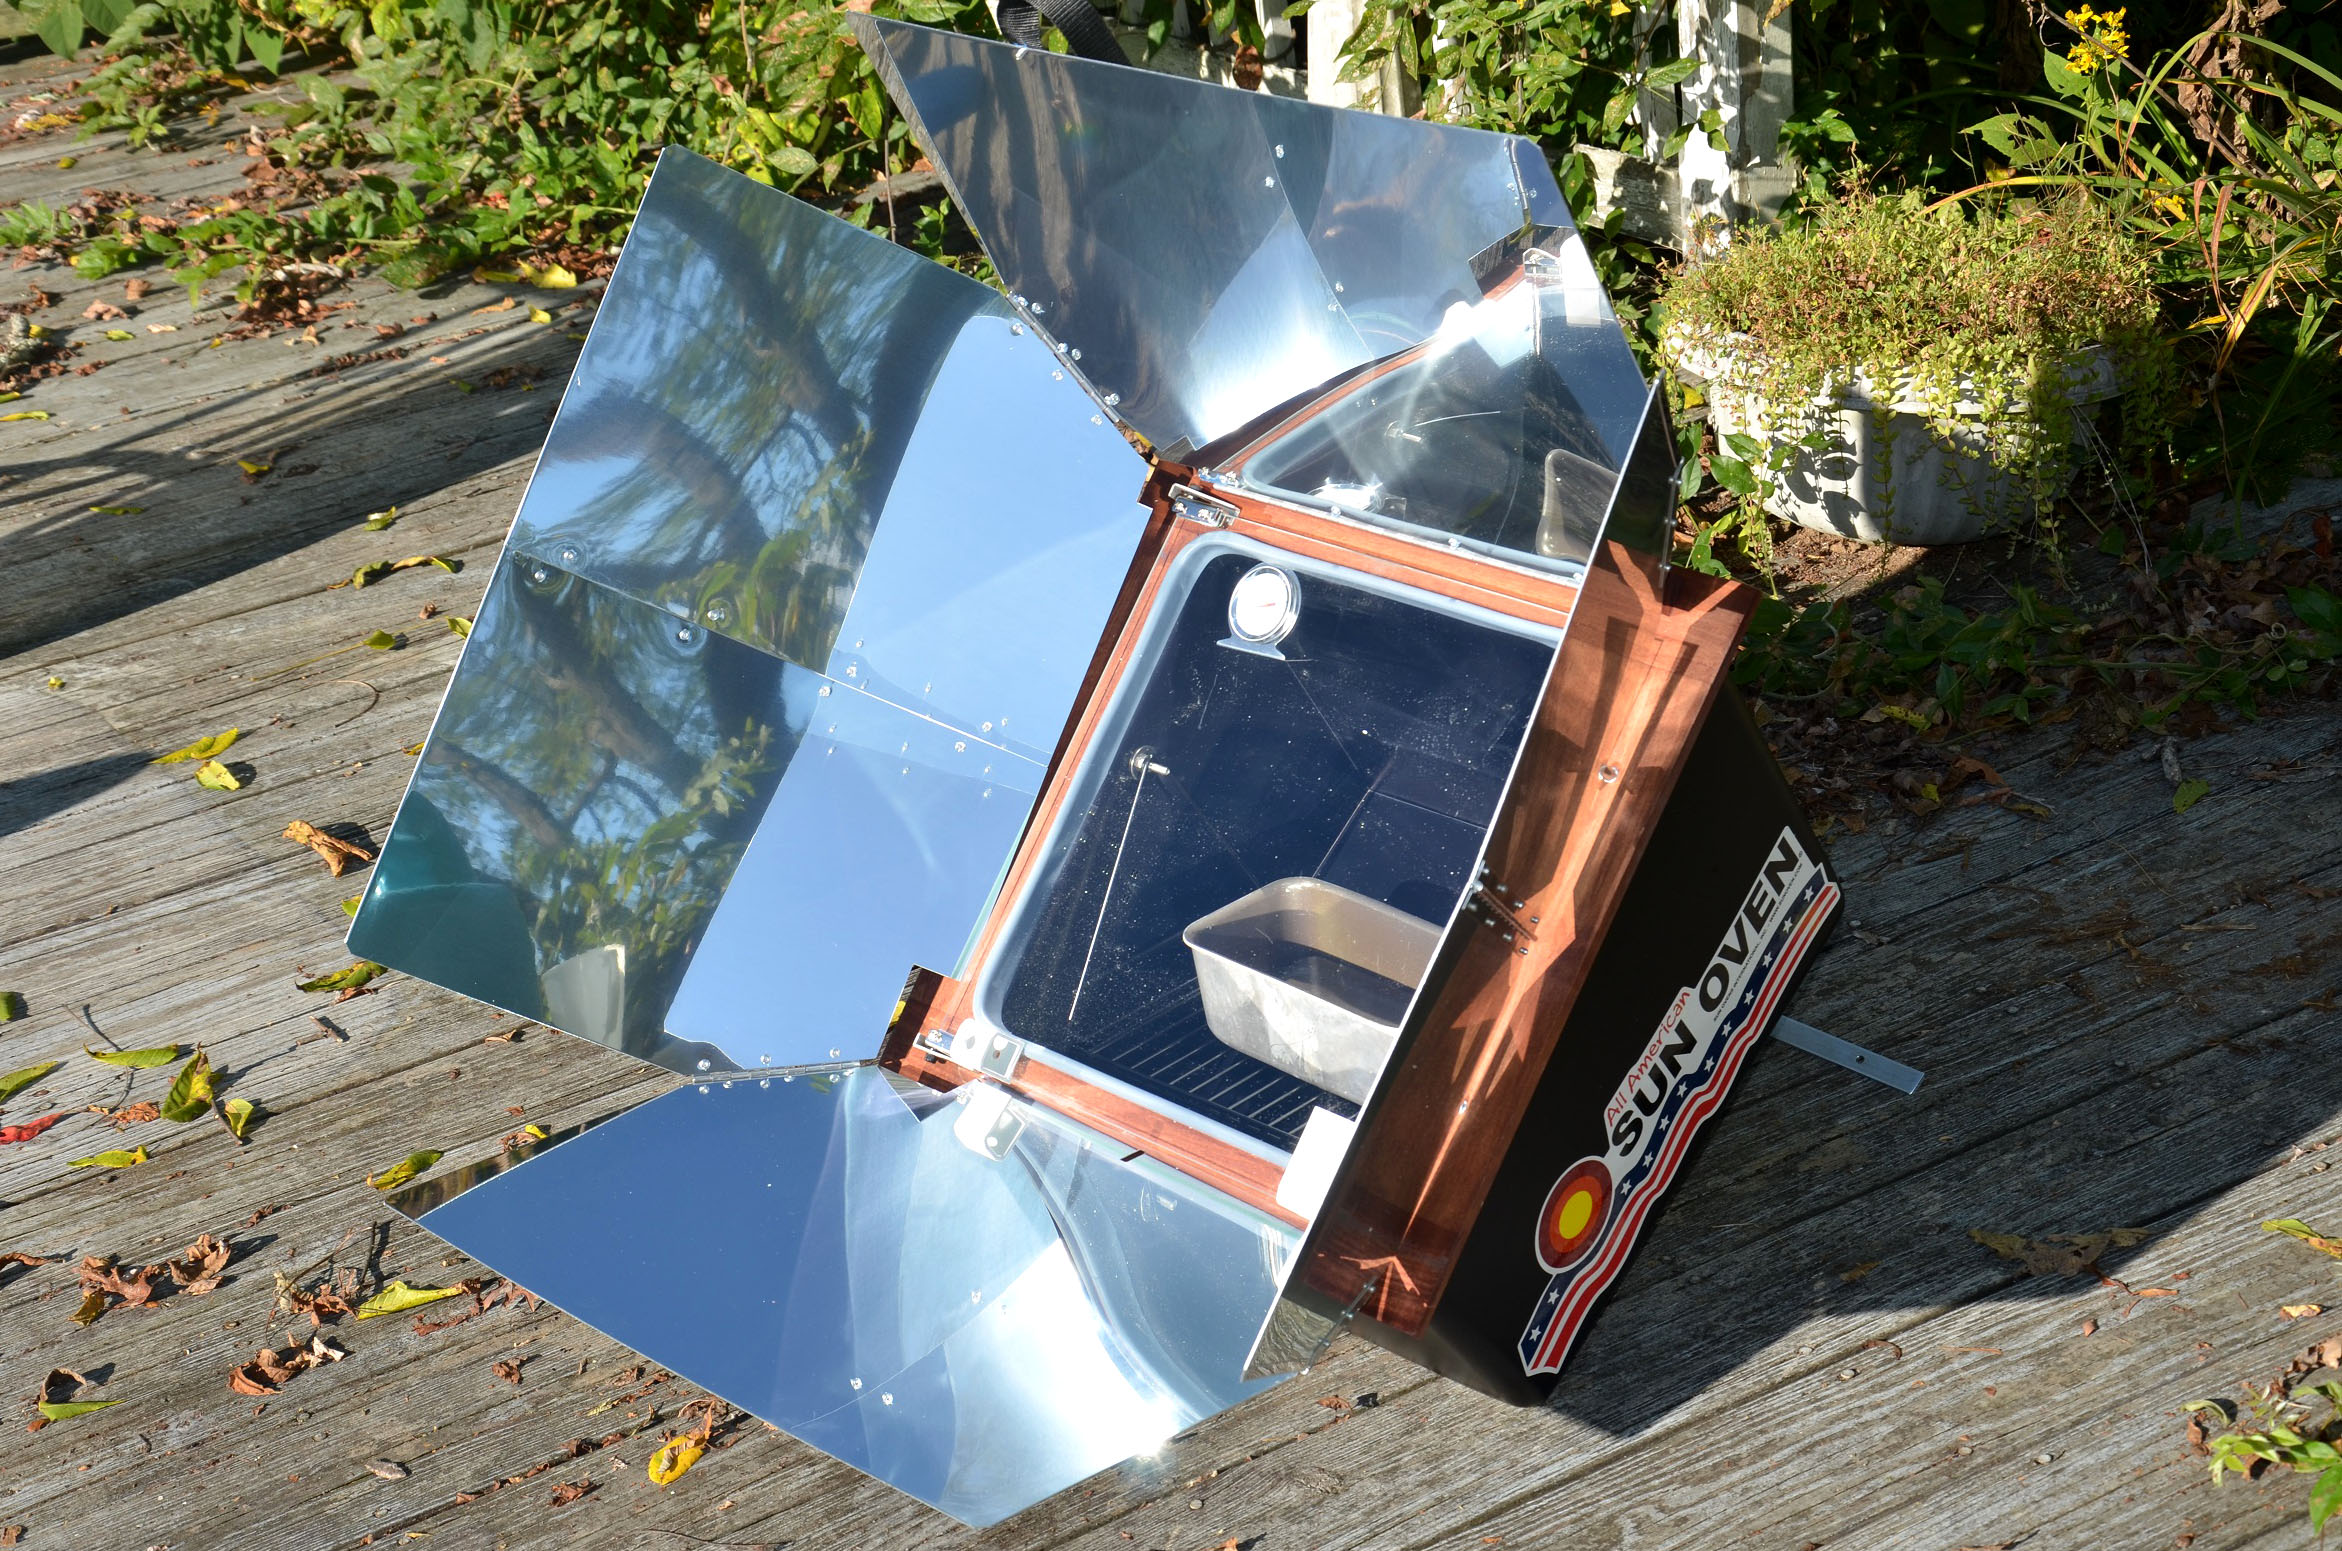
5. Use a Solar Oven
The technique of cooking with a solar oven is a fairly recent invention. This light-powered method is slow and steamy. It’s also perfect for producing tender meats and very moist baked goods. How does all this work? Just place your food in the oven, close the door, line it up with the sun, and let the light do the rest. While this is almost a care-free cooking method, you will need to twist the oven a little bit, every 30 minutes. This keeps the oven in the right position as the sun tracks across the sky. You may also have to raise or lower the zenith-adjusting leg, but only a few times in an entire day. You can bake beautiful bread in four hours, cut-with-a-fork roasts and baked apples in about five hours, savory soups and stews in about six hours and heated up leftovers in about one hour. The generous size of the unit pictured allows you to cook two things at once, like soup and bread, allowing you to cook for 4-6 people at once. And though it’s not quick like a microwave, this appliance doesn’t need any fuel or electricity to work perfectly. Grid down? Bugged out? No problem. Also, there’s no smoke to give away your position. Homesteaders, preppers, and energy conscious average folks can use this oven to cook their meals, probably with several decades of dependable service.
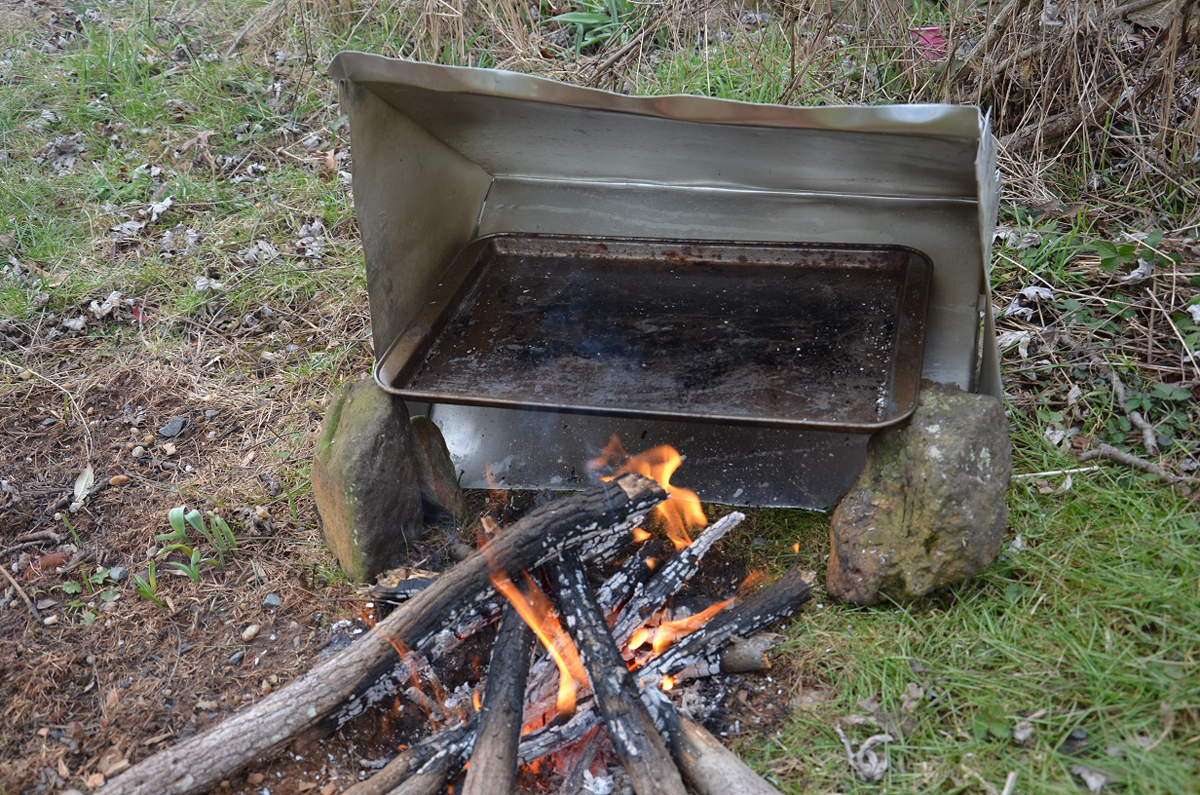
4. Rig a Reflecting Oven
These simple ovens catch the heat of a fire and focus it into a central baking area. In use for centuries, the reflectors can be any size, virtually any shape, and made from almost any new or cast off sheet metal. To make your own, you’ll need some sheet metal, some snips to cut it, and a pan or grill to place inside the unit. For the one pictured, I “borrowed” an old cookie sheet from the kitchen. For larger and heavier units, I’d definitely recommend a drill and some pop rivets to secure the joints, or sheet metal screws – whichever you prefer. Fold a large rectangular piece of sheet metal in half to create the main piece. Then cut some 90 degree triangles to build the sides. If you’re good with sheet metal and have some specialized tools for it, this entire project will be a breeze. I just used the snips, my gloved hands, and cut interlocking tabs to join the two triangles to the main piece. The final bit is the easiest, set it all up. I used several stones behind the unit to make it stand up by the fire (though integrated legs are better). I also used stones in the front to support the pan. More traditional set-ups involve holes in the side panels to use spits and skewers, and to place rods that would support a pan or grill. However you build it, just make sure that it is sturdy and able to stand up to the weight of the food and the likelihood of being bumped by the cook. Maintain a large bed of coals, and you’ll be baking in the reflector oven.
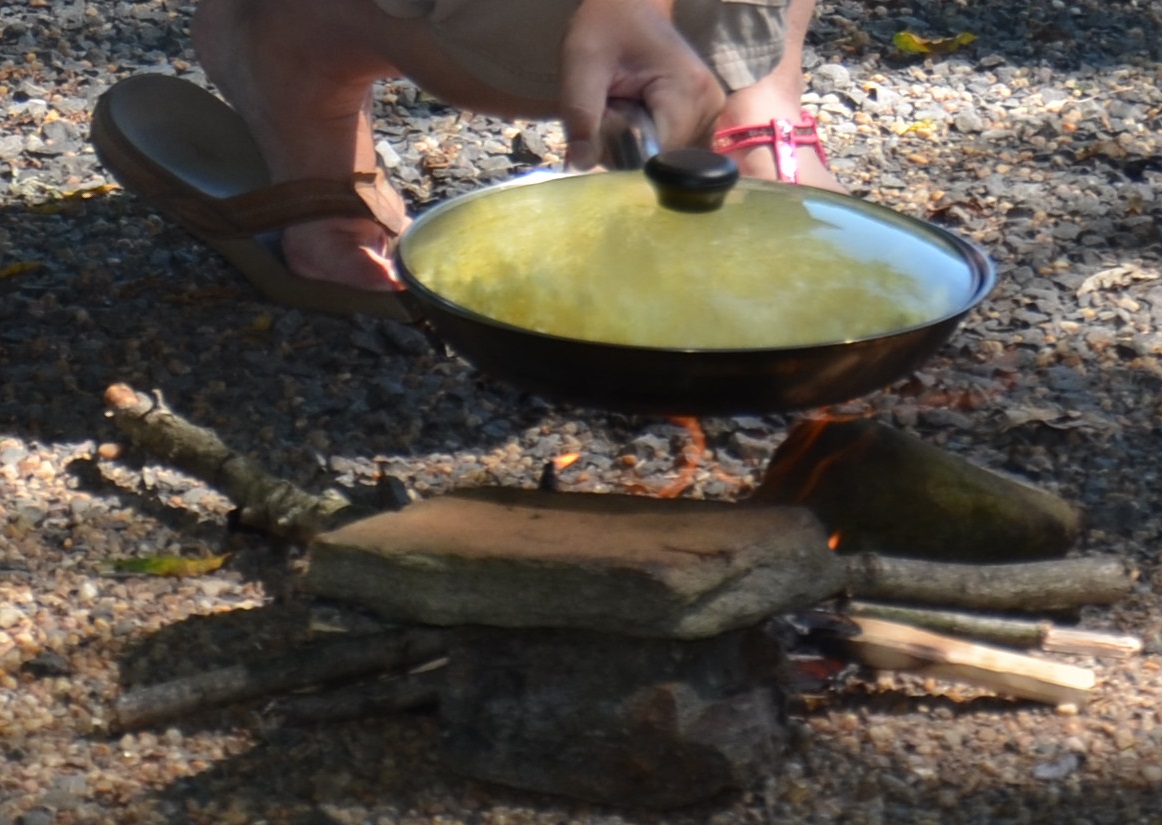
3. Skillets and Griddles
Skillets, frying pans, griddles and improvised frying containers can allow you to make very tasty meals, often resembling home-cooked favorites. Bricks, stones, cinderblocks or other fire-proof supports can do a great job suspending a frying pan or griddle over a small fire. These supports will allow you to cook if they are only 6 inches tall, but one foot tall supports will work much better. Here are some tricks to try:
— Use small dry sticks and split wood pieces to keep flames under your pan.
—Pour a spoon full of water in the pan or on the griddle to see if it’s level.
—If it isn’t level, add small thin stones or other non-flammable objects to level it.
—These can be temporary set-ups or semi-permanent fixtures.
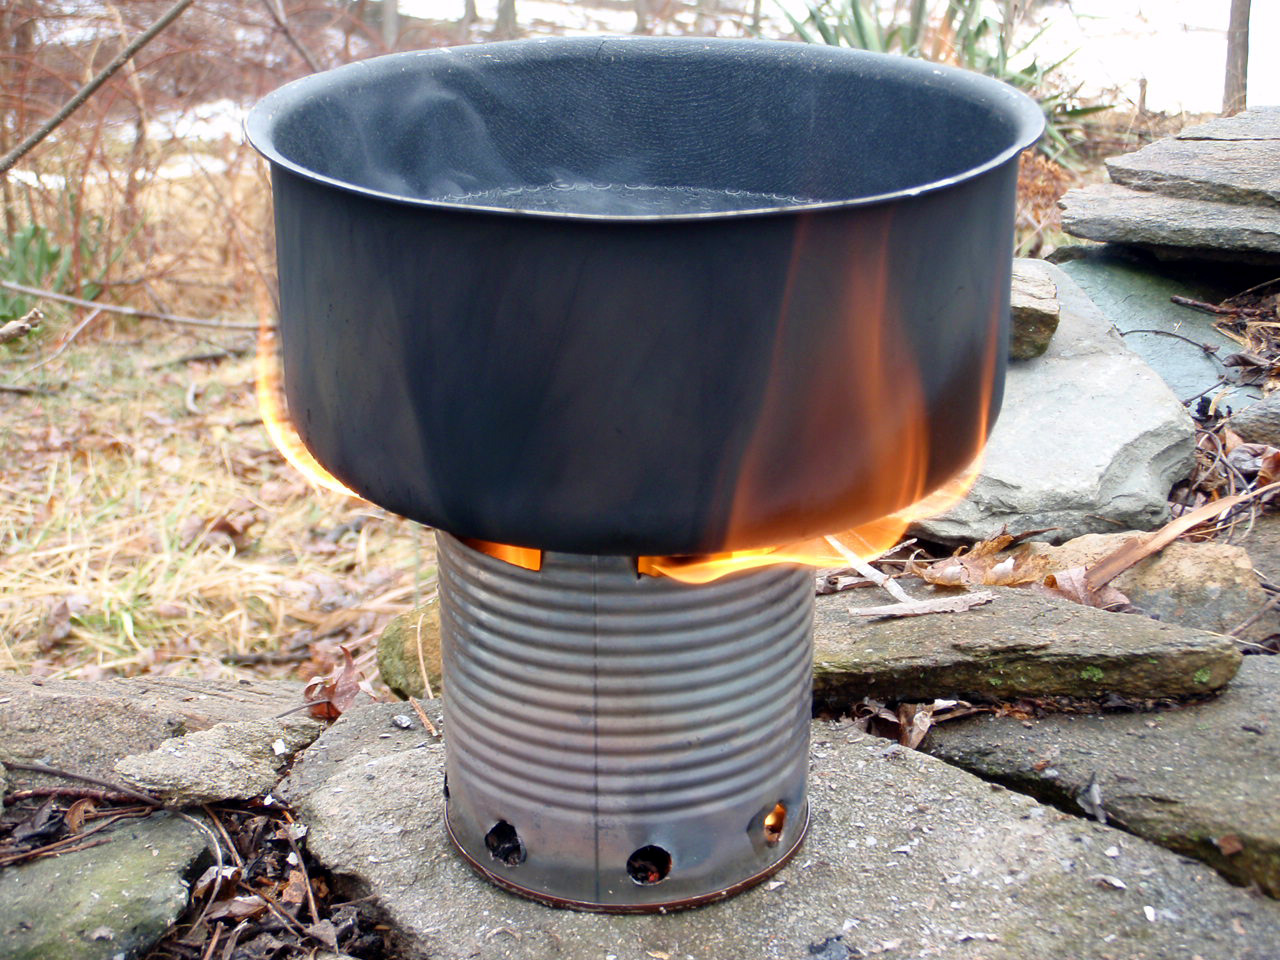
2. Turn a Can into a Camp Stove
A store-bough camping stove is a wonderful thing. Most are easy to use and efficient. But if you don’t have access to one, or you run out of fuel, you need to know how to build a cook stove and find alternative fuels for it. Food and beverage cans are the raw material for a variety of stoves that burn liquid fuels and dry fuels like wood. All you have to do is make the right cuts in the metal, add your fuel and light it up. Home-made “rocket stoves” can burn sticks and other plant fuels. They can also burn fuels like alcohol and wax-soaked cardboard. Just don’t pour gasoline or other explosive fuels in a stove like this, the results can be tragic.
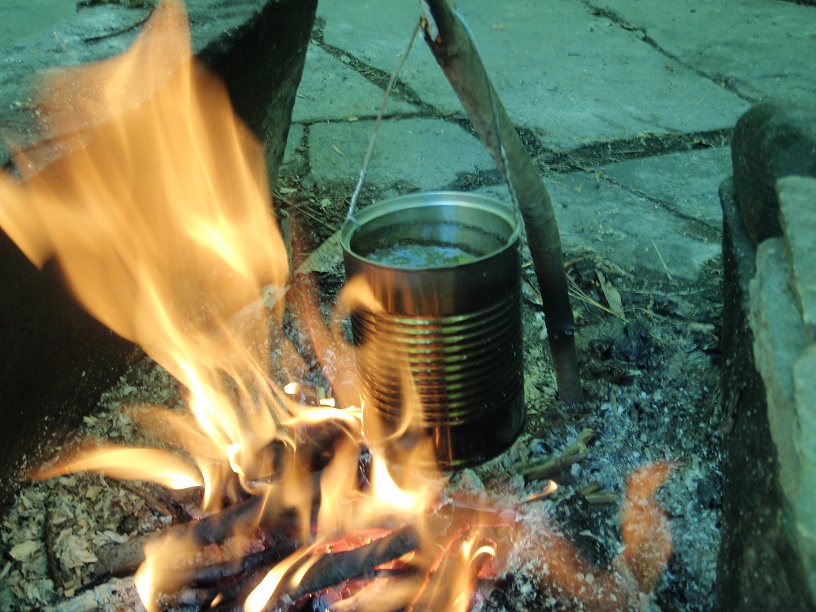
1. Cook in a Can
If you have a spare metal can, you can attach a wire bail or set it on a grill to make an improvised cook pot. Most food cans come with some kind of plastic or epoxy inner coating, so burn the empty can in a fire for a few minutes and scrub it out aggressively to clean out the residue. Then fire up a serving of hobo stew, or whatever else you like. This is also an easy and quick way to disinfect drinking water by boiling it.