We may earn revenue from the products available on this page and participate in affiliate programs. Learn More ›
Why throw away a trusted old friend that flat-out catches fish—and spend money to replace it—when basic repairs are this easy?
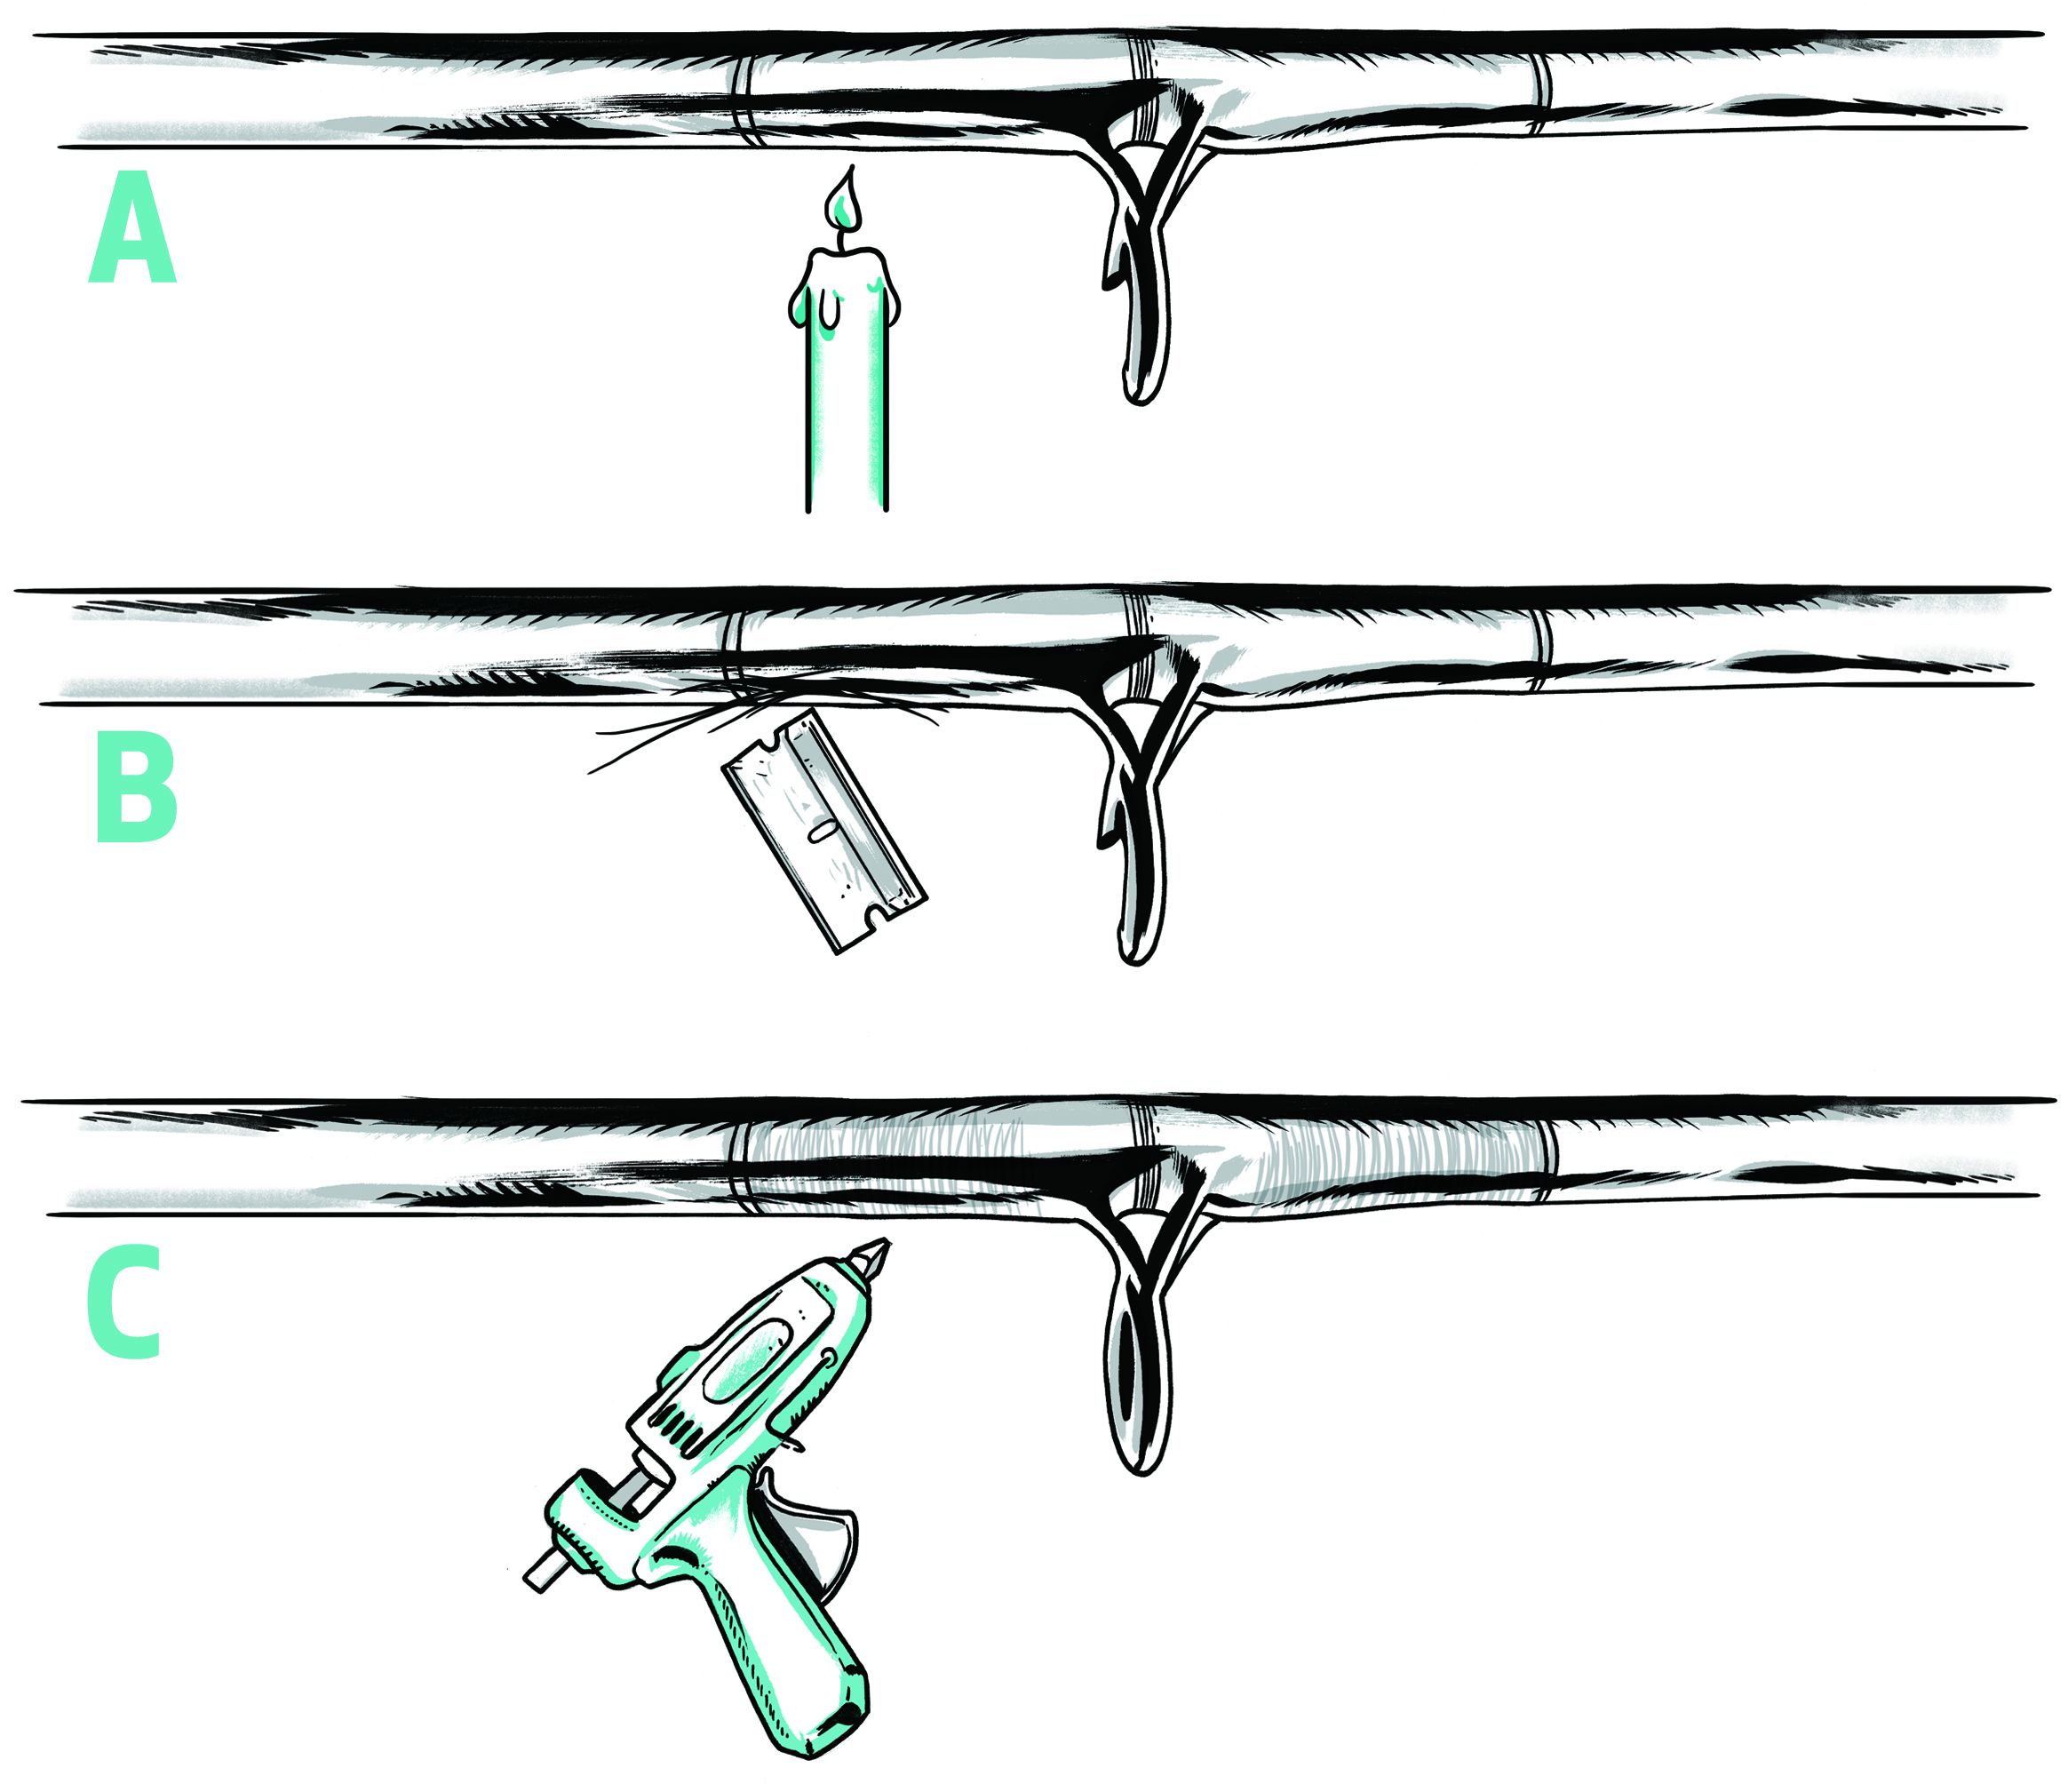
1. Replace a Guide
Use a candle to heat the epoxy around the guide’s factory wrappings and break the seal (A). Cut off the old wrappings with a razor blade, cutting on the rod guide’s feet to avoid marring the blank (B). Clean the area well with acetone or isopropyl alcohol and let dry. Place and position the new rod guide. Using rod-guide thread or heavy-duty nylon sewing thread, wrap the new rod guide on. Seal the wrapping with a coat of clear epoxy glue or hot glue around all threading (C).
2. Restore A Tip
Clip off the jagged end to make a clean break. Sand down the end so the new tip will just fit. Put a few drops of hot glue into the ferrule of the new tip. Slide it onto the broken rod. Wipe off excess glue, but leave a small seal between the tip and the rod. Hold the tip in place until the glue cools and sets a bit. Sand off any excess globules after drying.
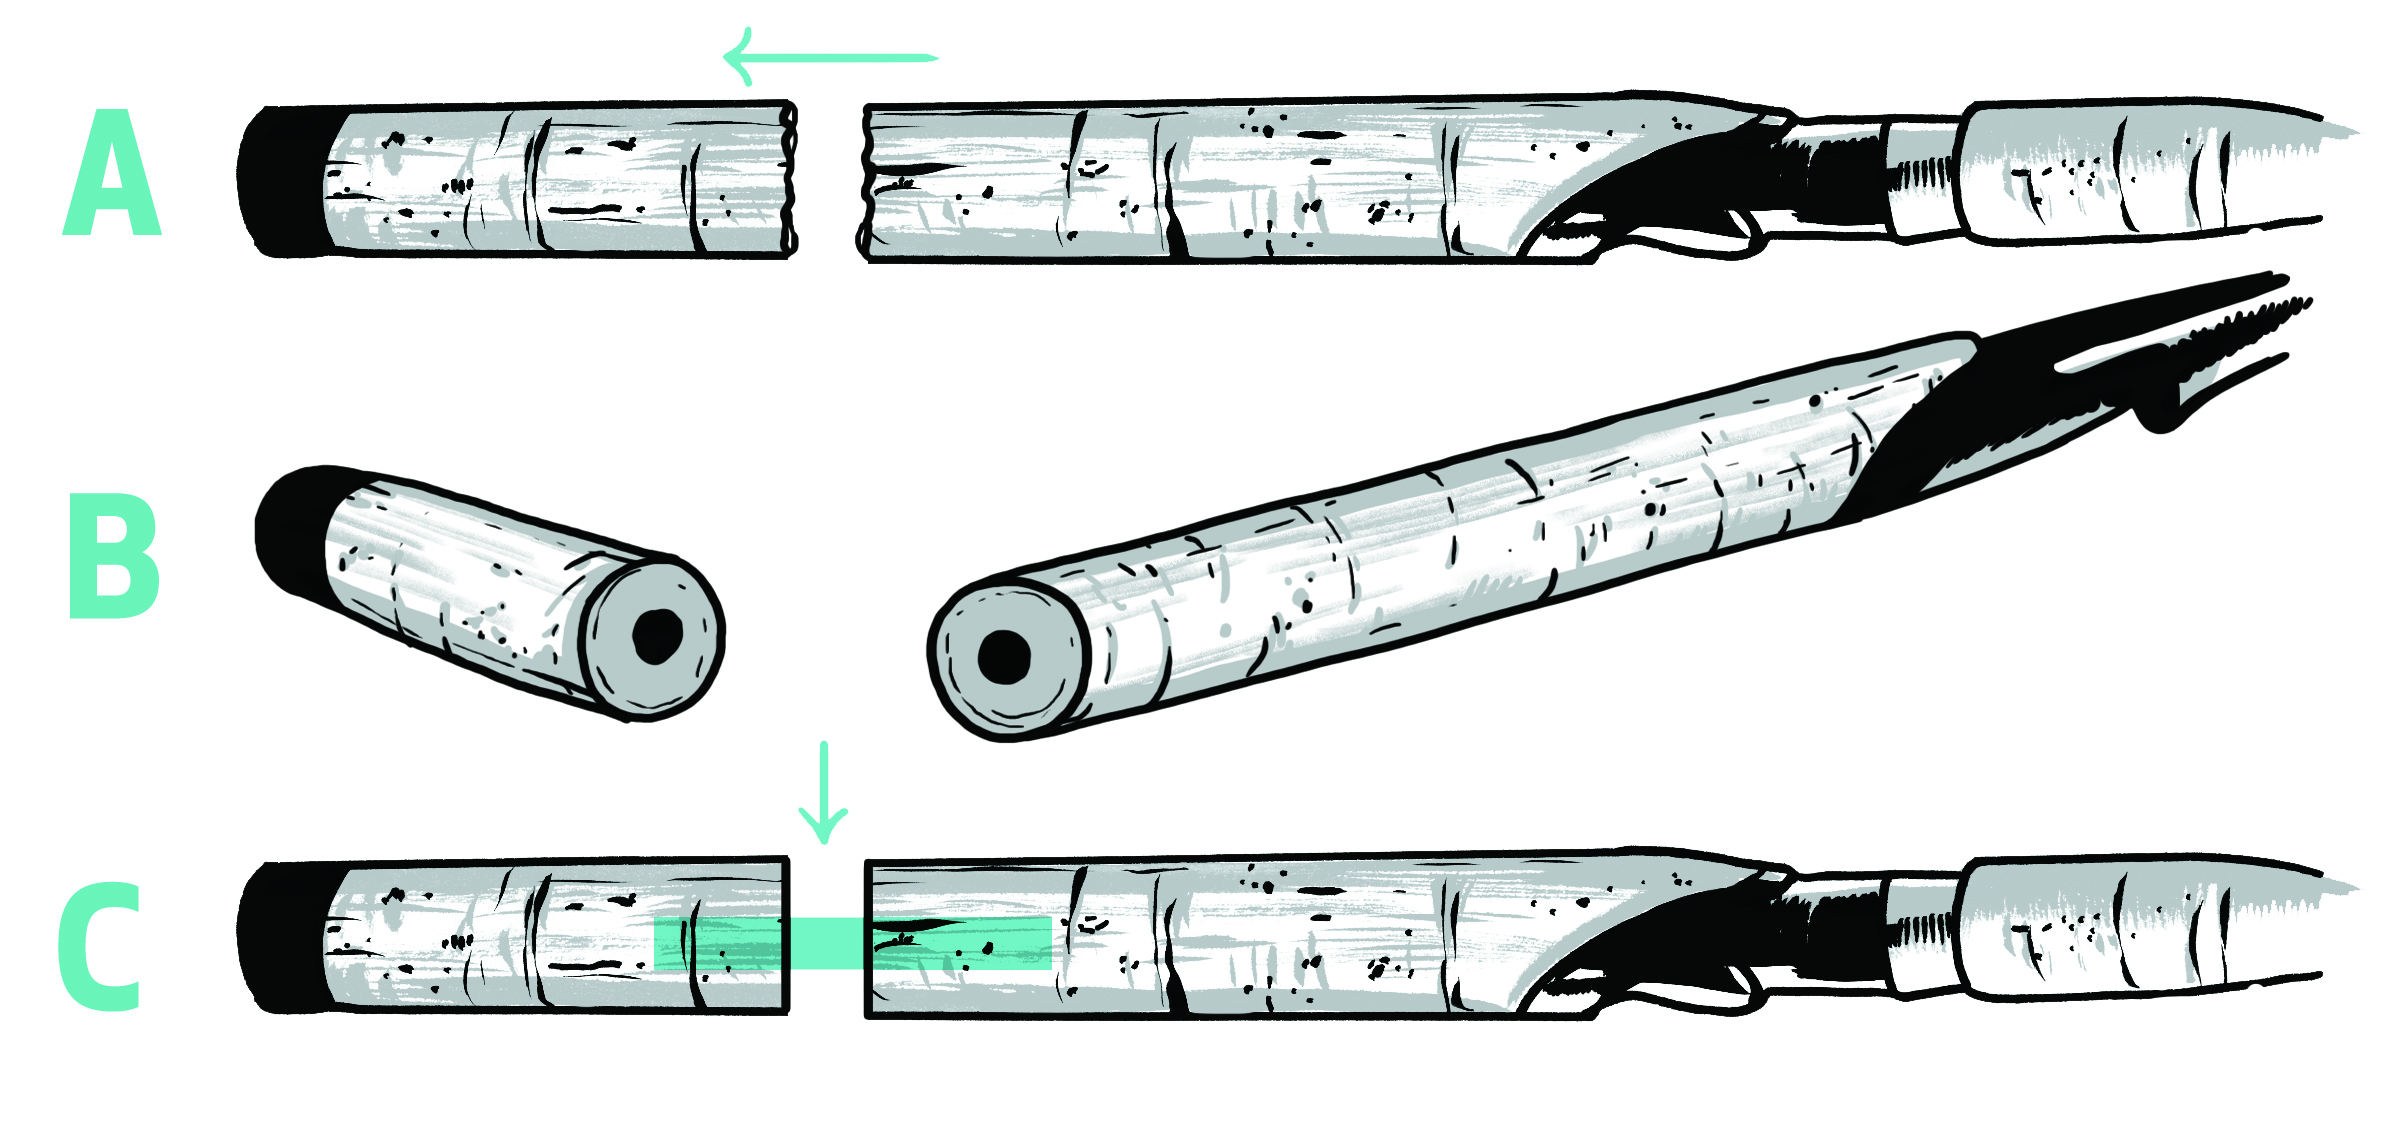
3. Repair A Grip
Detach the broken end and remove all cracked or crushed material (a). Trim a new piece of cork to the correct size. Drill out a hole in each piece of cork (b). Cut a wood dowel to the proper size and length. Coat the dowel with epoxy or hot glue and insert it into the rod cork; slide the new cork piece over the other end (c). Inject glue into the junction to seal and connect the pieces; wipe off any excess. If the seam is sloppy, make a cork paste (sanded cork combined with wood glue) and use it to refurbish the grip.
Want more tips and projects to save you cash in the outdoors? Click here.
Got your own DIY tips to share? Email us at howto@outdoorlife.com.