We may earn revenue from the products available on this page and participate in affiliate programs. Learn More ›
A wingbone yelper can hold great appeal for turkey hunters. It conveys a sense of spirituality and connection with one’s prey by using non-edible parts of deceased birds to call living ones to the gun. If taken care of properly, one of these can last a lifetime. It can produce an array of turkey sounds with accuracy and clarity, it’s essentially weatherproof, and has considerable aesthetic appeal.
Wingbone calls come in various styles and configurations, but in my studied opinion the most functional one—and the simplest to make—is a two-piece design utilizing the radius and ulna bones from a turkey’s wing. Those bones from any wild turkey will work, but hen bones work best for duplicating hen sounds. With a few decorative touches, your wingbone call will also serve as a source of pride.
Step 1
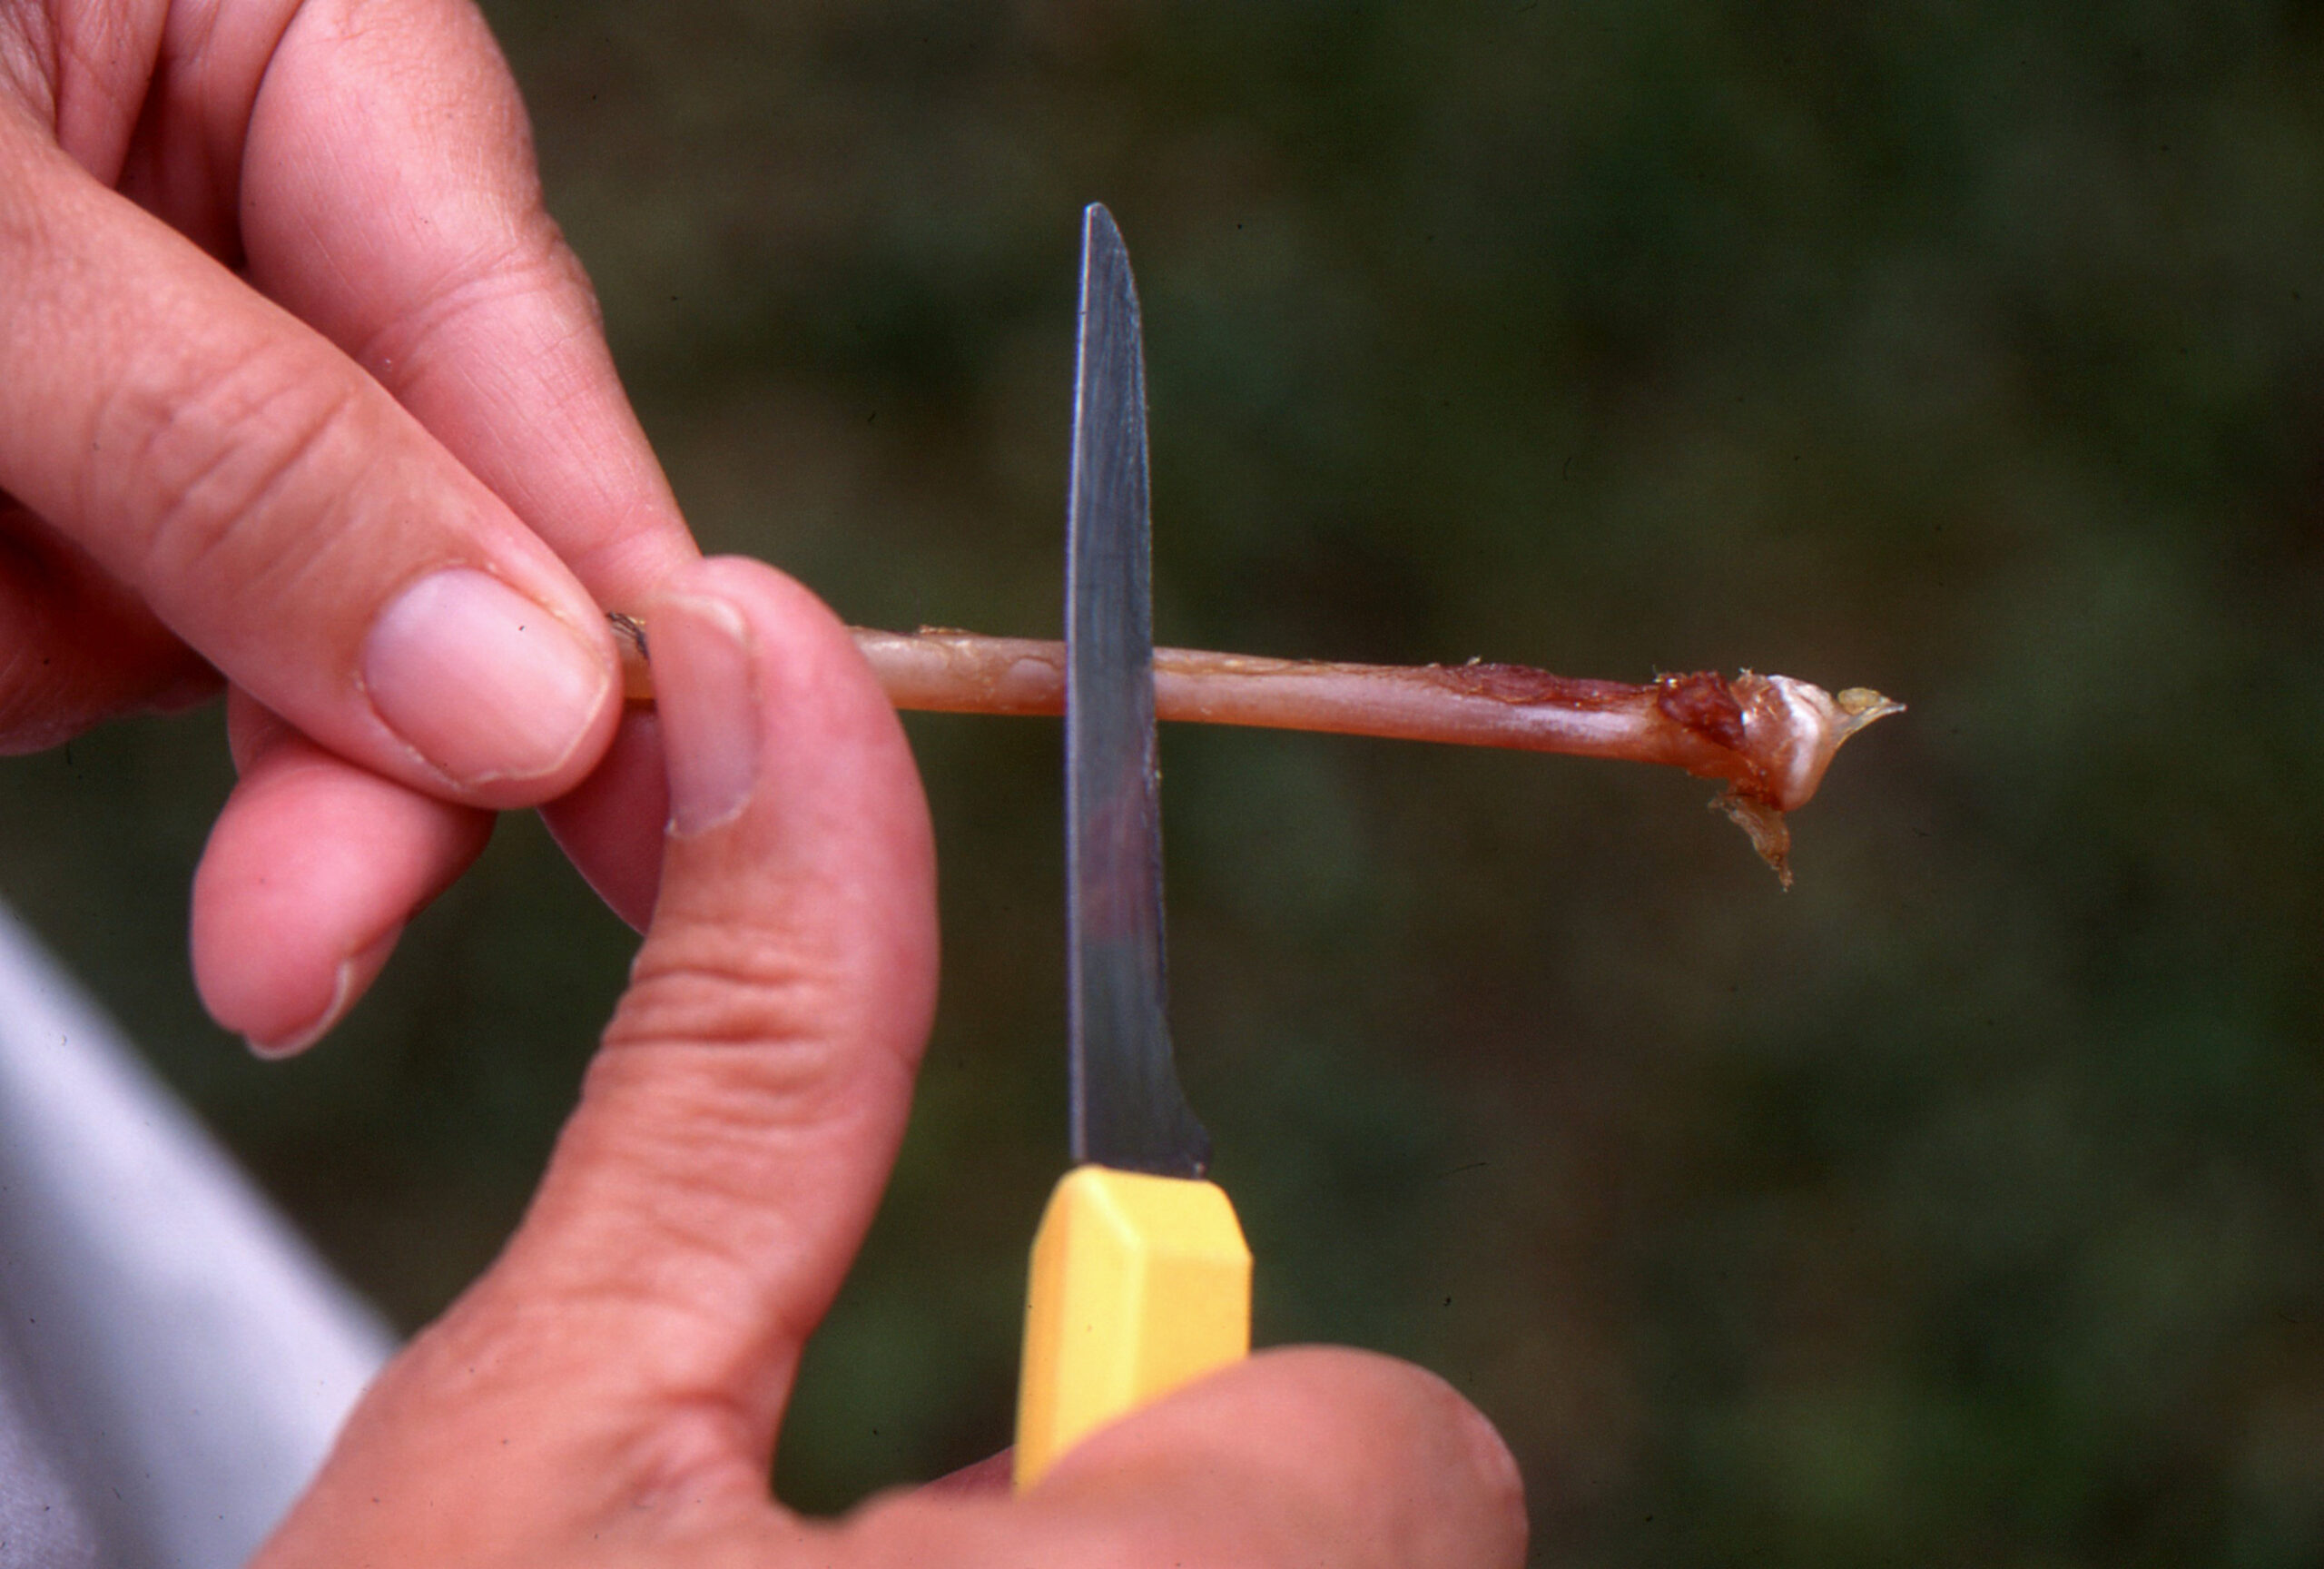
Begin by separating the radius and ulna from the wings. After removing as much meat and sinew from them as possible, use a rat-tail file or a small hacksaw to cut away the joints at each end of the two bones, making the cuts as close to the joints as possible. Then use a pipe cleaner or thin piece of wire to remove marrow inside the bones. Next, boil the bones for an hour or until you can easily remove any remaining flesh or sinew by scraping it away with a pocketknife. Use a bit of bleach or detergent to whiten the bones if you wish; however, their natural patina is quite attractive.
Step 2
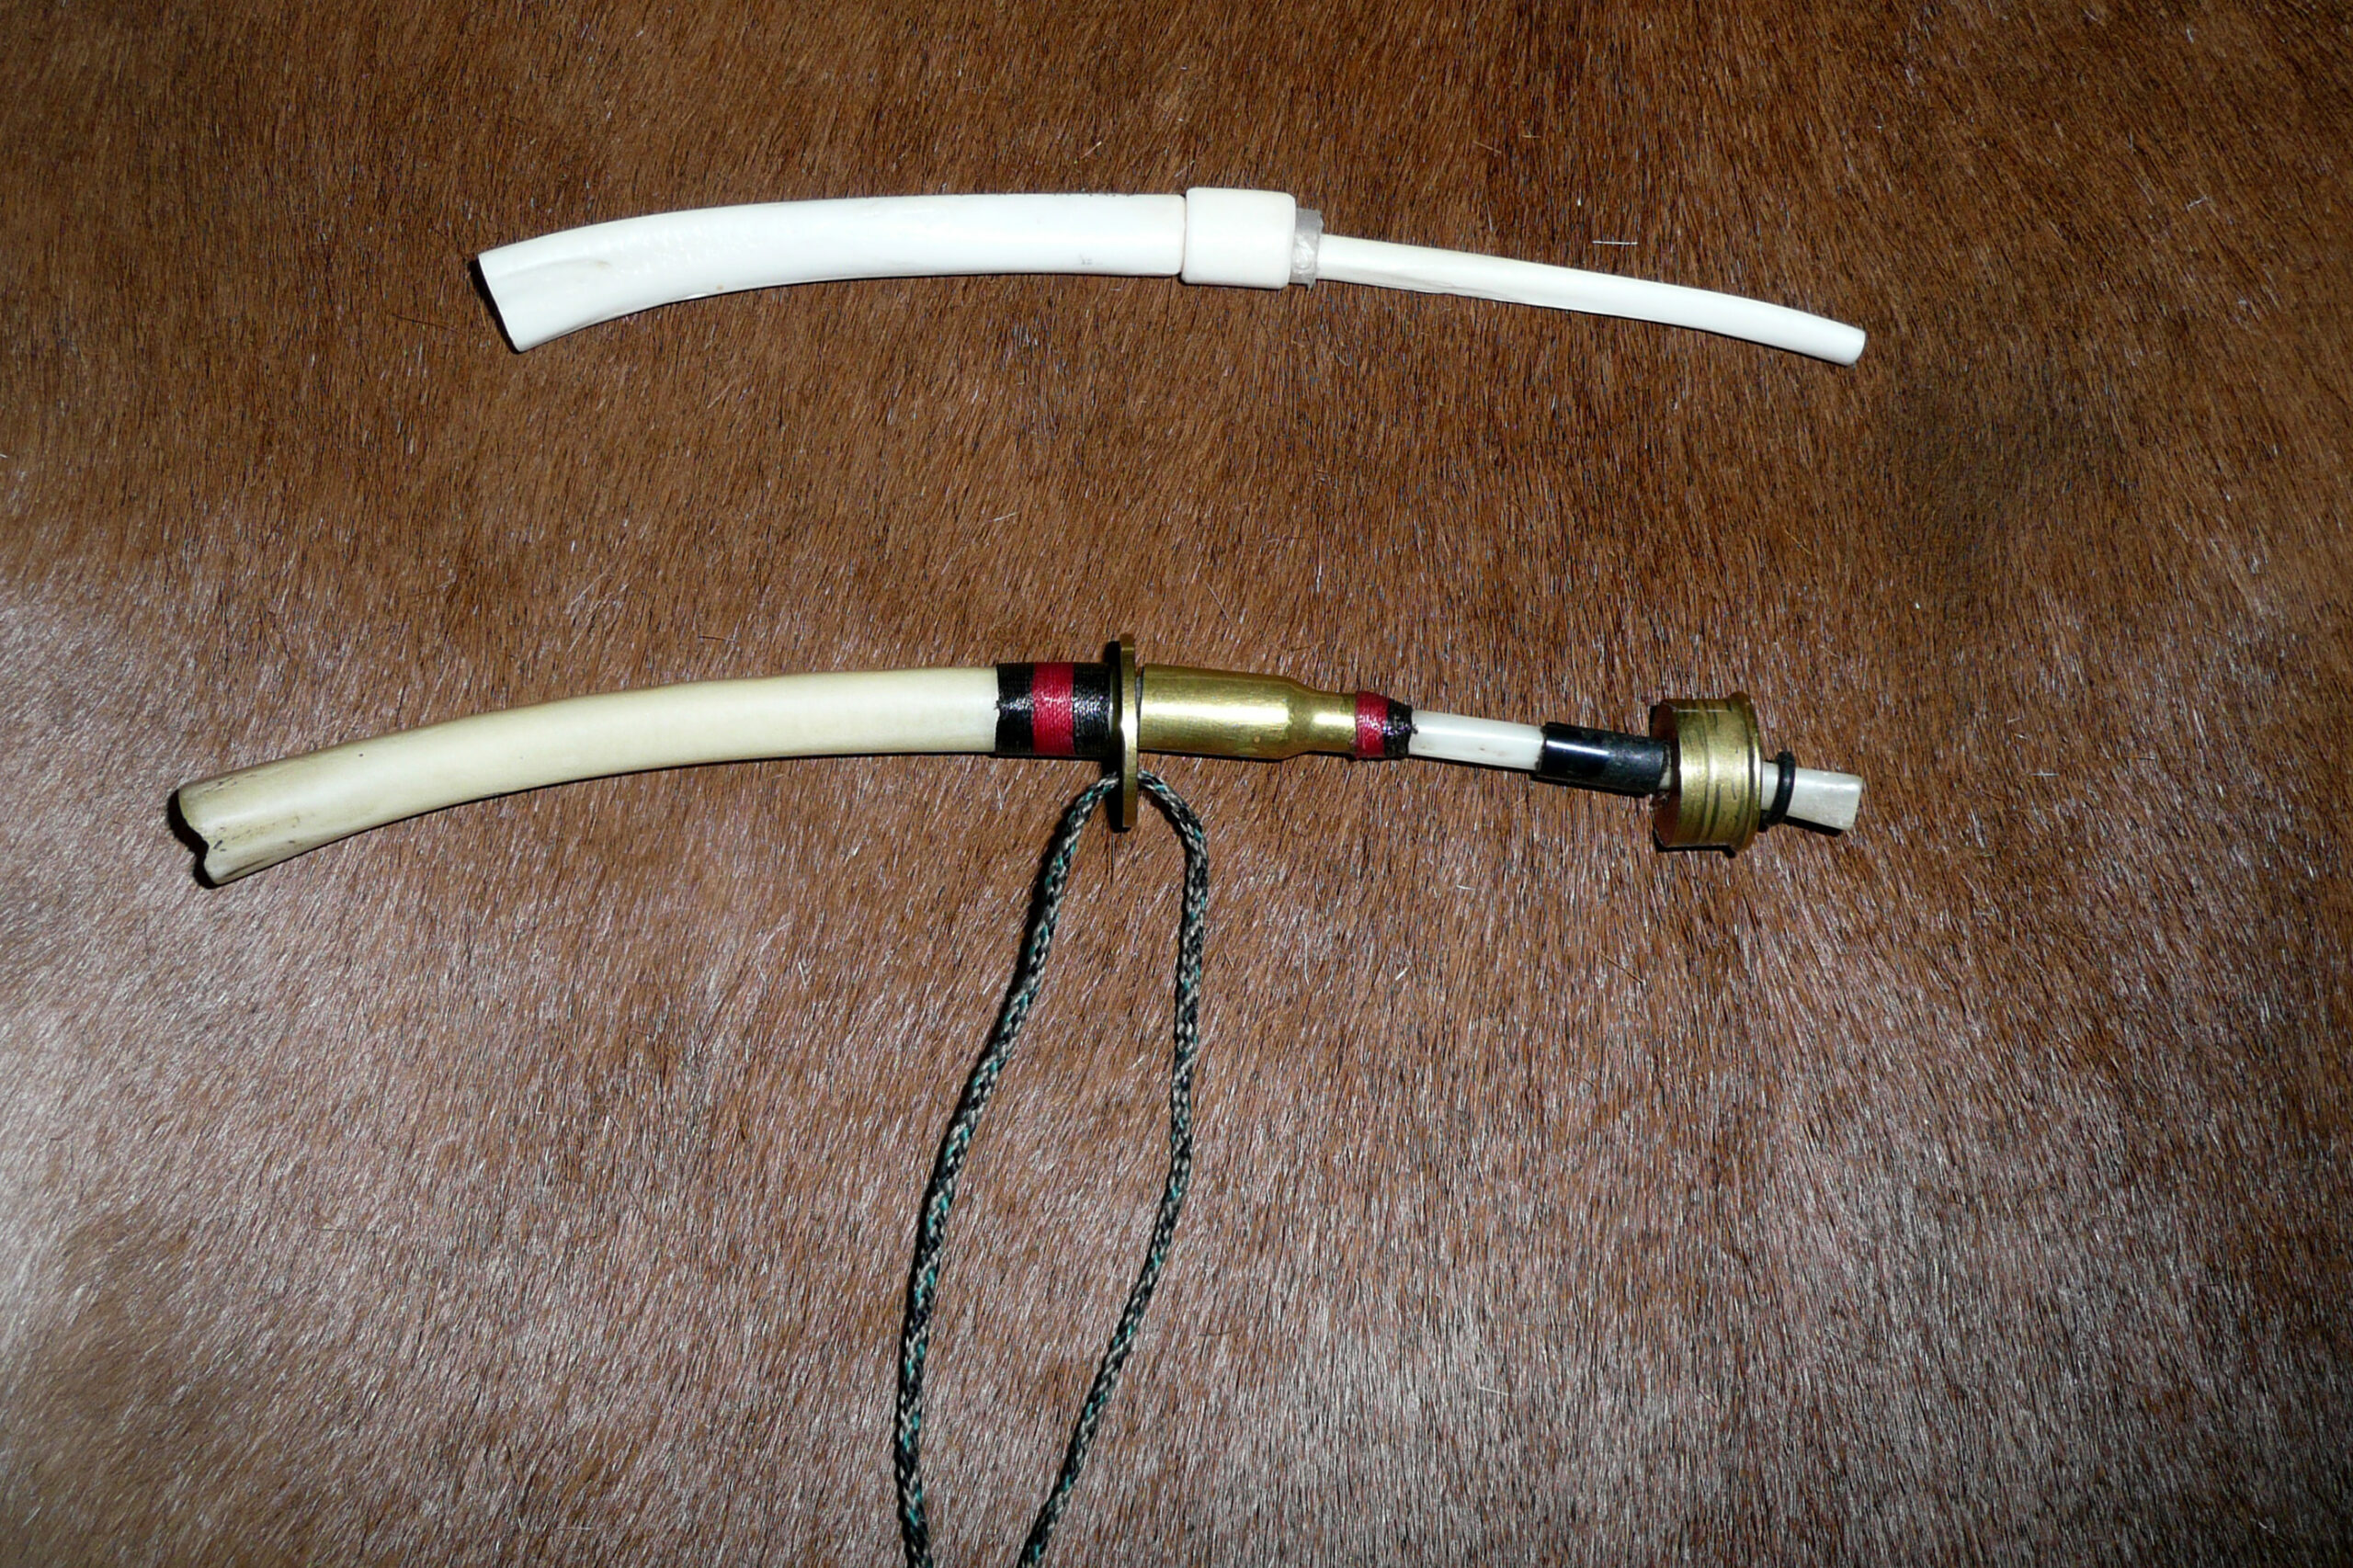
The standard construction of a wingbone yelper calls for the radius to be inserted into the narrow end of the ulna until it binds, keeping the slight natural curve of the bones in alignment as you do so. The bones are then epoxied together. (This construction is reflected in the unadorned call in the photo above.)
To give your call a touch of flash, use a spent .222 or .223 shell to join the bones. Cut away the base of the empty shell and slip it over the small end of the ulna. Insert the radius into the other end of the casing. If using hen bones, you should get a nice fit. Wrap the unions at the casing openings with heavy sewing thread of whatever color suits your fancy and seal the wrappings with epoxy.
Step 3
Once the epoxy has set, add a mouth stop to the suction end of the yelper. It should be tight enough to stay in place but not so tight it can’t be adjusted to get the proper fit as a lip guide. Among the possible materials for the mouth stop are a faucet washer, trimmed down wine cork, test tube stopper, or, my personal favorite, the brass base of a spent 28-gauge shotgun shell. Bore a hole through the primer area and glue a piece of cork or a test tube stopper inside. Once this sets, bore out the material and slide it onto the radius as a mouthpiece. This is particularly attractive if you used brass at the union of the two bones.
Step 4
In the photo above, I’ve attached the lanyard to a round piece of brass through which I bored one hole to fit the call and a second for the lanyard. An easier solution is to make the lanyard keeper from a snake-type guide, such as those used on fly rods, that you affix somewhere along the length of the call with epoxy. You could also simply tie a lanyard above the mouth stop.