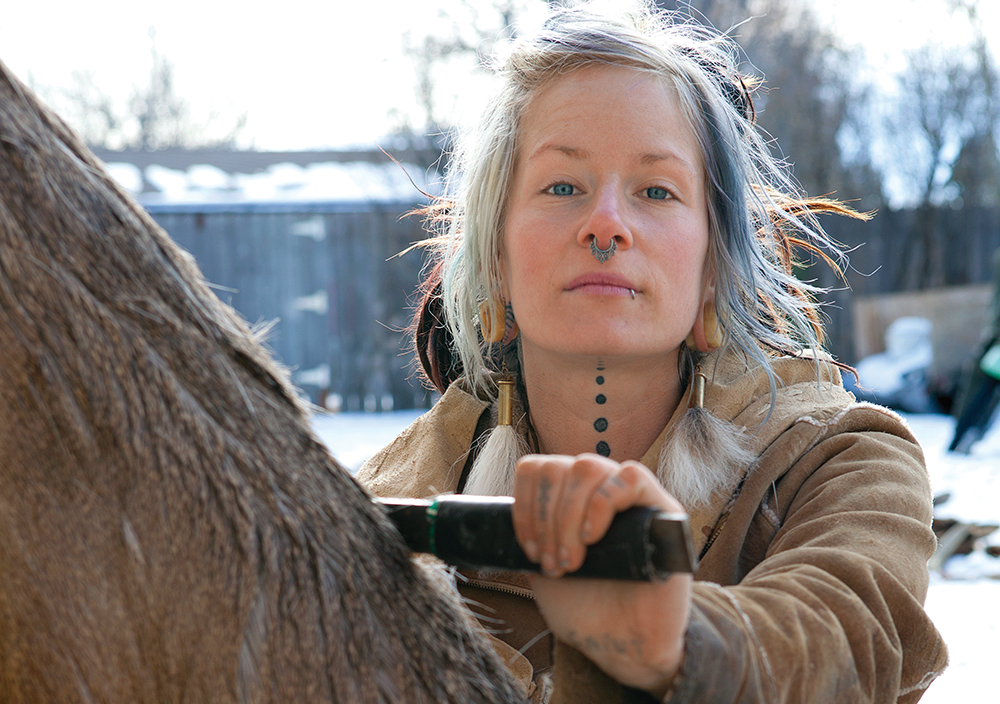
Harmony Cronin calls her vagabond beginnings on the fringe of Yellowstone National Park “trucksteading.”
Raised by a non-hunting family in Denver, Cronin spent her early 20s bouncing around the West, sleeping in the beds of friends’ pickup trucks and seeking the sorts of people and knowledge that she wasn’t exposed to earlier in her life. Like early homesteaders in the area, she found she could make a living from the land—or, in her case, from the wild animals that occupy the land north of America’s oldest national park.
Cronin—a 27-year-old blonde, blue-eyed, and body-pierced evangelist for a modern back-to-the-land movement—can often be found in little Ennis, Mont., singing the praises of healthy, organic, free-range protein (read: wild game) and teaching others how to use an animal from its nose to its toes. She is especially interested in reviving traditional skin-tanning methods, including using the brains from an animal to soften and preserve its hide.
She got her start in tanning from a humble source. After killing and skinning a rat, she decided to try to develop skills that would allow her to use every piece of a harvested animal, even the pelt of a marauding rodent. That’s what led her to tanning.
Brain tanning is the ancient art of preserving animal hides using the emulsifying agents in brain matter, which helps break up the mucous membranes that cause animal hides to harden. This traditional method was used by many Native Americans for the preservation of buckskin with which to make clothing, but modern tanning methods in factories using chemical baths have largely replaced brain tanning. Only a handful of people still have the skill to tan hides using traditional methods; one of them is Harmony Cronin.
Cronin studied with master tanners and learned the art primarily through trial and error, she says. Her craft has kept her in Ennis. She initially offered to skin game in trade for hides that she could use to practice her craft, but after local butcher Chris Di’Michele of Deemo’s Meats saw how skilled Cronin was at skinning, he offered her a full-time job. That provided Cronin an opportunity to procure plenty of brains and plenty of skins, and it also afforded her time to perfect her skill. Now that she is an accomplished brain tanner (she also makes her own buckskin for clothing), Cronin offers classes to those interested in learning the craft. She’s even been asked by the tribes who participate in the annual Yellowstone Native American bison hunt outside Gardiner, Mont., to teach intensive brain-tanning courses at their respective reservations. Here’s her primer in brain-tanning hides.
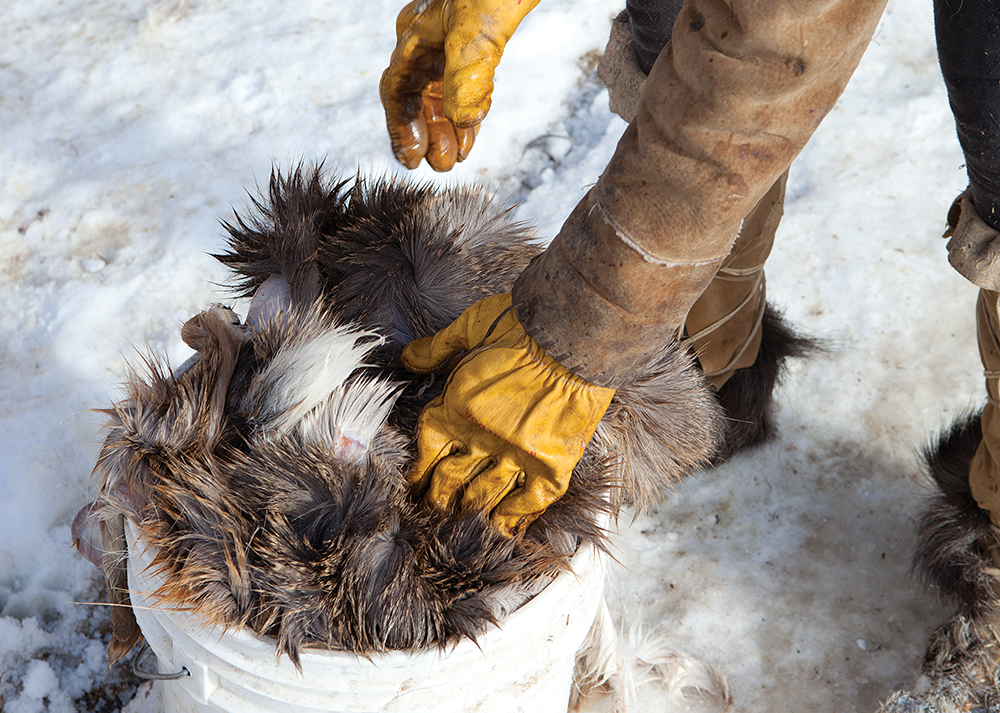
Step 1 / Skinning and Fleshing

After the animal is skinned, the hide must be carefully fleshed to remove any leftover fat and tissue.
Step 2 / Initial Soaking
The hide must be soaked in water for up to three days. This allows the hair to slip, or loosen, and raises and softens the grain layer of the hide.
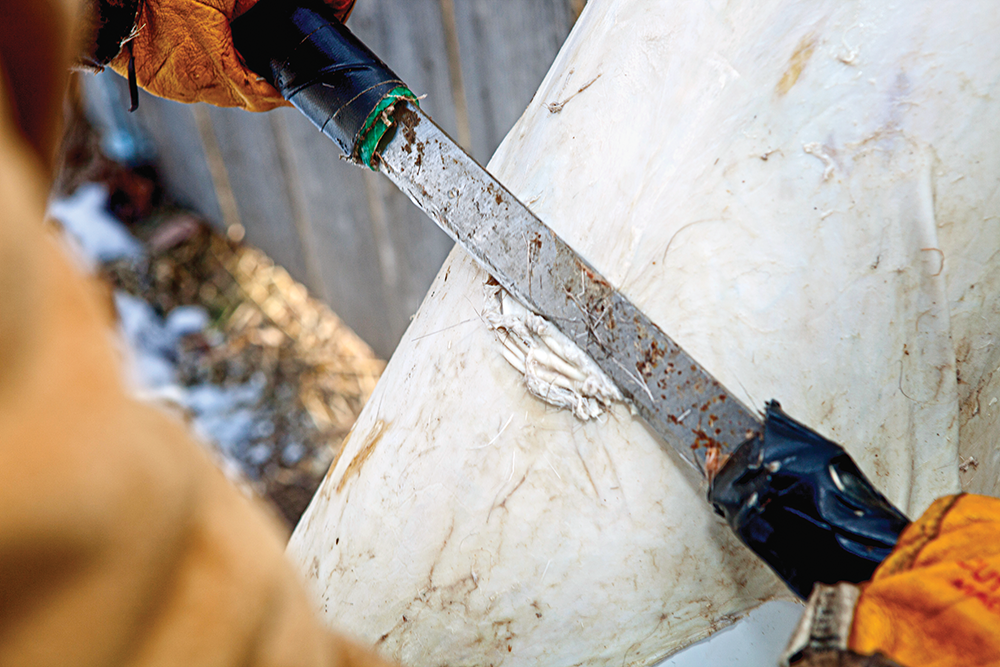
Step 3 / Graining
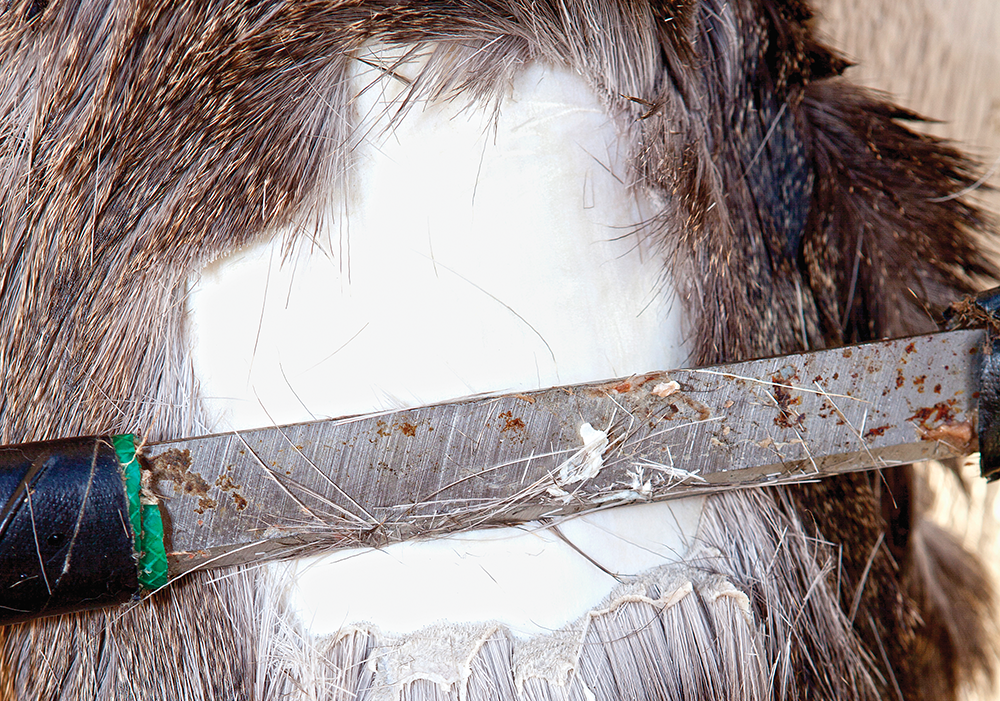
After the hair begins to slip, the hide must be thoroughly scraped to remove all the hair, the follicles, and a portion of the grain, or the outer layer of hide. “This can be the most intensive step of the process—pretty labor intensive and meticulous,” says Cronin. “Any patches or streaks of grain left on will become dry and stiff, and will impede the brain penetration.” Her favorite scraping tools are the hump ribs from bison, but she says elk and deer ulna or radius bones also work well.
Step 4 / Membraning
This critical step involves removing the the first layer of mucous membrane from the fleshy side of the skin. If this membrane is not removed, the brain mixture won’t be able to penetrate the skin and your hide will never get soft.
Step 5 Wringing
Wringing helps further break down the mucous membrane and, done properly, leaves the hide with the proper water content for maximum flexibility. This is usually accomplished by attaching the hide to an anchor point and then twisting it around a large stick to remove as much water as possible.
Step 6 / Braining
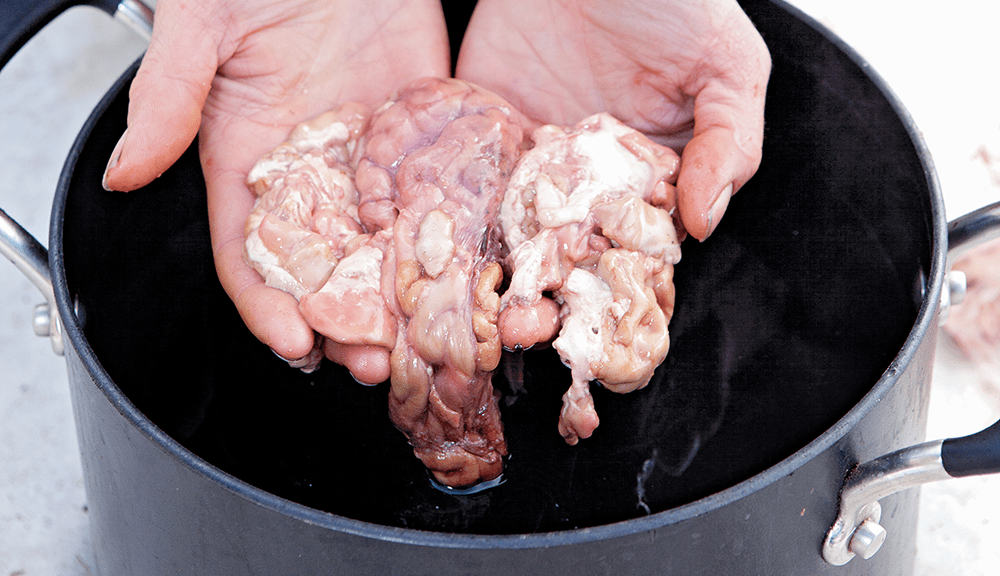
Animal brains are heated in water (Cronin uses approximately 1 pound of brain per hide) so that the braining solution has the consistency of “a brain milkshake.” (A note to the squeamish: Eggs, oil, and soap will also work, though not as well as brains.) The water should be very warm but not so hot that you can’t put your hands into the brain solution. Put the skin in a tub containing the solution and massage the hide by hand to help the emulsifiers in the brain tissue penetrate the hide. Most hides take two brainings, but some may take up to five.
Step 7 / Hand Softening

This is critical to producing the soft, supple feel of traditional buckskin. After the final braining, the hide should be worked across a firm object (the backs of chairs work well; Cronin has a steel T-post that she uses for the task). Properly softened, the hide should be supple even after it gets wet. Cronin says that after washing her buckskins, the hide may take a bit of manual manipulation to soften completely, but that it should take only a few minutes to make the clothing supple after a wash.
Step 8 / Smoking
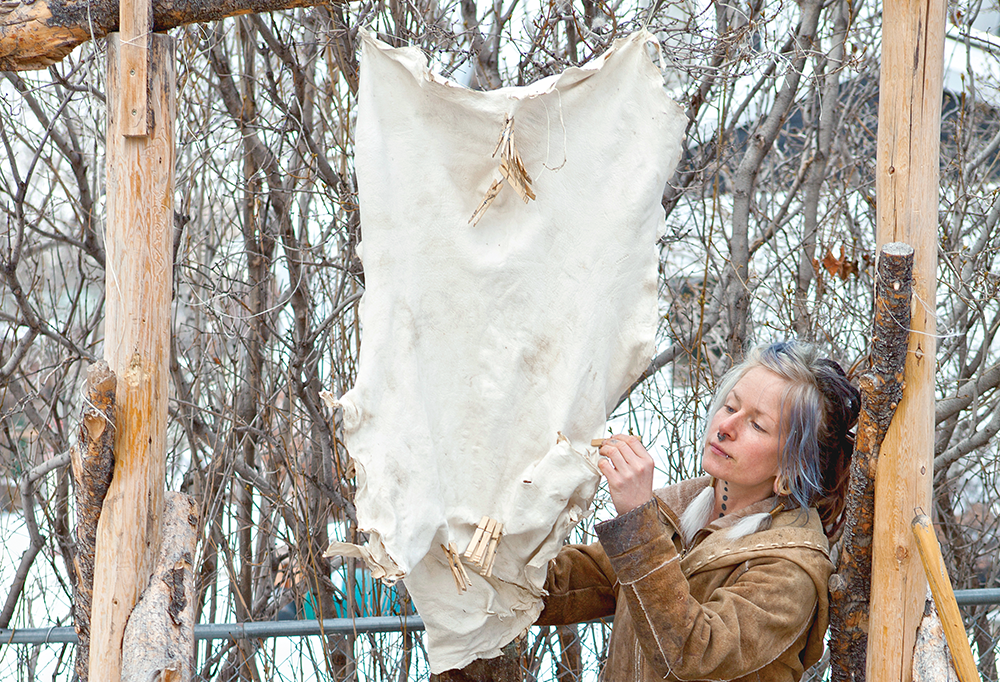
Cronin stitches two hides together into a modified bag and suspends them over a smoker. The key is to use punky wood, which creates smoke without flame. The bag design traps the smoke in the hides and gives the finished buckskin a distinctive color and smell based on the wood used; sage gives the hide a yellow hue, and Douglas fir gives the skin a brown finish. The smoke acts as a preservative.
The Buffalo Bridge Project
Cronin is a member of the Buffalo Bridge Project, which she describes as “a crew of primitive-skills specialists trying to revitalize and restore the hunting traditions” centered around Yellowstone National Park. Native American tribes annually conduct a hunt for wild, free-ranging buffalo outside the park, both as a method of maintaining their ancestral traditions and as a means by which to procure meat, hides, bones, and other materials.
“We camp in wall tents and tepees outside of Gardiner every year during the hunt to help tribal buffalo hunters skin and process their meat,” Cronin says. “In exchange, we often get skins, heads, bones, organs, and meat, which gives us the opportunity to practice all sorts of ancient skills and processes, from skinning buffalo with stone knives to brain tanning with traditional bone tools to tanning stomachs, cleaning skulls, and making bone paintbrushes, bladder bags, heart sacks, and hide glue—you name it.” For more information on the Buffalo Bridge Project, visit Harmony Cronin’s website.