
A couple weeks ago, I talked about using PVC for the working surface of your fleshing beam. Learning how to use a fleshing beam is critical if you want to become proficient and efficient at prepping your hides for taxidermy. This is a skill that I think all hunters and trappers should strive to attain, as it’s fulfilling, sometimes necessary, and can even make you a few bucks. It also gives you the opportunity to utilize more of the animal—even on animals you don’t plan on having mounted. You can often sell well handled capes to taxidermists, who are in constant need of replacements.
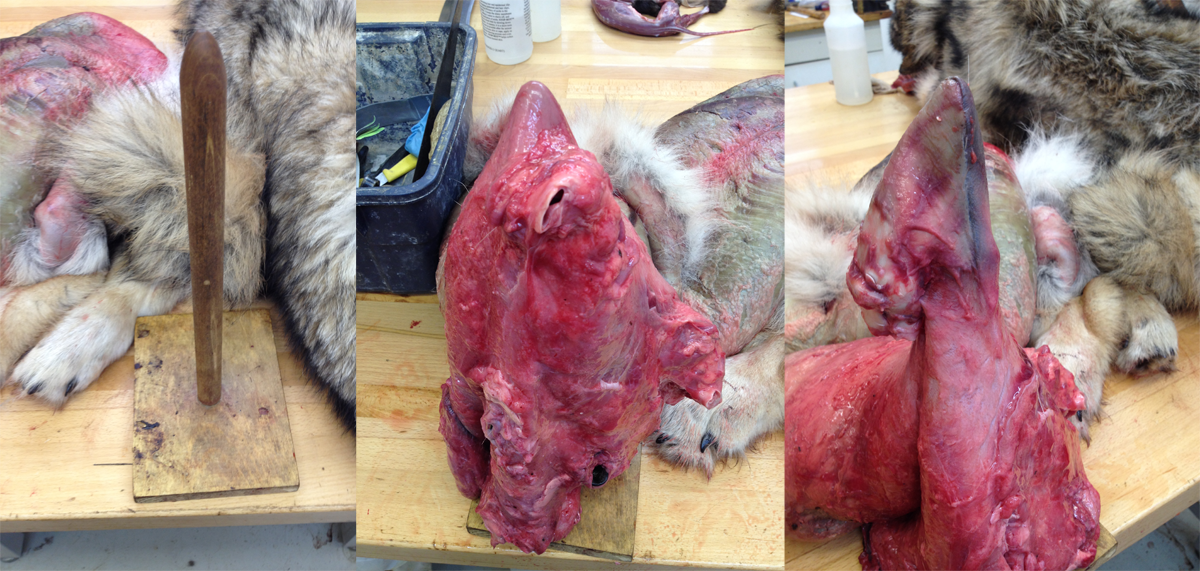
One critical step in prepping hides is “turning the ears.” If you’re not familiar with the term, it means to separate the skin on the back of the ear from the ear cartilage, literally turning the ear inside out. This allows salt to penetrate (or just air dry for stretched hides) and dry out both the cartilage in the ear and the skin on the back of the ear. If the ear is not “turned” far enough, the moisture in the cartilage will cause the skin to decompose, and when it comes back from the tannery, some or all of the hair will fall out or “slip” from the ear. This is a deal breaker for taxidermy.
Many tools are used for turning ears, everything from spoons and screw drivers to specialized pliers that pull the skin back from the ear cartilage. The principal is basically the same for all the tools—to separate the skin from the cartilage and turn the ear—but some tools are not ideal for a wide variety of animals (at least for me).
I copied the basic design of my ear turner from one used by the taxidermist who taught me how to prep hides. It’s a simple ¾” wooden dowel that’s shaped almost to a point (but has a dull, rounded tip). That dowel is about 12” long and fixed to a piece of board so that it will stand up straight on a table.
To use it, I place the hide on top of the dowel, with the point of the dowel on the back side of the ear. I cut flesh back away from the ear cartilage and, pulling the hide down onto the dowel to put pressure on the ear, I begin to separate the ear skin from the cartilage with my knife, all the way out to the edge on each side. Then, I work my way up the ear until I can feel that I am within a quarter inch or so of the tip of the ear. After cutting the excess meat and fat from the ear butt, you’re done.
I prefer this type of ear turning device for a few reasons. First, it’s free-standing. I don’t have to prop it on the table or hold it with one hand, so it gives me more effective use of both hands. Second, it is versatile. I can, and have turned ears on small, delicate animals, as well as big, tough ones. So far, I’ve turned ears of marten, fox, coyotes, lynx, wolverines, wolves, otters, black and brown bears, caribou, sheep, deer, mountain goats, muskox, and moose, all on the same “turner.” Finally, it’s very simple and is the only tool I need for the job besides the knife. The specialized tools like ear turning pliers can work great on some animals, but often require finer detail work with a knife and dowel after being turned most of the way.
To get good at it, you need to find what’s most efficient for your needs. That takes some trial and error, but this is a simple, very cheap tool you can make yourself that will get the job done just fine.