We may earn revenue from the products available on this page and participate in affiliate programs. Learn More ›
There isn’t much to making a standing broadside shot on a deer under calm conditions—but that doesn’t prevent countless hunters from missing every year. Add in some typical complicating factors, like wind or a deer that’s moving or a rest that isn’t quite rock-solid, and the hit percentage dips even more. Here are five skills to master so you can count yourself among the successful hunters.
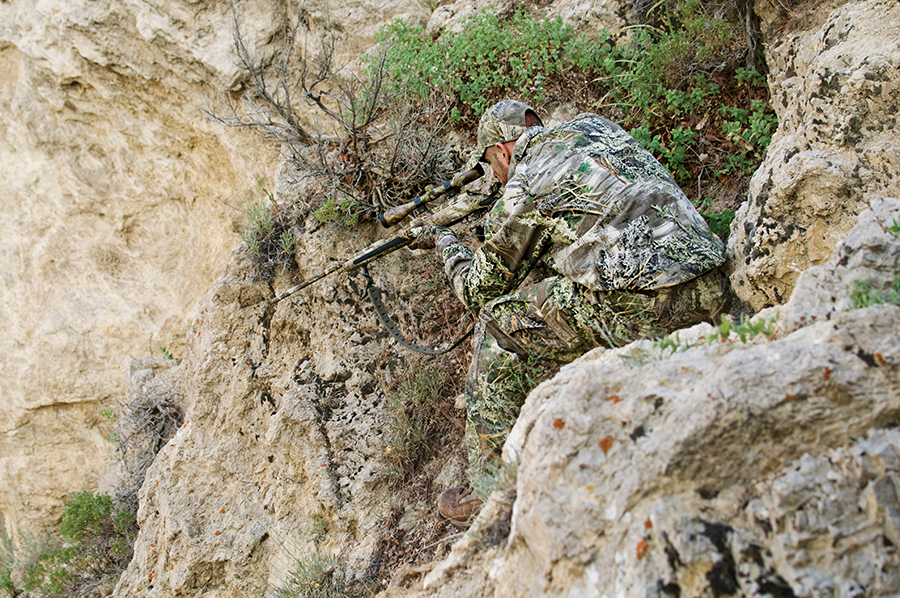
1. Shooting at a High-Angle
Nothing is more likely to induce a panicky look in a hunter’s eyes than the topic of shooting at steep angles.
Assuming the shot angle is significant, (more on this below) the first thing to know is that no matter whether he’s shooting uphill or downhill, the shooter should always compensate by holding lower on the target, or dialing the scope down, as if the target were closer. This is because the distance the bullet travels along the horizontal axis is always less than the visual distance to the target. And it is the horizontal component of a bullet’s travel that is used to calculate the degree of drop. (The visual distance is like the long edge of a right triangle and the horizontal distance is the portion that’s flat along the ground.)
But, more important, shot angle is rarely a factor, with the exception of long shots in vertigo-inducing terrain.
A 10-degree slope, which looks significant from a shooter’s perspective, hardly makes a difference on even a 400-yard shot.
Once the angle is at 25 degrees, which is a very steep shot indeed, the horizontal distance is about 90 percent of the visual distance. At 35 degrees, which would be like shooting down into a serious canyon, the horizontal distance is 80 percent of the visual measurement. So, for a 400-yard target, we would use distances of 360 yards for a 25-degree slope and 320 yards for a 35-degree angle when figuring out the actual bullet drop. But these would be extreme shots that hunters rarely encounter.
A more relevant consideration with shot angle is the orientation of the animal’s vital zone. The shooter needs to make sure that the bullet will hit the animal so that the bullet passes through the middle of the vitals.
2. Judging the Wind
One item that should be on any hunter’s mental checklist before taking a shot is the wind. A moderate breeze capable of stirring up leaves translates to a wind speed of 3 to 5 mph. A stiff breeze that causes tree branches to sway is moving around 10 mph.
With a .30/06, and other similar calibers, a 10 mph crosswind doesn’t make a difference until the shot is 200 yards or more. At that distance, the bullet will drift about 3.5 inches. At 300 yards, the distance increases to 10 inches. So even with a deer facing into the wind, the crosshairs wouldn’t be held off the body to make that shot. At 5 mph, the effect of wind is even less: At 300 yards, a 5 mph wind would push the bullet just 4 inches.
So unless it is blowing a gale, wind isn’t much of a factor within 200 yards. Beyond that, pay attention, but be careful not to hold off too much, unless the animal is way out there.
3. Picking the Right Style of Reticle
A standard duplex reticle is perfect for making fast, accurate shots on big game out to nearly 300 yards or so with the rifle sighted a little high at 100 yards. If a .30/06 shooting a 168-grain bullet at 2,800 fps is set 2 inches high at 100 yards, its bullet will hit 4 inches low at 275 yards. Any deer within that range requires no correction for holdover. Just place the crosshairs on the center of the chest and let fly. This will apply to any similar big-game cartridge.
Scopes with ballistic-compensating reticles can make it easier to hit at longer ranges. If you know your holdover marks and have put in ample practice time, an accurate rifle can consistently hit a deer in the vitals at 400 yards or more. But before jumping on the ballistic reticle bandwagon, consider this. If you don’t know the exact distance to the deer, via a reliable measurement from a rangefinder, those holdover marks are worthless. Guessing won’t work. The other thing required if you want to use these reticles is regular practice. It is easy to get confused when you’re looking through a scope with dots and hash marks all over the place. If you’re ready to devote the time and effort to master your gear, then go for it. Otherwise, a classic duplex reticle, adhering to the sage KISS rule for simplicity, is the way to go.
4. Hitting Deer on the Move
You spot a deer moving through your shooting lane at a walk. If you can’t get it to stop, should you take the shot? And if you decide to pull the trigger, how much lead, if any, should you build in?
A moving target, even one plodding along at 2 mph, does require some lead if it is 100 yards or more downrange. Using a .30/06 as a baseline, at 100 yards the crosshairs need to be held 4 inches in front of the desired point of impact. At 200 yards, that distance increases to 8 inches, and at 300 yards we need a full foot of lead.
If the deer is moving more quickly than that—say, at a brisk 5 mph trot—the holds at 100, 200, and 300 yards increase to 10, 20, and 30 inches, respectively, making a good hit much trickier.
The rule here is that holding out for a standing shot is really best unless the deer is within 100 yards. And you should not shoot at a deer moving at anything more than a slow walk beyond 100 yards. Whether you take the shot on a slowly moving deer at longer distances is up to you, but don’t do it unless you’ve had a chance to practice on moving targets beforehand.
5. Making Follow-Up Shots
One bad shooting habit that is easy to develop is not being ready for a follow-up shot. Shooters will often lift their head off the stock, dismount the gun from their shoulder, or forget to cycle the action before looking for the animal, or perform some ugly combination of all of the above.
The correct thing to do with any manually operated rifle is to immediately cycle the bolt or lever while maintaining a good sight picture of the animal. The only way this becomes automatic is by practicing it with an empty gun during dry-fire exercises and at the range with live ammo.
Make a point of never taking a shot without running the action and keeping the gun in the up and ready position. It doesn’t matter whether you’re practicing practical field marksmanship from the prone, sitting, and kneeling stances or shooting off sandbags for accuracy. Run the gun immediately and reacquire the sight picture, whether there’s another round in the chamber or not. Make this an automatic action every time you pull the trigger, and you’ll do it in the field when it really counts.