We may earn revenue from the products available on this page and participate in affiliate programs. Learn More ›
In the ammunition world, “shortage” has become the new normal that hunters and shooters have had to endure this year. Beyond just ammunition, the shortages have affected many products—especially shooting components. Even many traditional muzzleloader shooters are finding percussion caps to be almost nonexistent. But what if you could make your own?
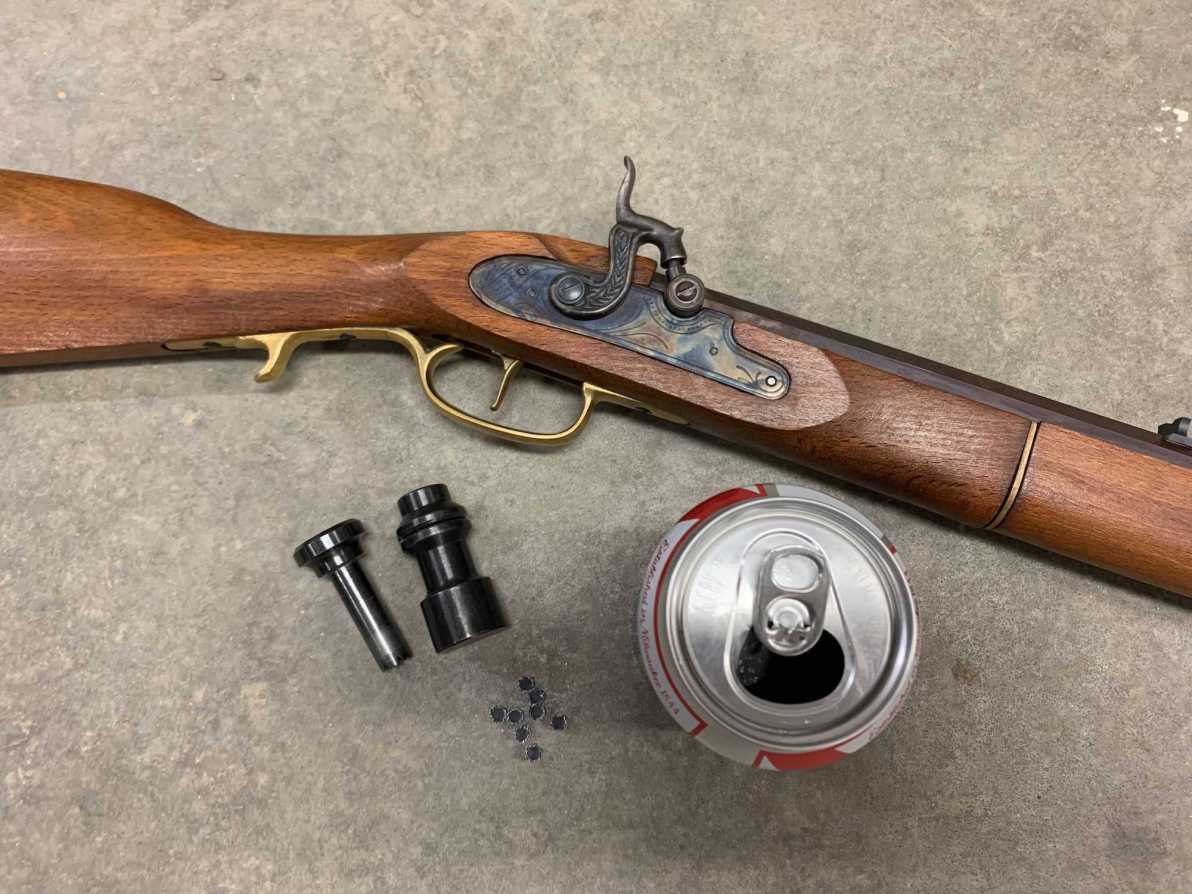
Making your own percussion caps would not only be a little bit more sustainable, but also fit with the traditions of simplicity and self-sufficiency many muzzleloader enthusiasts share. Many already cast their own projectiles, make their own patches and lubes, and even powder—so why not make percussion caps, too? One day, I happened to stumble upon a tool that promised to do just that. The No.11 Percussion Cap Maker looked to be an easy-to-use tool to make percussion caps out of something anybody can find in abundance: aluminum cans. I immediately ordered one.
A percussion cap isn’t complicated. It’s simply a small metallic cup with a tiny amount of percussive explosive in it that’s used to ignite the charge in a cap-lock or percussion-fired muzzleloader or revolver. To be practical, caps need to be tight-fitting, reliably firing, and pack enough punch to consistently ignite your powder charge. At almost 200 years old, percussion cap technology (and making your own percussion caps) isn’t exactly re-inventing the wheel. But caps have long been commercially produced in abundance—so it’s probably safe to say that most shooters have always just bought them. I wanted to know how easy this tool would be to use, and if it provided a practical option for caps, or if it was just a gimmick that I would be trying to fine-tune for the rest of my days.
How Making Percussion Caps Works
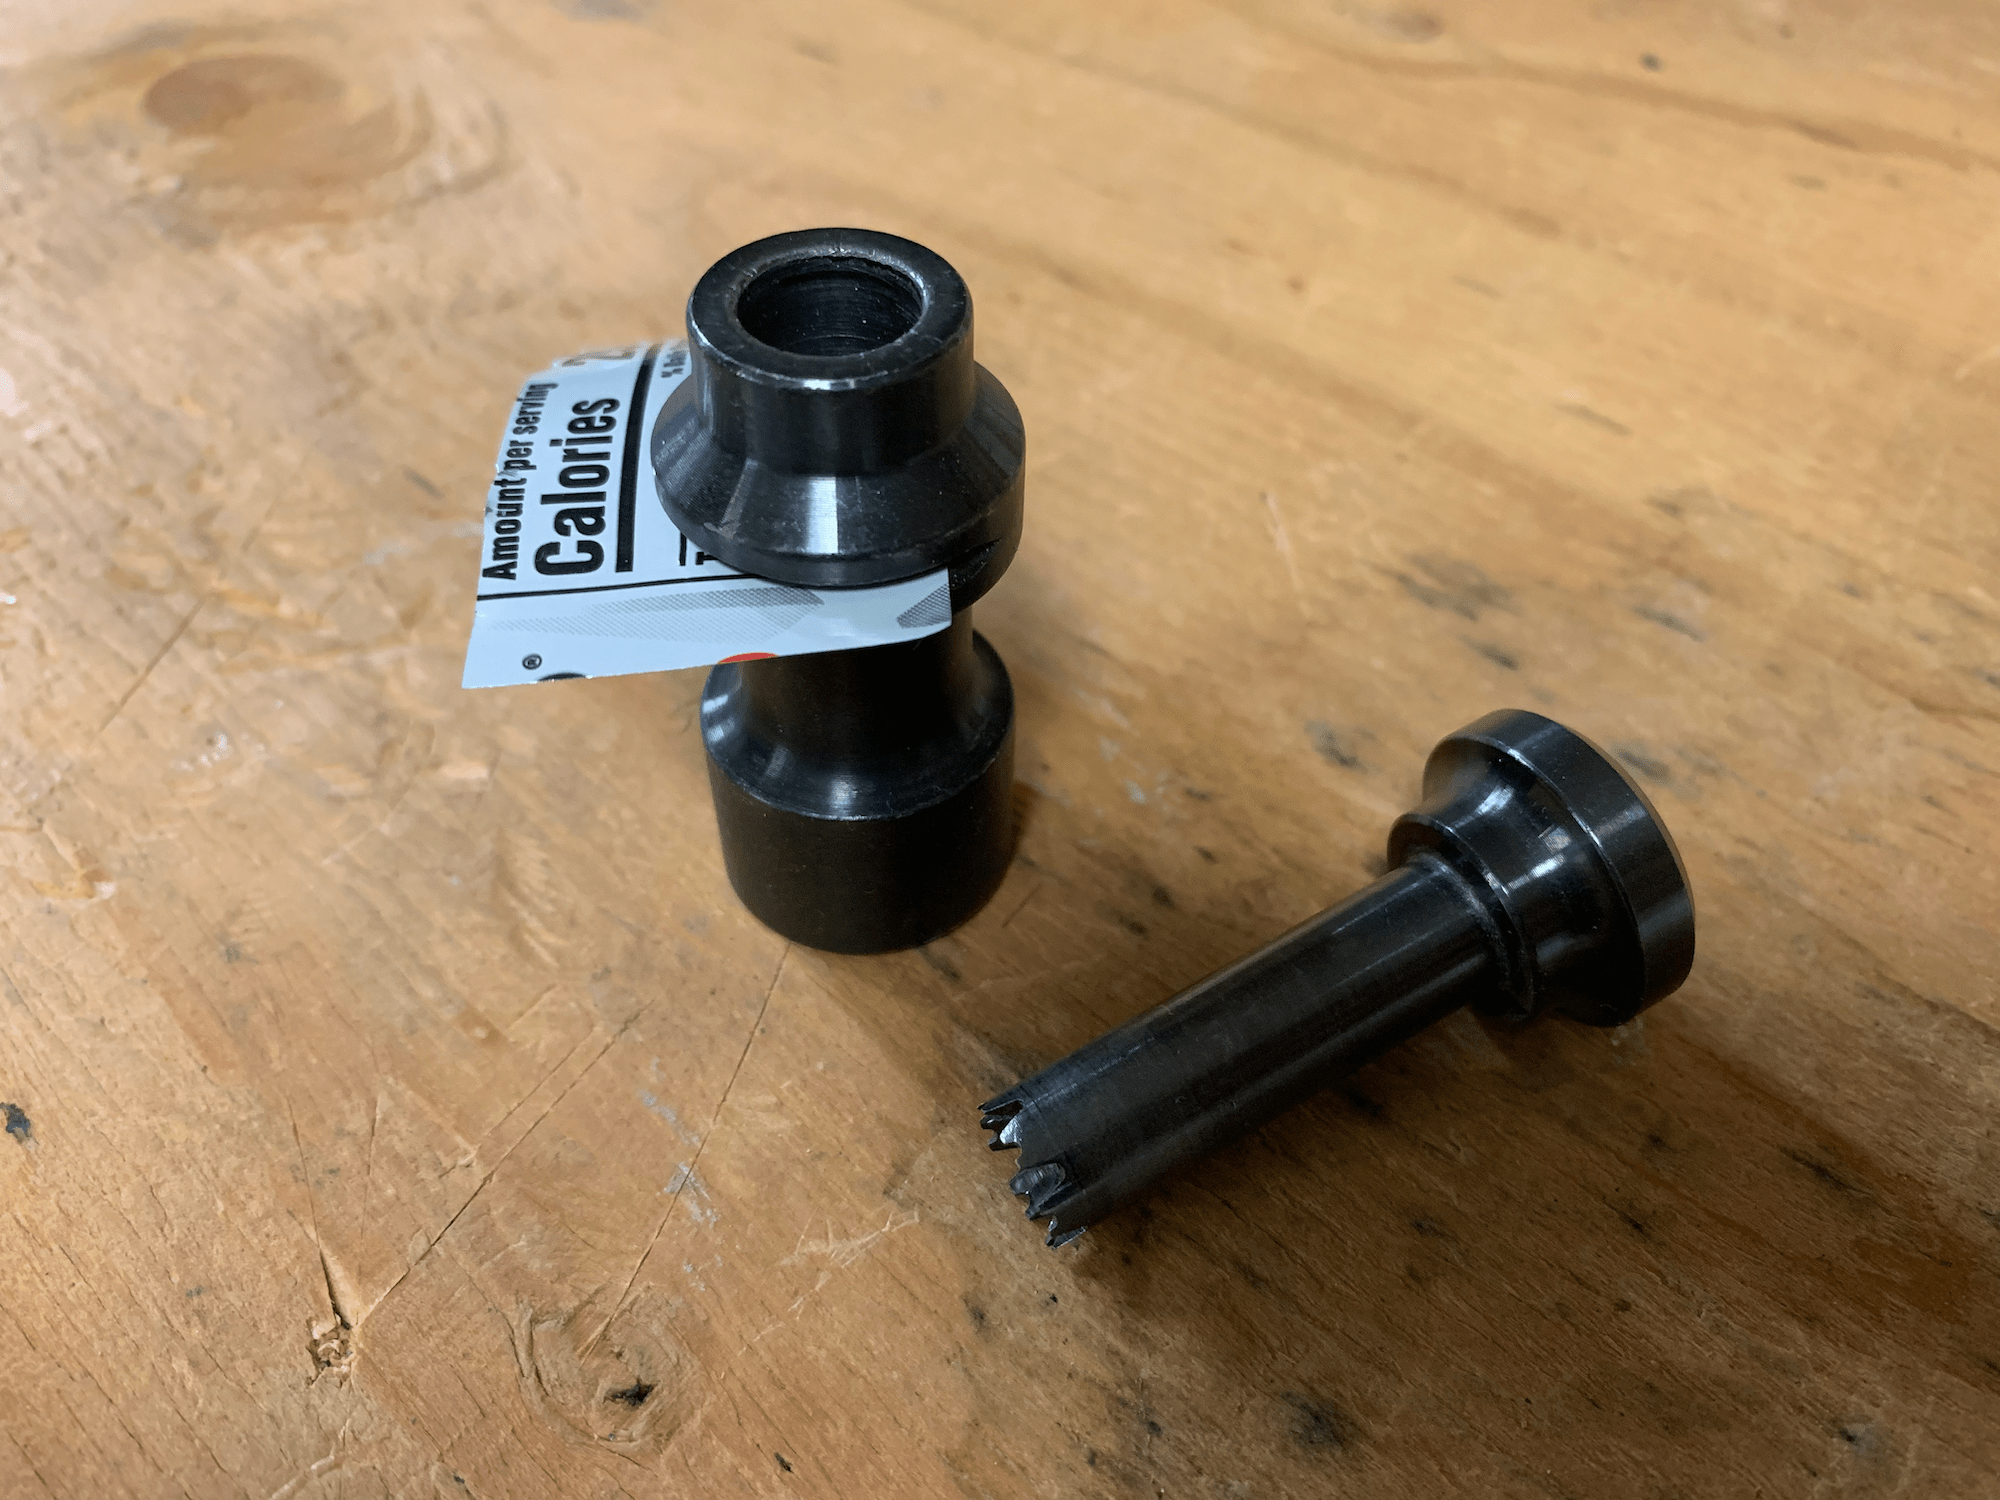
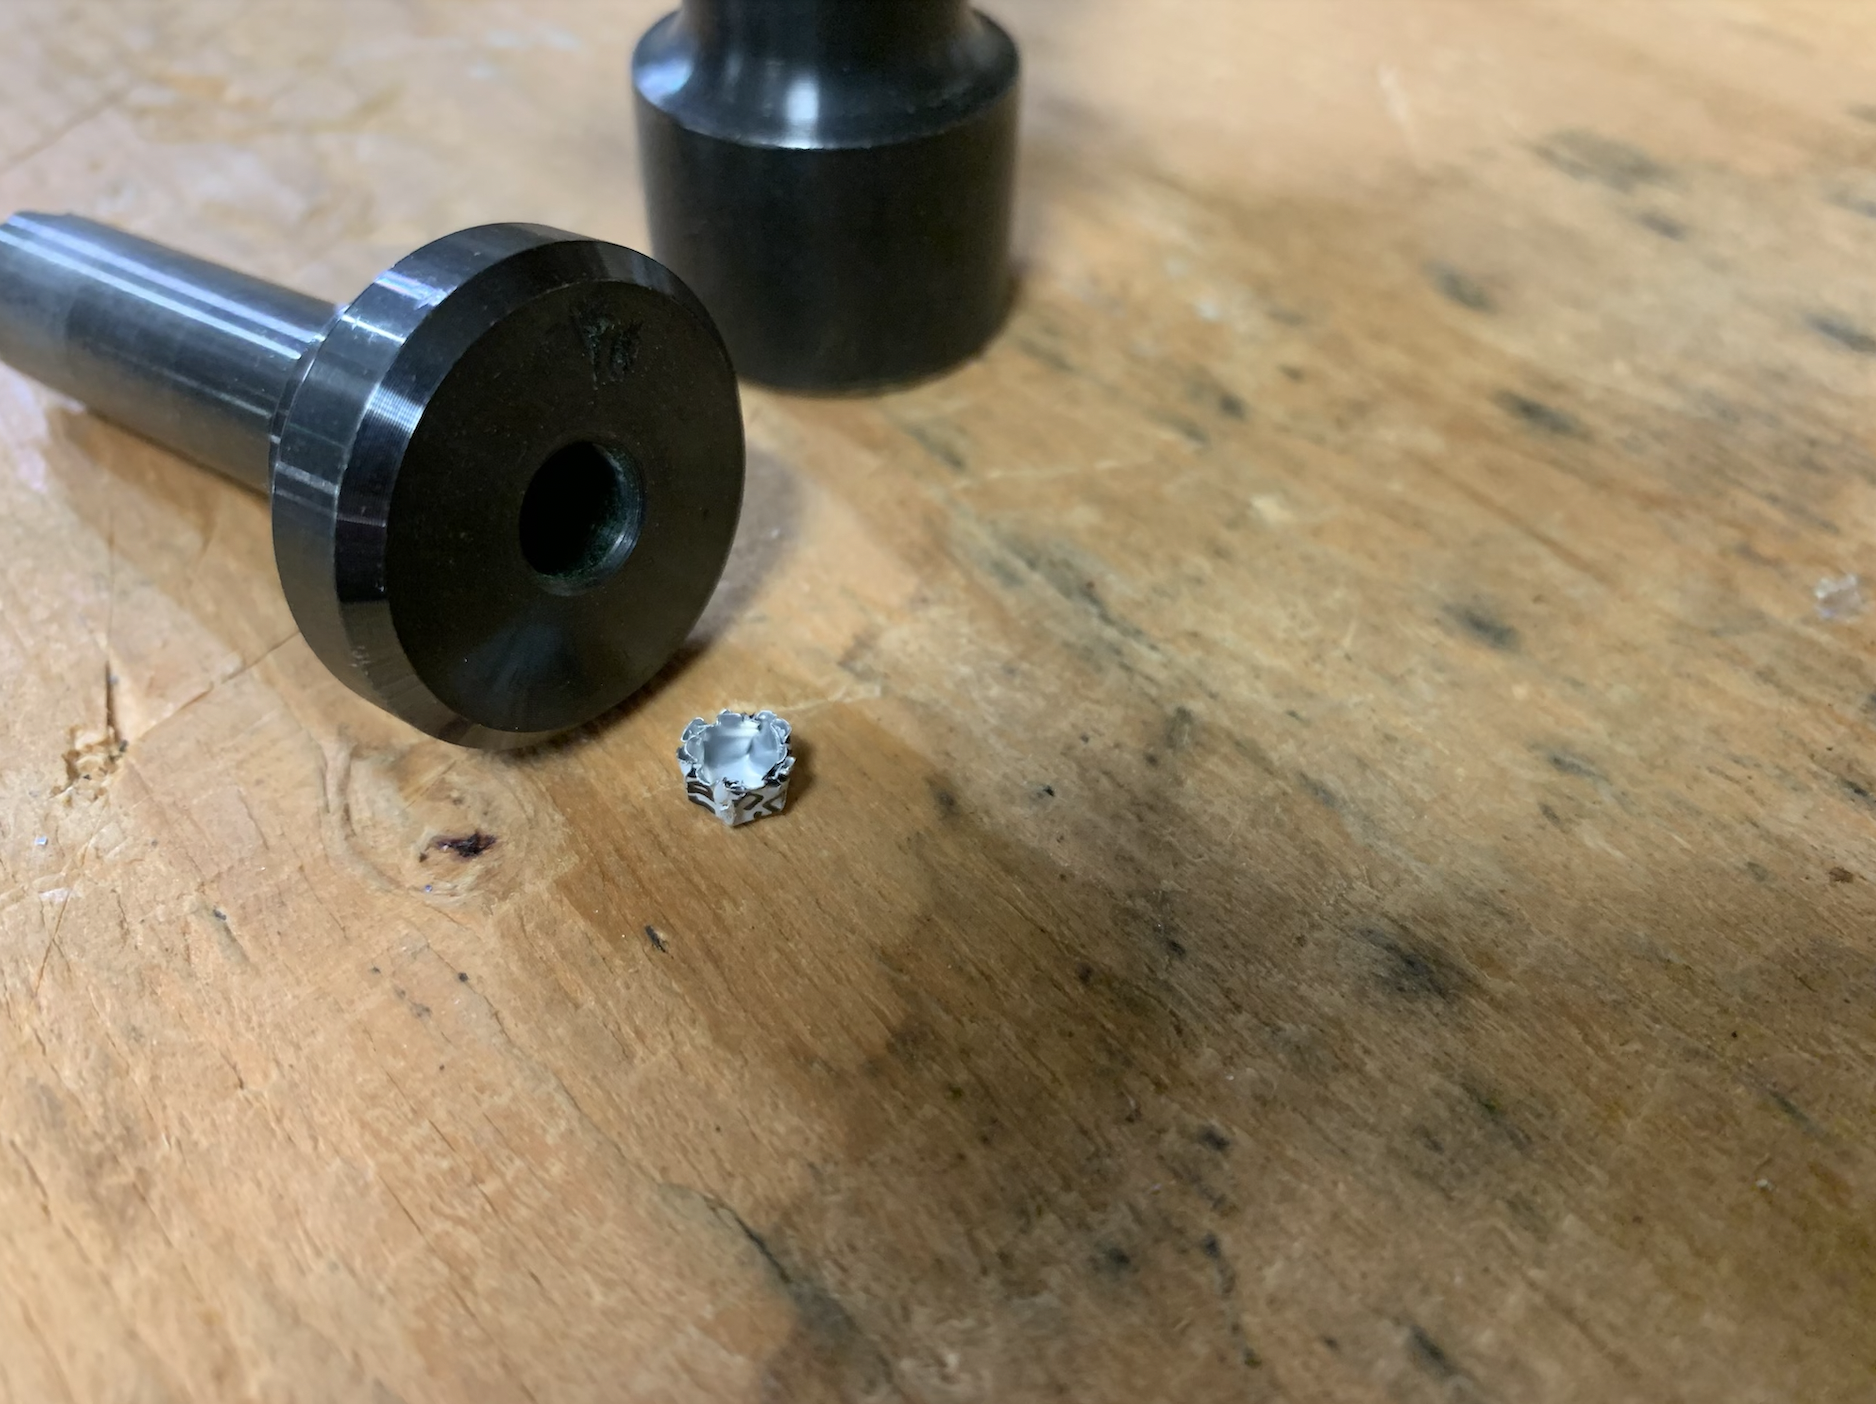
The percussion cap maker itself is simple. It’s a machined-steel die and punch that you can operate by hand on a flat surface, or with the aid of a wood or synthetic mallet. The caps themselves are made from aluminum cans, which you prep by simply cutting them into strips, flattening, and thoroughly wiping away any remnant liquid. The die has a slot to slide the aluminum strip, then the punch is placed in the die, and then a crisp, swift, downward stroke on the punch will push it through the aluminum. Pull the punch out, tip it over, and out falls your cap.
Most commercially-made caps are very neatly drawn out, and you’ll immediately note the cruder appearance of these caps; this is because rather than being drawn out, the sides of the cap are folded. The punch itself has what appear to be teeth. Although it cuts a perfectly round, over-sized hole in the aluminum, as the punch is pushed further, it folds the excess aluminum to form the sides, looking like a paper cupcake cup. If you’ve pre-cut an aluminum can into strips, you can make caps very fast, you just want to make sure and brush out the teeth on the punch periodically to keep them clean.
The second part of making your own percussion caps is priming them. They aren’t any good if you can’t charge them. The most straightforward option for charging your caps is to order a Prime-All kit from the same manufacturer. It’s a pre-proportioned kit with the individually inert chemical components and measuring scoops you will need for your priming compound. Each kit is said to prime roughly 2,000 shots, but even at half of that, it’s a good deal.
Follow the directions exactly and carefully, and you end up with a tiny amount of gray powder that is like what you’ll find in a kid’s cap gun caps. You then fill your caps individually with the priming compound, wet with a drop or two of acetone, then let dry for 24 hours. Now you have percussion caps.
Another option for priming compound is to use those kid’s snap caps, and even strike-anywhere match heads, for which directions are available. That’s going to be a much more time-consuming process, but you have the option.
In application, I found this little tool to work as well as advertised. I could crank out a lot of caps quickly and found that although I could use my hand to drive the punch, a plastic mallet was quicker, more consistent, and more comfortable. I’ve punched out more than 1,000 caps with it and have yet to see any sign of wear or dulling of the punch teeth. For priming, I set my caps in a Winchester Large Rifle primer plastic tray, which holds each individual cap securely. I mix the priming compound as per directions in a paper cup, making sure to wear safety glasses. I use an eye dropper to wet the compound in each cap with acetone. This helps settle the powder into the cap and activate the binder. Once wet, I also gently pack it down with the square end of a matchstick. Then, I set it in a covered area out of the way to dry for 24 hours.
How Well Do Homemade Percussion Caps Work?
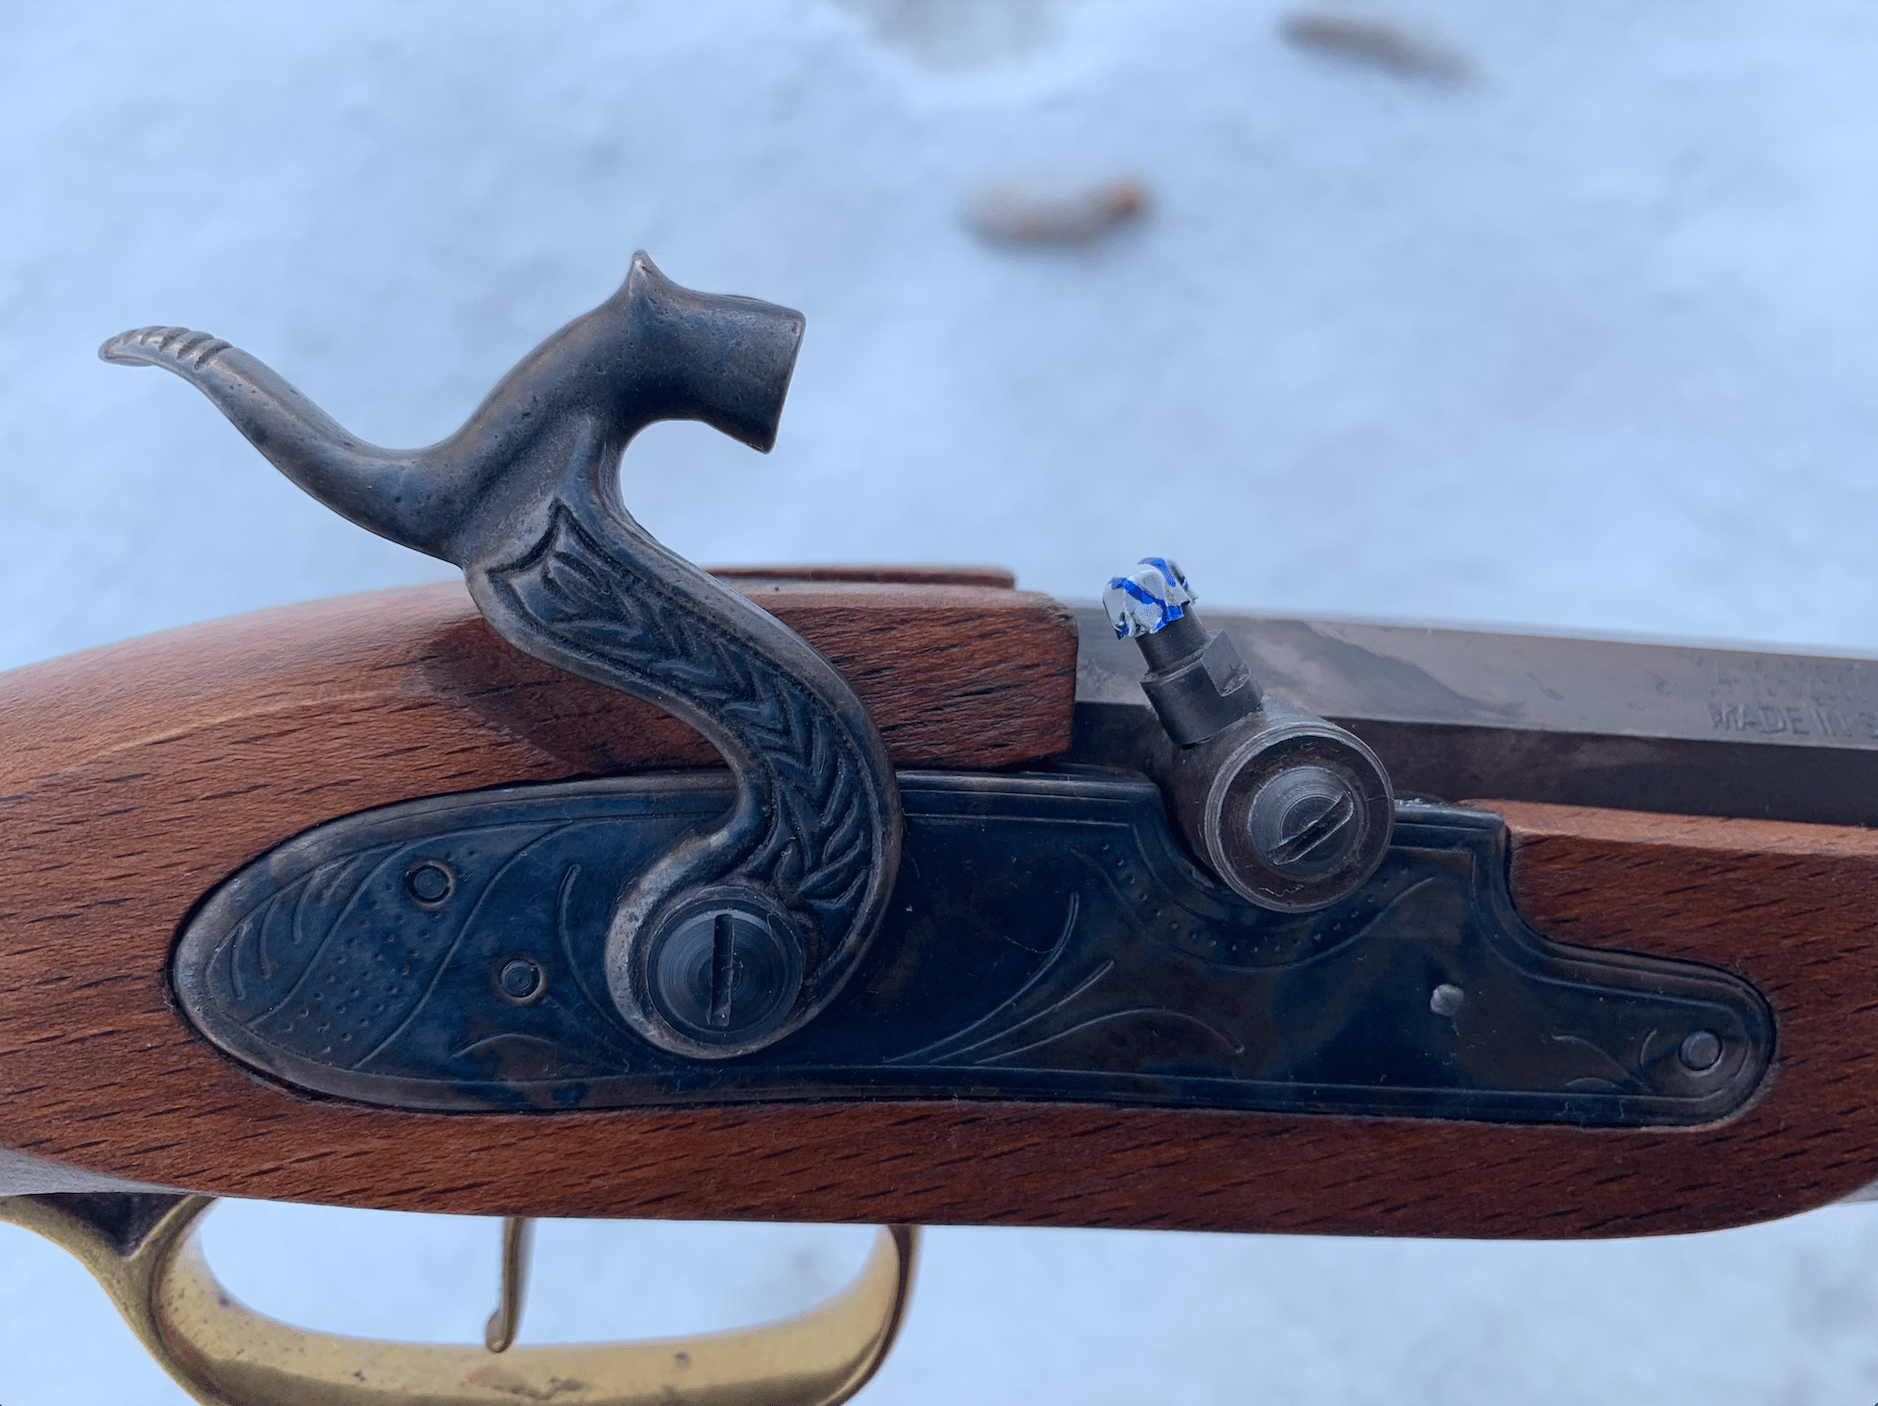
Through the several hundred caps that I’ve made and charged, I have had no performance issues. The caps fit tightly on a No. 11 nipple, and I have not had a single cap fail to fire instantly. In fact, they seem to fire louder and with more force through the flash hole than the commercial caps I use. This observation is slightly anecdotal, but they are louder, and when tucking a patch into the end of the empty barrel, it is blown out with more force than with my commercial caps. I did notice that they leave a rusty, oxidized residue upon firing using the Prime-All compound, and are likely more corrosive than commercial caps, but if you’re shooting black powder, you’re already well schooled on the need to clean your smoke pole.
The only disadvantage I’ve found with these homemade caps is that they are a bit more fragile than their commercial competition. If they are squeezed or handled too roughly, it can affect their fit on the nipple, and some users have had trouble with the priming compound falling out. I haven’t had that issue, but unlike factory caps—which you can remove and put back in the container if not fired—once you press one of these caps on the nipple, you should either use it or discard it. Putting the cap on then removing it might loosen your compound. With a couple practice batches and careful handling, you should have no problems.
Read Next: Is Handloading Rifle Ammunition Really Worth It?
After using this No. 11 Cap Maker for the better part of a year, I would confidently say that it’s worth the money for any percussion gun enthusiast, and a No. 10 cap maker is available as well. Whether your motivation is self-sufficiency, nostalgia of making your own components, or just a cheaper option to shoot a lot, you’ll probably find it worth buying. And if the ammunition does continue to be the new normal—or happens again in the future—find some aluminum cans to recycle, and you’ll be prepared.