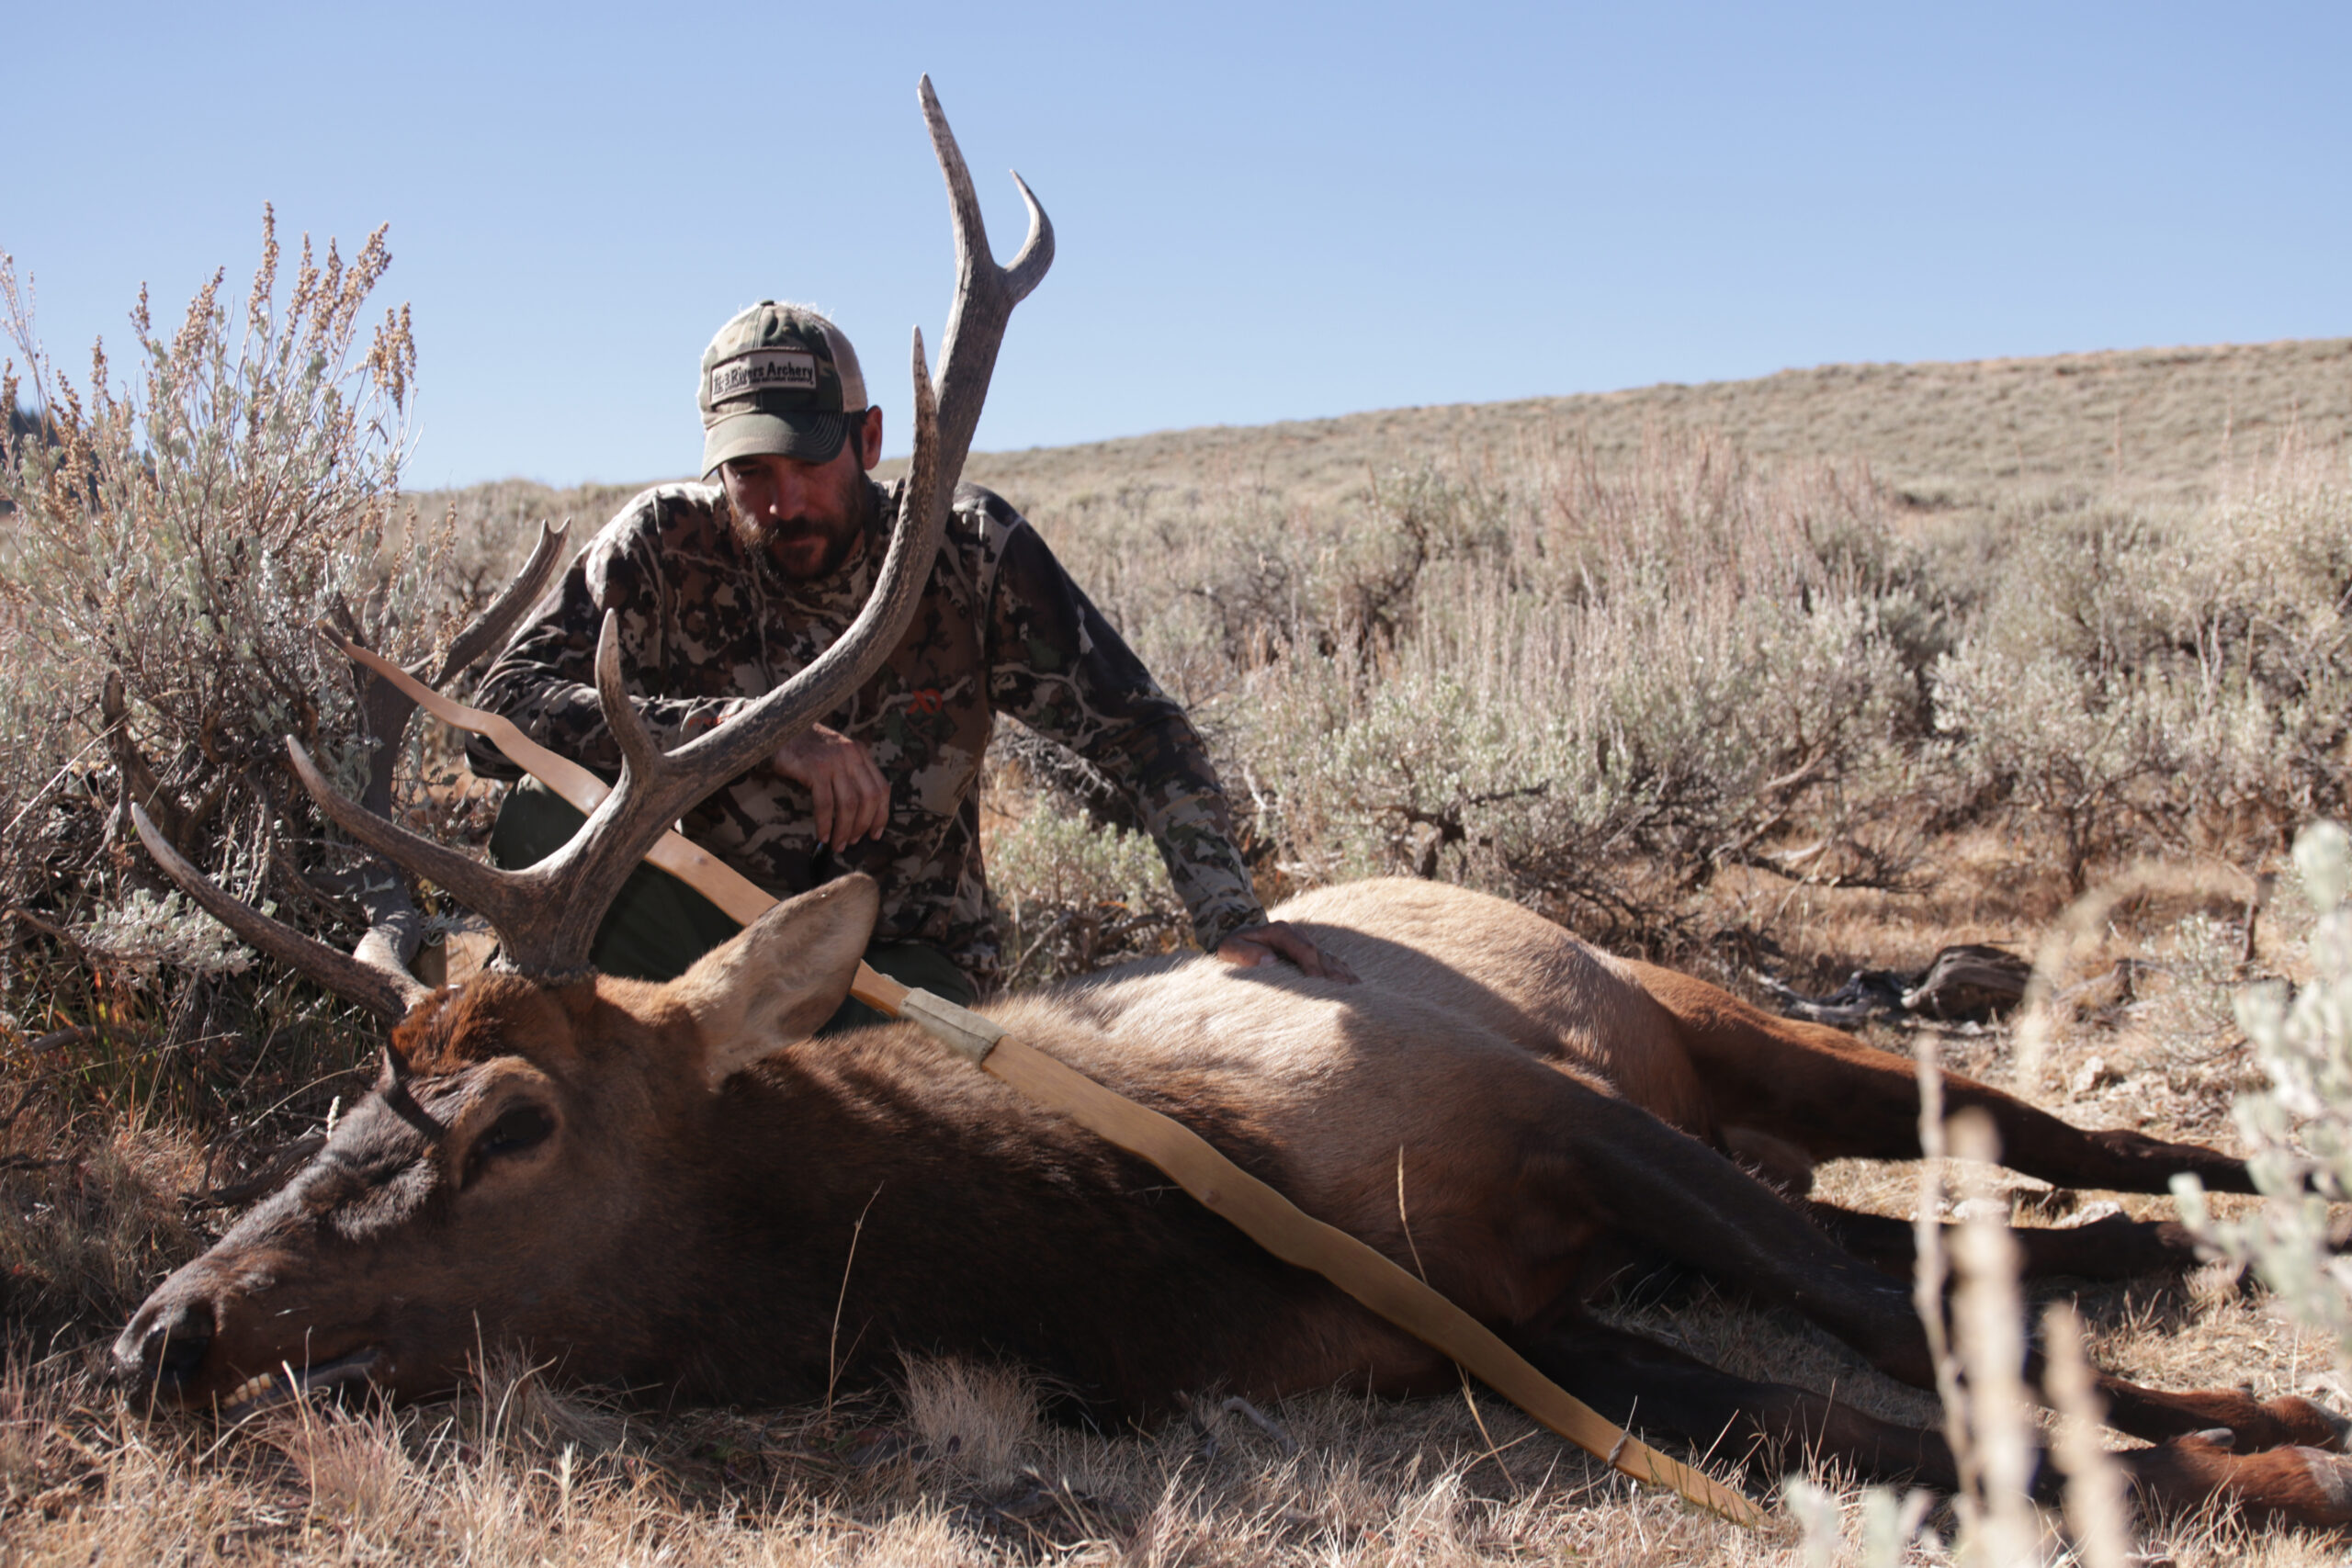
To many, the idea of going to the woods, cutting down a tree, crafting a simple longbow, and taking a deer with it is nuts—very cool, but nuts. But for some, the idea is captivating: as it was, and remains, for me since my childhood. I first learned how to make a bow and arrow in 1999 and have made hundreds since. I’ve hunted all over North America with those simple bows and taken over 30 big game animals, from elk and bears to whitetails and hogs. I even used one of my bows to take a deer that helped me I win Season 8 of Alone. These bows are deadly effective and not all that difficult to make.
In this article, I explain how to make a bow. If you decide to give it a try, know that you’re certain to have some failures. You’ll most likely break a few as you learn, but if you persist, you’ll make a great bow, shoot your first arrow, and, eventually, take that first deer (or squirrel or rabbit). And when you do, even if it’s a 90-pound doe, you’ll remember it for the rest of your life, because you did everything, start to finish, with your own two hands.
When you research how to make a bow and arrow, you’ll find a lot of information on different bow woods and designs. Then you’ll find out that a good Osage orange bow stave will cost a hundred bucks or more. Or, if you’re lucky enough to cut your own, you’ll be looking at a two-year wait before it’s dr enough to turn into a bow. Your enthusiasm might start to wane. Luckily, you don’t have to buy an expensive stave or wait years to get started. In this article I’ll show you how to cut your own wood and turn it into a fully-functional bow, capable of taking deer, in as little as a few days. Let’s get started.
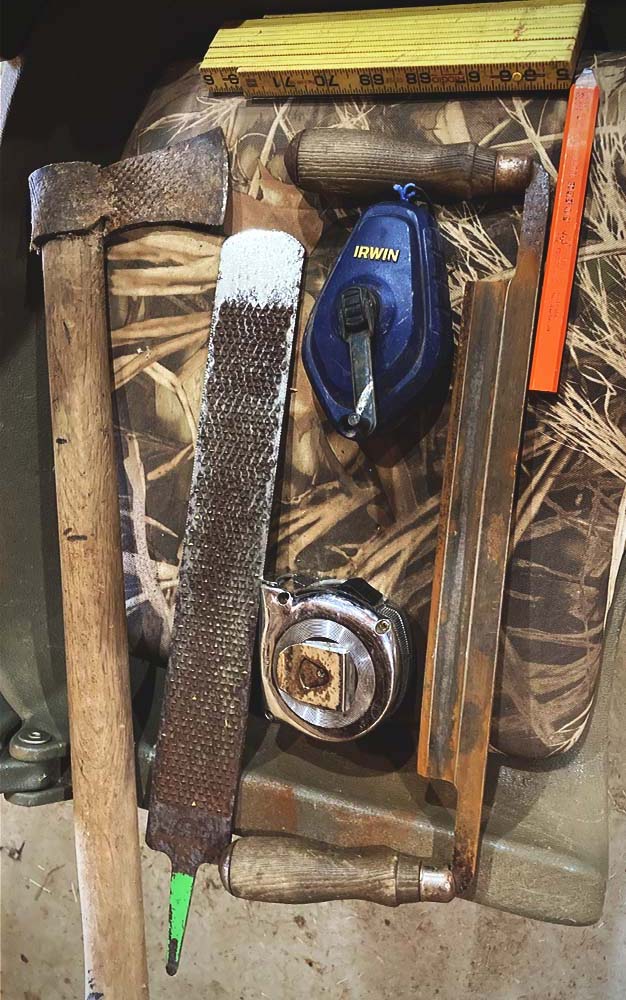
Tools You Need to Build a Bow
- Draw knife with 8-10-inch blade
- Large rasp
- Hatchet or machete
- Measuring tape
- Straight edge
- Chalk line
- Pencil
- Card scraper (optional)
- Compass (optional)

You’ll also need a tillering rack to hold the bow while tillering. Tillering is the heart of bow making and it’s the process of selectively removing wood from the limb’s belly to make both limbs bend evenly. A tillering rack allows you to draw the bow and look at it from a distance so you can see if the limbs are bending evenly and smoothly. To make the rack, all you need is something solid to mount it to, a pulley, and a rope. First, you’ll need some sort of cradle to hold the bow. I’ve found that about 5 feet off the ground is about the right height. Then, at about ground level, mount your pulley. If you’re mounting the rack to a wall, make sure you leave enough space between the bow cradle and the wall so that the limbs don’t scrape against it when the bow is drawn. The cradle should be rounded some so that the bow can rock to align itself with the drawing rope when pulled.
How to Cut a Bow Stave
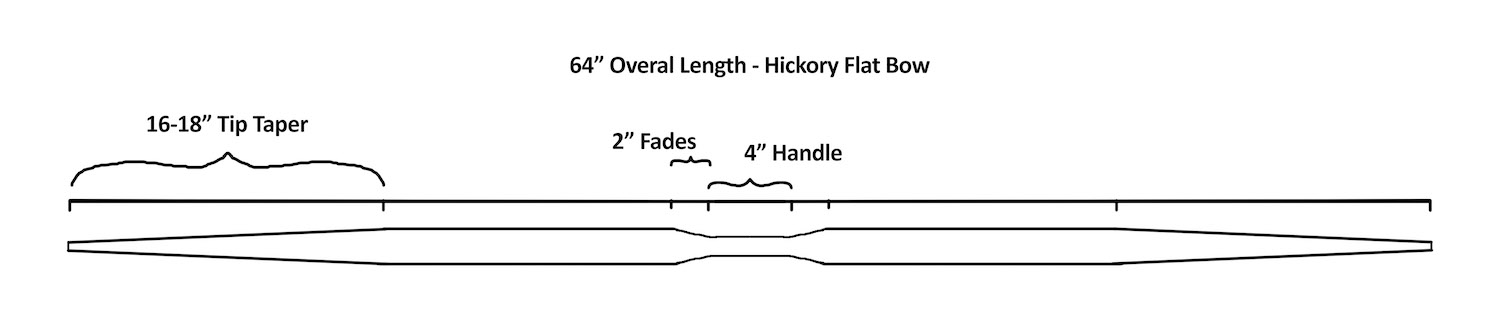
For this build I’ll demonstrate with hickory (elm is also great). It’s a great beginner’s bow wood because it’s incredibly tough and can handle a lot of mistakes and still make a bow. You can force dry hickory quickly so you can skip the long seasoning times necessary for other woods like Osage (more on this later). You’ll need to find a tree that is free of big knots, limbs, and excessive twists. In most tree species you can see if the grain is straight by looking at the bark. Bark that spirals around the tree is a sure sign that the wood underneath is twisted and not good for a bow. A bow (for a 28-inch draw) will be around 64 inches in length, so your stave needs to be at least that long. The easiest way to determine how long to make your bow is to double your draw length and add six inches.
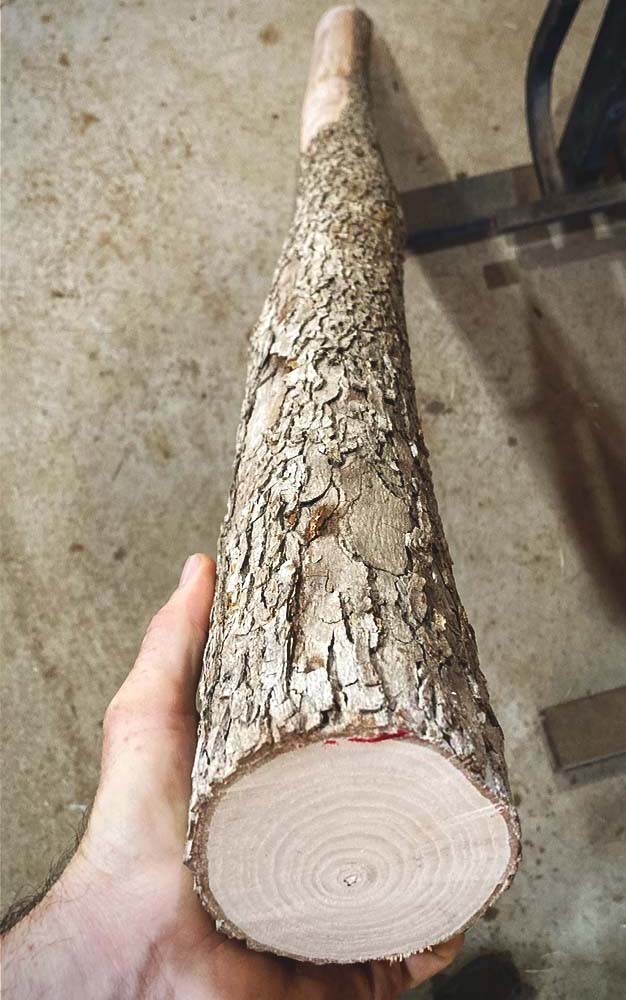
Preparing the Bow’s Back
The other great thing about hickory and elm is that the back of the bow lays just below the bark and cambium. All you’ll need to do is remove the bark to expose the wood underneath. If you cut your wood in the spring or early summer when the sap is up, the bark will peel away to reveal the pristine wood below. With other woods, taking the bark off a green tree causes it to crack as the wood dries rapidly, so be careful if you’re using a different species. For this build I’m using a dry stave, so I’ll remove the bark and scrape the remaining cambium off with the draw knife. Just be careful not to cut down into the actual wood itself. If you’re starting with a freshly cut hickory, I’ll tell you how to dry it later.
READ NEXT: The Best Recurve Bows
Laying Out the Bow
Turn the stave to get it as straight a line as possible from end to end, then use a chalk line to pop a line down the center of your stave. Once that’s done, you can measure off each side of the chalk line to achieve the dimensions shown below. Draw everything out with a pencil so you’ll have good reference lines for cutting out the profile.
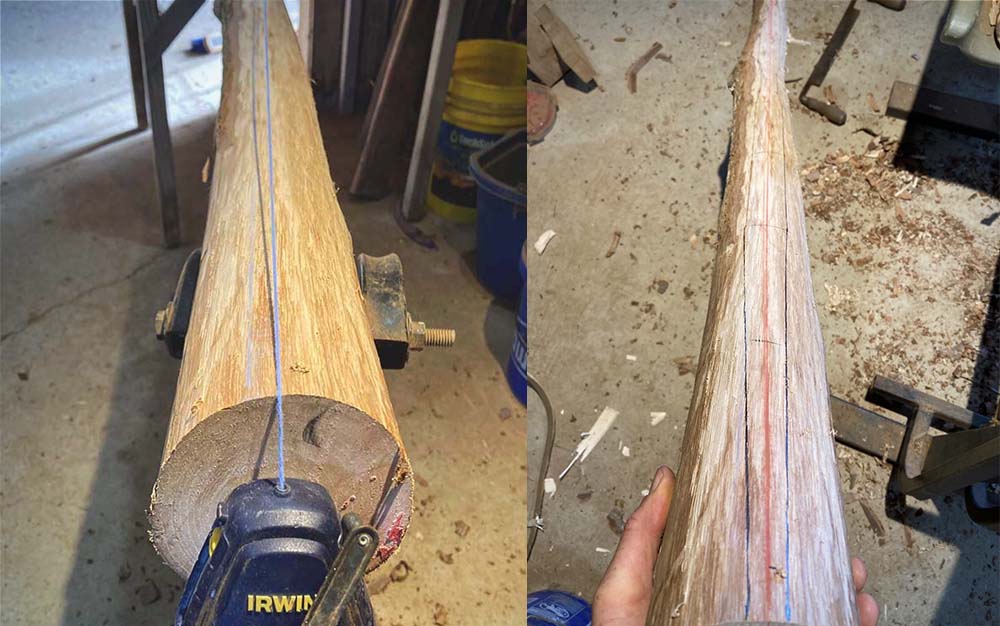
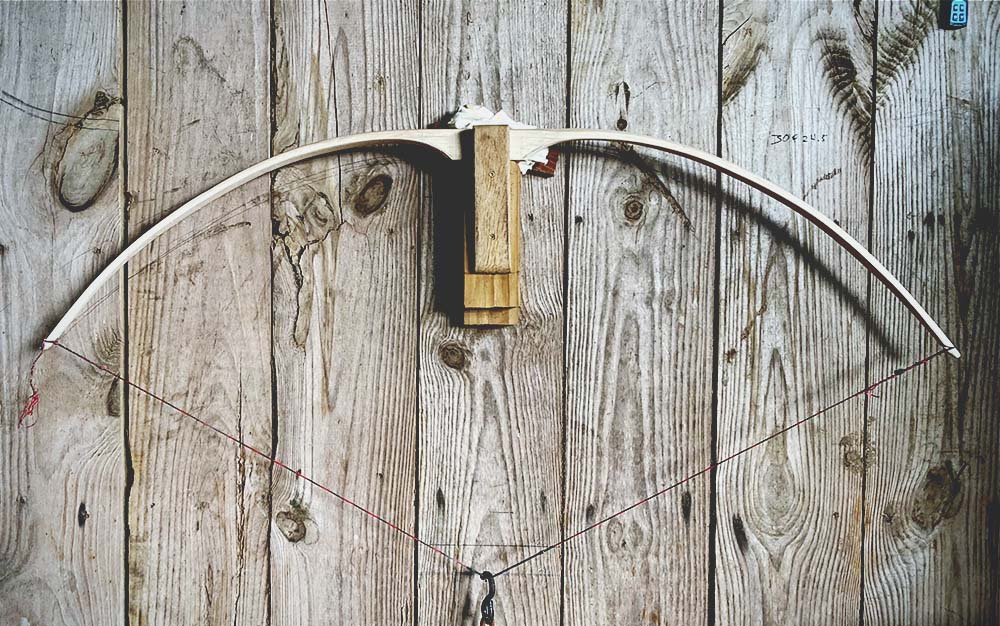
The bow you’re making will be 64-inches long and 1.5-inches wide at mid limb. The handle will be 4-inches long and about 1 1/8-inch wide. From the handle, the bow will flare out to 1.5-inch wide limbs, hold that width to approximately mid limb, then taper to half-inch wide nocks. When finished, the limb cross section should be rectangular with a nearly flat back and belly.
Roughing Out
Once you’ve drawn the limb profiles on the back of our bow, you’ll need to start taking wood off the sides and belly. If you have access to a band saw, you can use it to remove wood quickly. A hatchet or machete works just fine if you don’t have power tools. Take the sides down to the profile lines drawn on the staves back. When I’m within an 1/8-inch I’ll smooth the sides out with a sharp draw knife or farrier’s rasp and take it right down to the line, so when you look at it from the back of the bow, the profile should appear nearly finished.
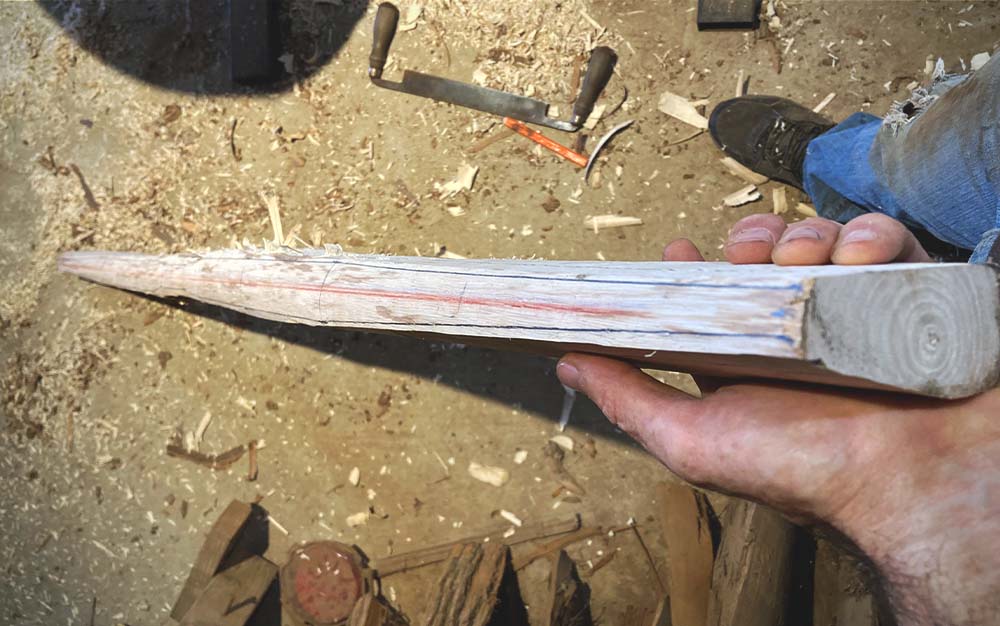
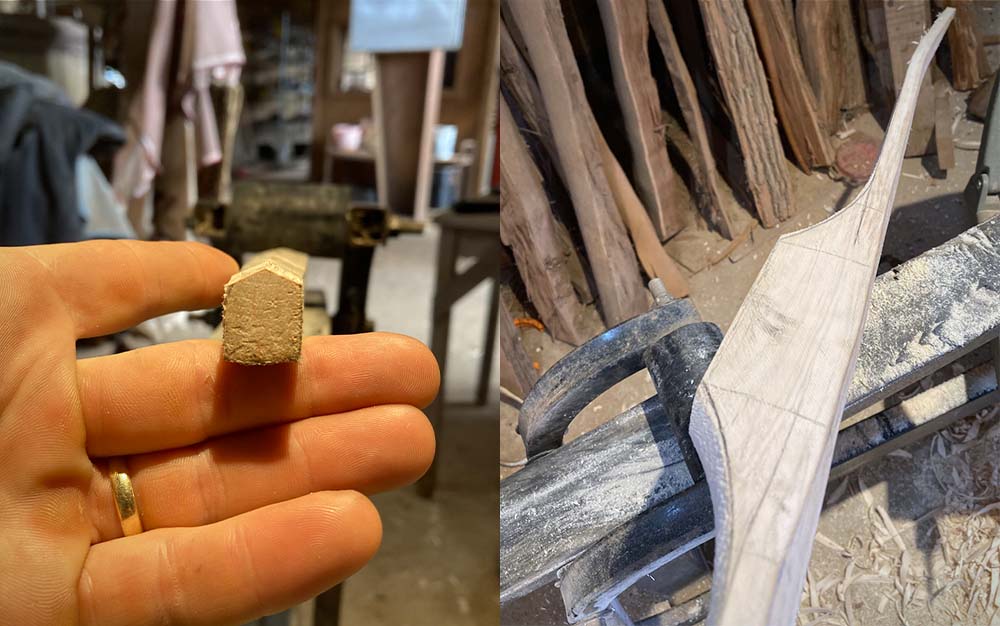
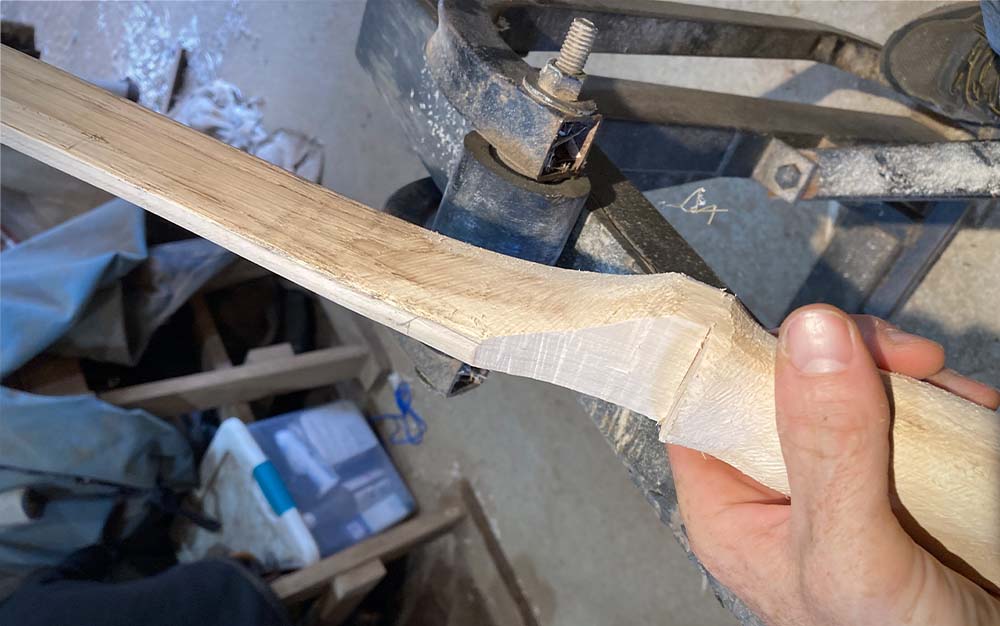
Once the back to belly profile is cut out, you’ll need to draw a reference line on the sides of the bow for the limb thickness, handle section, and fades. An old chop saw blade or other round object works great for tracing the fades. The handle should be about 2-inches deep. From there, fade to about half an inch as the line moves away from the handle section into the working part of the limbs. Next, take off the bulk of the belly wood. As with the sides, I usually use an ax or hatchet at first, then once I get close to the line, I use a sharp drawknife or rasp to even things up.
For the next step, accuracy and attention to detail are important, so pay attention. If you have a compass, set it to 3/8 of an inch and redraw the lines on the edge of the limbs. Now, use your rasp to remove wood from the belly down to those lines. The result should be a limb cross section that looks something like a house with the edges of the limbs forming the walls and the roof pitch formed by the wood you just removed. This will be close to the finished thickness of your bow’s limbs, so be careful not to remove wood below that line.
Drying the Stave
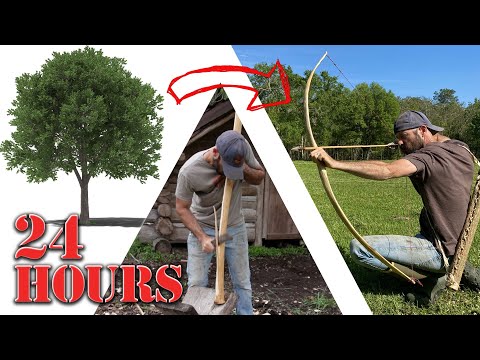
At this point, the stave will start to look something like a bow. If you’re working with a green stave (one that’s just been cut from a live tree), you’ll need to dry it before moving to the next step. The fastest way to do that is to dig a shallow trench about a foot deep, 8-inches wide, and as long as your bow. Build a hardwood fire in that trench and let it burn down to coals. On each side of the trench, place a piece of tin or plywood to hold and channel the heat, then suspend your roughed out bow above the coals overnight. Throw another piece of tin or canvas tarp over the whole works to retain the heat. In 10-12 hours, the bow should be dried to under a 10 percent moisture content. Check out my video “Primitive Bow from Live Tree in 24hrs!” to see how I did it. Of course, if you’re using a stave that’s already seasoned, you can skip all that.
Floor Tillering
At this point, you should have a stave that roughly resembles a bow. It’s still too stiff to string at this stage and wouldn’t bend evenly, so it needs tillering. Tillering is the process of removing wood from the belly of the bow in order to make the limbs bend evenly to full draw at your desired weight. Essentially, you’ll remove wood from stiff sections while not removing wood from areas that easily bend.
Start your floor tillering by pressing the tip of one limb on the ground to check the bend. You want to see a nice smooth bend. Pay attention to the arc of the individual limbs and that both limbs bend evenly. If one limb is a little stiffer, take more wood off that one until they both feel about the same. If you see stiff or weak areas, mark them with a pencil so you know where the limb is bending the most and where it’s weak.
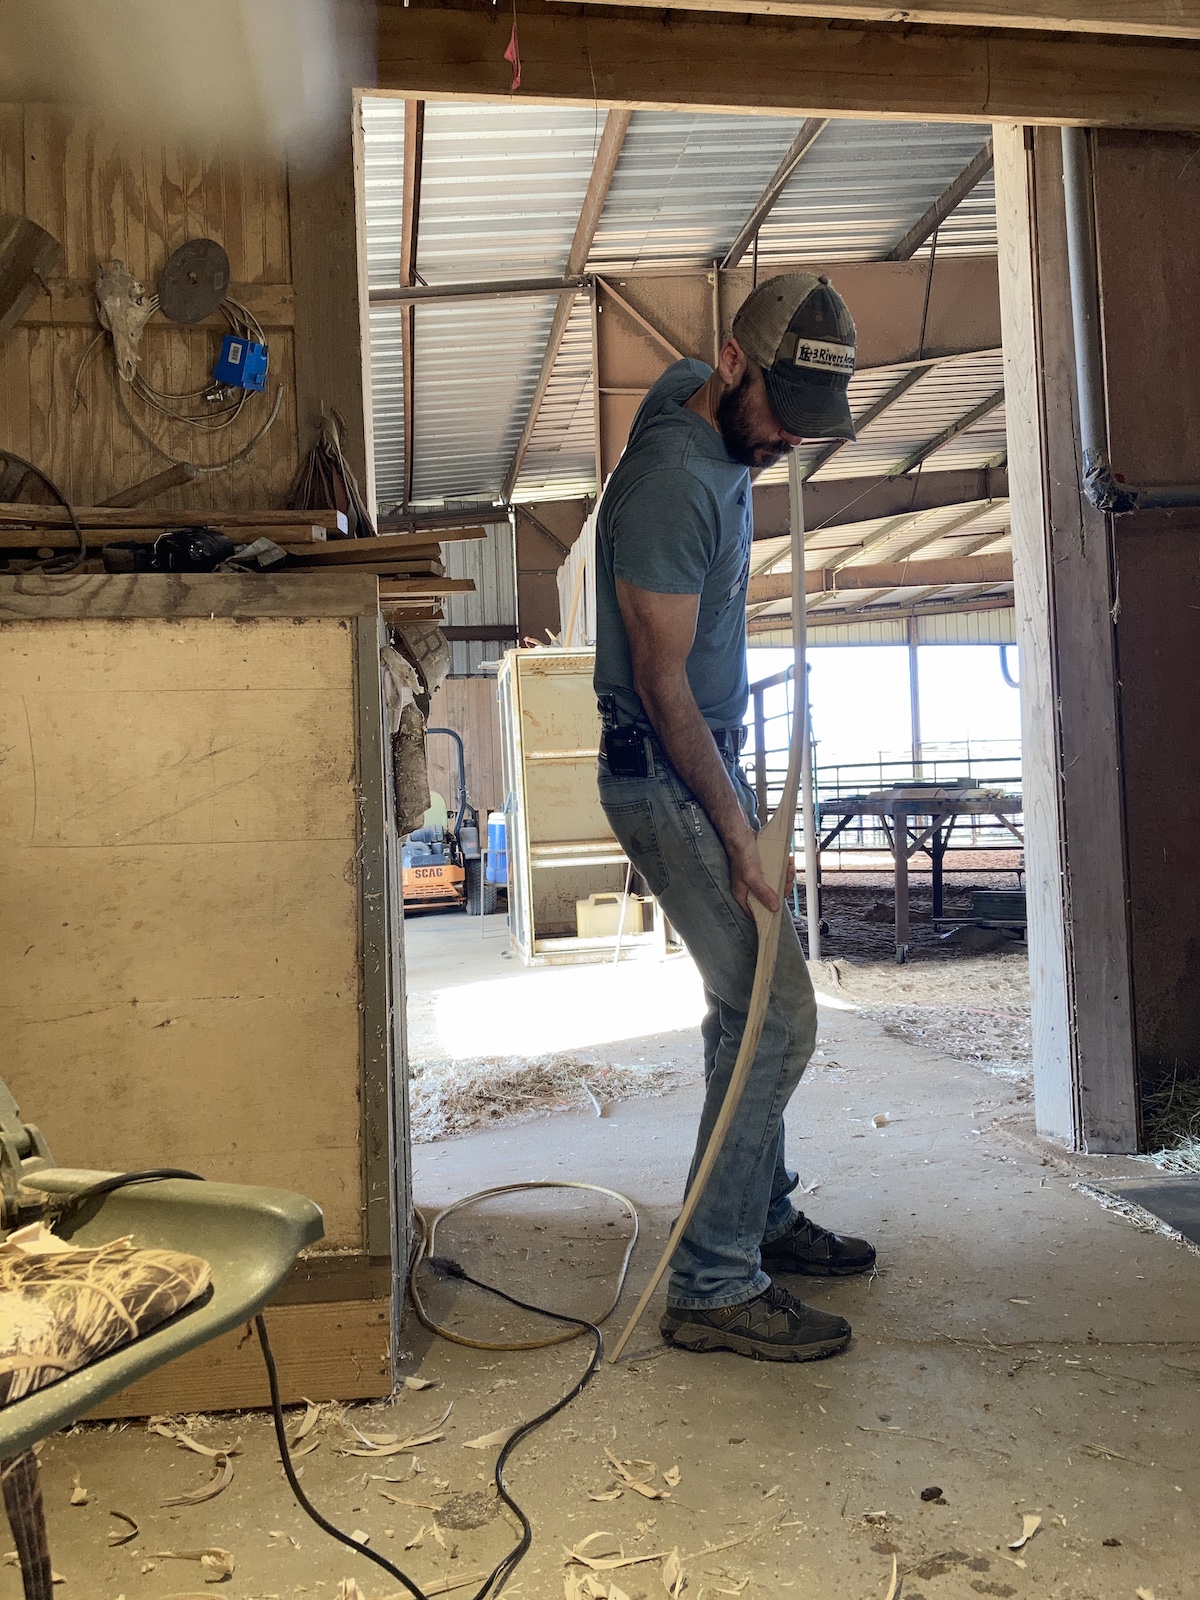
Use your draw knife turned on edge (or a cabinet scraper if you have one) to scrape wood from the stiff spots while avoiding the weak areas. In that way, you can even out the bend and make the limbs bend on a smooth arc. Take a little material off, then press the tips on the floor to see what you’ve accomplished.
When you remove wood, be careful not to take too much off in one area or start your scrapes from the same spot each time. You’ll need to feather your scrapes out to avoid creating a noticeable step down in the thickness of the wood. Our goal is to make the limbs bend in an even arc.
One problem that many beginning bowyers encounter during the tillering stage is scraping too much wood off the belly and losing track of the sides’ thickness. Because bow staves often have some small amount of propeller twist, they don’t always sit perfectly level in the vice. In other words, the limbs will often sit at an angle to the ground. So, if you always maintain a relatively level scraping tool, it’s easy to favor one side over the other, causing the raised edge to take the brunt of the scraping and end up thinner. This is a problem if you don’t catch it early. Also, if you’re working with a snaky stave, the high points will take the brunt of the scrape while the low points barely get touched. This will cause thick and thin spots as you move up and down the limb.
Throughout the tillering process, starting with floor tillering, you’ll need to constantly check that both sides of your limb are even in thickness and that the limb is a constant taper from fades to nock. The thickness taper from handle fades to nock will come naturally through the tillering process, as long as you’re careful not to create thin spots.
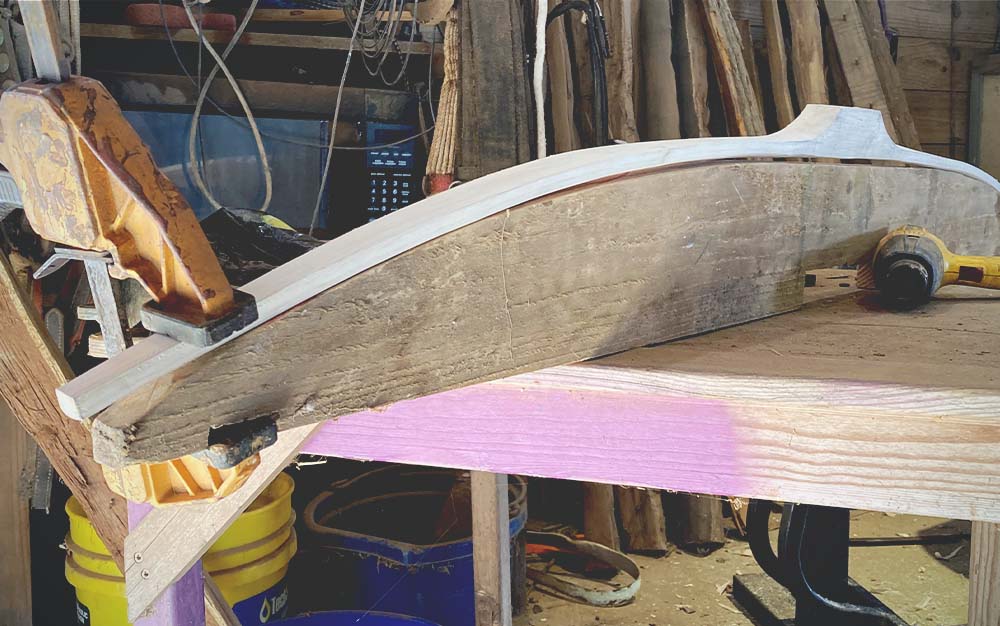
Backset and Heat Treat
Many whitewoods, hickory included, benefit greatly from clamping the bow into a form to introduce what’s known as backset. Basically, backset causes limbs to sit forward of the handle when the bow is unbraced. This makes for a quicker, more efficient bow. The forms are easy to make from a 2×6. Clamp the bow into the form as shown below and use a heat gun to heat the belly side of each limb for about half an hour each. Keep the heat gun moving and around a 1/2 inch above the limb. After about 10-15 minutes you should start to see a slight color change as the wood begins to darken. The heat will allow the stave to take on the shape of the form, and slightly harden the belly.
Filing the Nocks
Start by rounding the belly side of the limb tips just enough to get rid of the sharp corners. Then draw the lines where you want the string grooves to be. After that, file them out. It helps to use your finger as a guide when first starting the groove. You’ll need to round off all sharp edges that the string will contact, but be careful not to cut the ring on the back of the bow while you’re at it.
Final Tillering

Once the limbs bend evenly through the floor tillering process, 6 inches or so, it’s time to move to the tillering rack. At this point, you’ll need to round off any sharp edges on the back of the stave. To get started, use a long tillering string draped loosely between the nocks. Place the bow on the tillering rack and attach the pull rope. The tillering string length should be a few inches longer than the bow length. Many bowyers use a bowstring with a loop on one end and a simple timber hitch on the other end. The timber hitch allows you to make the string longer and shorter as the tillering process progresses.
Stand back and give the rope a pull. See how the limbs bend in relation to one another. Most likely you’ll see that one limb is stiff and the other is more willing to give. Also, take note of what part of the limb is bending most. This is where the limb is doing the most work. The goal at this point is to even things out. So, you’ll need to remove wood from the belly of the stiff limb and/or from the stiff portion of both limbs. Remove wood from whatever limb section you need in order to get things bending evenly on a nice arc.
The whole tillering process should be done slowly. You’ll end up making a lot of trips between the tillering block and vice as you identify stiff spots and remove wood to even out the limbs. Early in the process, you can take a lot of scrapes (40 or 50) from the belly side without significantly changing the way the limbs bend. But as you approach the final few iterations and you’re nearing your final draw weight, as few as three or four scrapes can make a difference. As things progress, you’ll need to go to the tillering rack to check the tiller more and more frequently.
One thing to note here is that wood has a kind of memory. After removing a few scrapes, you’ll need to bend the limb a few times and allow the wood to settle into its new bend. This is a small but crucial step. If you skip this step, it’s almost like the wood doesn’t know that it can bend that way and remembers its previous position until it’s overpowered and forced into the new bend by the other limb. At this point the stronger limb becomes the weaker one and you’ll need to remove wood from the other limb to even things out. Too much of this and you’ll end up with a bow that’s under your target weight. Once you’re able to string the bow, this step will become increasingly important as you move toward a finished tiller. Once you’re able to string the bow you’ll need do draw it to target weight and stress the wood, so it reveals its true bend.


In addition to looking for stiff spots where you’ll need to remove wood, you’ll also want to keep a close watch for weak spots where the limb bends more than anywhere else. These areas should be expected early in tillering, so don’t let them worry you. You just need to take a pencil and mark them clearly so you can avoid removing any more wood from that area until you remove enough from the stiff spots to even the arc of the limbs out. If you continue to take wood from that area before evening out the arc, they’ll turn into a hinge. A hinge is an area where the limb makes a very noticeable, angle like bend. If that happens early in the process, you still have time to fix it. If it happens late, you have to take the rest of the limb down to match that weakest spot which will produce a bow under your target weight.
When you get the bow’s limb tips down to where they would be if the bow was braced, without putting undue pressure on the bow, you’re ready to shorten the tillering string and brace the bow. This will probably be difficult the first time, as the bow will likely still be very heavy. If you can’t get the string on, take off a little more wood.
Once you get it braced, give it a short draw to feel the weight. Be careful here, though. You don’t want to draw the bow far beyond your target weight. For example, if you’re looking for a 50-pound bow, don’t put more than about 60 pounds of force on the string, even if you’re reaching that weight at only 15 inches of draw. Trying to pull it past that target weight will stress the wood more than needed and lead to additional and unnecessary string follow.
Continue the tillering process until you get the bow drawn close to your final draw length without going over your desired draw weight much. As long as the limbs look symmetrical and there are no obvious weak spots, keep drawing the bow down a little at a time until you get close to your draw length.
You can make final adjustments to the tiller while the bow is strung. Be careful not to nick the string with your scraper. Take a few scrapes away where needed, then flex the limbs to get rid of the memory and allow the wood to settle into its new arc.
Reducing Weight
With the bow strung and nearly at full draw but not exceeding your desired draw weight, you can continue removing a few scrapes at a time until you reach your target weight. I prefer to do the final weight reduction with the bow strung. This saves time otherwise wasted in stringing and unstringing. More importantly, it allows you to keep a close eye on the tiller. At this point, go slow. Just a few scrapes can have a noticeable effect on how the limbs are bending. Take a few scrapes off each limb, then draw it to check the weight. Keep removing wood slowly, until you reach your desired weight at your draw length. Once you get there, the bow is pretty much done. Some people prefer to leave the bow like this and use their bow hand as the arrow shelf. There’s nothing wrong with that, but I prefer to cut out a shelf on the bows I make.
Arrow Shelf
How deep you can cut the shelf will depend on the depth and design of the handle and fades. Just be sure to stay within the stiff handle/fade area and not extend the shelf into the bending part of the limb. Also, don’t get too caught up in trying to make your bow “center shot” by cutting the shelf too deep. Just cut it in far enough to keep the arrow on the rest.
Finish Work
Now you’ll need to sand everything down and seal it to protect the bow against the elements. For wood bows, a good sealer is an absolute must. I usually start with a good 80-grit sandpaper for the heavy tool marks and work my way down to 220. When sanding, especially with coarser grits, be careful not to take too much off in one area. You can change the way the bow bends if you do. After the 220 a good rubdown with 00 steel wool will really shine things up. One of the down sides of hickory is that it tends to soak up humidity, which can raise the moisture content and cause the bow to follow the string (stay bent instead of springing back when unstrung) in a bad way. To help guard against that, you’ll need to seal it well. I use seven or eight coats of spar urethane or Tru-Oil.

How to Make Arrows

The video above walks you step-by-step through the process of making wood arrows for your selfbow.
Here are the steps for building a set of wood arrows:
- Order shafts in the proper spine
- Taper the nock and point ends
- Seal and stain the shafts
- Install the nocks and points
- Fletch the shafts
Read Next: The Clothing That Helped Me Win Season 8 of “Alone”
Final Thoughts on How to Make Your Own Bow and Arrow
Learning how to make a bow and arrow isn’t for everyone. It’s a lot of work, as you can see. Your first few attempts won’t be perfect, but you’ll learn and improve with every handmade bow and arrow you make. You may even break a few before turning out one that will shoot. Persist and you’ll get it figured out. And when you do, you’ll know that you did that. If you decide to take it one step further and hunt with your hand-crafted weapons, you’ll struggle as you push the boundaries of your capabilities. Like making the bows, you’ll try, fail, learn, and try again. Then, some crisp October morning you’ll find yourself following a bright red trail with your own wood bow in hand.
About Clay Hayes
The author is a wildlife biologist, backcountry hunter, and experienced outdoorsman. After building his first successful bow in 1999, he has introduced thousands of people to archery through his books, magazine articles, and videos. He is the Season 8 winner of the survival show “Alone.”