If you’re ever caught off guard in the wilderness, and the snow is deep, getting back to civilization may not be easy. Not only will you have to deal with the cold temperatures, you’ll have to find a way to travel through tough conditions.
Being under-dressed for a wintry environment is a key factor in many winter hypothermia cases, and it can also make walking through deep snow a nightmare. In fact, slogging through white powder without snowshoes is often called “post holing” because you leave what looks like a row of deep holes in the snow and likely dampen your clothes and feet in the process. Such work is a massive drain on your energy, and you’ll soon be exhausted and soaked in sweat—a bad combination even if the thermometer doesn’t drop below 32 degrees.
Thankfully, avoiding winter trouble is easier than you’d think. In a pinch, you can build improvised snowshoes and string of other related winter accoutrements. In addition, here are a few quick-thinking steps you can take to survive a snowy winter emergency.
Insulate Your Clothing
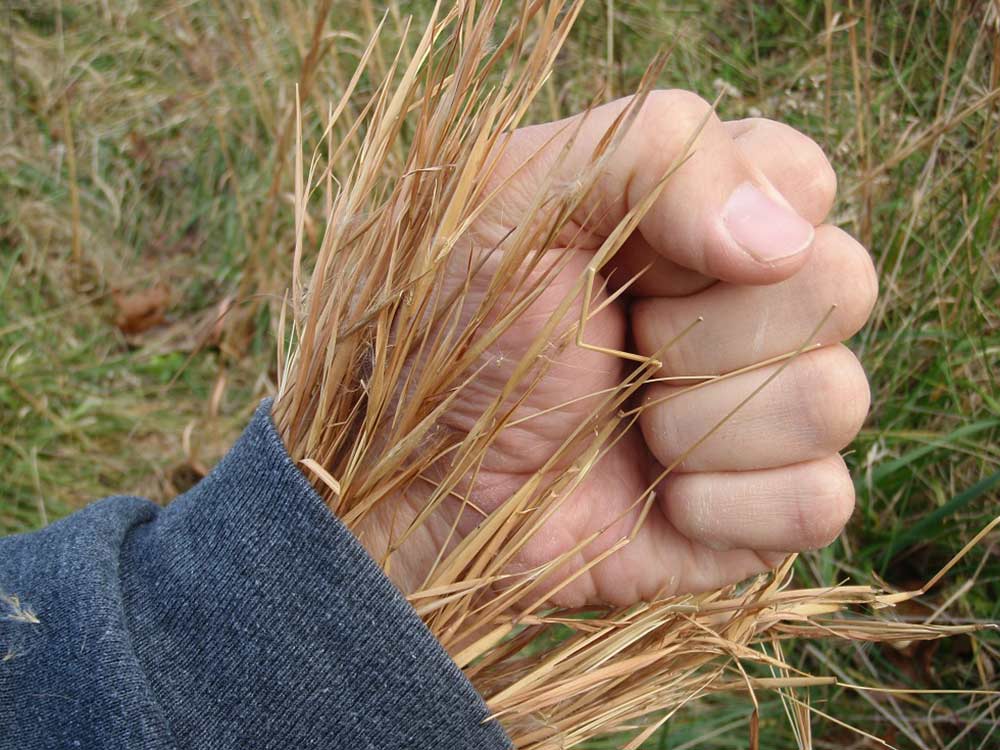
If the weather takes an unexpected turn and your clothes aren’t keeping you warm, you can stuff them with natural, insulating materials to make them warmer. The goal is to create dead air space around your body, so the elements cannot strip away your body heat as easily. Tree leaves, grass, moss, ferns, pine needles, bark fibers, and weed tops make great insulation. Cattail fluff is a great choice and it’s easy to pluck from the top of tall seed stalks that stick up out of the snow. Yes, any of these materials can be itchy and prickly on your skin, especially the pine needles and grass—but would you rather be uncomfortable or frozen? Natural stuffing can be live or dead material, but dead is usually a better choice. The materials can also be wet or dry, but if you are already hypothermic, your cold skin may not warm up the wet insulation to a point where it can help you.
The best way to effectively use extra insulation in your clothing is to start at the bottom and work your way up. Select the loosest clothing you have for an outer layer so you can fill the layer between your clothes and your skin (or your base layer). If you only have one layer of clothing, then you have no choice but to put the insulation in the clothes, next to your skin. Tuck your pants into your socks, undo your pants, fill both legs of your pants with insulation on all sides, and then try to get your pants secured again. Next, turn your attention to your top half. Tuck your shirt into your pants and fill the front, back and both sleeves with insulation. You should look like a scarecrow on the yellow-brick road, but you should also be warm by the time you are done. Lastly, pull up your hood, or put on a hat filled with insulation. This get-up is itchy, prickly, crunchy, and ridiculous looking, but it might also save your life.

Fire Over Ice
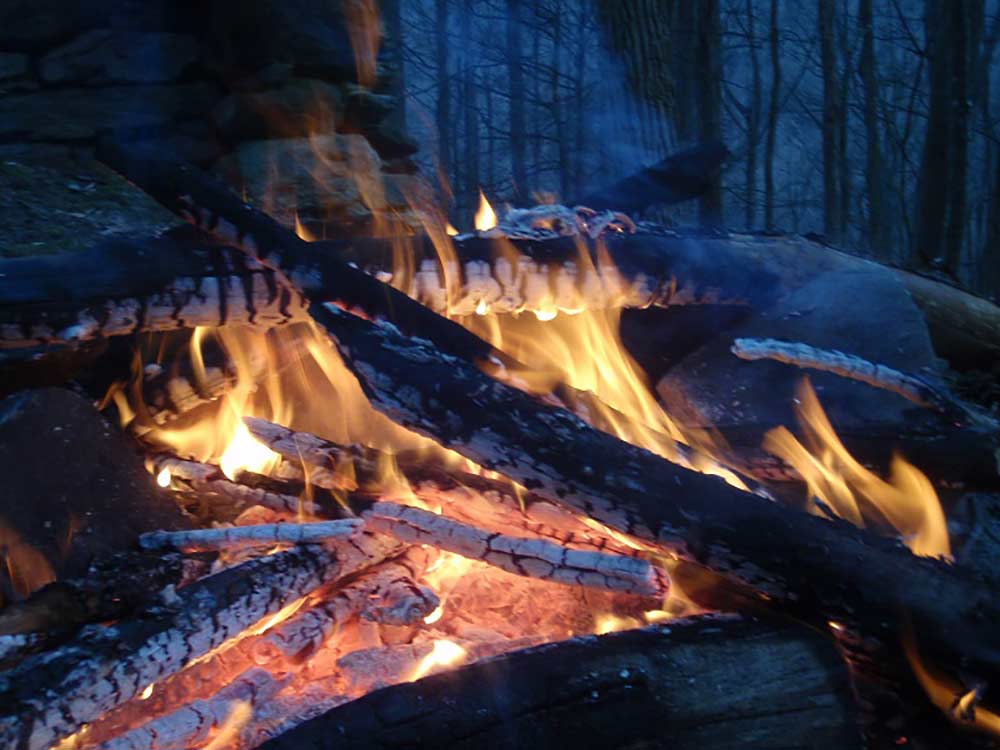
Building a fire on top of snow is one of those things you never really think about until you have to do it. In areas with little snow, you can always dig down to the soil surface to build your fire. But if the snow is especially deep, and you lack digging tools or you don’t have time to dig, a fire on top of the snow may be your only option. Less experienced outdoor enthusiasts often get a rude shock the first time they try burning a fire directly on the snow. The fire starts out normally enough. Then the snow melts under it, which puts out your coals and leaves you with no fire and a jumble of wet, black sticks.
The thing you need to build fire on top of frozen water is material to form a “raft.” You can use a manmade material like a piece of metal with some logs under it, so the metal doesn’t melt the snow below. If you don’t have metal, you can make a raft from dead wood, rotten wood or fresh cut (green) wood. The latter is the best of the foraged materials, because the live wood has enough moisture in it to keep it from burning for a few hours, but not so much moisture that it puts out your burning sticks or bed of coals. You can use whole chunks of wood, or split the wood in half to create a flat raft. Obviously, the whole pieces will last longer than split wood, and you can replace raft materials as needed. You can even use this trick to burn a fire out on an ice sheet, though it’s hazardous.
Carry a Natural Heater
After you have your fire on the snow, try to find a few exposed rocks to use as portable heaters. Stones can hold a lot of heat, and radiate that warmth for a long time when properly insulated. Look for rocks in high, dry areas. Never use rocks from a wet area because they may have trapped moisture, which can cause them to explode when heated. Avoid glasslike or crystal filled stones, and don’t use slate or shale either since they are prone to explode and break near heat. Heat your stone(s) near the edge of a campfire—not directly in the fire or over the coals. Make the rocks fairly hot to the touch, but not hot enough to melt your synthetic clothing (or your skin). When you hold a rock under a coat or jacket, it can stay warm for about an hour, and if you use small rocks, you can walk around with them.
DIY Snowshoes: Step 1
Now the you’ve insulated your clothes, made a fire, and even warmed up a rock to carry around as your own portable heater, it’s time to make gear to get you home through the deep snow. There are many different ways to make snow shoes, and the crudest and quickest method is to strap a bundle of evergreen boughs underneath each foot—though it’s a cumbersome task that does little to improve traction.
The best way to make snowshoes (and the most traditional way) is to weave cordage throughout a tear-drop-shaped wooden frame. A complete set is lightweight and strong, but its very time consuming to create and requires a lot of cordage.
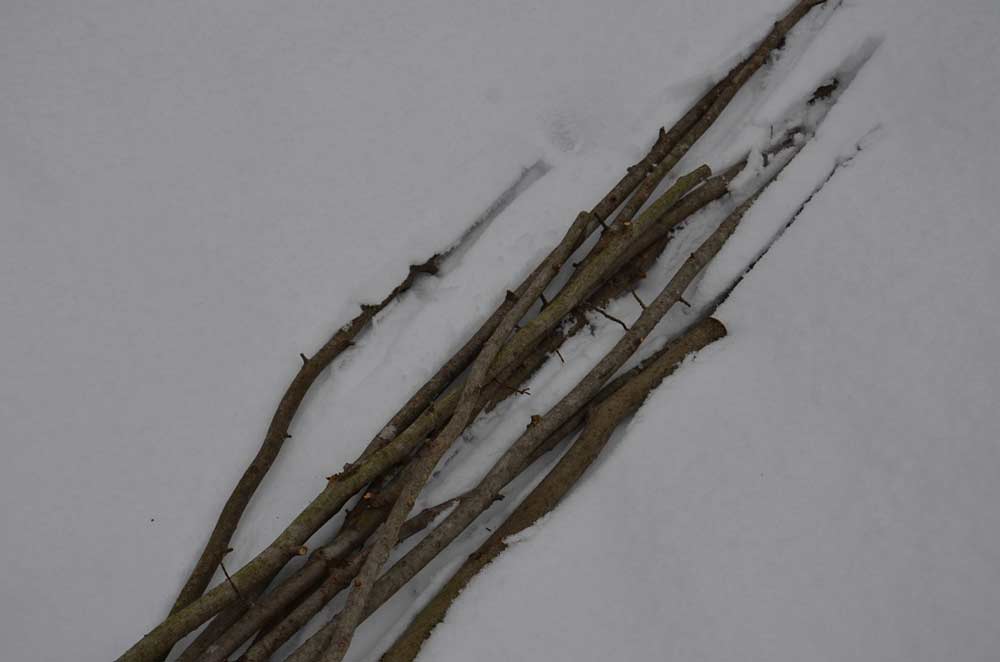
A good compromise is a pair of stick snowshoes, which will have you hiking quickly enough and offer better performance than branch bundles under your feet. Get started by collecting some fresh cut sticks. They can be living or dead wood, branches or saplings—as long as they are flexible. Cut eight sticks as long as the length from your foot to your armpit (four feet for each snow shoe). Cut another stick that is several feet long to cut smaller for the crosspieces of the shoes. You’ll also need about 50 feet of thin, strong cordage.
Step 2
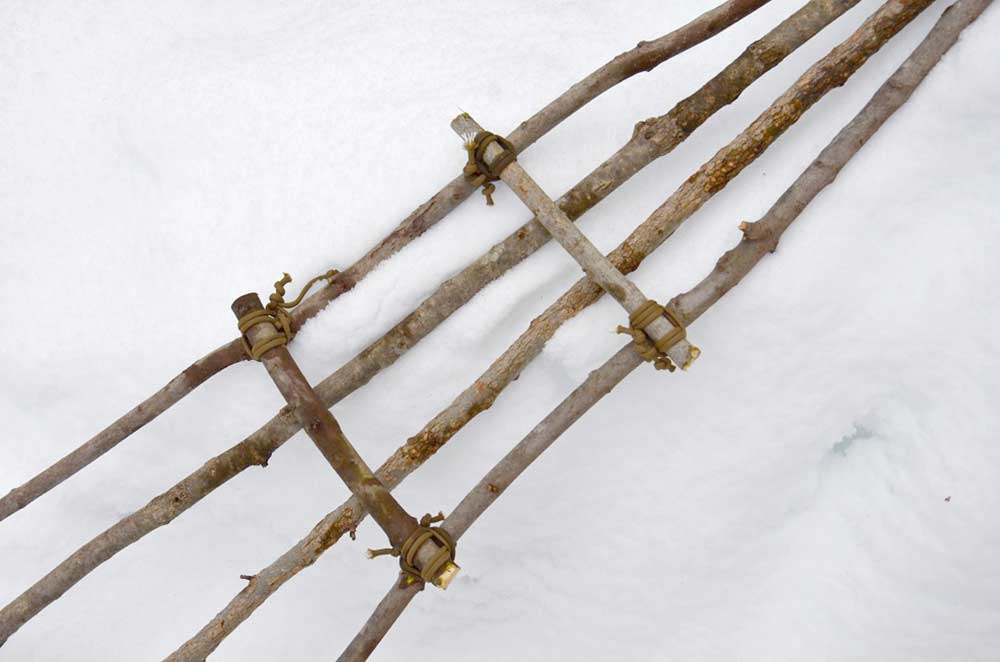
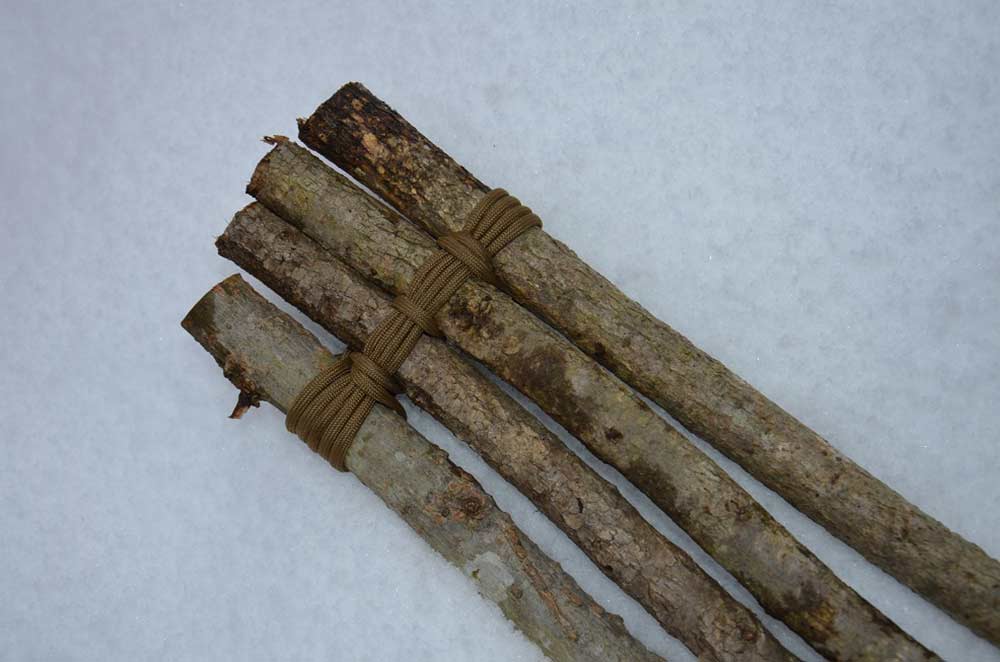
After assembling your materials, separate your eight long sticks into two bundles of four. Align the cut ends of one bundle and lash them together. Do the same with the other bundle. I like to use a modified tripod lashing technique (because there are 4 legs instead of 3). I used 550 cord for this pair in the images, so unless you use smaller-diameter cordage, tie your knots well if you follow this example, because 550-cord knots, lashings, and hitches can creep, drift, and come undone in ice-cold conditions.
Step 3
Mark a point about one foot from the lashed end of each bundle and attach a cross piece that is roughly 8-inches long across each bundle. This is where your toes will sit. Tie a knot to last a similar stick about 8 to 9 inches behind the first cross piece (or make your best guess given the length of your foot). This second stick is where your heel will hit on the snow shoes. Use tight square lashings for each connection. If crosspieces are in the right place, your toes should be covering the first stick you tied, and your heels should be covering the second stick you tied, for each shoe.
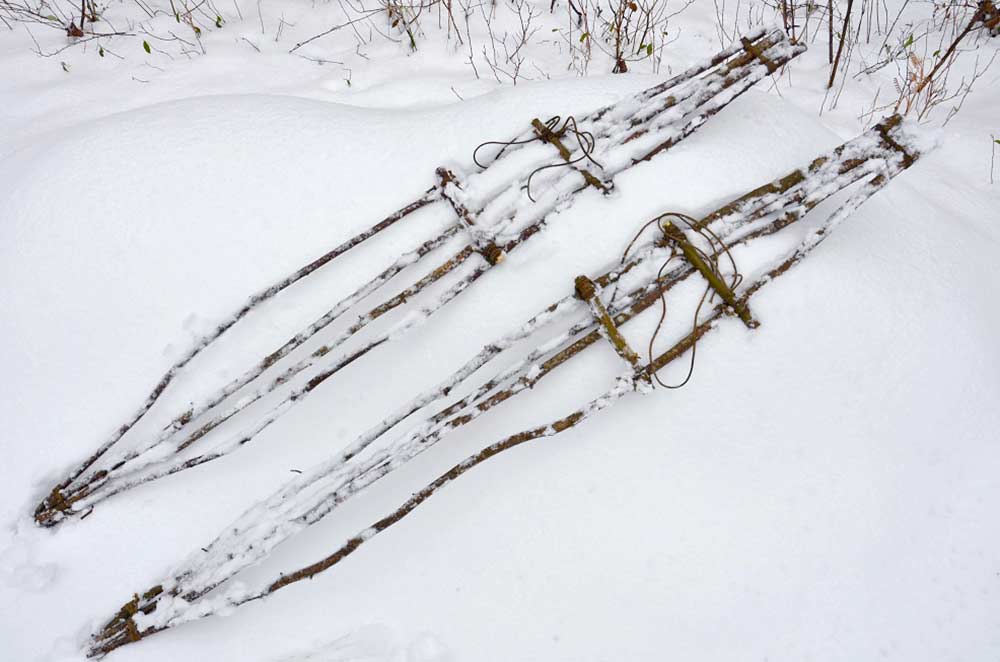
Finish by lashing together the loose tips of each shoe with another modified tripod lashing. The finished product should be a pair of “cigar-shaped” snowshoes that are durable and won’t fall apart.
Step 4
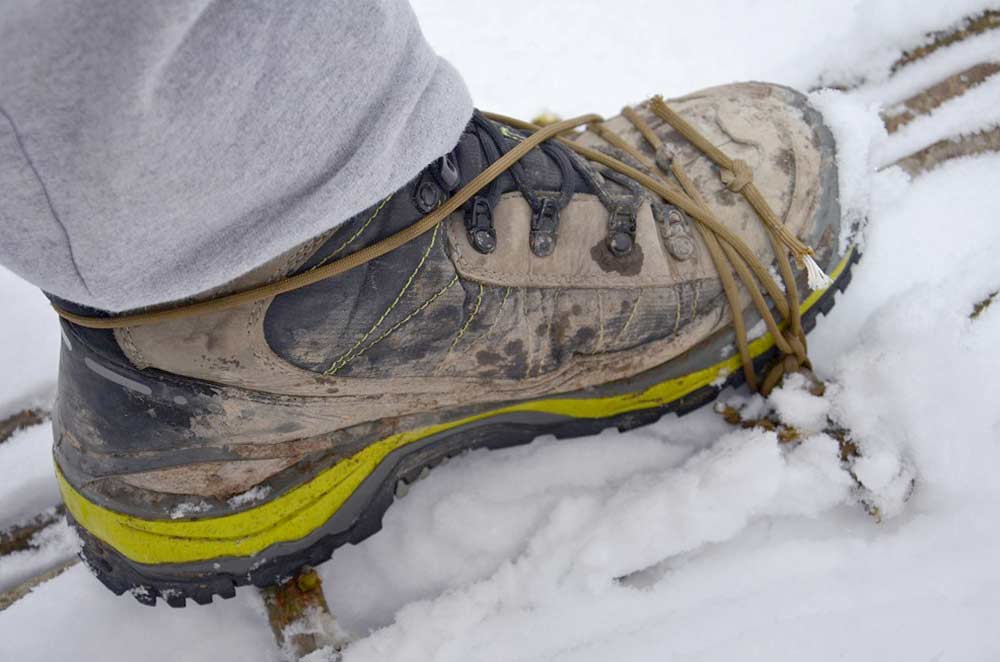
Using more cordage, attach one snowshoe to each foot. Focus on tying down the toe area of each boot, then wrap line around your boot heel to help keep the snowshoe attached. It’s important to remember you’re not tying your heel down to the shoe—just wrap the cord behind your foot to keep it from slipping off. You’ll need the binding to allow your heel to lift up with each step.
After the shoes are strapped to your boots, you’re ready to go! These snowshoes are surprisingly effective at dispersing bodyweight over snow. For best results, use some poles or improvised walking sticks to help you tread through the white stuff.
Step 5
Because wind can build drifts of deep snow over holes, effectively hiding them from view, using a pole as a probe to detect divots can be a lifesaver in deep and uneven snowpack. The probe can also be used as a walking stick, or as a tool for ice fishing.
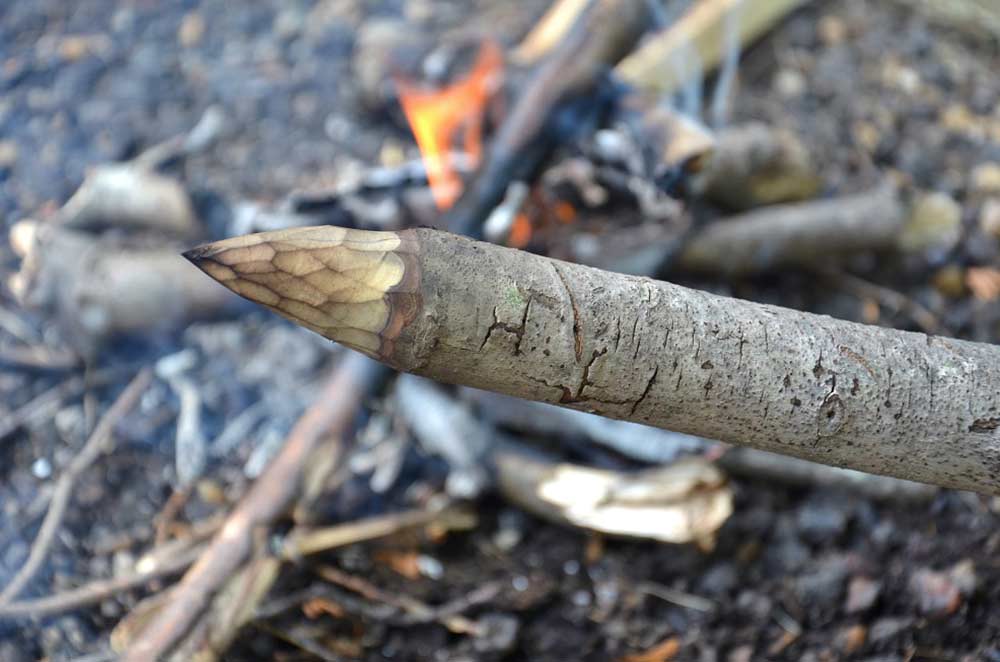
Cut a sapling that is strong and straight, and with a sturdy section that matches your height. You can sharpen one end, though it’s not necessary. To make it even more durable, fire-harden your sharpened end by toasting the point over a fire until it gains just a little color.
Read Next: 10 Tips for Starting Fire in Bad Weather
Use the probe by sticking it into the snow to test prospective places to step. If you feel a void or place of less resistance under the snow, don’t step there (even with snow shoes on). A probing tool like this can be vital when crossing glaciers and other terrain, which commonly have holes, crevasses, water, and other hazardous features under the snow. Make one and carry it with you, since you never know when you’ll need it.