We may earn revenue from the products available on this page and participate in affiliate programs. Learn More ›
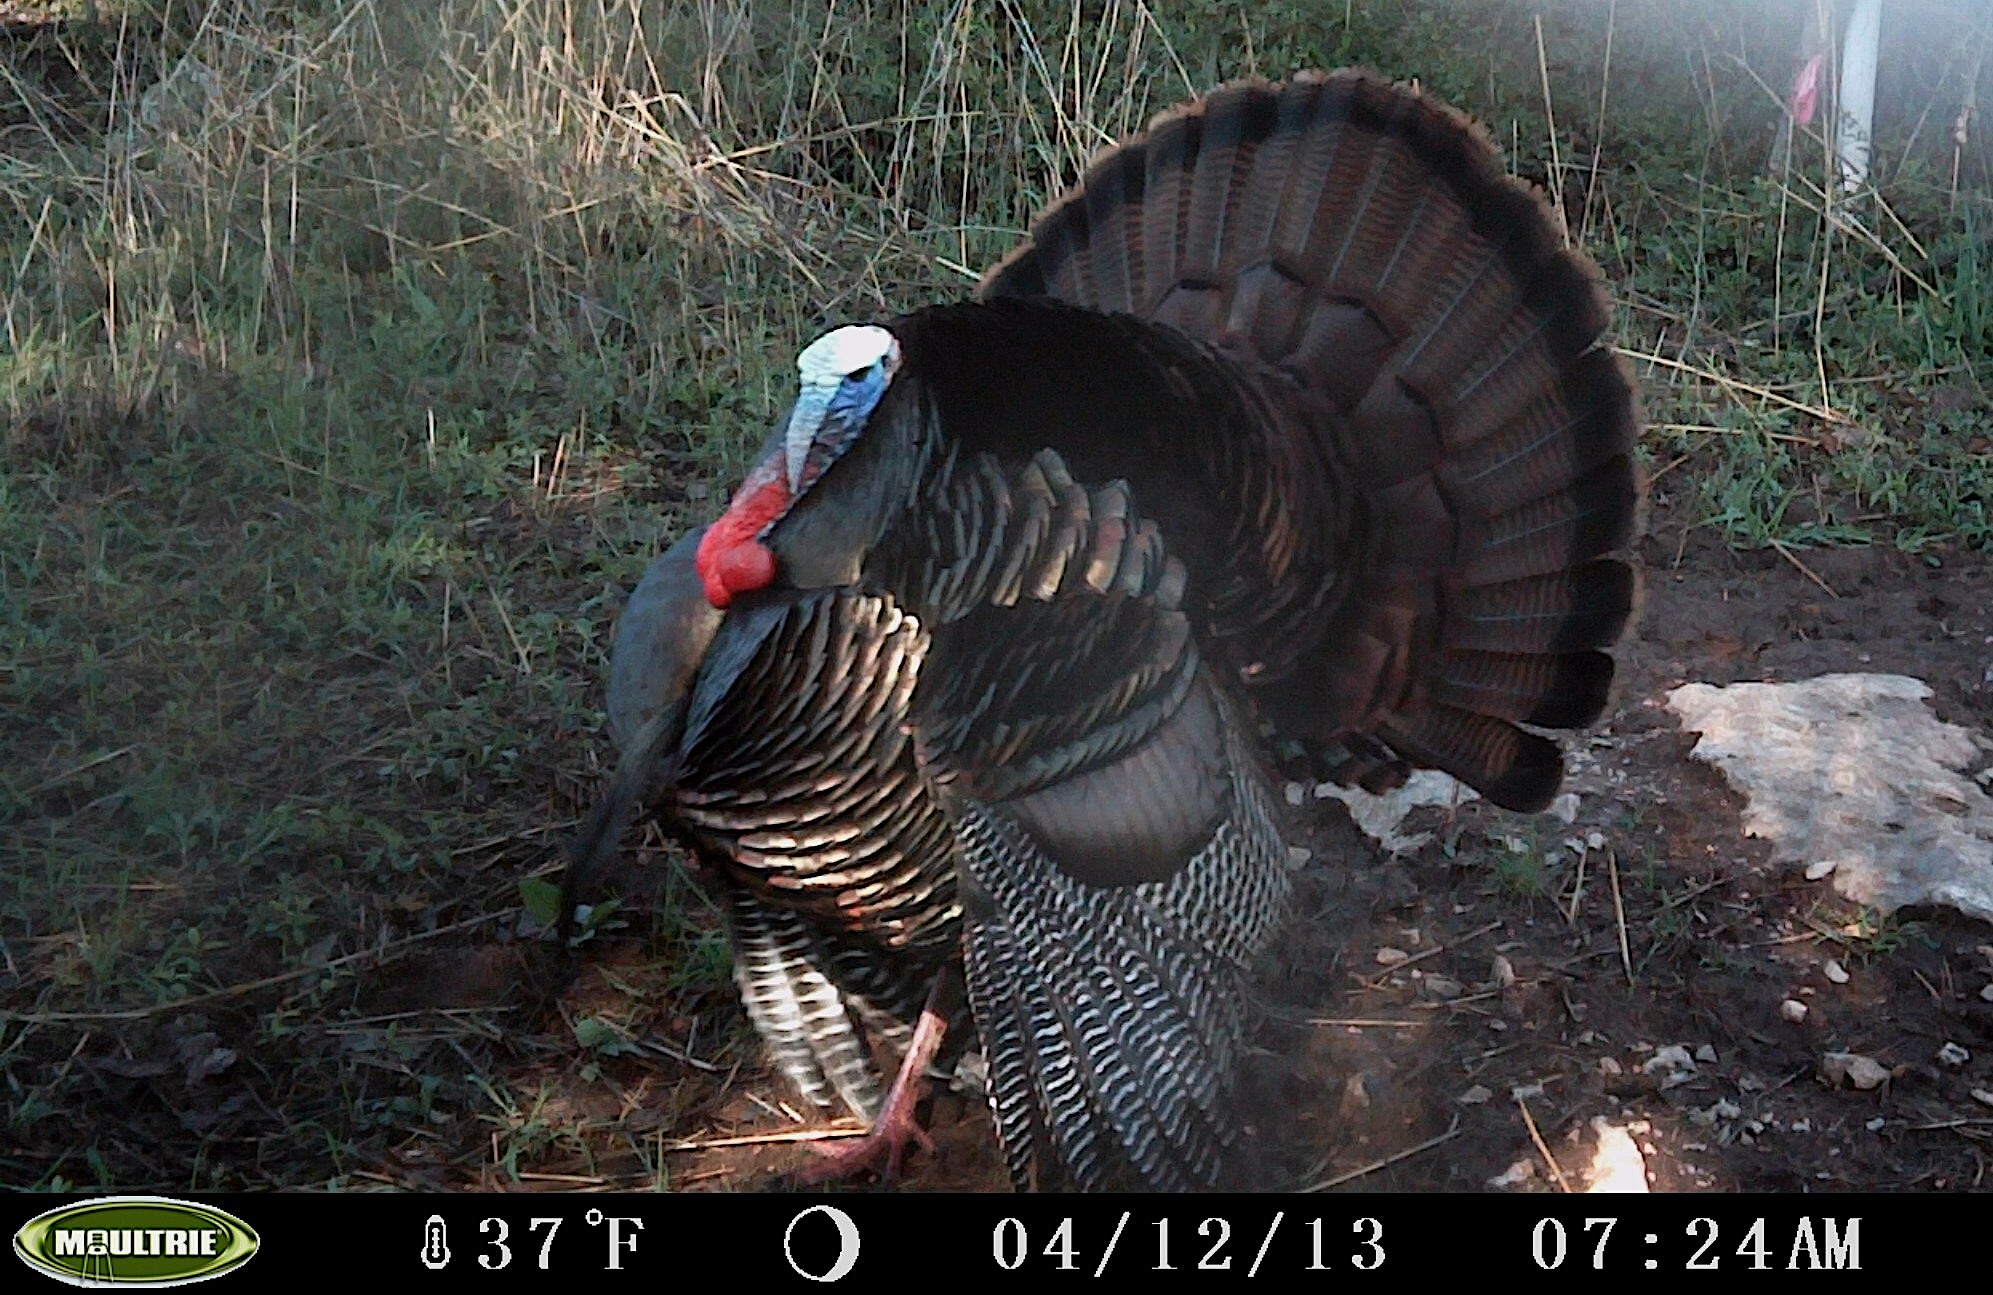
The tactic of using trail cameras for turkey hunting took far too long to become popular. Trail cams have been used to scout whitetails for decades. Of course, some people started using them for turkeys early on, too. But many turkey hunters have only recently bought in, and many more aren’t using trail cameras at all. Scouting turkeys with trail cameras is something all types of turkey hunters can benefit from. Run-and-gun gobbler chasers still need to know flock numbers, turkey patterns, and likely hotspots to try. Low-key blind sitters can use trail cameras to pattern turkeys and decide the best times to sit their spots.
Trail cameras help with both aggressive and passive turkey hunting tactics. Here are the keys to get the most out of your trail camera turkey scouting strategy.
Where to Hang Trail Cameras for Turkeys
Location is everything. Positioning cameras in potential turkey hunting honey holes is the goal. Of course, sometimes you strike out, and other times you hit a home run. Most of the time, it’s somewhere in between.
Open Areas
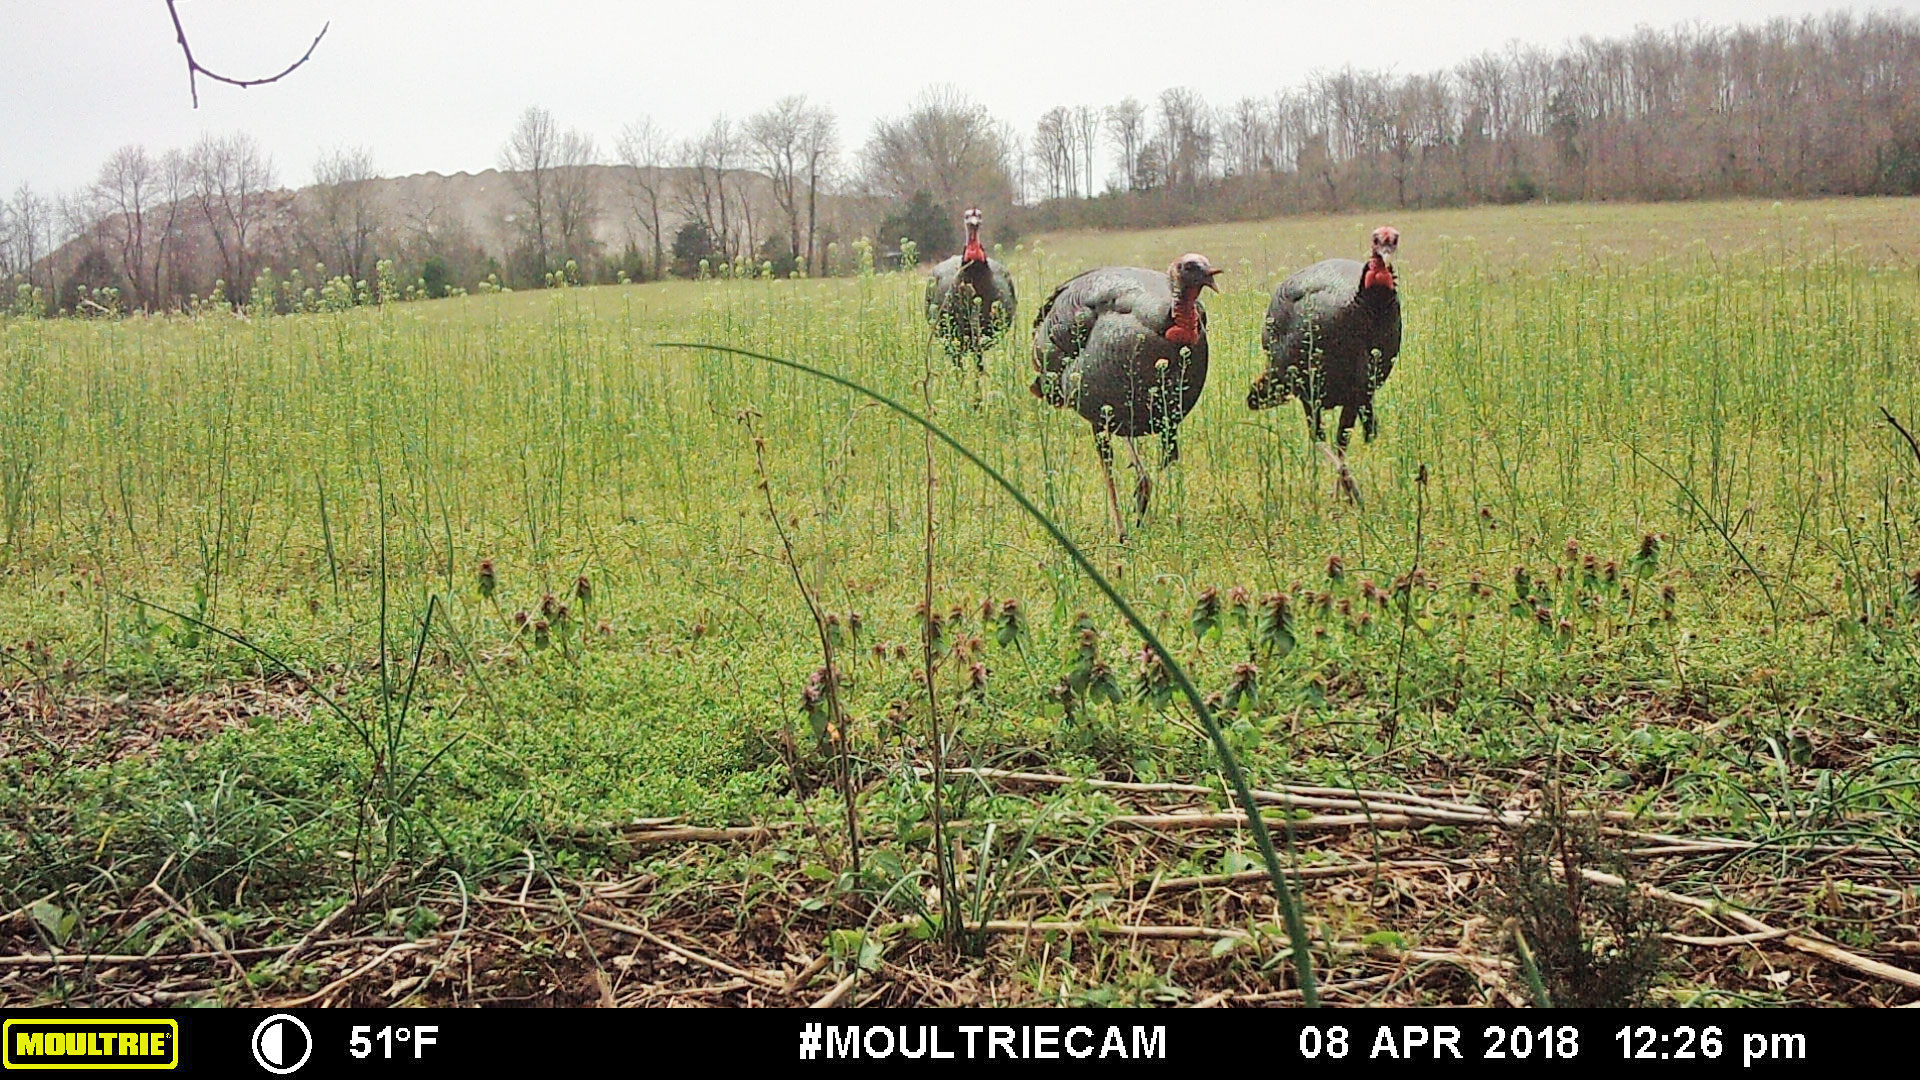
Start with open areas. Ag fields, food plots, and grassy openings are ideal spots to catch turkeys in the morning and evening. Open meadows and timber with minimal ground-level cover can be good all-day hotspots.
Cover and Roosts
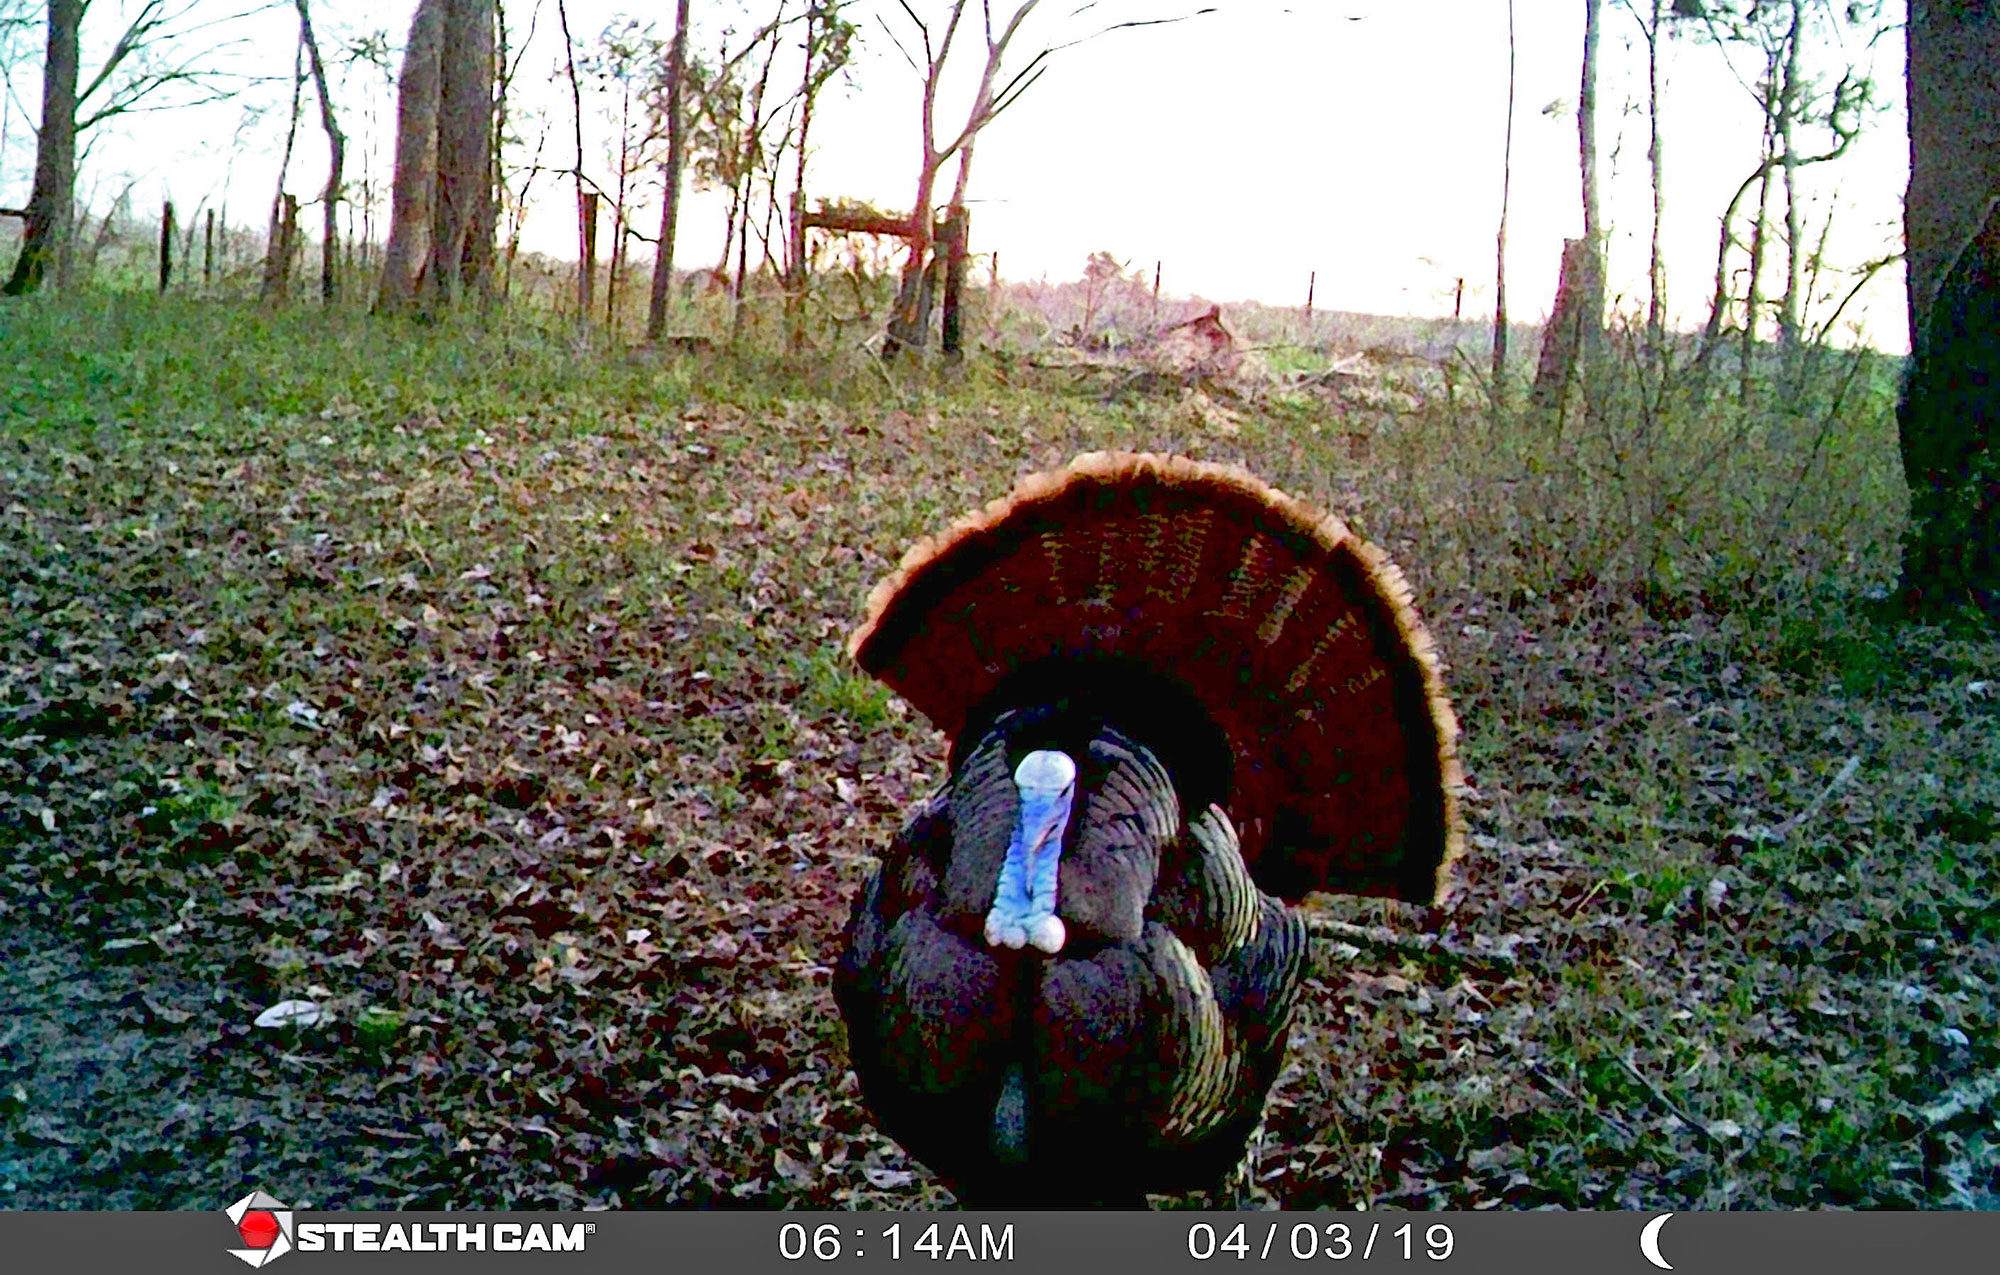
Areas that offer cover are good, too. Turkeys need quality roost trees. Roost fly-up and fly-down zones are ideal camera locations. Hens won’t be far from nesting cover, either, and toms won’t be far from hens. Plus, on warmer days, shaded areas offer reprieve from the heat. Mature hardwoods are great feeding and loafing areas, and they’re good roosting areas as well. Likewise, stands of conifers, such as cedars and pines, offer cover from the elements. If you have a good idea of where turkeys are roosting, post cameras around it to learn how turkeys are entering and exiting the roost. The earlier and later you capture photos of them, the closer you are to the roost area itself.
Travel Routes
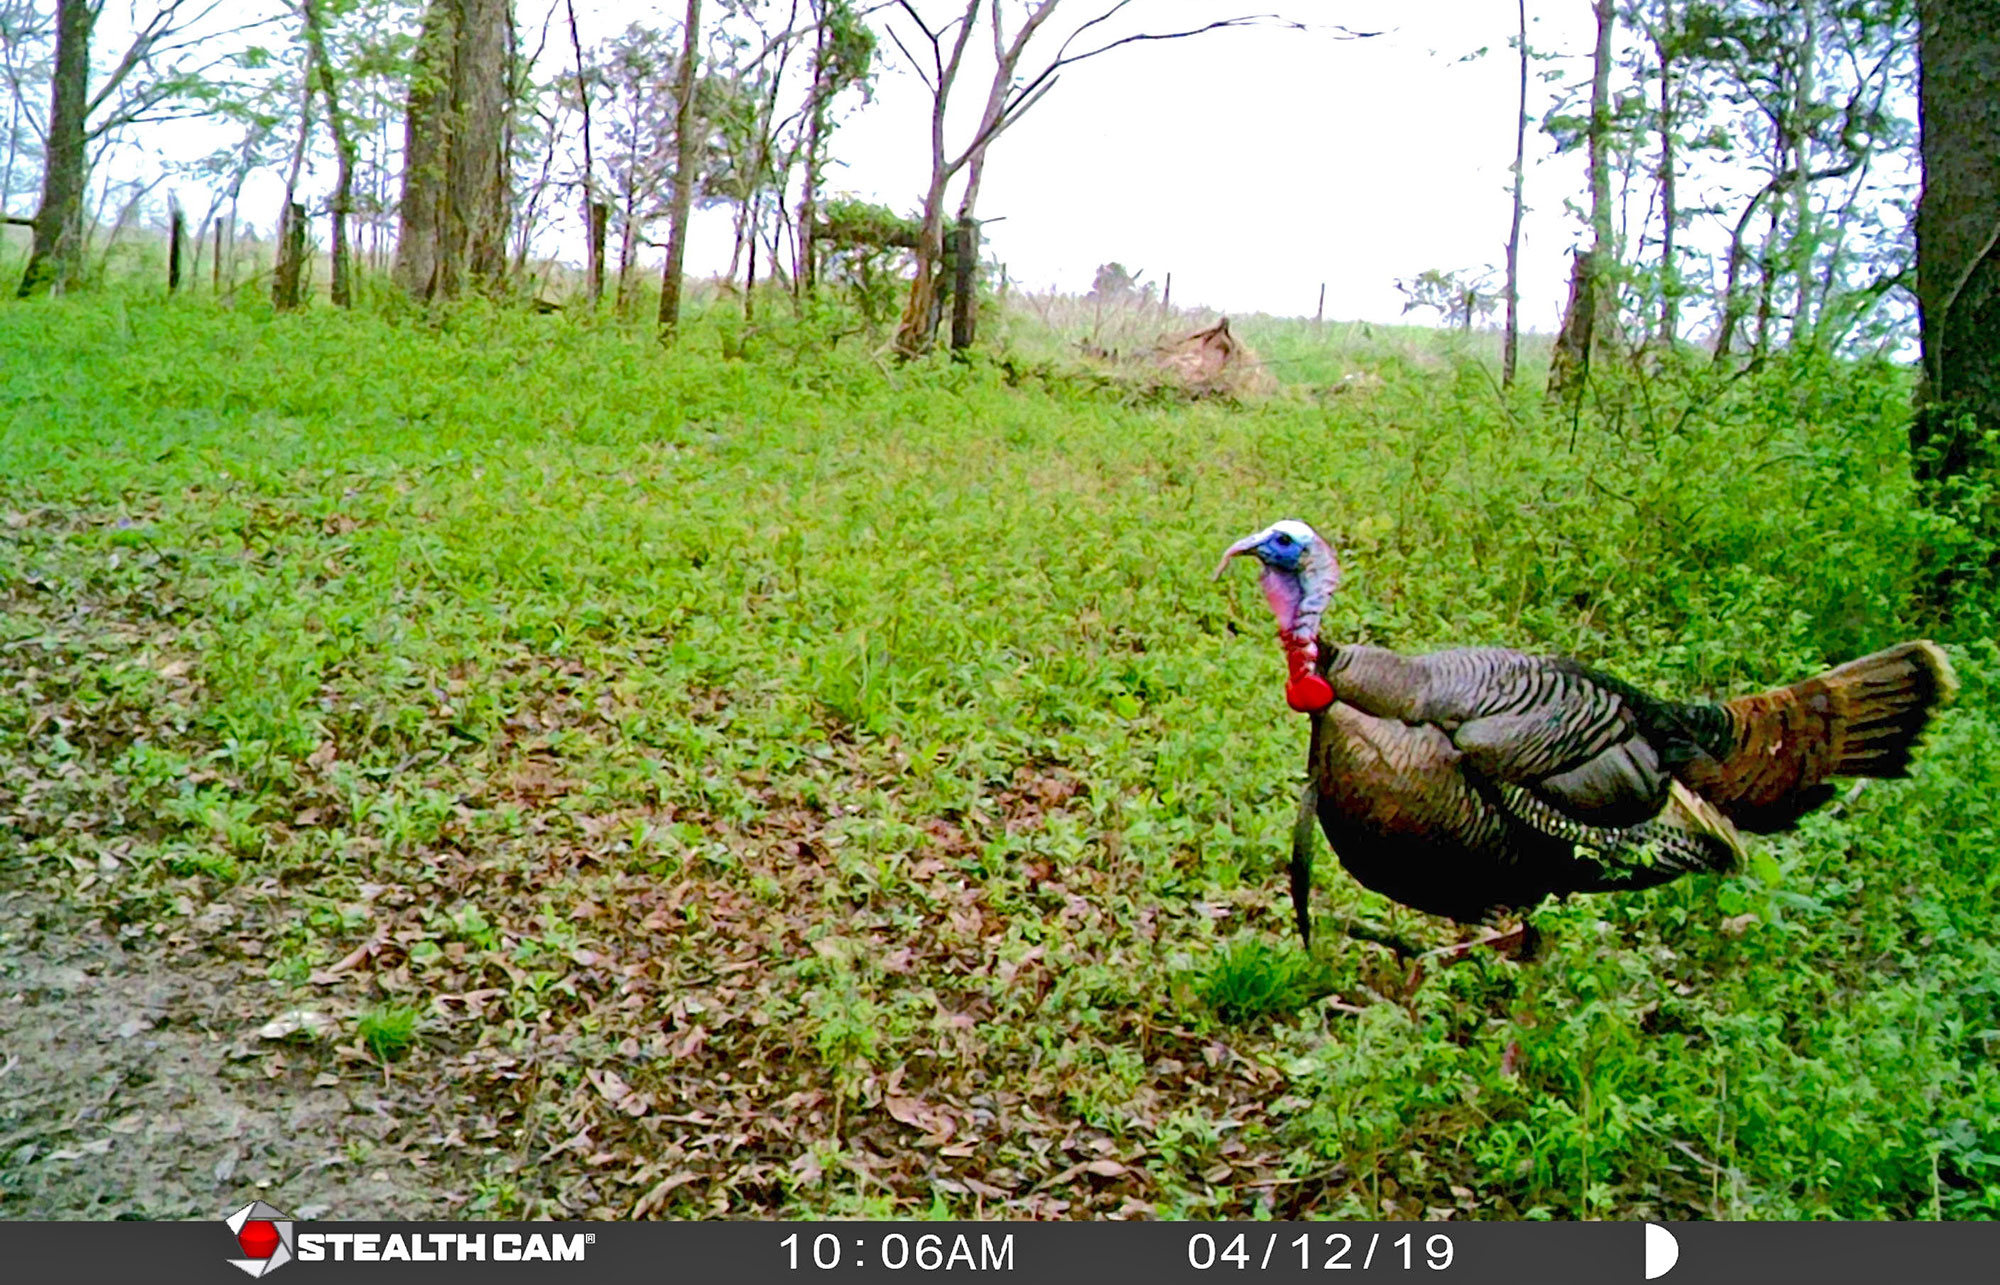
Travel routes are key transition zones from roost sites to food sources. Because turkeys use their incredible vision as their main defense mechanism, larger trails where turkeys can see a long way and feel safe on are solid bets. Tighter trails that make turkeys feel claustrophobic are not good trail cam locations. Unless a lot of predators or hunters are present, logging roads are great spots to consider.
As with most game animals, a lot of activity revolves around food. Remaining mast crops provide good spring food sources. Fresh, lush, green vegetation draws turkeys as well. Furthermore, green plants draw bugs, which turkeys love to eat, too. Read our full guide on what turkeys eat here.
Don’t forget water, though. While turkeys get most of their water intake from dew and the foods they eat, they still drink from water sources, especially during droughts. Plus, turkeys like to roost over water, even when they don’t need to drink from it.
Pinch points are solid bets as well. Fence gaps, ditch crossings, strips of timber that bottleneck, and other areas that force turkeys through narrow areas are good places to capture them on trail cameras. Don’t forget about known strut zones, as these areas tend to see annual usage, too. Regardless of where you’re planning to put trail cameras, search for sign, including tracks, feathers, droppings, scratching, dust bowls, wing-drag marks, etc. Find these things and turkeys are sure to be nearby.
Post Trail Cameras Correctly
Once you’ve got some good spots picked out, it’s time to post them. Ideally, you’ll do this about two weeks before the opener. But in-season trail camera usage is beneficial, too.
When choosing where to set the cameras, you can either hang them high or hang them low. To capture a larger area with your cameras, hang them higher and angle them downward (just know you’ll miss turkeys that walk right in front of the camera.) Hanging cameras high is ideal for time lapse mode in larger food plots and fields.
However, in most instances, hanging cameras low is the best option. Turkeys aren’t tall, and posting cams about 1 ½ to 2 feet off the ground is ideal, especially for tighter areas, such as pinch points, watering holes and the hardwoods. Position them about five to ten yards away from where you expect the main turkey action to be. Remove all vegetation and obstructions in front of the camera.
READ NEXT: Best Affordable Trail Cameras
Settings are important, too. If running cams in traditional photo mode, burst mode or multi-shot settings can help capture faster-moving birds. (Obviously, this isn’t as important as with deer, but it still matters.) Furthermore, set cameras for shorter delays so cameras get back up and running sooner. This is even more important for turkeys, because turkeys tend to move linearly, and toms tend to bring up the rear. With a long delay, you might miss that tom at the back of the line. For wide open areas, time lapse mode or video mode are useful. Video provides both visuals and audio, which can provide clues, too.
More Trail Camera Tips for Turkey Hunters
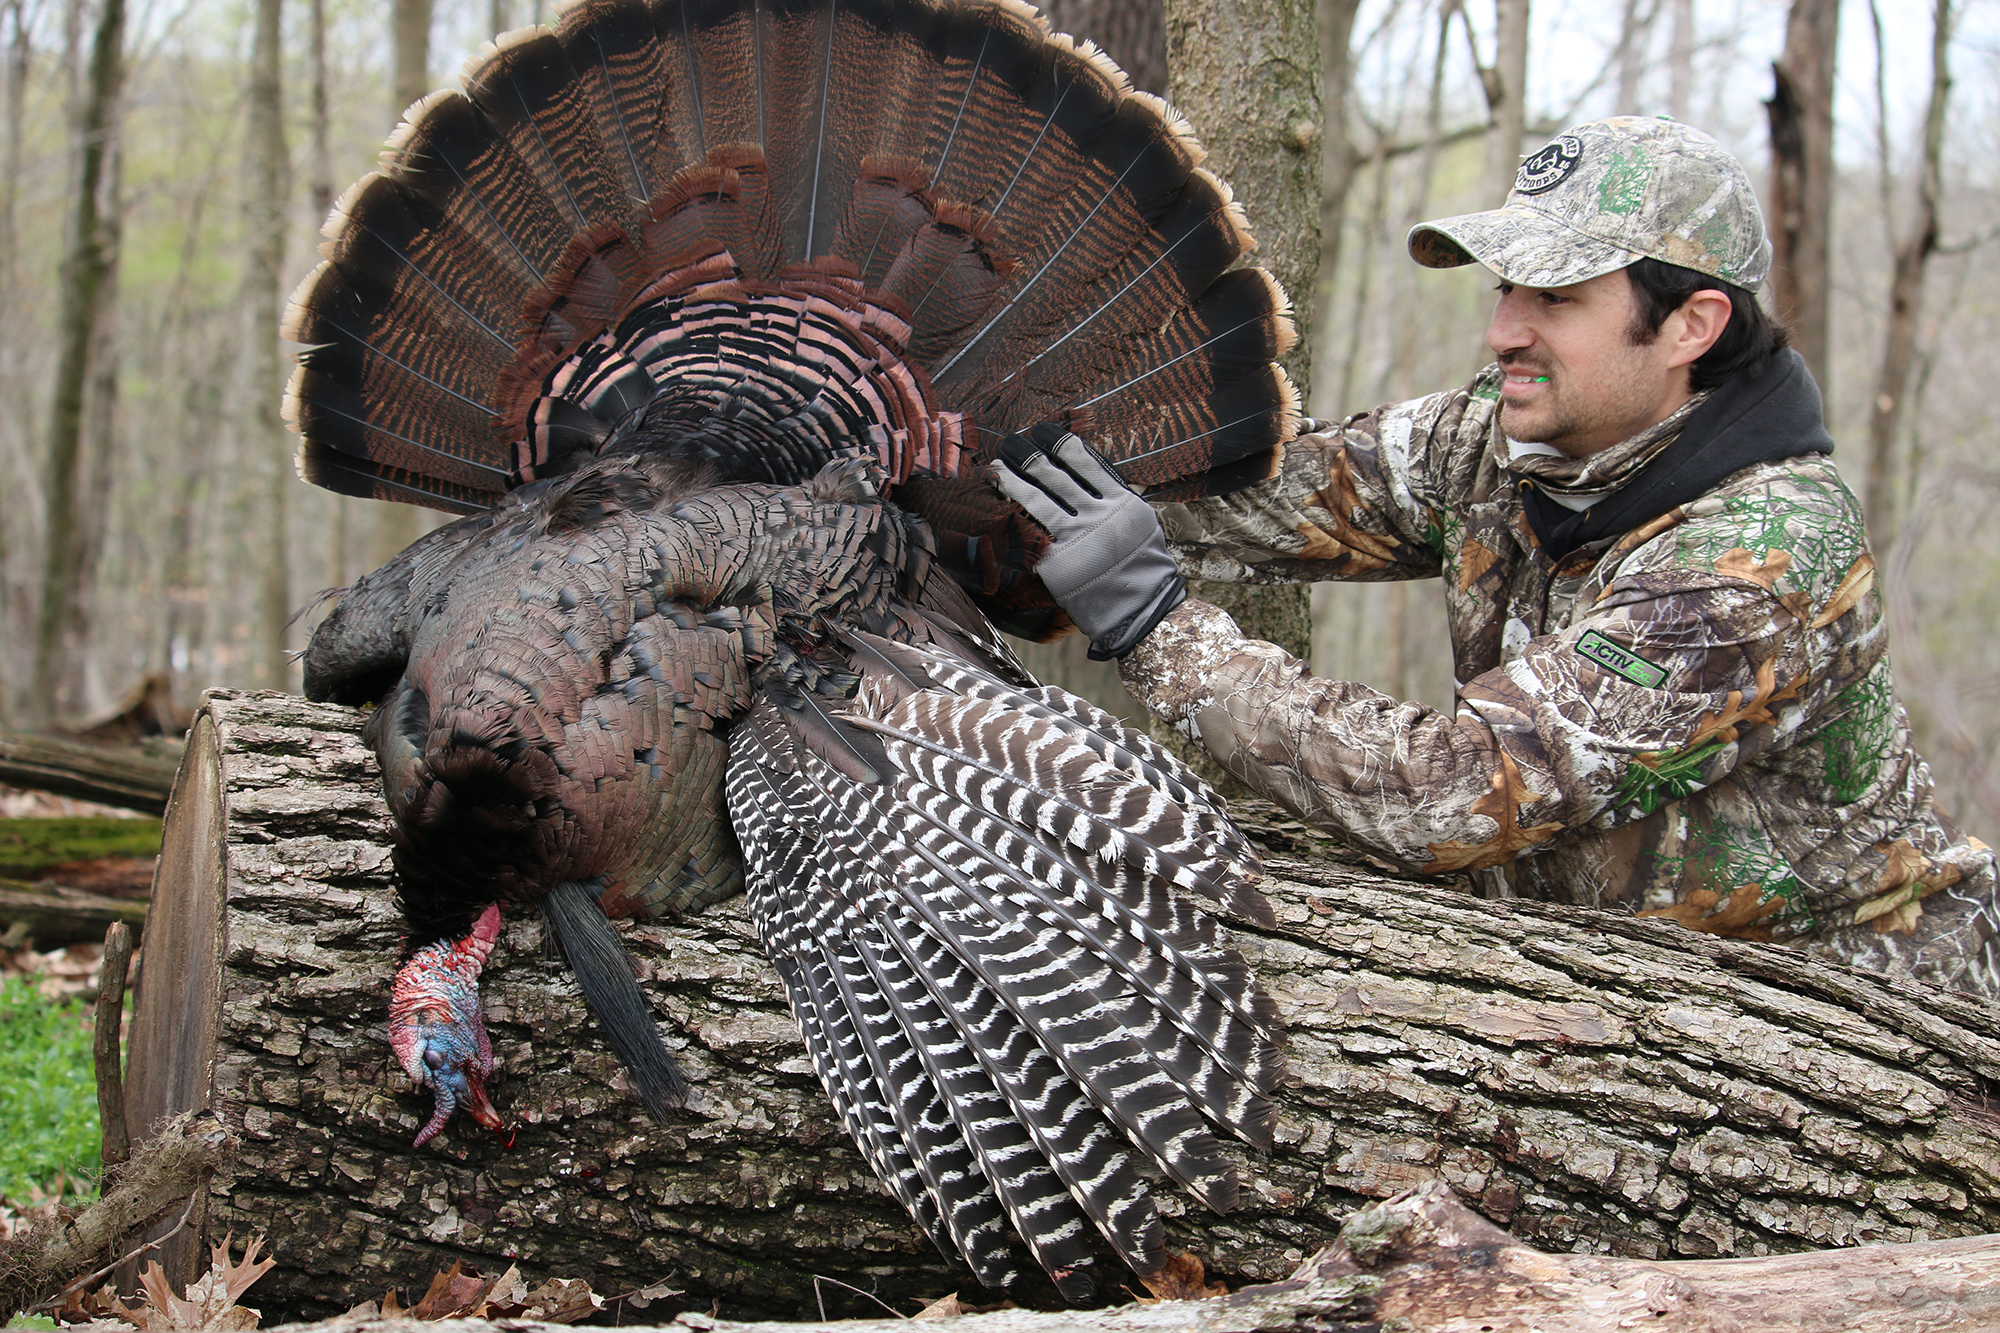
The goal is to capture images that help you learn about turkey patterns and eventually kill a longbeard or two. Here are a few quick tips that will help with that mission.
Mark Trail Camera Locations
It’s easy to lose track of trail cameras. The more that are deployed, and the more spread out they are, the greater the odds of forgetting about one. Solve this issue by marking trail camera locations in a hunting app. Personally, as a HuntStand ambassador, that’s the program I use. But I did so long before working with them in a professional capacity. It’s a useful tool.
In addition to marking trail camera locations, this app also allows you to upload trail camera photos to each of the associated trail camera locations. Simply mark the camera location, give it a name, and drop in the photos. This is a great way to organize photos, and even keep a backup of images in the cloud.
Give It Time
Allow time for cameras to do their thing. A few days should begin to reveal patterns. A week or two will really highlight great spots to hunt. Turkeys are creatures of habit. They tend to repeat patterns each day, even more so than whitetails.
File Trail Cam Photos
Once you’ve checked trail cameras, file photos away in an organized manner. This will make it simpler to reflect on historical trail camera data, which is just as important for turkeys as it is deer. Oftentimes, turkeys will return to the same roost trees, strut zones, and other key areas year after year. They might not be the same birds, but others will return to benefit from the landscape just as past turkeys did.
Analyze Trail Camera Data
Studying the data within trail camera images is important. Observe the timestamp to see what time of day turkeys are visiting that area. Take note of the direction of travel, too, which can reveal where they came from (where they were earlier in the day), and where they are going (where they will be later in the day).
Make Hunting Plans Accordingly
With newfound scouting intel, it’s time to make hunt plans. Use the gathered information to supplement your boots-on-the-ground scouting. Think about it in terms of shifts throughout the day. In conjunction with what you learn in the field, use trail camera photos to determine your best options for the morning roost hunt (after fly-down), mid-morning, midday, mid-afternoon, and evening roost hunt (before fly-up). It’s often hard to tell where turkeys go midday if they’re not gobbling or strutting in fields. This is where trail cameras really shine: they can unlock some killer midday spots you wouldn’t have found otherwise.
Consider Cellular Trail Cameras for Turkeys
Cellular trail camera use for turkey hunting is a growing trend. The ability to get real-time information is beneficial for scouting purposes. It also limits the pressure on turkeys, as these cameras don’t require frequent in-the-field visits. So, where legal, consider the use of cell cameras.
Best Trail Cameras for Turkey Hunting
Here are our three top picks for affordable cameras to use during turkey season. —Alex Robinson
Moultrie Mobile Edge
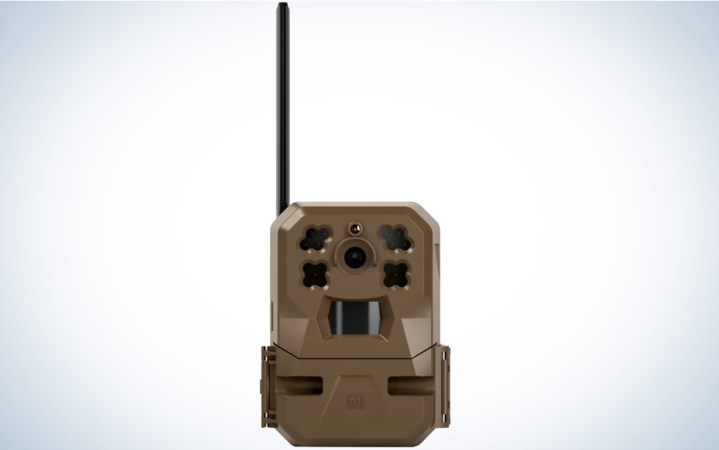
This is the best affordable cellular trail camera on the market. The camera automatically connects to the strongest network in the area (without requiring you to switch sim cards) and promptly sends photos. Here’s the cool part: The Moultrie Mobile app is designed with image recognition, so it identifies turkeys, vehicles, and humans in photos. From there, you can sort your photos based on species, turkeys in this case.
Tasco 12mp
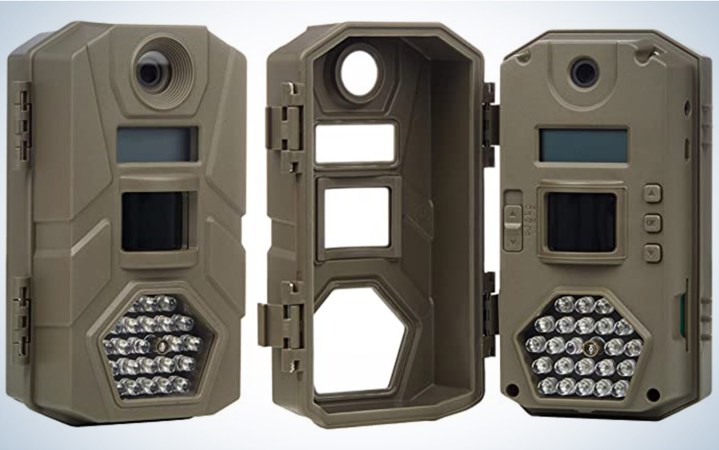
This is the best cheap standard trail camera out there. It doesn’t take great night photos, but because you’re using it for turkey hunting, you don’t need good nighttime image quality. For less than $200 you could get four Tasco cameras and have your turkey hunting property effectively covered for the spring.
Tactacam XB
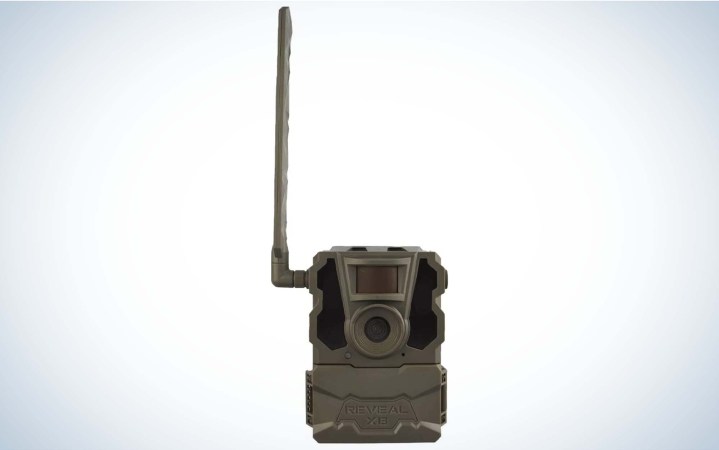
This cellular trail camera takes outstanding photos and video. Its app is simple to use and the camera runs reliably. I used one on a deer hunting property in Wisconsin all last fall. The camera also has a built-in GPS so you can see where it’s located on the app.