
Without question, the most important advancement in the history of mankind is the ability to make fire. Just think: Without it, we'd still be eating cold woolly mammoth steaks. For someone in a survival situation, being able to start a fire provides countless benefits. Over an open flame, you can cook food, which provides needed nourishment. The heat from fire allows you to boil water, thereby killing microscopic organisms and rendering the water safer for drinking or cooking. You can sterilize knives and tools for emergency backwoods surgery by placing them in a fire for a few minutes. The heat from a fire can keep you warm when the temperature drops and will dry wet gear if you get caught in a rainstorm or tumble into a stream. An underrated benefit of a campfire is that it can provide a sense of security and comfort on long, lonely nights in the wild. Being able to start a fire can give a huge boost of confidence when things turn dire, and nothing's more important in a life-or-death struggle than having a positive attitude. At night, a search party has a much better chance of finding you if you've been able to start a signal blaze. By day, the smoke created by a fire serves the same purpose. Water will always be the most important component in human survival, but no skill can do more to keep you alive in a survival situation than being able to create fire. There are many ways to do so, but it's up to you to be prepared when the time comes.
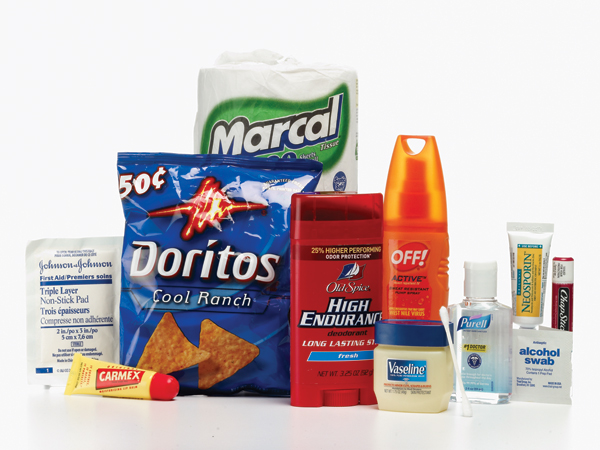
The essential skill of starting a fire can be a daunting task when everything is wet and the wind is howling, your hands are stiff and cold, your body is shivering and you're faced with a do-or-die situation. At a time like this, you need all the help you can get. The good news is that you're probably carrying a number of items in your pack that can serve to make your tinder bundle better. Toilet paper, a gauze bandage (and its paper wrapper), a cotton ball, cotton swabs, paper towel, lint from your pockets and clothing fuzz all do the trick. Pull the gauze, cotton ball or cotton end of a swab apart to increase the fluff factor. Raggedly tear toilet paper or paper towel and then direct the striker spark at the frayed edge of wadded paper, rather than at the center of a flat piece. Don't be afraid to cheat a little by using an accelerant. Pitch and fresh evergreen sap are good natural accelerants, but some common household products work as well or even better. Alcohol Swab – Quickly takes a spark and turns it into an inferno. Gun oil wipes work well, too. Carmex – Readily bursts into flame and turns paper into a long-burning candle. Chapstick – Extends the burn time of paper by a factor of about five. Deodorant – Wipe it on paper, and the paper will burn much longer than it would without it.
**
Hand Sanitizer** – The alcohol-based stuff is like napalm. Will take a spark directly.
**
Insect Repellent** – Very volatile, so it bursts into flame quickly after a spark is struck. Neosporin – Takes a while to ignite, but burns slowly to sustain a flame for a long time.
**
Petroleum Jelly** – An excellent accelerant that burns long and hot.
**
Snack Chips** – Fritos, Doritos, Cheetos: They all burn like an oil field on fire.
**
Zinc Oxide** – Burns slowly but steadily, keeping the flame alive after paper is consumed.
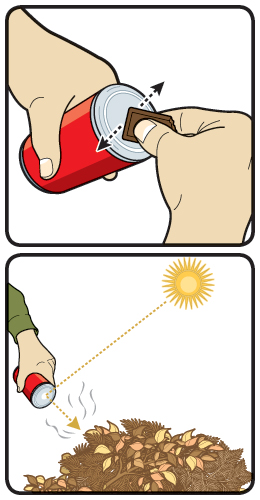
Polish the bottom of a soft drink can by rubbing it with chocolate (the purer the better; toothpaste also works), then reflect intensified sunrays off the shiny surface onto your tinder bundle. Snackers everywhere, rejoice!
Any good survival guide includes a section on fire, but few books are devoted entirely to the subject. One of them is The Complete Book of Fire, by Buck Tilton. In it, Tilton covers the history and chemistry of fire, looks at methods of creating fire and discusses which types of wood burn best. ($10; menasharidge.com) BACK TO THE BEGINNING >>
Water makes up about 75 percent of your body weight, mostly in cells and the circulatory system. Maintaining that ratio of water to other elements is necessary for your organs to function properly. If you suffer a net water loss, you become dehydrated. During a normal day, you need to drink about a half-gallon of water to replace routine losses from breathing, sweating and emptying your bladder and bowels. Under survival conditions, however, you need at least a gallon because of the extra workload and exposure to the elements. When you become dehydrated, you descend gradually into debilitation. You lose the ability to perform necessary survival tasks that require strength and endurance, which leaves you increasingly vulnerable. You lose the ability to think clearly and make sound judgments that might keep you alive. You become sluggish and apathetic, and you might suffer medical conditions such as hypovolemic shock from lowered blood volume, or other cardiac problems. In cold weather, dehydration sneaks up on you because you don't feel as thirsty as you do in hot weather. Nevertheless, body water loss continues and it must be replaced. Dehydration in cold weather leads to increased risk of hypothermia and frostbite. In hot weather, don't wait until you feel thirsty to drink, because that indicates you're already in the early stages of dehydration. Carry your water supply in your belly, not in a canteen. Don't ration your water; instead, ration your water loss by reducing the amount that you sweat.
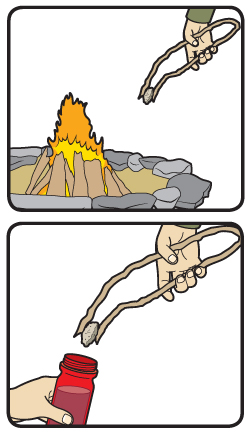
Need to heat water but lack a fireproof vessel? Stick clean, dry stones in your fire and then transfer them to your water supply to significantly raise its temperature. Use improvised tongs (a limber stick bent double) to pluck the stones out of the fire and drop them into your container.
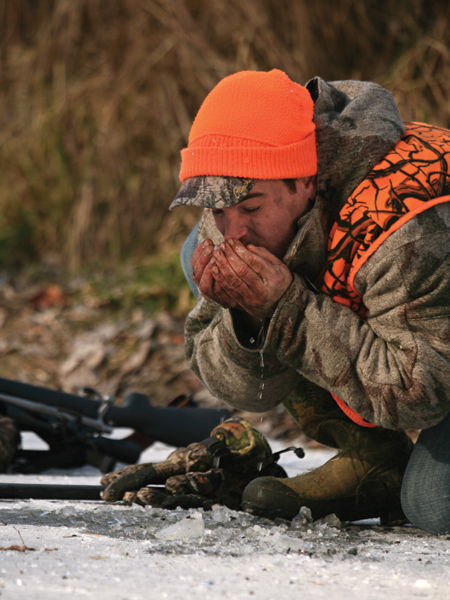
The process of digestion takes water from your body. Though the food contributes to your energy level, the digestion process speeds dehydration. To extend survival time, drink all the water you have, without rationing, but eat only when water is available for drinking. Foods that contain large quantities of juice, such as citrus fruits, help offset a lack of water, contributing both liquid and energy. BACK TO THE BEGINNING >>
Your life depends on keeping your body's core temperature within a certain range, and the purpose of shelter is to protect your body's temperature. Without shelter, the human body is not equipped to survive exposure to the elements. A shelter should do the following three things. Keep You Dry The best shelter is tight enough to prevent moisture invasion. When your clothing becomes wet, you begin the plunge into hypothermia, even in moderate weather. Wearing wet clothing causes evaporation and conduction. Evaporation sucks warmth from your body, and wet fabric conducts heat away from your body much faster than dry fabric. Protect Against Wind Convection is the enemy in every season. If you are wet, even a slight breeze ramps up the evaporation process and hastens death by hypothermia. When you're dry, exposure to a cold wind quickens hypothermia and promotes frostbite, which leads to gangrene, infection, loss of limbs and possible death. In hot weather, the wind sucks moisture out of your body, leaving you dehydrated. Regardless of the atmospheric temperature, keep wind out of your shelter. Provide Shade When the weather is hot, you need shade to keep you cool and stave off heat-related conditions like heat stroke. Rest in the shade during the heat of the day and wait until the sun is low and the temperature drops before venturing outside and resuming activities. If you have water to spare, dampen your clothes, stay in the shade and use evaporation to cool your body.
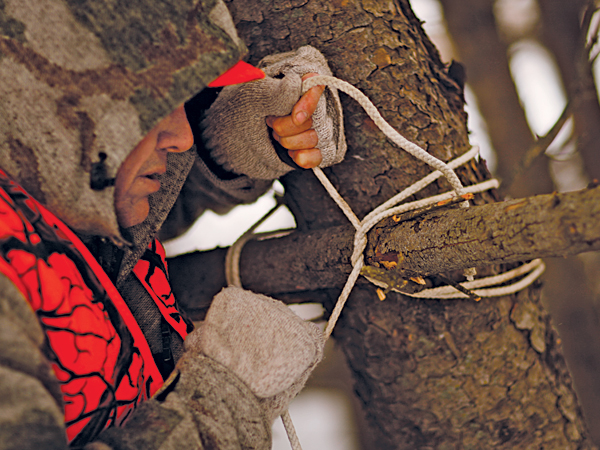
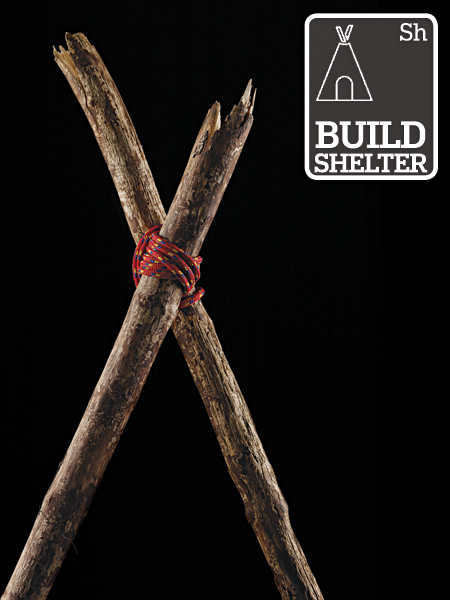
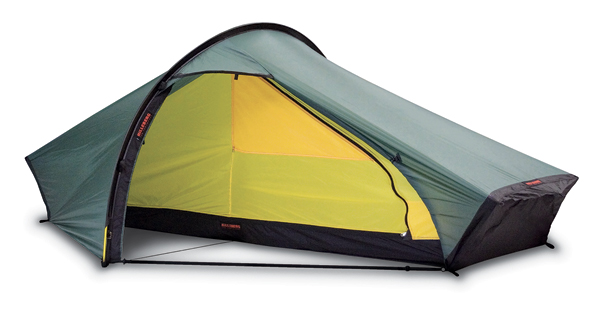
If you don't have a tent, you'll have to build a shelter from natural materials. It takes good judgment to recognize a suitable shelter site; a good eye to spot appropriate natural resources for building a shelter; and the skill to put them all together to protect yourself from the elements. Location is Key – Pick the wrong spot to construct a shelter, and the best-case scenario is that you end up living wet, with insects, in the cold zone or with wind. The worst-case scenario is that you don't live at all, because a landslide, widow-maker, avalanche or flood wipes you out. When selecting a shelter site, look up into the tree canopy for dead limbs that could crash down on you; look upslope for rocks or snow that might come your way; look for insect habitat; and study the drainage situation. If you're in a canyon, cold night air will settle on you. If you're on an exposed ridge, you might be hammered with wind all night. The middle zone is most comfortable. Things to Look for – When creating a shelter from natural materials, seek out vines for lashing poles together, the root wall of a fallen tree, bark slabs, boulders, a forked tree and dense foliage. Be Creative – Look for different solutions, depending on your situation. A tree with a low fork (5 or 6 feet off the ground) can support a cut sapling to create a slanted ridgepole onto which you can pile brush or cut boughs to form a one-man tent-shaped lean-to. No Forked Tree? – Prop saplings together to form a teepee, lash them together at the top with vines and then pile on the brush and boughs to shed precipitation and block the wind. Look for Natural Windbreaks – Boulders, downed trees and such are perfect. Then build up the shelter against them to provide protection in all directions.
Rich Johnson is one of America's top outdoor survival experts. His background in both military (Special Forces) and civilian survival gives him an unmatched depth of knowledge and experience. To learn more from Johnson, read his Guide to Wilderness Survival, available at amazon.com. Also visit his website, richjohnson-outdoors.com, and his blog, Getting Out Alive, at wilderness-urban-survival.blogspot.com.
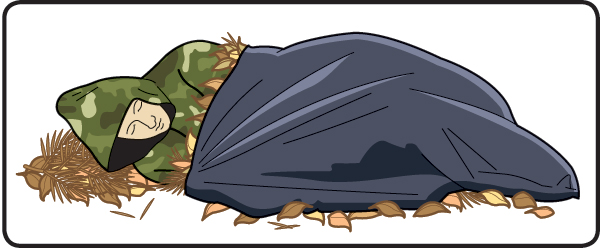
A large plastic trash bag can serve as a waterproof lower-body covering to pull over your legs and hips, while your parka protects your upper body. For insulation, stuff the bag with leaves, pine duff or dry grasses.
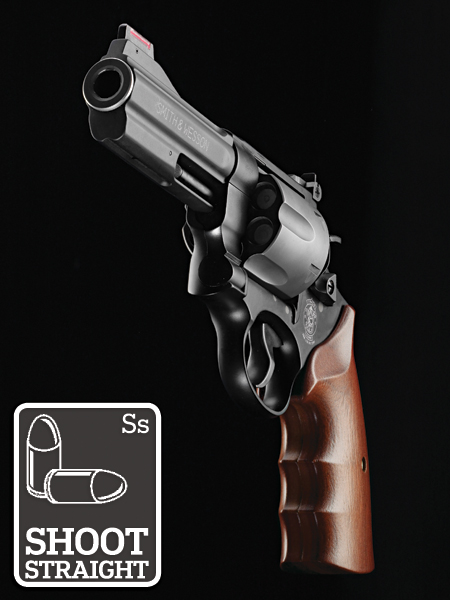
What qualifies as your ideal survival gun depends largely upon what it is you're trying to survive. Is it a marauding grizzly? The prospect of being alone in the woods for many days without a reliable food supply? Different scenarios call for different tools. As either a backup for your deer rifle or in those cases where it isn't practical (or legal) to have a big-game rifle with you, a large-bore handgun is a smart option for personal protection in the wilderness. Versatility You can't go wrong with a .44 Magnum. The list of available loads, especially when you include .44 S&W Specials, could fill a small phone book. There's everything from mild 180-grain loads for cowboy action shooting to the hard-hitting 320-grain hard-cast bullet loaded by Cor-Bon, which has been proven on critters as large as American bison. The fact that you can find ammunition in nearly any gun store also counts in this cartridge's favor. Portabilty It's hard to top the Smith & Wesson Model 329 PD, pictured here. The frame is constructed from an alloy so light that, when empty, the gun doesn't feel like it's made of metal. At only 26 ounces, it's a comfortable gun to carry, but the tradeoff is that it isn't so comfortable to shoot with full-power loads. Be prepared for the moment of truth by practicing with light loads that are easy to control, and carry it with an appropriate defensive round when in the backcountry.
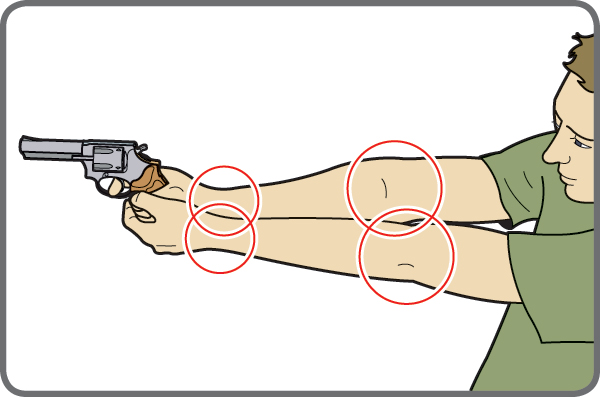
Few people know how to control a revolver better than Jerry Miculek, a world-champion handgun shot, so we turned to him for some advice on how to shoot well when your life depends on it. Get a Grip "One thing I recommend is to use two hands at all costs, and if your hands are big enough, wrap the thumb of your weak hand over the top of your strong-hand thumb to lock the gun down. You're going to have to lock your elbows and your wrists, too (see illustration), or that gun is going to fly away from you." Muzzle High "Lead with your front sight. When you're shooting under stress, you want to come in with the muzzle a bit higher than the rear sight. Coming in with your hands low like this, you'll get a good sight picture as you get on target." Trigger Pull "As soon as the gun clears leather and the barrel is parallel to the ground, start adding pressure to the trigger. Once the gun is extended, you want half the double action taken up already. It takes 12 pounds of energy to get that trigger moved, and if you haven't started the trigger pull until you're on target, you're going to push the gun to the left or right, especially with a light gun." Practice "Break down your draw into three or four steps and practice until it's smooth. Make it fluid and you'll have much better hit probability. Keep that finger out of the trigger guard until the muzzle is covering the target. Your trigger pull is more important than your sight alignment." Ammo "To learn the proper trigger technique, shoot the lightest ammo you can before stepping up to something stiffer. A hit with a .22 Short is better than a miss with a .454 Casull."
When Scandium is mixed with aluminum, the resulting alloy (used to make the S&W M329 PD, pictured on the opposite page) is lighter than titanium and nearly three times as strong. Compared to traditional steel, Scandium reduces the weight of a revolver by 40 percent while retaining nearly all the strength of a steel-framed wheel gun.

To improve your gun-handling skills, there's no substitute for shooting under the watchful eye of a qualified instructor. To up your game, enroll in Gunsite's 250 Defensive Pistol class. The five-day course emphasizes basic skills, including marksmanship, gun handling and how to develop a proper "combat" mind-set. During the class, you'll go through many simulations, including low light, and by the end of the week you'll have a whole new set of skills to help you prevail in any situation in which you need to draw a gun. ($1,428; gunsite.com) BACK TO THE BEGINNING >>

Anyone who has been lost can easily recall the sickening spiral of despair caused by not knowing where you are. The more you try to reason your way out of trouble, the more disoriented you become. Landmarks move, trails dissolve and your brain starts betraying your senses. Panic, with its urgency to take risks and ignore lifesaving instincts, starts to replace cool-headed reason. That's why search-and-rescue experts say that getting lost is usually the catalyst that spurs tragedy in the outdoors. Disorientation breeds panic, causing otherwise cautious people to attempt to scale cliffs, ford rushing rivers and allow themselves to become emotionally and physically drained. Desperate people fail to recognize even familiar landmarks, which is why the best thing you can do if you're lost is to stay in one place. Getting lost doesn't have to end in tragedy. Even those born with a good sense of direction get disoriented, but smart outdoorsmen don't rely on their senses alone. They borrow from technology as old as human navigation: They carry a compass and a map. Of course, we have more modern ways of staying found. GPS units are so affordable and simple to use these days that every hunter, hiker and angler should carry one. But batteries die, liquid-crystal screens crack and satellite signals fail in timber and canyons. So if you're serious about making it back alive on a regular basis, learn how to read a compass and then follow it home.
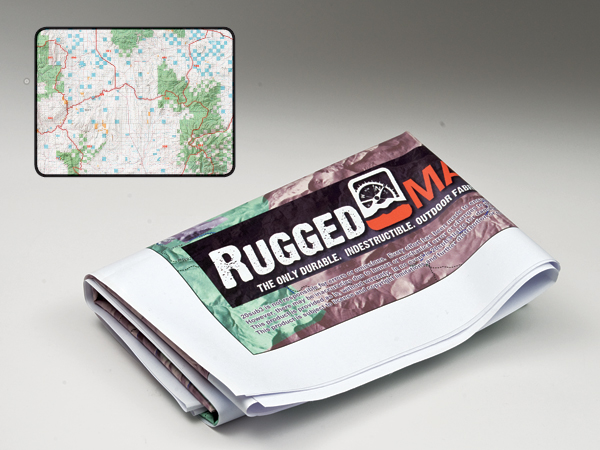
There's no arguing that GPS units have become mandatory equipment for sportsmen, but there is no replacement for a map and compass and the ability to read them. Read a Compass In order to appreciate the full route-finding power of a compass, first get familiar with its mechanics. The red arrow will point to magnetic north, and you should practice walking in a wide circle while watching the arrow remain fixed on north. Now, turn the central circular dial so that the red arrow on the base matches up with "N" on the dial. Read a Topo Map Once you've found north, use your compass to find a bearing on a map. The bearing is the direction in which you'll walk to safety. Place the compass on the spot on the map that you want to take a bearing from. With the N and red arrow pointing to magnetic north on your map (all maps should disclose the magnetic north declination, or difference in degrees from true north), read the number on the dial that points in the direction you want to go. That number is expressed as a degree on a 360-degree circle, and is a straight line, though it may lead you up and down mountains. Stop periodically and refresh your bearings to maintain your direction. Read the Landscape If you lack navigation tools, take cues from nature. Trees grow fewer limbs on their north sides. Ants often build hills on the south sides of tree trunks. More moss and lichen will grow on the north sides of rocks. A Map That Does More: Navigation tool? Emergency Tarp? Yup!
Most maps spend their lives in tri-folded obscurity in a glovebox, but 20sub3, a Vancouver, Washington, company, has created a method of printing detailed topographic maps on waterproof polyester fabric that you can scrunch in your pack, wear as an emergency raincoat or even use to gather water from a lake or creek. The company's Rugged Maps are completely customized, so you can plot your favorite canyon, deer lease or wilderness area, and never have to worry about trying to read your map in a torrential rainstorm or snow squall. ($20; 20sub3.com) Mytopo.com will print the precise boundaries of your game-management unit on its waterproof paper maps, which use BLM's 1:100,000-scale land-ownership maps as a base. (from $10; mytopo.com)
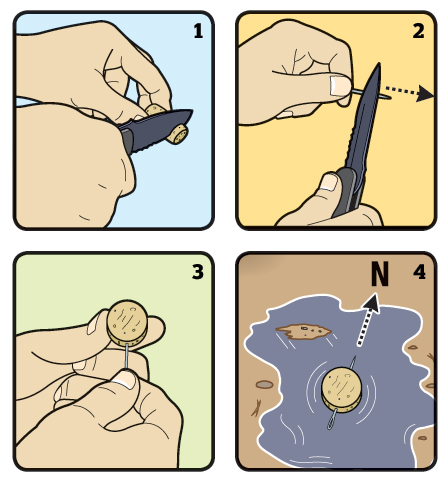
You can make a simple compass with a few basic items. Here's how. 1. Cut the bottom half-inch off a wine cork 2. Magnetize a sewing needle by "shaving" it 15 to 20 times with your pocket knife, always making strokes toward the pointed end. 3. Stick the needle longways through the cork so equal lengths stick out both sides of the cork. 4. Place the needle-impaled cork in a bowl of water or a shallow puddle. Watch as the point of the needle rotates to magnetic north.
The revised edition of this classic outdoor skills book includes simple explanations of reading maps, traveling by compass, finding bearings and traveling in the wilderness. It's geared mainly toward orienteers, but there's plenty of solid information for any outdoorsman. ($19; wiley.com) BACK TO THE BEGINNING >>