Sure, you’re a self-proclaimed grill-master. After all, isn’t everyone who’s got a beer in one hand and tongs in the other? But if you want to reach steak-grilling legend status in your deer camp, there are a few things you can do to prepare a better venison steak. This is our ultimate guide to making the perfect wild-game steak, all the way from field to plate.
It Starts With Shot Placement
Every big-game hunter recognizes the consequences of making a poor shot, hitting guts, and potentially tainting meat (not to mention unnecessary pain put on the animal). But another key aspect to keep in mind is the time it takes for the animal to bleed out.
An animal that isn’t bled properly (read: quickly and thoroughly) can undergo immense stress, which will raise blood pressure and potentially cause smaller blood vessels (capillaries) to burst. The result? What is referred to as “blood splash,” which is an escape of red blood cells from blood vessels into the surrounding muscle. Some butchers may even refer to this as “blood spotting.” These sort of hemorrhages appear as small dark red spots in your meat. A small amount is fine to eat, though heavy blood splashing is not recommended for human consumption.
What does this mean other than “make a good shot?” Simply put: Forget about headshots. I still see posts on hunting forums where hunters target a doe’s head and wonder why their backstrap is polka-dotted. The brain of a cervid is incredibly small and even though they’ll drop with a headshot, they will continue to undergo stress. Blood pressure skyrockets, and blood splash will occur.
What about rutting bucks and bulls? Those bruisers surging with testosterone? Well most of us aren’t going to pass up tagging out on a trophy animal because we’re worried about the flavor of the steaks. Hormones can make meat tougher and add hints of “gamey-ness,” but below I discuss how to partially counteract these effects, and later discuss the concept of “gamey,” in general.
Hanging and Aging Wild Game for Better Steaks
After graduate school, I volunteered at the Union Gospel Mission in Spokane where the Washington Department of Fish and Wildlife would frequently drop off both roadkill and poached wild game. Then-chef Derek Mobley always asked the same question when the carcass arrived: “How long ago was it killed?”
The answer would determine how long he would let the meat hang in the walk-in cooler prior to butchering. His reason for doing so was simple: to tenderize the meat. He and his crew would then serve the wild game in traditional dishes that would feed potentially hundreds of the community’s needy. They wanted everyone to walk away well-nourished and with full bellies, and to never turn up their nose at wild game. Tough, gamey meat was purely unacceptable.
To tenderize, Mobley would let big game hang for 4 to 5 days before cutting and packaging. For larger, older game, Mobley might hang the meat for up to a week. Hanging big game (bone-in) for several days counters the effects of rigor mortis while also preventing muscles from contracting. I’d recommend attempting this, if possible, with those trophy bucks and bulls.
Aging goes a step further to tenderize and concentrate flavor. Both hanging and aging require keeping big game in temperatures between 34°F and 38°F over the period of 7-14 days. Some hunters hang their game even longer. During aging, enzymes naturally present in the meat break down muscle proteins and connective tissues, while moisture evaporating from meat concentrates flavor. This is why I tend to believe “wet aging” (sealing game and storing in the fridge for a couple weeks) isn’t exactly aging. Nor is quartering game and putting it in a cooler with ice and the drainage plug removed, as the closed lid and compact storage prevents evaporation and adequate airflow.
But both “wet aging” and storing in a cooler do allow the meat to rest and further tenderize. Properly aged meat is hung as a whole carcass with adequate air flow and ideally away from direct light, with either hide on or off. In guaranteed consistent cooler temperatures, hide-on is your best option for preventing fat from oxidizing (and thus potentially spoiling meat), while also avoiding that dark, dried “candy shell” coating. Game aged with the hide off will likely require you to trim the outer layer of meat—anywhere from ¼- to ½-inch of meat in some instances—as it’ll be dry and tough and overall unpleasant (though the meat beneath is something special).
A quick note on cooler storage and water in general: Soaking your game in water is not recommended, as water ruins texture and robs meat of its flavor. So make sure that drainage plug is removed and meat never flounders in water. Replace with fresh ice daily. The only time I recommend placing big game in water is when trying to prevent freezer burn with trim, when the goal is to VERY QUICKLY freeze the meat (in a deep freezer) before water has time to permeate meat.
As I mentioned above, cool temperatures are a must when hanging and aging meat. While you can age upland birds in temps up to 55°F, anything above 40°F is the danger zone for big game. In regard to bacteria, white bacteria is really nothing to worry about. You can easily wipe off with a 50/50 mixture of vinegar and water. When you see green, you can do the same or cut that section off. Black mold can be dangerous. Cut that segment out immediately or risk losing all your meat. When in doubt, always trust your nose. If it smells rancid, it probably is.
Utilizing Wild Game Bones and Fat
Every meat-eater knows fat is the root of flavor. So what does this mean in regard to big-game fat? Do you keep it or toss it? I’d argue that depends on the animal’s diet.
To be fair, most of us are used to the fat flavor of grain- and corn-fed animals. Unless you’ve eaten mostly wild game your entire life, your tastebuds are tuned to think grain-fed animals taste best. It’s the reason grass-fed beef tastes strange to most. Truth be told: This trend isn’t necessarily a good thing. Over the past couple centuries, we’ve fooled our tastebuds into thinking this is how meat is supposed to taste. Additionally, meat with diets consisting of exclusively grain and/or corn are higher in calories and fat, versus those fed a natural diet.
It’s also potentially the major reason non-hunters turn up their nose at wild game—they’ve been conned by their tastebuds. Full disclosure: I didn’t start hunting until my mid-20s (12 years ago) and ate domestic meat most of my life. Wild game tasted odd at first until I ate more and more, eventually training my tastebuds to realize: “This is how meat is meant to taste.”
But back to the topic of fat. The solution is simple and recommended by wild-game cooking legend Hank Shaw. Cut off a piece of fat and put it in a skillet with water, simmering to allow the fat to render. If it smells good, keep the fat on. If it smells bad, toss it along with the rest of the fat you can carve away from the animal. Remember: Your nose never lies.
In regard to bones, everyone’s jaw drops at the sight of a perfectly roasted wild Frenched rib rack. We drool over a photo of a fist caked in grit and blood holding up a freshly seared tomahawk steak. But since the marrow inside is fatty tissue, bones themselves are, more or less, subject to the same rules as fat itself: They can add or detract flavor. Some hunters testify they aren’t worth the effort, while others claim those slender curves of meaty calcium are worth every bead of sweat. I’d suggest testing the fat (using the rendering technique above) to determine whether you should debone your big game or keep the ribs or bones inside your hindquarters. To learn how to keep the ribs attached to your backstrap for tomahawk chops or a Frenched rib rack, you can check out this tutorial from Remi Warren.
Butchering Roasts and Backstraps into Steaks

Whether you take your big game to a processor or break it down yourself, it’s helpful to know how to cut your roasts and backstrap into steaks, and how thick to cut them. It all comes down to a ratio of surface-area to overall size of the cut. With the backstrap, you likely don’t want to cut it into steaks unless it’s from a large critter, like an elk or moose. For whitetails and mid-sized game, cutting backstrap into medallions makes it harder to evenly grill to medium-rare, since there is such a narrow margin between surface area and overall mass. Heat has a shorter distance to travel to get to the core. Meat cooks quicker, and cooking quickly is what leads to missing that perfect mark of medium-rare.
The concept of surface area versus mass is also the same reason I might only take three steaks from the sirloin tip (football roast) of a 2½-year-old doe, and save the rest for jerky. I want my steaks wide and at least an inch thick, otherwise I risk an unevenly cooked or overcooked final product.
Always make a point to trim off any silver skin or fascia. The topic of whether to keep fat is up to you, as discussed above. As a general guideline, your steaks from the hindquarters will be more tender versus front quarter steaks, though you can pull off flat iron and blade steaks from the front quarters.
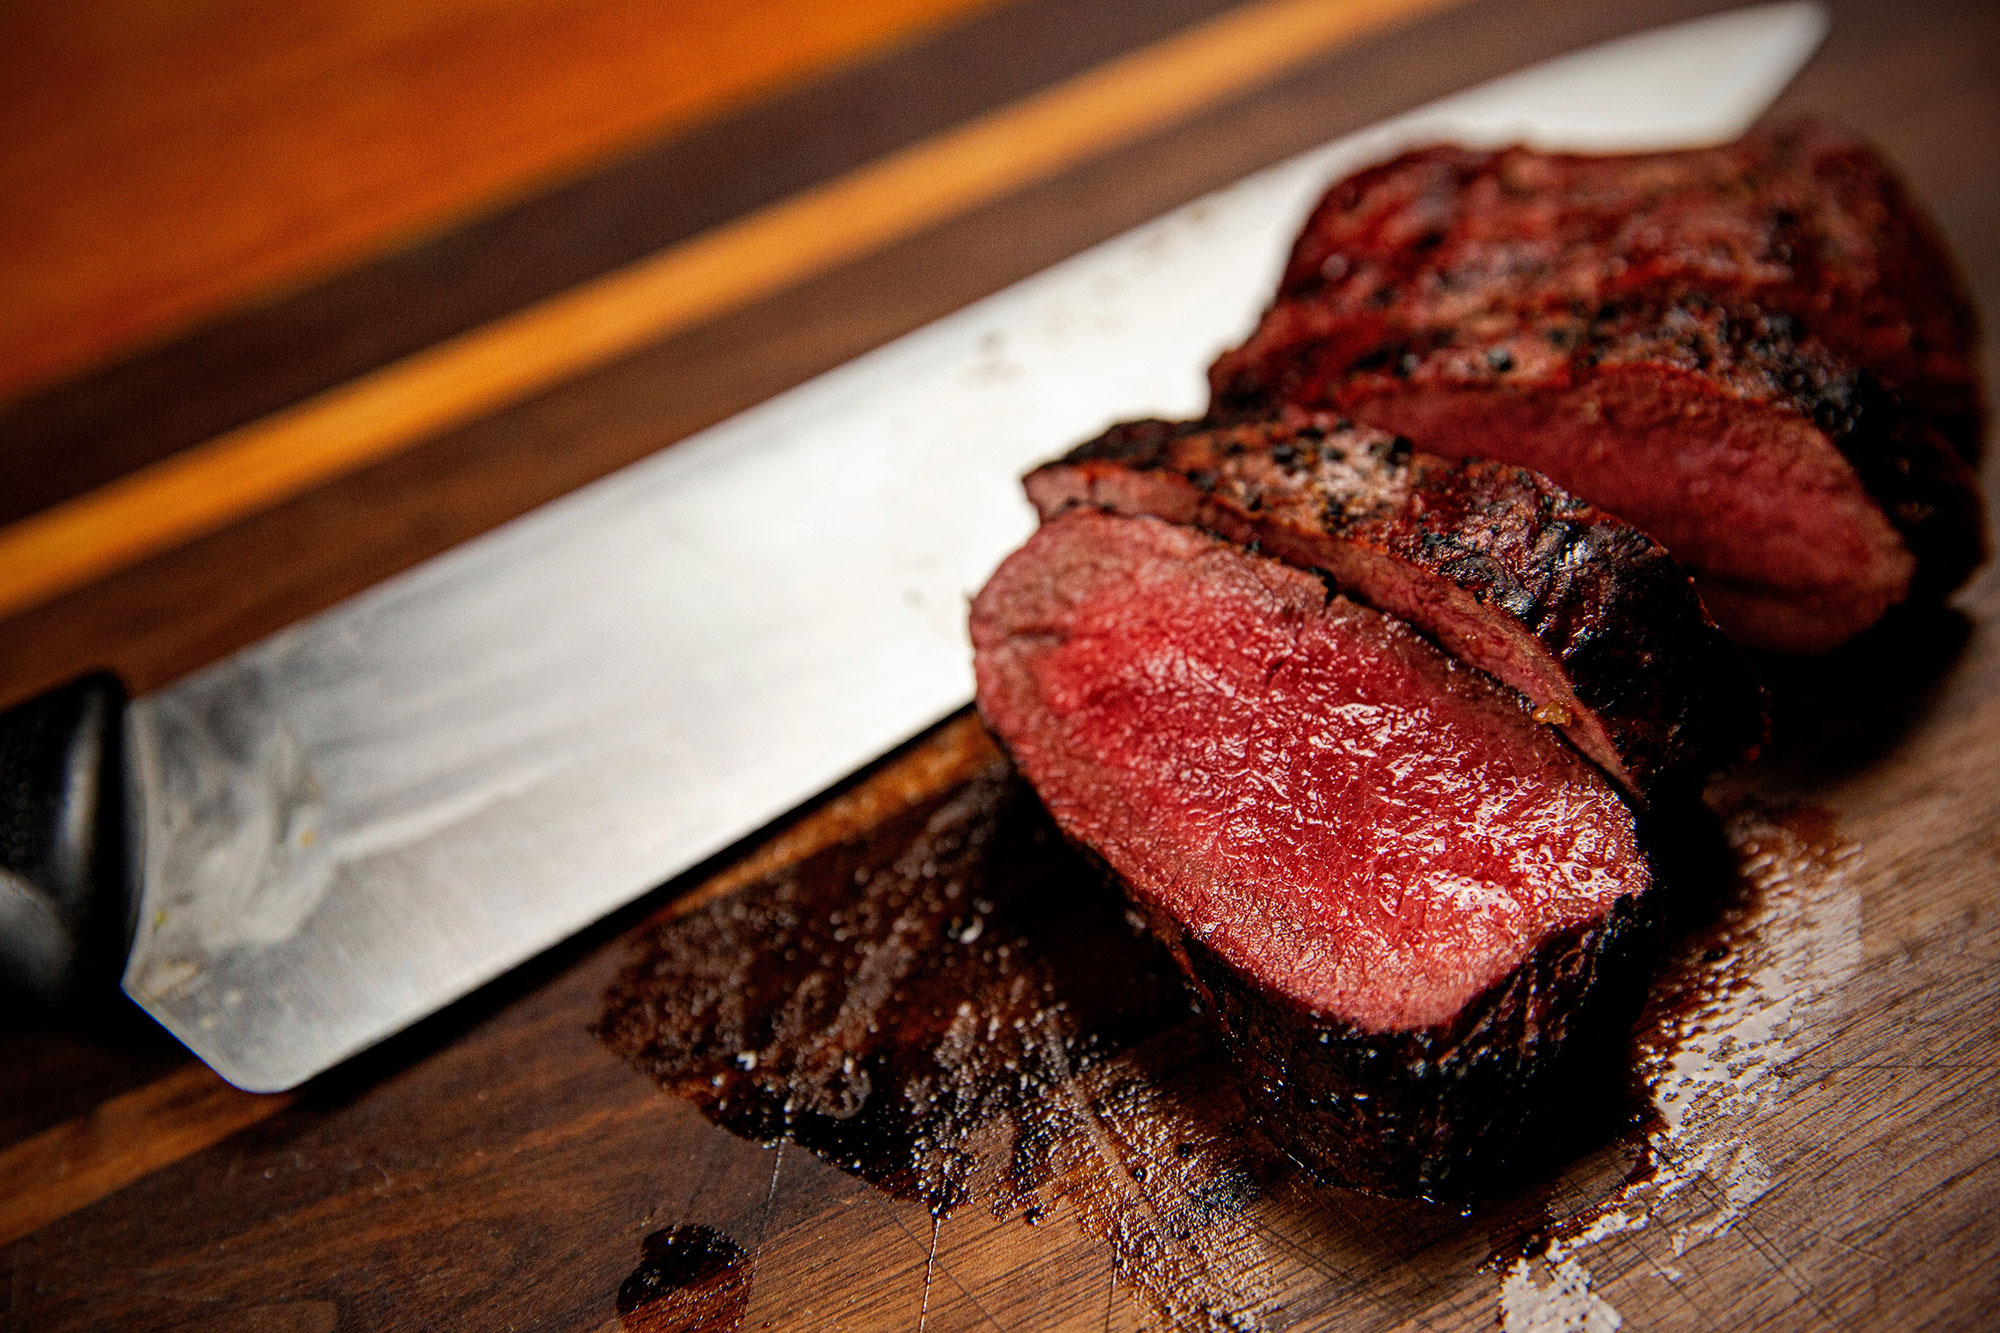
Grilling Wild Game Steaks: Follow the Four Rs
Repeat after me: Room temperature, Roast, Reverse sear, Rest. This is how you achieve that perfect, juicy, delicious medium-rare (meat between 130 and 135 degrees). It’s my distinct opinion that red-meat game (this includes waterfowl) drops exponentially in flavor for every degree past 135. So let me further break down the Four Rs:
- Room temperature: Make sure your meat is thawed and pulled from the refrigerator an hour to a few hours (depending on the size of the cut) prior to grilling. This ensures even heat distribution while cooking instead of a purple, cold gelatinous center in the end. Additionally, when you pull your meat from the fridge, liberally dust it with kosher salt and freshly ground pepper. These spices will adhere to meat while it comes to room temp and help boost flavor while cooking. If you’re cooking a bone-in steak, the bone and meat around it will remain colder longer than bone-out meat.
- Roast: A low roast also aids with even heat distribution and ensures that when the center hits that desired temp of 110°F, the other edge isn’t overcooked. (I’ll explain why 110°F shortly.) For roasting, I recommend an oven temp of 200 degrees. Ideally, you want a convection oven to adequately circulate heat. I don’t have that, so I leave a thick, heavy baking steel in the bottom rack to ensure consistent heat is maintained. First, rub the steak with olive oil and place in an oven-safe baking tray. Make sure to check meat temp with a meat thermometer every 30 minutes or more. A 1.75-pound roast might take 1½ hours at 200 degrees to reach 110°F, while the thicker half of a backstrap might only take 50 minutes.
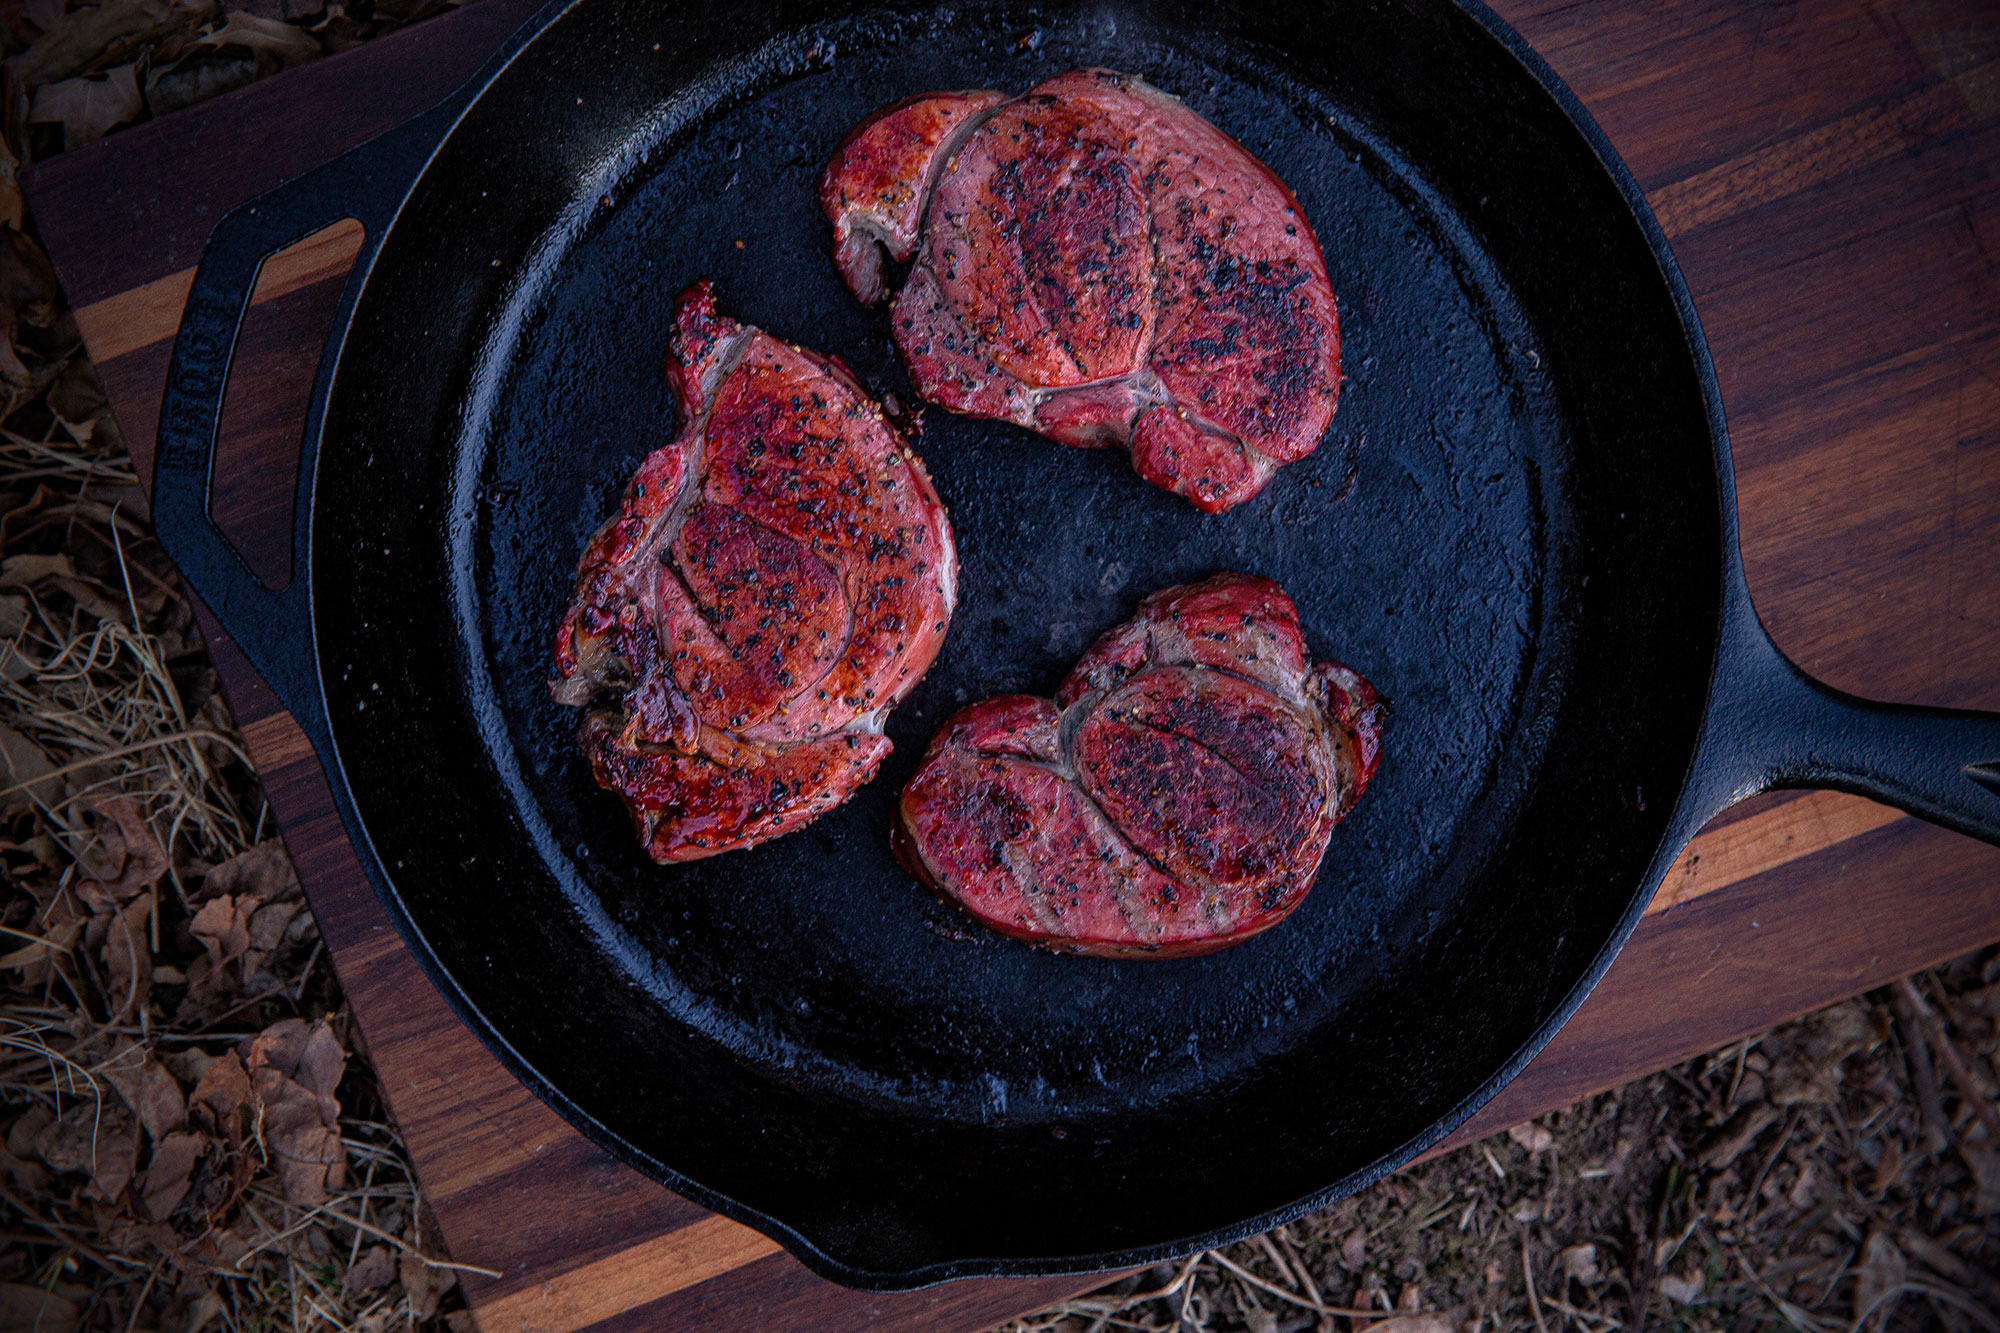
- Reverse sear: I pull my meat at 110 degrees and, to apply a hearty crust, I reverse sear the heck out of all its sides. This occurs either in a thick cast-iron skillet or open fire with temperatures ranging from 600-700°F. Yes, that hot. Reverse searing also caramelizes the meat (known as the Maillard reaction) which further deepens flavor. The low roast ahead of time, in conjunction with the quick sear of all sides (likely no more than 60 seconds per side), again ensures the steak will be evenly cooked (with little to no overcooked outer gray edges). The reverse sear should bring the meat internal temp up another 10 degrees, to around 120°F.
- Rest: This is likely the step so often overlooked or improperly applied. Letting meat rest does two major things: It allows for carryover cooking, which will bring your meat up 10-15 degrees (without, again, overcooking any layers), and it redistributes juices throughout muscle fibers so those juices don’t flood out onto your plate the moment you cut in with your knife. How long should you let it rest? My general rule for length of rest: 5 minutes, plus 1 minute per ¼-inch of thickest portion of meat. A thick backstrap should get 15-20 minutes.
So let’s recap: Salt and pepper meat, and bring to room temp of 68-72°F. Low roast at 200°F until it hits 110°F. Reverse sear to caramelize meat and create a crusty exterior for both flavor and texture (the steak should now be at 120°F-ish). Let it rest before carving to get it up to 130 to 135 degrees.
Smoking Wild Game Steaks
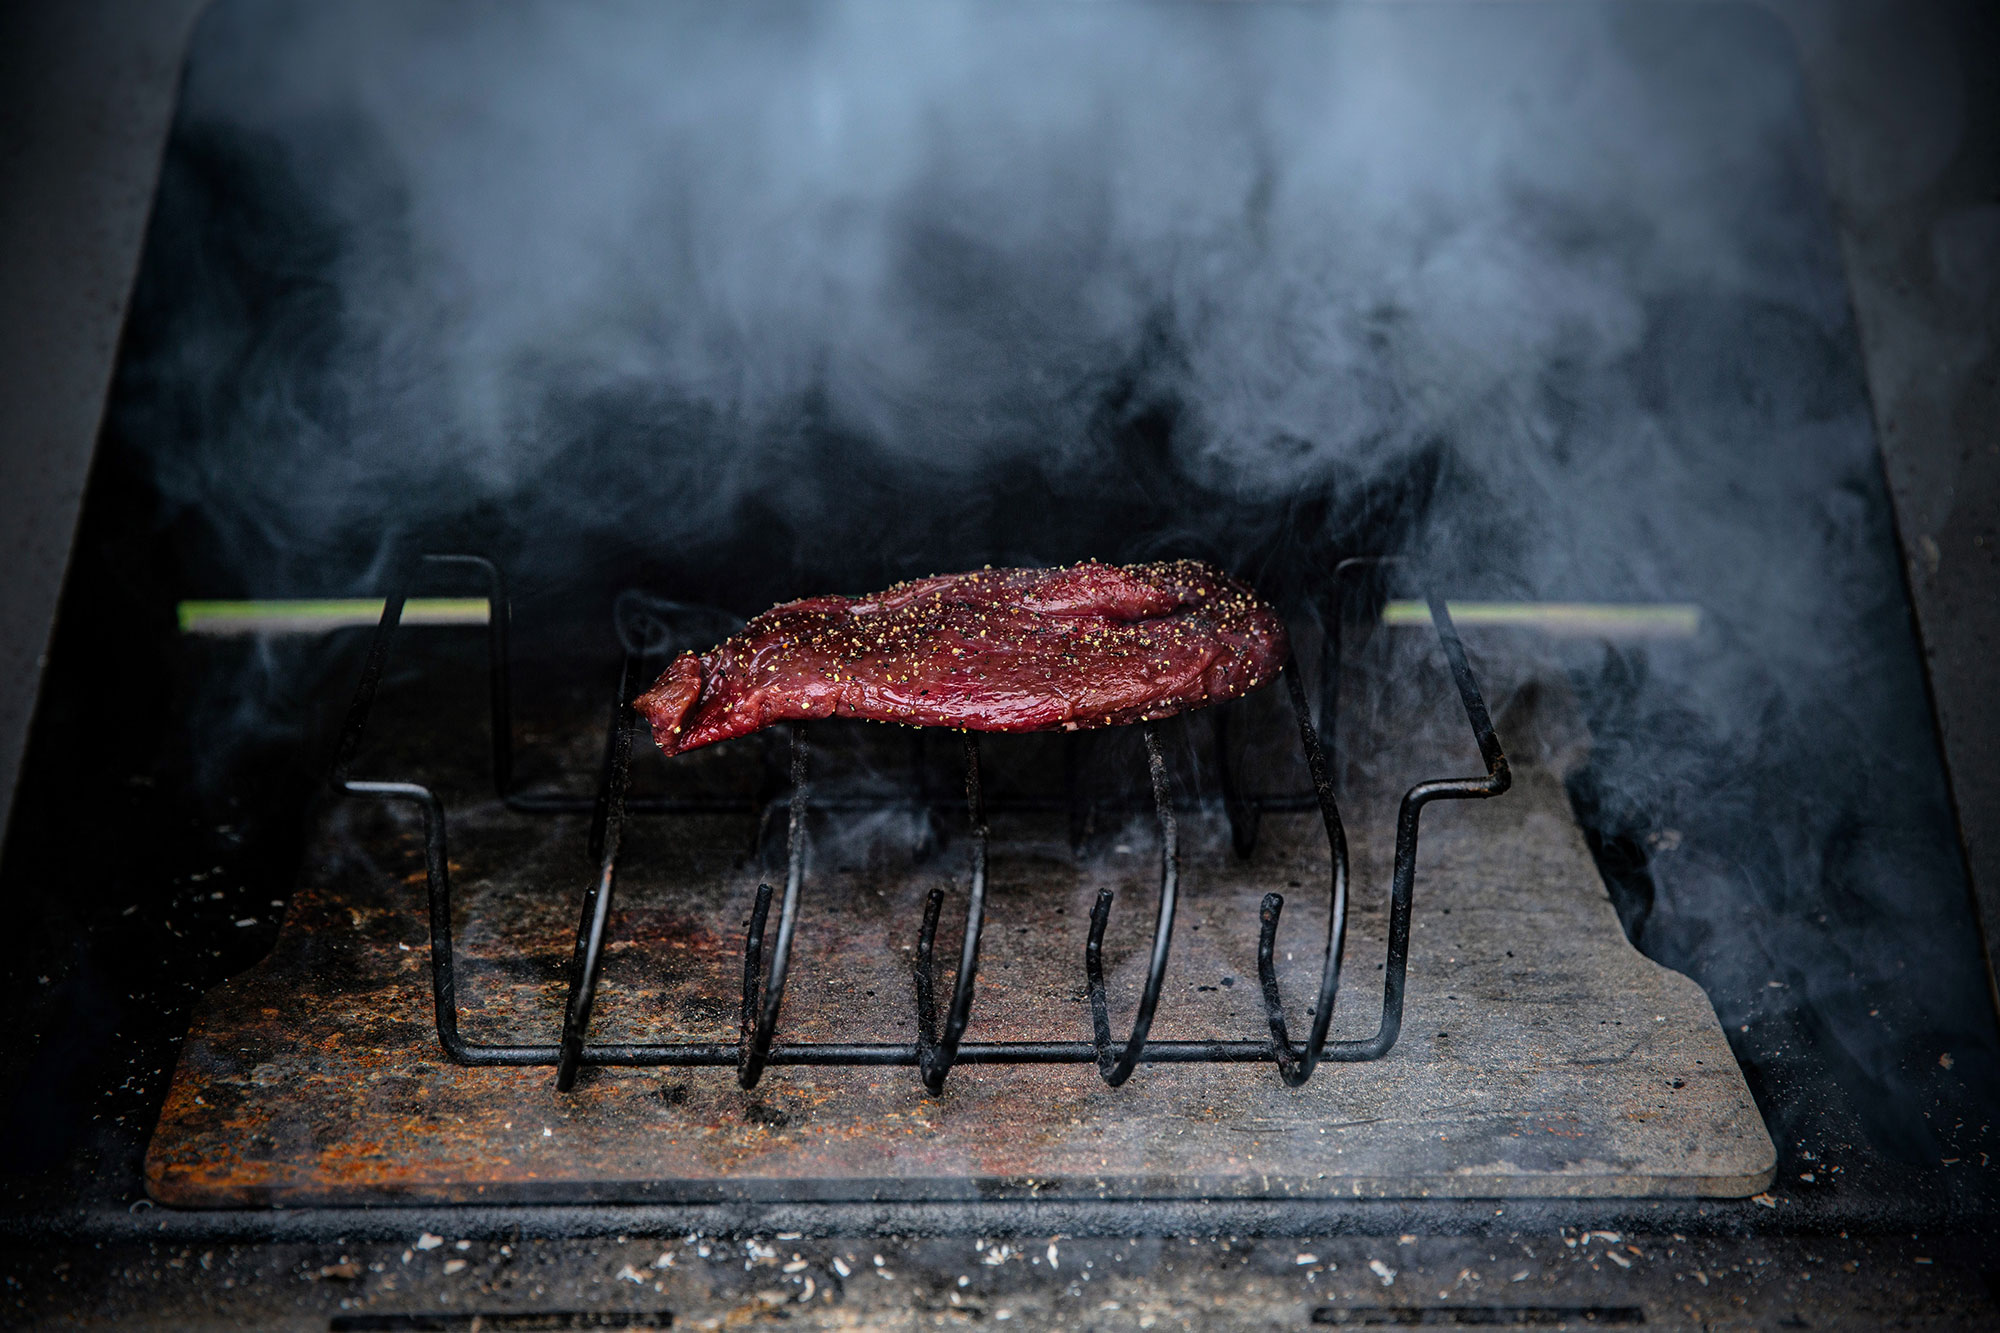
For smoking wild-game steaks, I apply the Three Rs, which means I subtract the Room Temperature step. Smoke penetrates meat up 140°F, so the longer cool meat can sit in a smoke ranging from 160 to 180°F, the more smoky flavor it will absorb. I actually put my wild game steaks in the freezer a half hour ahead of smoking to further assist in this regard. I personally don’t suggest smoking above 180°F if you want a semi-rich smoky flavor in the end. An inner loin, for example, might take 1 hour and 15 minutes to reach 110°F internal temp at a 160°F smoke, versus a 200°F smoke, which may take just a half hour to reach 110°F (and thus imbue meat with less smoke).
Using Spices and Marinades for Steaks
When it comes to spicing wild game, I am a purist: Salt and pepper only, please. And never, ever table salt. Use coarse kosher salt. As described above, I salt and pepper my meat when I pull it ahead of grilling. A benefit of salting hours ahead of time is salt binds to muscle fibers and helps retain moisture while cooking, similar to a dry brine. And do yourself a BIG favor and pick up a pepper mill (black peppercorn grinder).
Other folks lightly salt and pepper ahead of time and then sprinkle over flake salt after carving. Or you can salt at the end. You can even use smoked salts if you’re feeling wild. The decision likely comes down to your personal preference, but you should try each method to see which you like best.
I rarely use marinades, but when serving guests who are potentially sensitive to “gamey” meat, a marinade imbues your protein with distractingly tasty flavors while slightly neutralizing “gamey” tones. Something to consider: a Chamber Vacuum Sealer allows you to seal meat in marinade and because of the pressure, the marinade will penetrate the meat quicker and more thoroughly. An hour marinade using a Chamber Vac can easily taste like it’s been marinating for 12 hours. Generally speaking, a marinade might penetrate ¼-inch of meat per 24 hours, whereas this is accomplished with a Chamber Vac within a quarter of the time.
Using a Meat Thermometer
I am a firm believer in internal meat thermometers. The main argument against them: You lose juices when you puncture the meat. My response: You lose way more juiciness when you overcook the meat. Other folks rely on the thumb-and-finger method, where depending on what finger you touch or don’t touch with your thumb, the fatty portion of your palm (below thumb) will mimic the texture of a particular doneness. You can learn more about that by watching this video.
But different cuts (backstrap steak versus sirloin steak, for example) have different textures due to muscle striations. Nevertheless, MANY people rely on this method, so I know it can work (and does), although not necessarily when you’re cooking a whole backstrap.
The more you cook a particular cut at a consistent size and test it with your finger, aside from the above method, you will soon recognize doneness naturally. But I don’t risk it. Using a meat thermometer is easy, and precise.
A Final Note on “Gamey” Meat
This topic could be a short novel, but the bottom line is this: An animal tastes like it’s supposed to taste. Venison isn’t gamey because it tastes like a deer. Venison tastes gamey if it’s mishandled during processing or has spoiled. This is true of any kind of meat. Just because someone is used to pen-raised meat pumped full of hormones and gorged with grain doesn’t mean perfectly handled and perfectly prepared whitetail backstrap is “gamey.”
Reach out to me on Instagram (@WildGameJack) with your questions and comments.