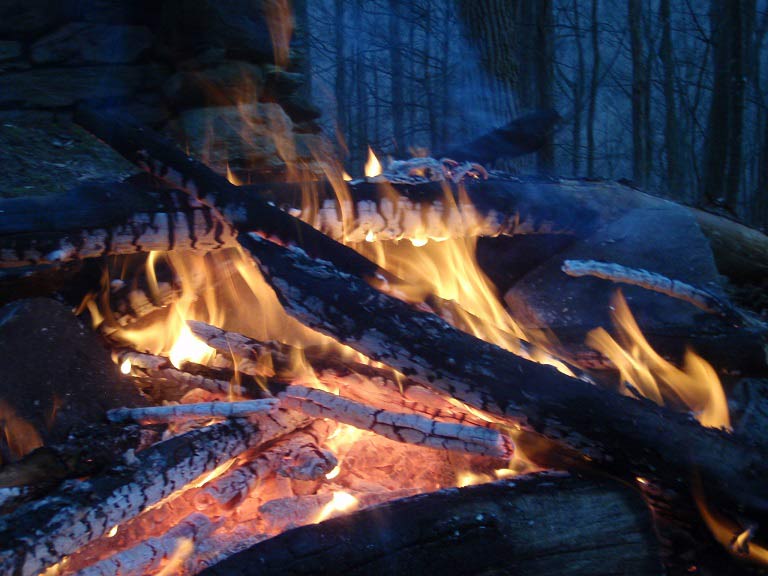
If you think you can only find a great meal in civilization, think again. I’ve eaten some of the best meals of my life under the open sky, next to a warm campfire. Primitive cooking may not be easy at first, and there’s a lot that can go wrong, but once you get the hang of it, you’ll wonder why you didn’t master it sooner.
There’s something so satisfying to the process of skewering wild game meat on a stick and watching it roast over a crackling fire. It is likely the same way that the majority of our ancestors prepared their food since ancient times. Whether fire-kissed meat is inherently tasty or we have been bred to enjoy its flavor, you cannot deny that it is delicious. Keep in mind though, that delicious doesn’t happen by accident. If you’re a beginner at this, be patient, and pay attention to the details if you want to produce a good meal.
Cooking on sticks over an open fire can infuse your food with a great smoky taste, and when sticks are your only utensils, there’s no nasty dishwashing to do after the meal. The same fire that cooked your meal will clean up the mess for you. Just throw in the sticks, and you’re done. Here are a few primitive cooking tips and techniques that I routinely use in camp with cooking gear made exclusively from sticks.
Stay Safe Around The Fire
You’ll need patience, attentiveness, and of course, good ingredients to make your wilderness meals into culinary masterpieces. But you’ll also need to stay safe as you work around boiling liquids and burning hot implements. Keep these tips in mind as you work around the cook fire.
Camp Cooking and Fire Safety Tips
Before you start, check for fire bans in the area, especially during droughts, summer heat, and windy conditions.
Clear all flammable debris in the vicinity before starting a fire. If possible, use an existing fire pit.
Remove any trip hazards from around the campfire. All it takes is one stumble to pour a pot of boiling water all over someone’s feet or to fall into the fire yourself.
Use caution when handling or moving pots containing hot or boiling liquid.
When you’re not actually cutting something, keep all blades sheathed, closed, or put away.
Be careful of your wardrobe. Synthetic fabrics can melt quickly, or even light on fire when a spark hits them. Loose clothing like long skirts or loose sleeves is also risky. Leave the hippie skirts and pirate shirts in your costume trunk.
Keep an extinguisher, a bucket of water, and a shovel nearby, in case the fire gets out of control.
Supervise and be extra careful with children near the cooking fire.
Keep the firewood pile upwind and away from your fire.
Never leave a cooking fire or a campfire unattended.
When cooking food on sticks, do your homework. Make sure that you don’t use any toxic or foul-tasting species of trees and shrubs.
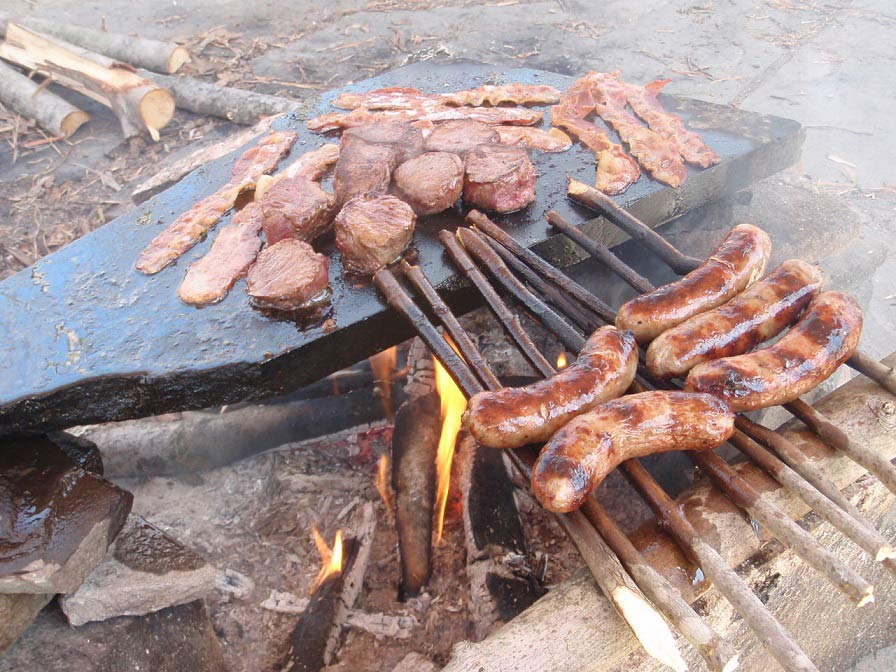
Cook With A Single Stick
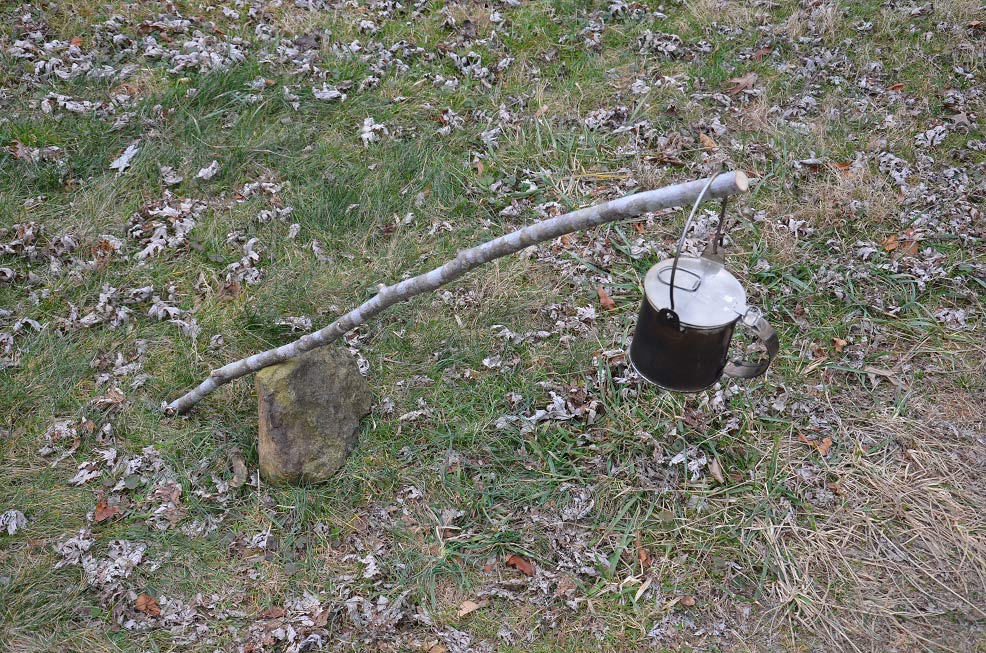
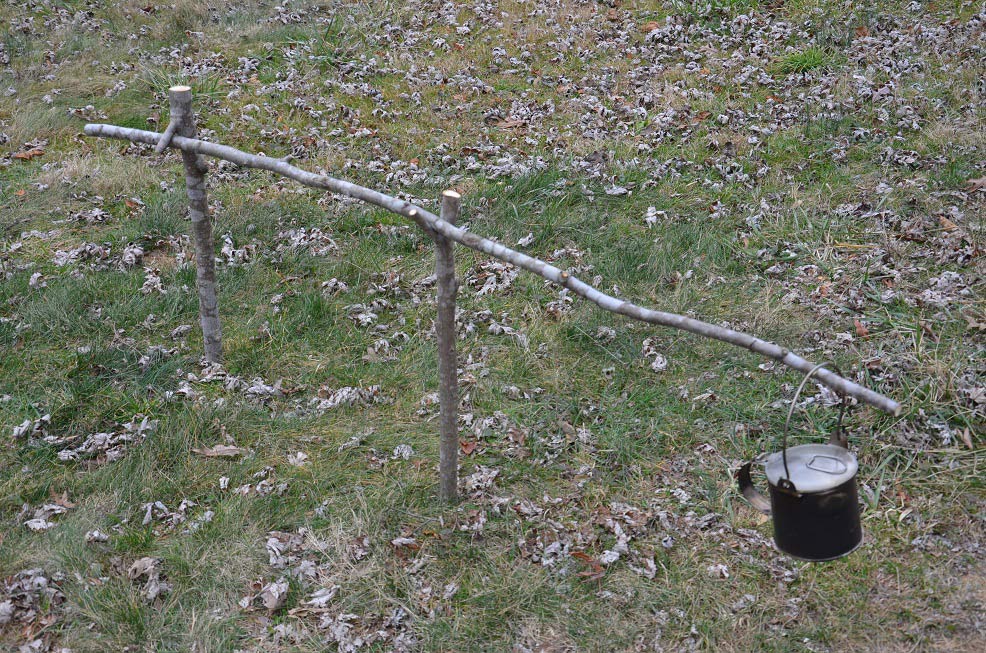
Whether you’re in a survival setting or just camping out with the family, it’s really nice to have a quick and efficient campfire cooking system. For either situation, you’ll need practical ways to suspend your cookware over the fire to boil water and cook your food. This rig is often called a dingle stick and has cooked so many meals for me that I couldn’t even begin to count them. While it is the least steady setup for holding a pot, it’s one of the fastest cooking rigs to build and secure enough if you don’t overload it.
Find a straight stick, about 3 feet long and carve a point on the thicker end (this end will go into the ground). If you’re planning to hang a pot with a bail, cut a small notch at the skinny end, or leave a natural “fork” to hold your pot handle. If you’re planning to impale a roast on your stick, carve a point on the smaller end too. Stab the thick pointed end of the stick into the ground on an angle. Place a big stone or log at the base to prop it up. Place another big stone over the back part of the stick in the ground if necessary, to keep it from flipping up out of the dirt. Hang your pot on the end or stab your roast onto the point, and adjust the height of the food by moving the support rock back and forth.
Roast on a Spit
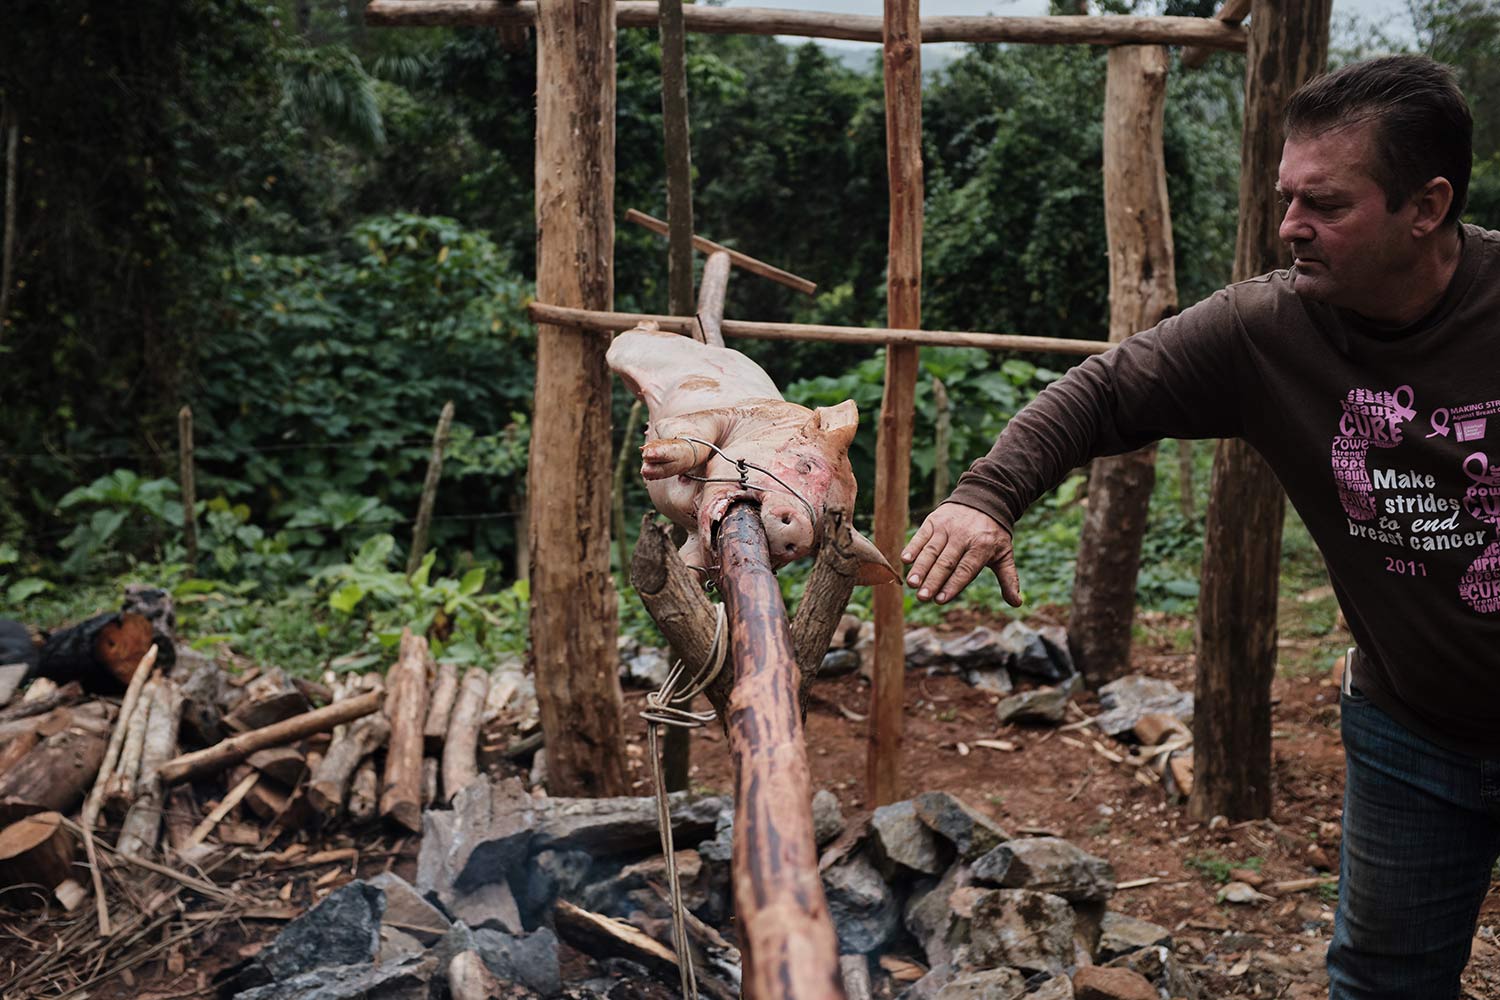
A practical and direct way to cook bigger food items, like hunks of meat or entire small game animals, is to roast them on a spit over an open fire. In the backyard, these spits are often made of metal and reused over and over. In the wild, they can be cut from green, living wood for one-time use. Live wood is very handy, as these moisture-filled sticks and branches resist burning. Just make sure it’s a non-toxic local species. Use a larger setup to roast medium-sized animals whole.
If you do decide to cook something that isn’t easy to balance, like a chicken or an odd-shaped roast, make a spit that has a side spike, barb, or prong of some kind. When the roast, bird or carcass is impaled on the spit, this barb will stab into it, stabilizing the food as you turn the spit. I prefer to use green-wood stakes with side branch forks to hold a spit over the fire. If my stakes start to burn, I prop up a flat stone against each one to block the heat.
Weave a Snowshoe Grill
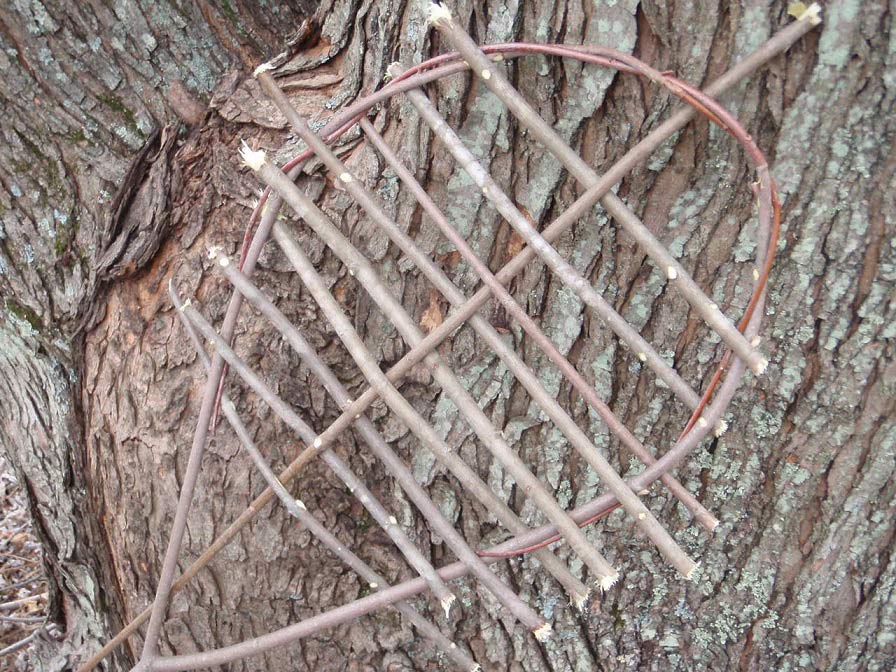
Do you need a grill to cook a meal for one or two people? You can weave one from green wood to cook steaks, fish, and many other tasty foods. The snowshoe grill (also called a tennis racket grill) can be used as a portable, reversible cooking surface. If it’s not too close to the flames, you should be able to cook several meals with it before it burns up. To make this fun little grill, follow these steps.
How to Make a Snowshoe Grill:
Choose the right kind of wood. You should have multiple species in any given area, but opposite branching woods like maple, ash, and dogwood will give you lots of natural forks due to their growth pattern. Just steer clear of buckeye and horse chestnut wood, which look like a good fork, but contain dangerous toxins.
Cut some small, straight green-wood sticks and one large forking branch, then carve a point on the end of the forked stick so that it can be stuck into the ground.
Bend the fork into a hoop, twisting the branch tips around each other until they hold their shape. Then lay one long straight twig down the middle of the hoop. Start weaving shorter twigs into the hoop, with an “over and under” pattern. If it is tight and difficult to weave, that’s good. The grill should be rigid and secure.
Place your food on the rack and use a couple more green sticks to pin the food into place.
Stab the pointed end of the grill stick into the ground, and prop the grill over the fire using rocks or a log, just as you would with a dingle stick. Turn your grill periodically until your food is fully cooked.
Build a Green-Wood Grill
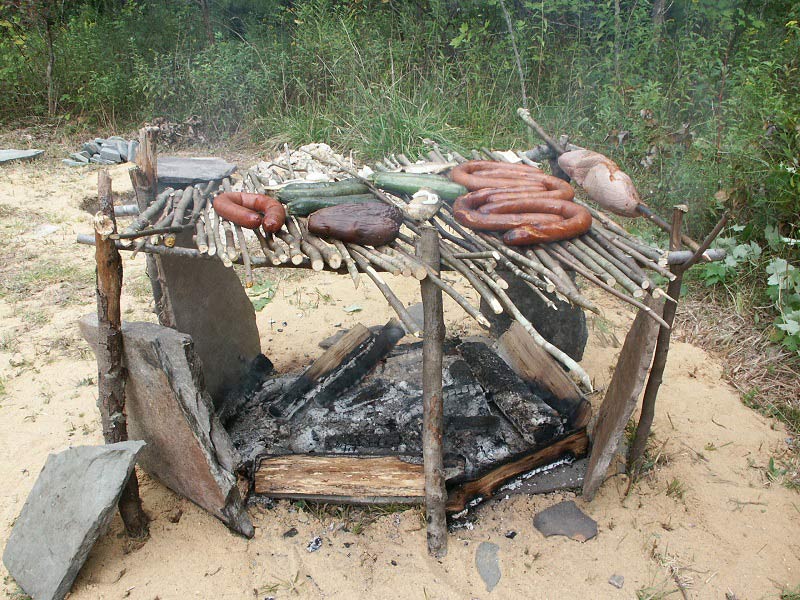
For a real wilderness feast, the green-wood grill is a great approach. This cooking method consists of a rack of fresh live sticks or branches, set up with a fire underneath. It acts very much like a metal cooking grill, and you may be able to use it several times before the sticks begin to burn. These sticks can be supported in different ways, and you can build the grill in any size or shape that you like. Square, rectangular, and triangular shapes are popular, and these can range in size from tiny to huge. I have built several massive grills over the years, the largest of which held enough food for 70 people.
Typically, I start my grills with four yard-long stakes, each with a forking branch at one end. Carve a point on the end that doesn’t fork, and drive these into the ground about 8 inches. Set two stout, green-wood poles in the forks, and lay a rack of green sticks perpendicular to them. Maintain a nice bed of coals and low flames to grill your meats and vegetables to perfection. I love roasting sweet corn this way, just as people have done here in America for centuries.
Tie a Tripod
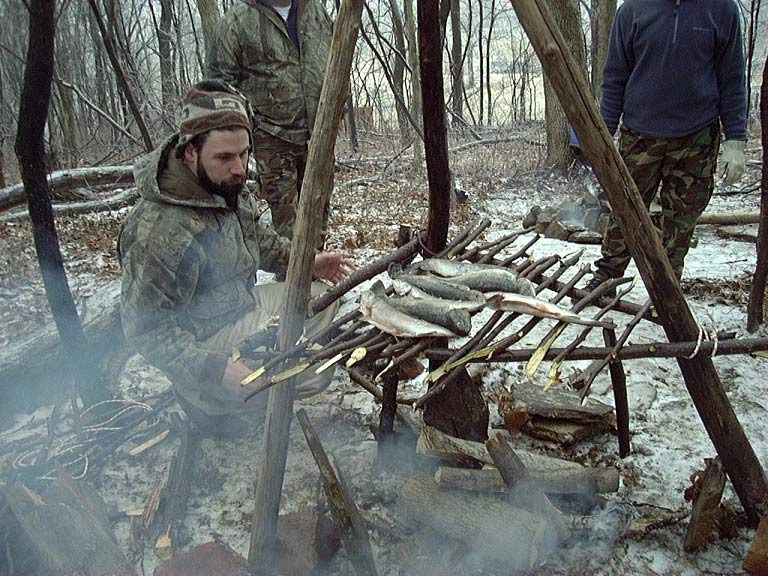
There are a few different ways to lash together a tripod, but for cooking, I usually lay three poles side-by-side and perform a tripod lashing. Tie a clove hitch or square knot to the end of one of the poles, and wrap the line around all of the poles five or six times. Wrap the line between the poles twice between each one, working back toward the original clove hitch. Finish by tying the free end of the line to the free end from the knot that started this whole thing. Spread the legs, and your tripod is done.
Use a chain and hooks to hang your cooking pot, or lash in some grill sticks to make a very stable green wood grill. For this, lash three cross pieces to the outside of the tripod and then lay your green-wood rack on top of the cross members. Use vines, rawhide strips, or leather thongs to lash the cross pieces since there will be a fire nearby. Synthetic rope may melt, and natural fiber rope may burn this close to the fire, and your rack and food could drop into the flames.
Read next: How to Build Emergency Winter Shelters
Set Up a Skewer
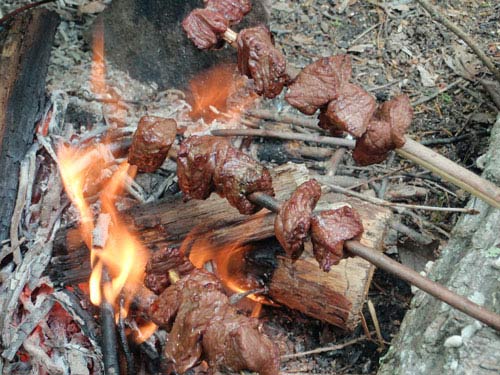
If you’ve roasted marshmallows over a campfire, then you’ve used a skewer. This pointy stick can give you many more options than just placing food directly on a bed of coals. You can easily make a wooden skewer by carving or breaking a point into a straight branch of live, non-toxic wood. To be more conservative, you can use wood that is dead, just know that it is more likely to light on fire, especially if grease starts running down the stick. For quick-cooking foods, impale them on the sharp end and hold the skewer over the flames by hand. For something that takes longer, set up the skewer like a dingle stick, or prop it up against a handy hearth rock.
Build a Cooking Crane
Hundreds of years ago, people cooked their meals in fireplaces at home, and swinging pot cranes allowed them to move heavy pots in and out of the fire safely. We can adopt this technique for our camp by building simple cooking cranes. Here’s how to carve a “three-stick” crane. Select three sticks: a long stick, a forked stick, and a hooked stick. Carve points on the ends of the hooked and forked sticks and stake them into the ground. The fork should be right side up, and the hook should be turned upside down. Make sure the upward fork is closer to the fire, and the downward hook farther away. Lay the long, straight stick on the fork with one end over the fire, and put the other end under the hook. Put a pot on the end in the fire, and leverage will hold it in place. This setup is good for small pots, but not sturdy enough for bigger vessels.