We may earn revenue from the products available on this page and participate in affiliate programs. Learn More ›
Looking for aneasy-to-build, lightweight car-topper that can handle open water and also floatsmall, shallow streams? This motor dory is the perfect vessel.
The 15½-foot hullweighs 60 to 80 pounds, depending on the materials used, and slips easilythrough the water, whether it’s rowed, paddled like a canoe or powered by asmall motor. The seats are removable and adjustable, and the hull interior isopen and easy to maintain and clean. Supplies and gear are stashed inwatertight fore and aft flotation compartments, which also reinforce thehull.
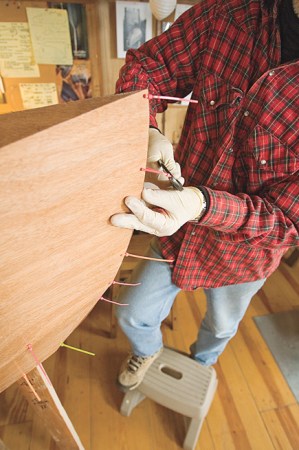
The entire boat isbuilt of standard 8-foot ply panels, and the components are sealed with anepoxy coating that prevents water soak, increases abrasion resistance, extendslongevity and simplifies long-term maintenance. The hull is constructed bylacing together five thin, flexible plywood panels; to simplify assembly thehull shape is the same on both ends. Plastic ties are inserted as needed in1/8-inch holes drilled in the panel edges and gradually tightened to hold hullcomponents in position while the hull is assembled. Two vertical compartmentbulkheads are installed at the same time to secure the hull panels at thecorrect beam width. Plywood panels are joined with epoxy-glued doubler pads,which reinforce the hull and provide support for seating. Sealed compartmentsin each end of the hull provide a safety margin of emergency flotation shouldthe hull accidentally fill with water. Seating planks can be installed,adjusted and removed as needed.
The optional motorwell is a waterproof plywood box epoxied into the bottom of the hull andextending a few inches above the loaded waterline. This puts the motor in themiddle of the boat for safety, accessibility and efficient transfer ofpower.
1 Stitch It Cut hull patterns from plywood and join them loosely together with plasticties. Tighten the ties gradually, progressing in sequence around the hull untilthe boat assumes proper shape.
2 Reinforce It Install two vertical bulkheads and lock hull panels in place with dabs ofthickened epoxy. Remove the plastic ties and apply a continuous bead of epoxyto reinforce the seams and provide a finished corner molding.
3 Waterproof It Seal the decks, seams and compartment corners with tabs or strips of fiberglasstape. Cover exterior seams with a strip of fiberglass tape or, for moreprotection, apply fiberglass cloth over the entire exterior of the hull.
4 Coat It Brush and roll an epoxy graphite mix onto the exterior bottom of the hull,around the optional skeg and inside the motor box. Equipped with the slick,tough graphite bottom, the hull will slide easily and can be dragged overbeaches, parking lots and launch ramps.
5 Toughen It Laminate thin strips of wood onto the top of the hull to form a stiff gunwalestructure which serves as hull reinforcement and mounting location for rowinghardware. After sanding, seal the gunwale with epoxy. The gunwale will providestrength and protection to roll the hull on its side for easy cleaning or toload the hull upside-down on a car-top rack.
6 Finish It The epoxy seal on the plywood is an excellent undercoat for varnish or paint.Wash and dry the surface, scrub lightly with a kitchen dish scrubber and brushon varnish or paint. Mount plastic screw-out hatches for access tocompartments. Install plank seating as needed, plus optional oarlocks,navigation lights and rod holders port and starboard for easy, hands-freetrolling.
materialsources: West System Epoxy 866-937-8797 Edensaw Plywood 800-745-3336 Beckson Ports 203-333-1412 Minn Kota Motors 800-227-6433
building plans: Plans cost $38 and include a manual written for amateur builders with photosand sketches. Order at butlerprojects.com, or send a check or money order toPaul Butler, P.O. Box 1917, Port Angeles, WA 98362.
Pacific TrollerMotor Dory Materials Both ends identical All ¼″-thick plywood (or 3/16″ for lightweight version)
Deck (make 2) 34″ 24″
Bulkhead (make2) 24″ 9″ 12″
Hull Panels (make4 of each) 8″ 12″ 96″ 93″
Floor Panels (make2) 19 ½″ 75″
Doubler Pads (all6″ wide) 8″ 12″ 19½″
Top of box extendsa few inches above loaded waterline
Motor cut-out
Motor clamppad
Top
Glass tape oncorners
Epoxy beadattaches box to hull bottom
Tape corners
Top View
Motor clamppad
Epoxy bead
• All ¼″-thickplywood
Gunwale: thinwood strips, epoxy laminated Epoxy bead Adjustable plywood seat support (epoxy to hull side as required) ¾ × 12″ plank seat (adjustable)
Make a Trolling Motor Box
A motor well can be built and installed to accommodatea specific motor, but there must be room for the prop to slip easily throughthe box.
Build the box from plywood and seal it with epoxy.Reinforce the inside corners with an epoxy bead and protect the outside cornerswith a strip of fiberglass tape or cloth. Epoxy the plywood box onto theinterior bottom of the hull at a desired location aft of midships.
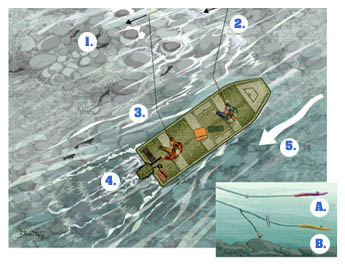
Use oars or a paddle to launch off a beach, and thenlower the motor when you reach deeper water. A short skeg may be added forbetter control in open water or full-length keel strips may be installed fordrifting small streams. Once you’re underway, a removable plywood splash coveris fitted against the motor and clamped over the top of the motor box.

