We may earn revenue from the products available on this page and participate in affiliate programs. Learn More ›
Few flies are as ubiquitously potent as the Clouser Minnow. Invented by legendary fly angler Bob Clouser in the late 1980s, the pattern quickly proved it had far more uses than originally intended. Clouser created the pattern to target smallmouth bass on Pennsylvania’s Susquehanna River, and while it’s still one of the best bronzeback flies you can tie on today, there’s nary a predator fish in the world that won’t slam one.
The Clouser Minnow is a baitfish imitation first and foremost, and no matter what size or color you’re casting, they all behave the same way in the water. Heavy lead dumbbell eyes on the bottom of the shank provide weight at the nose so the pattern sinks quickly when it splashes down and rides with the hook point facing up. Those eyes, however, also produce a jigging action when you strip the fly line. The rhythmic rising and falling of a Clouser is hard for any fish to pass up. But it can do more than mirror a swimming baitfish.

Clousers are most often tied with white or light-colored bucktail on the bottom (the belly) and a darker color on top (the back). Chartreuse over white, olive over white, and blue over white are just a few staples when trying to match baitfish species. But by tying them with an orange belly and dark brown back, as an example, Clousers can also mimic crayfish. Hopping them along the bottom can draw attention from species like smallmouth and carp, and if tied with darks like purple and black, the fly can also imitate a leech for walleye or yellow perch. From bonefish flats to deep lakes to jungle river loaded with exotic species, the Clouser will make the play. And if you’re into tying your own flies, making a Clouser couldn’t be simpler.
How to Tie the Clouser Minnow
Not only is the Clouser one of the most lethal patterns in both salt- and freshwater, it’s also one of the easiest to tie. It’s commonly taught in beginner tying classes, so even if you’re new to making your own flies, with minimal practice you’ll be able to knock out a Clouser in short order. Conversely, if you’re a seasoned fly tier, you can whip up a dozen in a jiffy. This is the perfect pattern to stockpile in the off-season because you can never have enough. Plus, Clousers tend to get beat up after extended use. The rough mouths of species like bass will take their toll on the bucktail, and lead dumbbell eyes get chipped and mashed.

One of the best things about the pattern is that it’s also easily tailored to your needs and target species. Hooks and dumbbell eyes are available in a massive range of sizes. This means you can make tiny Clousers with small, light eyes that will hammer on little creeks, or large Clousers with wider, heavier eyes and stouter hooks ready to tangle with offshore denizens. Regardless of what you’re chasing and what size Clousers you need, the tying process and materials list remains the same.
Materials
- Two colors of bucktail, one light and one dark
- Thread
- Short- to medium-shank hook
- Weighted dumbbell eyes appropriate for hook size and/or desired depth
- Flash material of your choice
Tying Steps

1. Place the hook in the vise with the point facing down. Cover the first two-thirds of the shank with thread from the hook eye toward the bend. Secure the dumbbell eyes to the top of the shank with a series of figure-8 wraps. Make sure to leave space between the dumbbell eyes and the hook eye.

2. Cut a sparse clump of the lighter bucktail. It should be long enough to extend past the hook bend by approximately an inch, and just past the dumbbell eyes on the other side ending just shy of the hook eye. Tightly secure it to the shank just behind the dumbbell eyes.

3. Wrap over the light bucktail toward the rear of the hook stopping just before the hook bend.

4. Now, wrap forward again ending just behind the dumbbell eyes.

5. Work the thread around the eyes so it’s positioned in front of them. Secure the cut end of the bucktail tightly in front of the eyes. You can snip away any excess to avoid crowding the hook eye, and ideally these wraps will have pointed, tapered look once the bucktail is secured in the front.

6. Rotate your vise so the hook point is now facing up or remove the fly and flip it if your vise doesn’t rotate. Cut a few long strands of flash material but be sparse — four to six strands are sufficient for the Clouser Minnow. Fold these strands in half around the thread until the ends meet and secure them at the nose of the fly with a few wraps. Ideally, the folded flash will extend just past the light colored bucktail.

7. Split the flash material evenly around the hook point and add a few more wraps at the nose to lock the material in place.

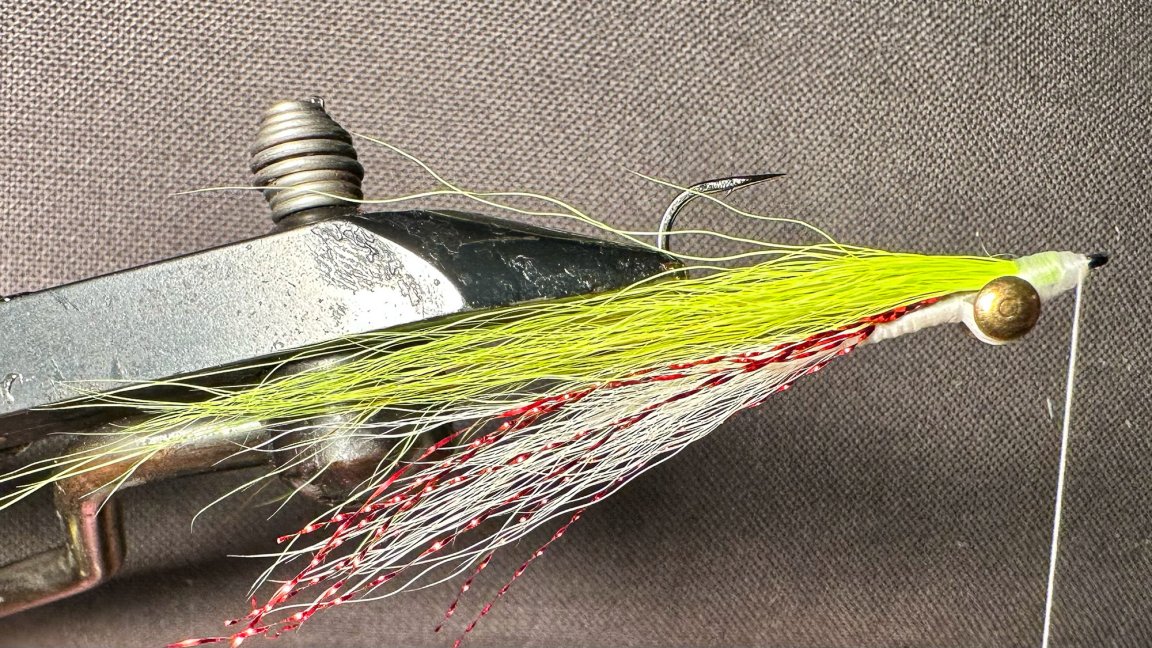
8. Cut a sparse clump of the darker colored bucktail. It should extend past the light bucktail by approximately a half an inch. Tie it in on the top of the shank forward of the dumbbell eyes. Be careful not to crowd or cover the hook eye.