
We may earn revenue from the products available on this page and participate in affiliate programs. Learn More ›
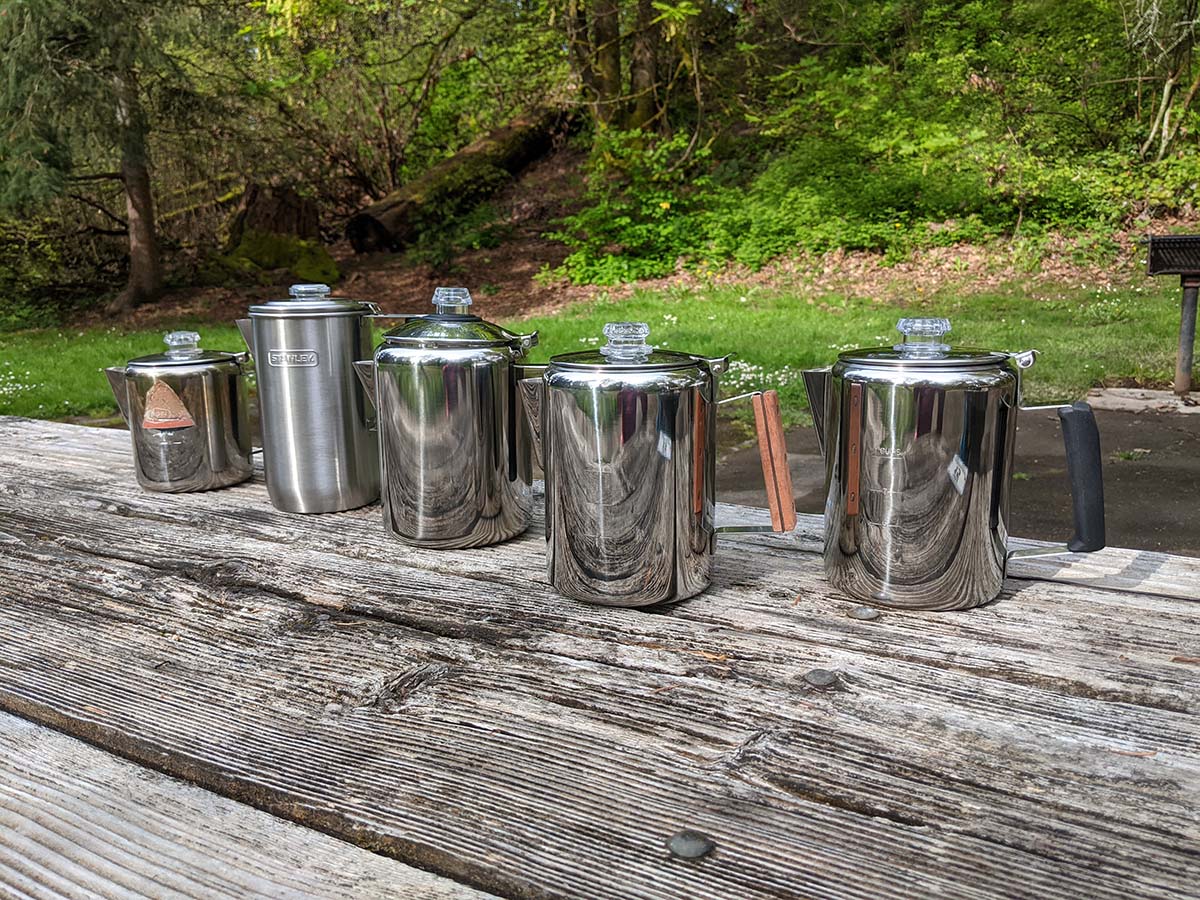
Ah, the camping percolator. Even if, like me, you’re more likely to use a french press, or even an espresso machine at home, when you’re headed to the woods, it’s time for something a bit more practical. Out there, it’s the rugged construction of stainless mixed with a seemingly bottomless capacity that reigns supreme (and no one wants to wait for the next round to brew when they roll out of their tent in the morning). After trying out six of the most popular models out there, I’ve narrowed down this list to four of the best camping percolators (and one that works in a pinch) currently available:
- Best Overall: Farberware Yosemite Percolator
- Best for Open Fire: Stanley Adventure Cool Grip
- Best for Two People: GSI Outdoors Glacier Percolator
- Best Budget: Cook N Home 8-Cup Percolator
How I Tested the Best Camping Percolators
I’m game for any assignment that calls for making copious amounts of coffee. To evaluate the camping percolators in my test, I started by brewing a batch of coffee in each one. To ensure a uniform grind for each pot, I used my local grocery store’s commercial grinder rather than the one I have at home and then applied the same formula to each batch: one heaping tablespoon of coffee per six ounces of water, and then percolated the coffee for three minutes (which produces a rather weak blend—this was in self-preservation), before I removed them from the heat. Since the quality of the coffee produced is more a result of the type of beans used (Fonté Italian Blend), instead of my go-to Caffé Umbria Gusto Crema, the temperature at which it is percolated and the duration for which it is percolated, I did not evaluate for strength or flavor. As I brewed the coffee, I noted the fit of the lid, the shape of the basket, the location of the fill lines, and other details that can become a nuisance on cold and damp camping mornings.

After the coffee brewed, I used a strainer to see how many coffee grounds made it into the reservoir. Next I tried to melt the handle by placing it directly over a medium-high heat to see how each fared (surprisingly, the wood handle in the test fared just as poorly as the silicone handles). Finally, I checked the durability of the knobs on the lid of the percolator by simulating a camping mishap: dropping a stainless steel pot on top of them from about a foot up. While all the knobs survived the test, this is widely known to be one of the most common fail points for percolators.
In addition to my four picks above, I also evaluated the Coletti Bozeman. The Coletti performed equivalently to the ones in this test at almost double the price. And for a price that steep, I expected it to perform better.
The Best Camping Percolators: Reviews & Recommendations
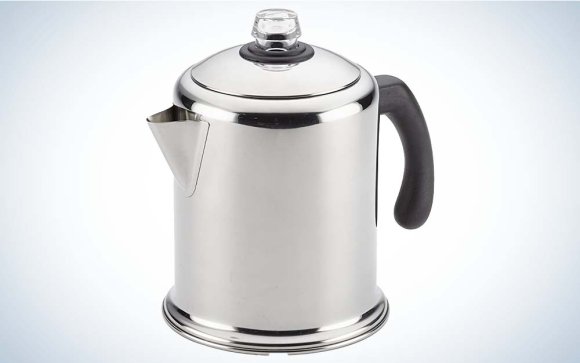
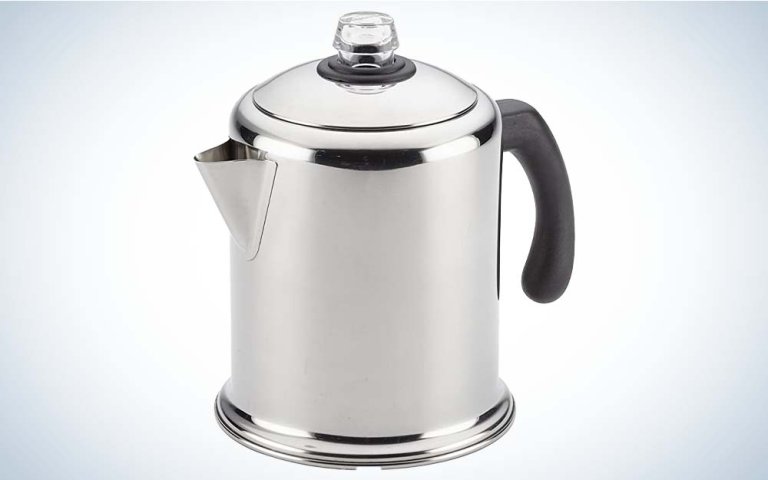
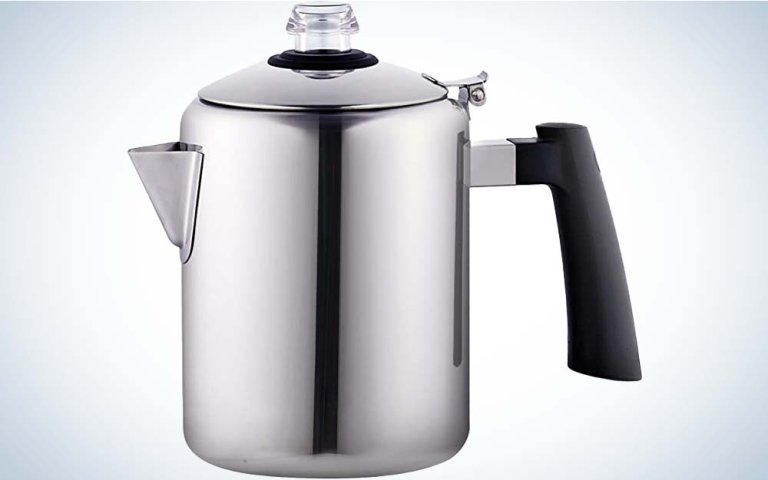
Best Overall: Farberware 12-Cup Yosemite Percolator
Pros
- Large enough for up to 10 eight-ounce servings of coffee in one brew
- Lid has a glass knob that snaps securely in place
- Only percolator in the test to produce ground-free coffee
- High-positioned handle is less likely to melt on a stove
Cons
- Lid isn’t connected to the rest of the percolator, making it easier to lose
- Plastic base below the percolator knob breaks easily (but does not impair functionality)
Key Features
- Capacity: 80 ounces
- Material: Stainless steel, glass, and silicone
- Electric stovetop compatible
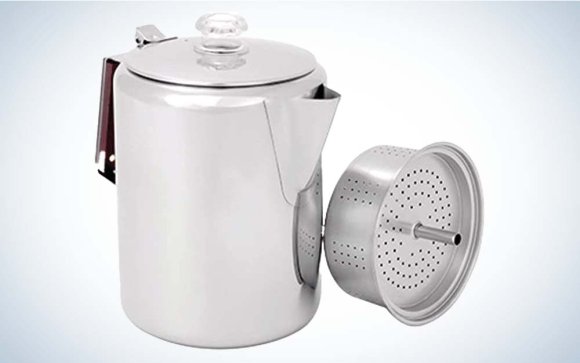
There are a number of reasons that the Farberware Yosemite came out on top in my test of camping percolators. But the main one is that it was the only percolator to produce ground-free coffee without the use of an additional filter. Looking at the percolator basket, you can see why. While most percolators have simple holes at the bottom of the basket, the Farberware Yosemite has metal tabs with very thin slits covering their holes, which prevents all but the smallest of grounds from escaping into the coffee. Even better, it did this for an impressive 80 ounces of coffee, which also made it the best camping percolator for large groups. With the Yosemite, you’ll have no trouble waking up everyone in your group (and then some) after a long night around the campfire. (If you prefer a smaller size, this percolator also comes in an 8-cup model.)

I liked that the spring around the metal tube held the percolator basket in place, so that it didn’t jostle around inside when the percolator moved or when I poured it. I was also impressed by the lid, which not only has a glass knob (preferable over plastic when you’re dealing with near-boiling water on a regular basis), but also snapped into place securely. But the lid does have its pitfalls. It was the only one in my test not attached to the rest of the percolator, which made it easy to lose or leave behind—which I did when I photographed the percolators for this story. The plastic plate below the glass knob was also the only failure in the durability test, where a portion of the rim came off. However, this did not affect the functionality of the knob itself, which screwed securely back into the lid, unharmed.
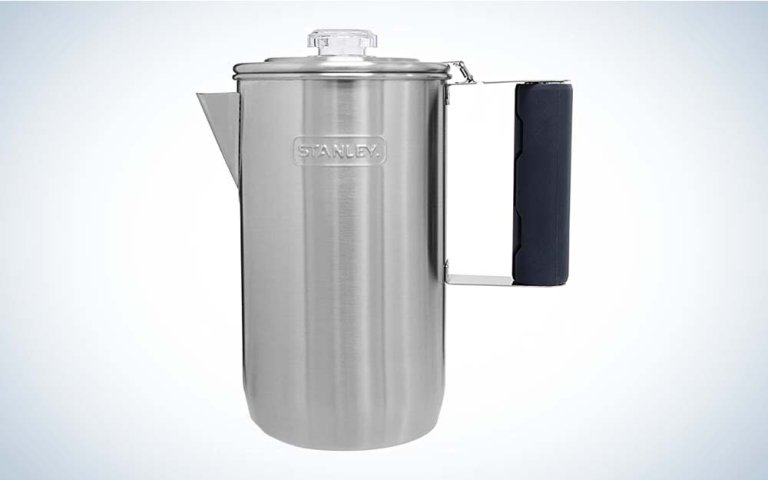
Best for Open Fire: Stanley Adventure Cool Grip
Pros
- Designed for use over an open fire
- Lightweight
Cons
- Lid slips off when trying to pour out the last cup of coffee
- More coffee grounds ended up in the coffee than other percolators in my test
Key Features
- Capacity: 36 ounces
- Material: Stainless steel, plastic, and silicone
- Cool Grip
There is something magical about percolating coffee over an open fire, with the embers popping and hot water bubbling up into the knob simultaneously. Word to the wise: that stainless steel construction does not mean your percolator is ready for the big time. If there’s any silicone, or even wood, present, then all bets are off. That’s what makes the design of this Stanley percolator so smart. Its removable gripper means that you can alternate between using this on a stove and then taking off the silicone to use over an open fire (be sure to grab a pot holder or oven mitt before attempting to grab it off the flames). The handle is also positioned high enough that I’m confident the silicone won’t singe on your stove top if you position it slightly off center.
There were a few things that I wish were different about this percolator. The lid shifted significantly while I poured out coffee. It’s connected to the pot itself, but if it wasn’t it would certainly fall off. There was also a fair amount of grounds in the coffee after brewing, although you can mitigate this with a coffee filter.
Best for Two People: GSI Outdoors 6-Cup Glacier Percolator

Pros
- Comes in a three-cup model
- Affordable
- Clear fill markings on the inside
Cons
- Low silicone handle is easy to singe on a burner if you aren’t careful
- The sticker affixed to the side when you purchase it is difficult to remove
Key Features
- Capacity: 30 ounces
- Material: Stainless steel, resin, silicone
- Easy-pour handle
While the GSI Glacier let more coffee grounds slip through the basket than the Farberware Yosemite, it still produced less gritty coffee than the majority of the field. And unlike the Yosemite, the Glacier comes in a range of sizes that are perfect for single people (the 3-cup model) as well as this 6-cup model in my test. I also liked that it was one of the few percolators to have the raised fill line on the inside of the percolator—you know, where you actually fill up the water—rather than the outside. It’s the small details like this that you appreciate when you are bleary-eyed and trying to not inadvertently water down your morning joe.

The only real ding here is the silicone handle, which can singe on medium-high heat if you aren’t careful. But this is less likely to occur with smaller groups, which often forgo the traditional family camping stove. The small size of this percolator pairs well with the best backpacking stoves.
Best Budget: Cook N Home 8-Cup Percolator
Pros
- Affordable
- Same stainless steel construction as the others in my test
Cons
- Handle melted easier than others in the test
- Inconsistent percolating
- Fill lines are virtually impossible to see on the inside
Key Features
- Capacity: 42 ounces
- Material: Stainless steel, plastic, and silicone
- Dishwasher safe
When you envision the camping percolator, it’s probably not a sleek stainless steel beauty that runs up to $50. No, it’s more likely to have a ding or five in its body, with greasy smudges or even soot stains. If you’re taking your percolator camping, it’s probably going to suffer some abuse, which makes the low price point of the Cook N Home a real draw.
At first glance the basket for the Cook N Home looks similar to our top pick, the Farberware Yosemite. But where the tabs covering the holes on the Yosemite were tight enough to let only the finest of coffee sediment through, those of the Cook N Home were spaced farther apart, which put it in the middle of the road in my test for allowing coffee grounds through.
The design of the metal tube and base made the percolating inconsistent at first, especially if you’re used to a consistent bubbling to measure your brew time, this can be a challenge. The fill lines on the interior were basically impossible to see, which made this problem even worse, and the handle design made it the most prone to melting of anything in my test.
Things to Consider Before Buying a Camping Percolator
Parts
Knowing the different parts of the percolator and how they work (covered in the FAQ section) can help you choose the right one for your purposes. First up is the body, which includes the percolator’s reservoir and spout. Inside the body you’ll find the basket perched on top of a hollow metal tube with a wide circular base. The lid, which is frequently connected to the body, features a clear glass or plastic knob at the top, which allows you to monitor the progress of your percolator.
Material
While all the percolators in this test were made out of stainless steel, various materials were used for both the handles and the knobs on each model, including silicone, wood, plastic, and glass.
Capacity
Choosing the best camping percolator that’s the right size for your needs can help make your mornings more enjoyable. For a large group, it’s worth the extra space in your camping box to pack a larger size, so that no one has to wait in the morning for their cuppa. But two people should opt for 32-ounce capacity or less, as this will take less time to brew.
Open Fire versus Camping Stove
Don’t be fooled by the stainless steel construction of most of these percolators—that silicone handle that makes them easy to grab off the best camping stoves without a pot holder means they can’t withstand the rigors of an actual campfire.
Coffee Beans
The best camping percolators will only get you so far—to get a great cup of coffee out of it you’ll need to purchase quality beans and grind them correctly. Unlike the best camping meals or camping snacks, where flavors that are simpler than what you’re accustomed to at home are usually best, the natural environs of camping—the feel of crisp, cold air, the smell of pine or fir, the taste of a campfire on your tongue—can make a great roast really sing. Don’t skimp and purchase Folgers—this is the time to splurge.
Coffee Grounds
A common issue with percolators is having grounds end up in your coffee. If you consider how a percolator works, it’s pretty easy to see why this occurs. Even when you use a commercial grinder, like those at a grocery store, and are familiar with coffee grinding, some of the different sized grounds will inevitably slip through the holes in the basket and end up in your coffee. For this reason, some people choose to use coffee filters (such as those used for drip coffee) with their percolator.
Percolator Knobs
One of the most common fail points of a percolator is the plastic or glass knob through which you can monitor the percolator’s progress. Most manufacturers sell these as spare parts, and it’s never a bad idea to have a few backups in your camping box.
FAQs
Percolators are an excellent choice for camping, as their stainless steel construction is typically more durable than a french press or pour over methods. It’s also the best way to make coffee for a large group.
Making percolator coffee is more straightforward than it looks. To start, remove the basket and tube from the percolator and fill the reservoir with cold water to the desired line. Keep in mind that a “cup” in a percolator is usually less than what the average person would drink in a sitting. Start with at least two cups per person and then adjust from there as you learn what you like.
Next, fill the basket with your coffee grounds. The grind for your percolator coffee should be coarser than what you use for drip coffee, as finer grinds will make their way out of the percolator basket and into your coffee. (Grinding your coffee at the grocery store is a good way to achieve this.) The amount of coffee you use depends on your taste, but I recommend starting with a heaping spoonful per six ounces of water. Increasing the amount of coffee grounds per cup will produce a stronger cup of coffee.
Next slide the basket over the metal tube connected to a base, then place the tube and basket back into the reservoir and close the lid. Set the percolator over medium-high heat. As the water heats up, it will push its way up the tube and into the basket and saturate the coffee grounds and drip back into the reservoir. You’ll know when this occurs because you’ll see water, and then coffee, bubbling up into the knob at the top. At this point, it’s a good idea to turn down the temperature on your stove (or move your percolator to a cooler location, if percolating over an open fire). How long you percolate the coffee depends on your taste, but three minutes will typically produce a weak cup of coffee, while six minutes will produce a stronger cup. Keep in mind that it’s easy to overbrew coffee using a percolator since, unlike pour over methods, it’s passing through the grounds multiple times. Balance your desire for a strong cup of coffee with the coffee flavor you enjoy.
Once you’ve pulled your percolator coffee off its heat source, just pour and enjoy.
Camping percolators typically run anywhere from $30 to $50.
Final Thoughts
After extensive testing of some of the most popular percolators on the market today, it’s clear that the Farberware Yosemite is the best camping percolator currently available. It has an excellent basket, which performed the best in our test. Combined with a thoughtful lid and handle, this percolator is a clear choice for anyone looking to enhance their camping coffee experience.
- Best Overall: Farberware Yosemite Percolator
- Best for Open Fire: Stanley Adventure Cool Grip
- Best for Two People: GSI Outdoors Glacier Percolator
- Best Budget: Cook N Home 8-Cup Percolator