We may earn revenue from the products available on this page and participate in affiliate programs. Learn More ›
We have all heard the idiom that “there’s more than one way to skin a cat”, and while I don’t know too many methods for skinning felines, I do know plenty of ways to sharpen a chainsaw. There are lots of chainsaw sharpeners out there, and different techniques for using them, but if you want to know a simple way to get your chainsaw sharp and efficient, keep on reading.
I will go over a tried-and-true method that doesn’t require expensive equipment, and can be done just as easily in the woods as it can be done in the garage. I’ll help you get the correct tools for your saw, and go through the whole sharpening process, start to finish. With a little patience and consistency, you’ll have a nice sharp chain when you’re all done.
What You Will Need to Sharpen a Chainsaw

There are loads of sharpeners available, but for this method, you will need a simple, inexpensive file and guide set from Oregon. The set includes a round file with a guide, and a flat file and depth gauge. These file sets come in four different sizes to match the common chain tooth profiles. Or, for about $27, you can get a kit that comes with all the round files, plus the flat file and gauges and guides. There are other companies that make very similar kits, and some of them are good quality tools. I have been using Oregon files for quite a while and they haven’t let me down, which is why I recommend them here.
As a side note, you don’t need the file guide, but having one helps you get a more consistent angle and bite on each tooth. This makes the process faster for most people.
Read Next: Best Chainsaw Sharpeners
Step 1: Find the Correct File Size for Your Chain
If you have the owners’ manual for your saw, the chain type and file size needed should be listed in there. Or, if you have an aftermarket chain on your saw, the package that the chain came in will have the required file size listed on it as well. But, what if you have an old saw and an old chain and you don’t have those things? Well, if you bought the full kit, you can simply see which file best fits the tooth.
Check which one fits the curve in the chain that will contact the whole cutting surface of the tooth. If the file only contacts one part of the tooth, it’s too small, and if it’s only touching the top and bottom with a gap in the middle, it’s too large. The file should fit the curve totally and contact the entire curve.
Obviously, it’s better to just have the correct info, but the guess-and-check method will work if you can’t find the info online or in your manual.
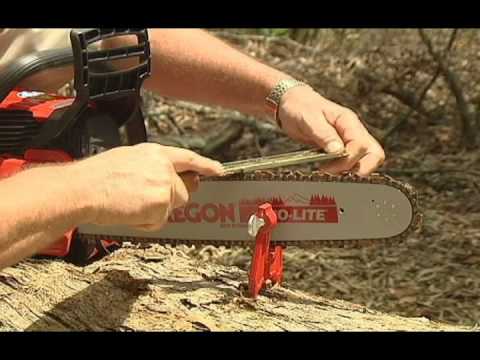
Step 2: Attach the Guide to Your File and Start Sharpening
Once you have found the correct file size, you can slide the handle on the file, and attach the file guide. The guide has lines on it that you will line up parallel to the bar, which will help keep you at a 30-degree angle. That’s the most common angle for cutting the teeth.
Files only cut in one direction, and so “sawing” back and forth isn’t what you’ll want to do here. The files only cut when “pushing” them. The tip of the file is where the cutting should start, ending down closer to the handle.
You can file from either side of the tooth, but whatever you choose, keep it the same for all teeth, left and right. So, you can choose to start the tip of the file “inside” the chain and file outwards away from the tooth, or start the tip at the “outside” of the tooth and file inwards. Either way, the file only cuts as it is pushed. You can push with the handle, and use your other hand out near the tip to keep the stroke flat and even.
If the teeth are just dull, and not heavily damaged, I usually make three strokes on each tooth. I quickly check to make sure the whole curve is being sharpened from the top of the tooth down to the flat as the base of the side curve, and that the file is cutting the whole surface of the curve from the inside to the outside. You should be able to feel a slight burr on the top and outside of the tooth. That lets you know that you apexed the whole cutting surface. I drag my finger along each tooth to feel a burr, and then move to the next one. For damaged teeth that hit a rock, you may need to make additional passes to remove the damage and raise a burr.
I use a marker to color the tooth I started on so I know when I make it around the whole chain. You can also start at the “break” in the chain, which is usually marked by two cutting teeth in a row facing the same way, or a colored link. Either way works to keep you oriented.
After I have done all the teeth facing one way, I switch to the teeth that face the opposite way, and work my way around again. Remember to switch hands with the file to keep the cutting direction the same for left and right teeth. If you don’t want to switch hands, move your body to the other side of the saw, or turn the saw around.
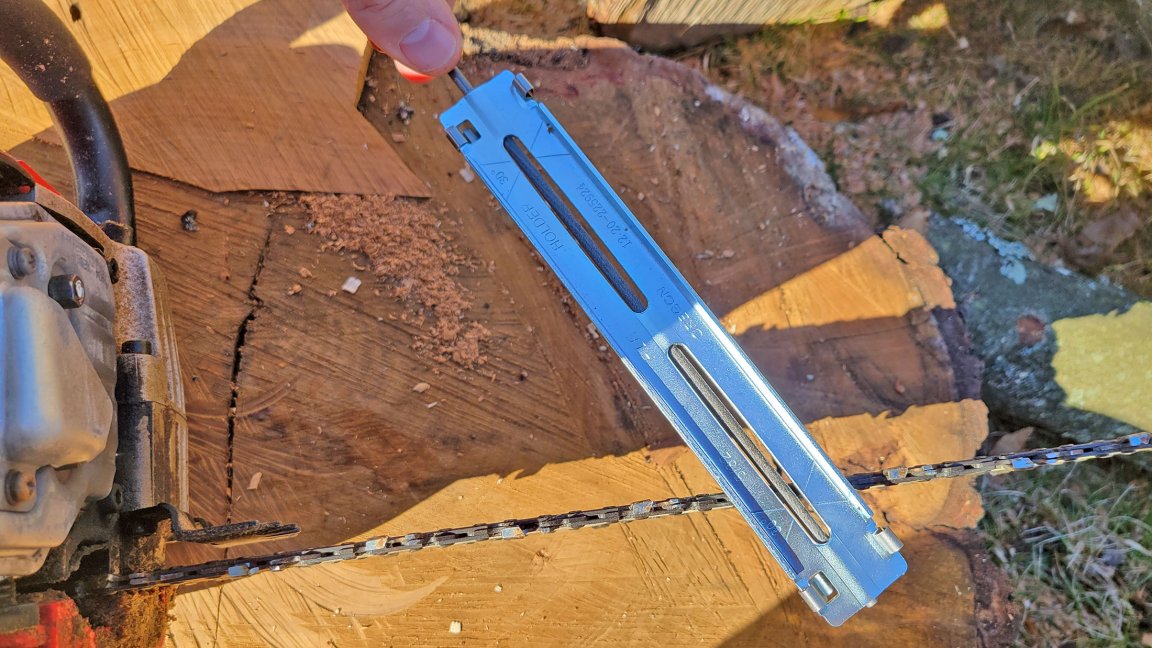
Step 3: File the Depth Gauges

Once you have sharpened all of the cutters, the next step is to file down your depth gauges (or guide links). With the Oregon kit, place the Depth Gauge Tool over the chain, and align the slit over the depth gauge you want to file. There will be a little bit of the depth gauge sticking up with the cutting tooth. Be careful not to hit the cutter when filing the guide. Take your flat file and push it across the depth gauge until it’s flush with the depth gauge. This will usually only take a stroke or two. Some people just make one firm stroke on each depth gauge each time they sharpen. I have tried that, and it seemed to work. If you don’t file your depth gauges, your cutter links will shave off thinner and thinner chips every time you sharpen the chain, and eventually, the chain won’t cut even if it’s razor sharp. The guides determine how deep a bite the cutting links will take out of the wood. Not taking down your depth gauges will result in slower and slower cutting.
After you have filed all teeth, and all the guides, you’re done! It will only take a few minutes once you get the hang of it, and you will easily make up that time by ripping your saw through logs like it’s a hot knife through butter. You can gas up, top off your chain oil, and get to work.
How to Sharpen a Chainsaw, FAQs
When it’s dull! You can tell that your chain is dull if the saw no longer cuts through logs easily or if it’s turning out really fine sawdust. You want to see big sawdust chips while you’re cutting.
How quickly a chain goes dull will generally vary quite a bit depending on whether you’re cutting green wood or seasoned wood, if the logs have sand or dirt on them, and even the type of wood you’re cutting. But, as a rule of thumb, if you sharpen your chain every time you refill your fuel tank, you should be good to go. When I’m doing firewood, I’ll run my saw until it runs out of gas and then give it a quick sharpening. I top off gas and oil, and get back to cutting. This way, I’m not getting frustrated with a dull chain. However, sometimes if I hit a bunch of dirt, or the logs are muddy, I will have to sharpen more often to keep things moving.
This depends on how much material you take off each time, and how much damage the chain gets from hitting rocks. Chainsaw chains have marks on the cutting teeth to let you know when to stop sharpening and replace the chain. If you sharpen a chain too much, the teeth can thin out and weaken and break off. Realistically, a chain will last years for use around the house or farm. It’s still a good idea to have at least one spare chain around just in case one breaks or gets heavily damaged.
If your saw is not cutting straight through, it can be either a twisted bar, or an imbalance in chain sharpening. When I was new at sharpening, I thought I had somehow bent my bar because the saw wasn’t cutting straight. It turned out that I wasn’t sharpening the left and right teeth equally, so one side cut faster, and made the cut curve. This is a major reason for making a good effort at keeping consistent from first tooth to the last, left and right sides.
Read Next: Best Electric Chainsaws
Final Thoughts on How to Sharpen a Chainsaw
While there are many other methods and sharpeners for keeping your chainsaw sharp, this simple process will yield good results every time, and keep your chain from being subjected to excess material removal, which will increase its lifespan. Once you go through this process a few times, you will speed up significantly, and get better and better results. Keep your saw nice and sharp. It will cut faster and be safer to use.