
We may earn revenue from the products available on this page and participate in affiliate programs. Learn More ›
Many people have heard the story about two woodcutters chopping trees in the forest. One chops and chops and chops without stopping, while the other takes breaks frequently, but still manages to chop more wood. That’s because while the second woodcutter was “on break” he was sharpening his axe. Now, lots of corporate types use this story to try to teach something about productivity, or whatever, but the only real takeaway is that a sharp axe translates to less hard work.
A sharp axe will have less glancing blows, cut deeper, and cut faster. I’m not interested in banging a dull hunk of metal into a tree for 15 minutes when I could get it done with a sharp axe in less than five. So, sharp axe good, dull axe bad. But how do you get your axe nice and sharp and ready to do some real work? Believe it or not, it’s not that hard, and it doesn’t require expensive tools. Here’s a step-by-step guide on how to sharpen an axe.
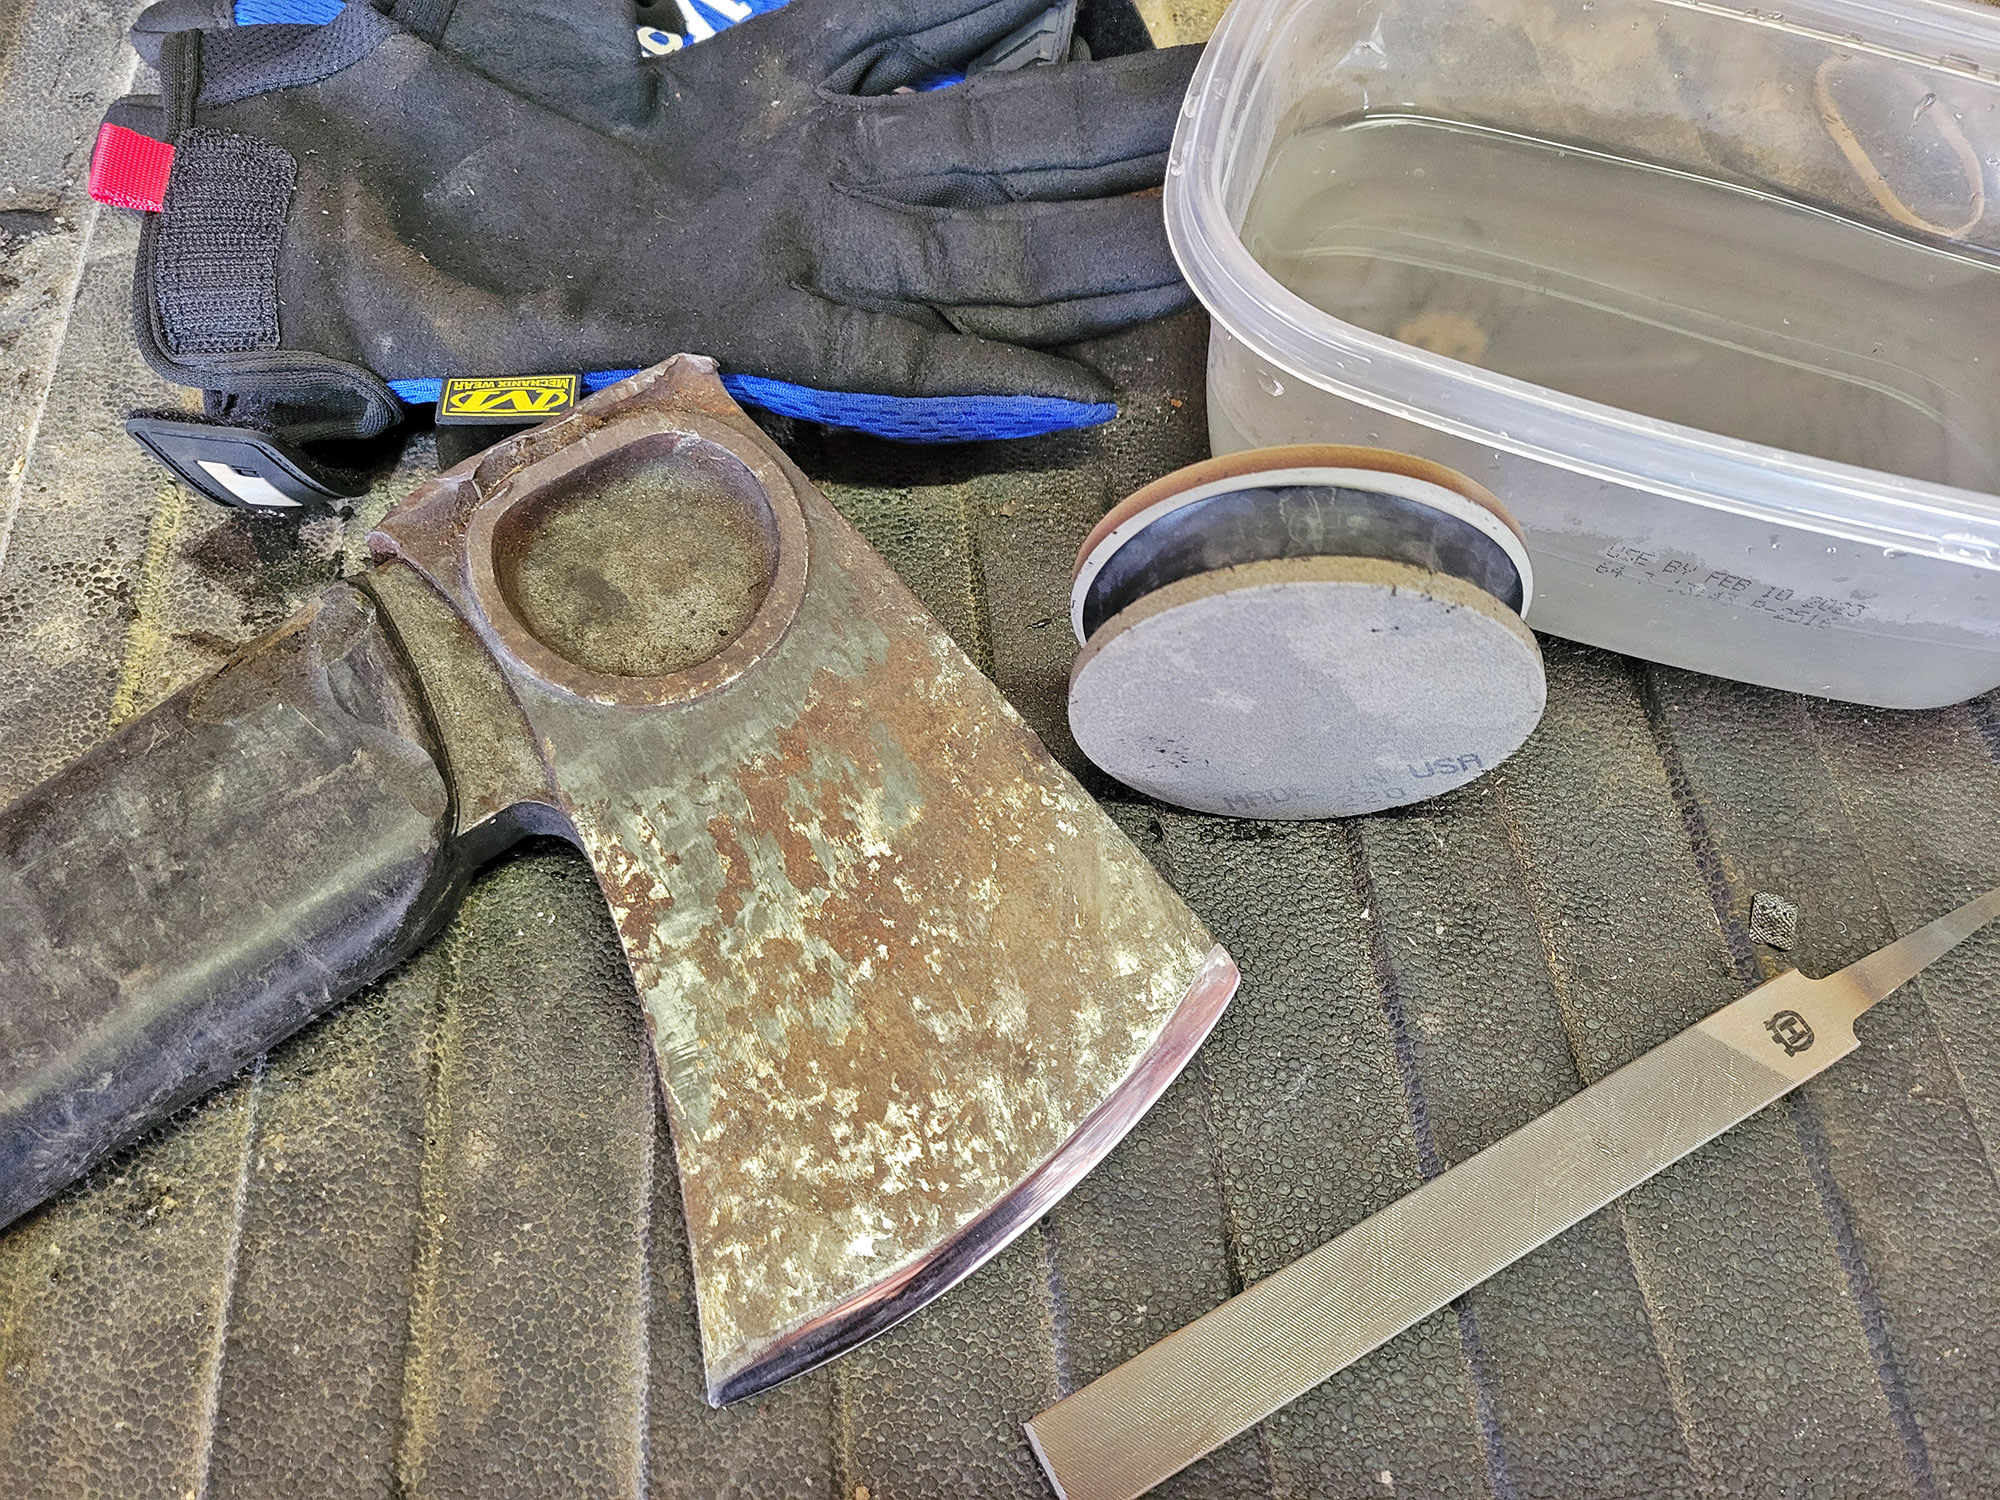
What You Need to Sharpen an Axe
- File
- Puck-style sharpening stone
- Vise (optional)
- Bowl of water and old toothbrush
- Work gloves
For this method, you really only need two tools. A flat file, and a “puck” style sharpening stone. The file should be a Mill Bastard file. These are commonly available at any hardware store, and if you get your technique correct, you don’t actually need a puck afterward. An 8” or bigger file makes this easier, but you can get the job done with a smaller 4” or 6” file. I sharpened my axe for this tutorial with a flat file for leveling chainsaw guide teeth, just to show that it can be done with a small file. (Plus my bigger file is getting dull and needs replacing).
After you’re done with the file, you can move on to really honing and sharpening the edge with a puck-style sharpening stone. I use stones from Straight Grain Supply because they are dual grit, and the rubber band makes for a good grip. The stones come in a variety of grits, and can be used alone without a file if you like. I use both because the file removes damage faster, and the pucks give a finer edge with the higher grits. For these stones, I keep a bowl of water and an old toothbrush handy. Letting them sit in water before sharpening helps to keep them from getting clogged up with metal particles. A quick scrub with the toothbrush and some water helps keep them clean and cutting properly and it extends their effective life.
If you have a vise, that can be helpful if there is damage that needs to be sharpened out, but it’s not necessary. If you don’t have a vise, having a longer file is much more important. More on that later. The last thing you will need is a dull axe. I used my “beater” axe for this story. It’s been used as a wedge and it’s been beaten and deformed. It has smashed more than a couple rocks while taking out roots. It had some serious damage, so I thought it would be useful to show how effective the file is. As a final note, I recommend wearing a pair of work gloves for this because your hands and fingertips will be very close to the edge.
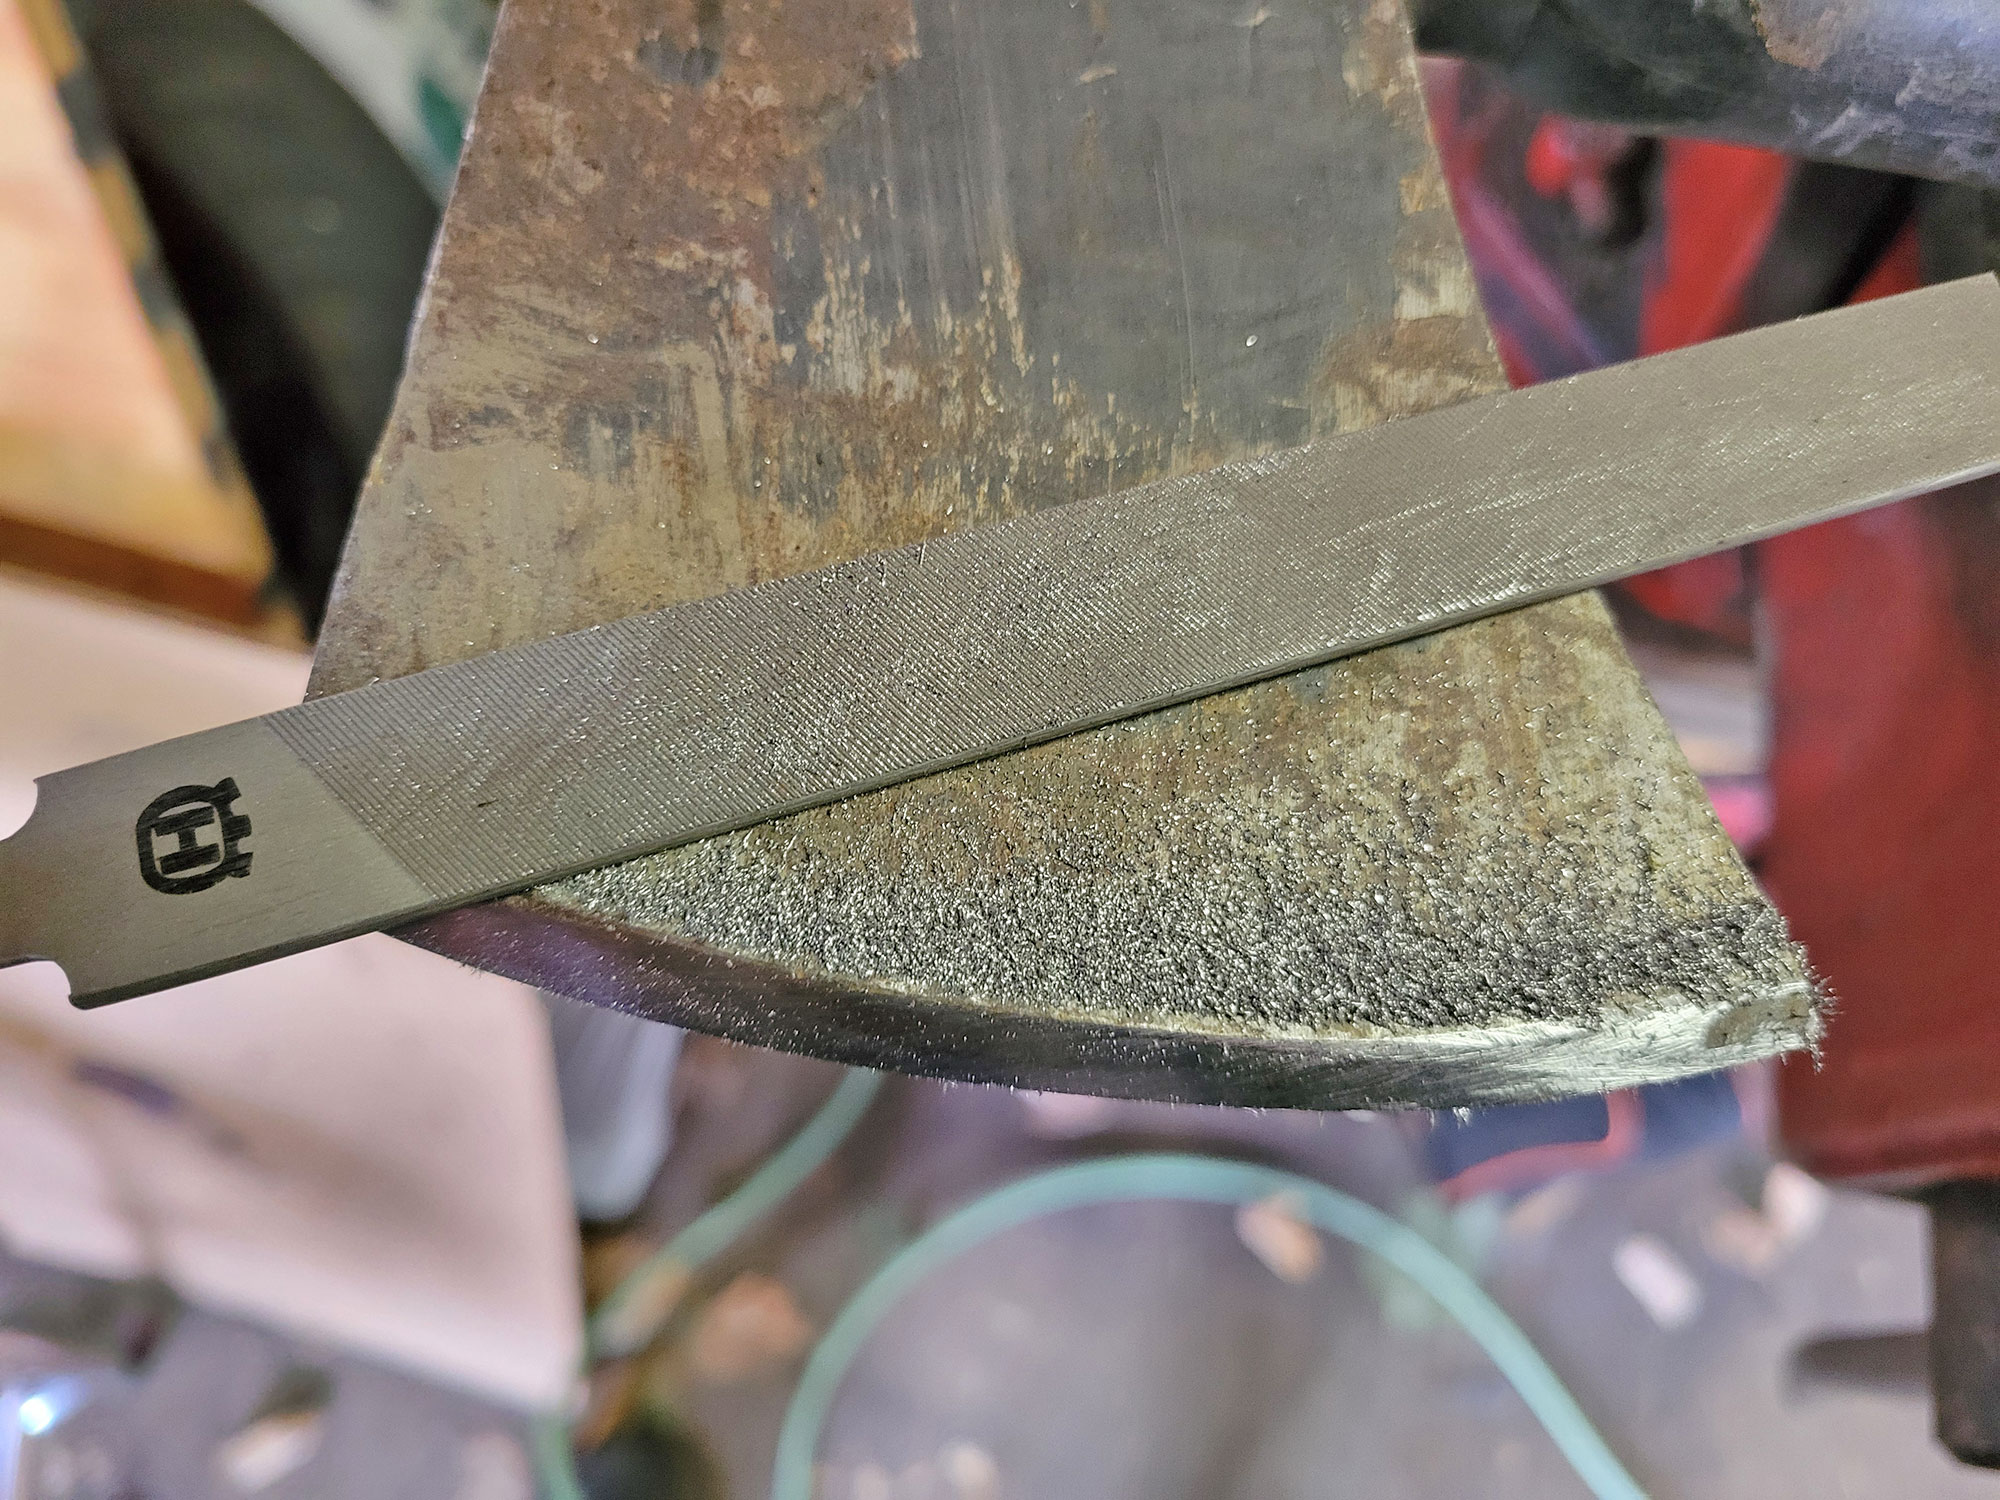
Step 1: Profile the edge and take back the cheek
Drew Conover
First, you will take your file and set your edge angle and thin out the cheek of the axe. The cheek is the portion of the blade just behind the edge. You can thin this out if you want the axe to chop deeper into the wood. If you have to bring the edge back for significant damage, you should file the cheeks down a bit to keep the cutting performance. Make sure you are sharpening the whole bevel, not just a tiny portion near the apex of the edge. With a longer file, you can ball up an old rag or t-shirt and put it on the axe head and rest the tip of the file on it as you make your cuts with the back of the file. Make the rag thick or thinner so you can match the angle of the bevel. The rag acts as a pivot point for the file and allows you to keep pressure on the axe head so it won’t move around.
With a shorter file, this method won’t work, and a vise really comes in handy. For wood handled axes, rubber jaw protectors, rags, or leather can be used to protect the wood in the vise.
Pull your file across the edge from one end of the blade to the other. These files don’t just cut with the file moving from tip to handle, they cut laterally as well. You will feel the file bite into the material. Lift the file and go back and make another lateral pull.

Make passes until all damage is removed, and you feel a burr on the entire edge. Flip it over and do the same thing to the other side. After you have apexed the edge on both sides, you should have a pretty sharp axe, and you can stop here if you want. With just a file, you can achieve a great working edge. But, I like my stuff really sharp, so I continue on to the stones.
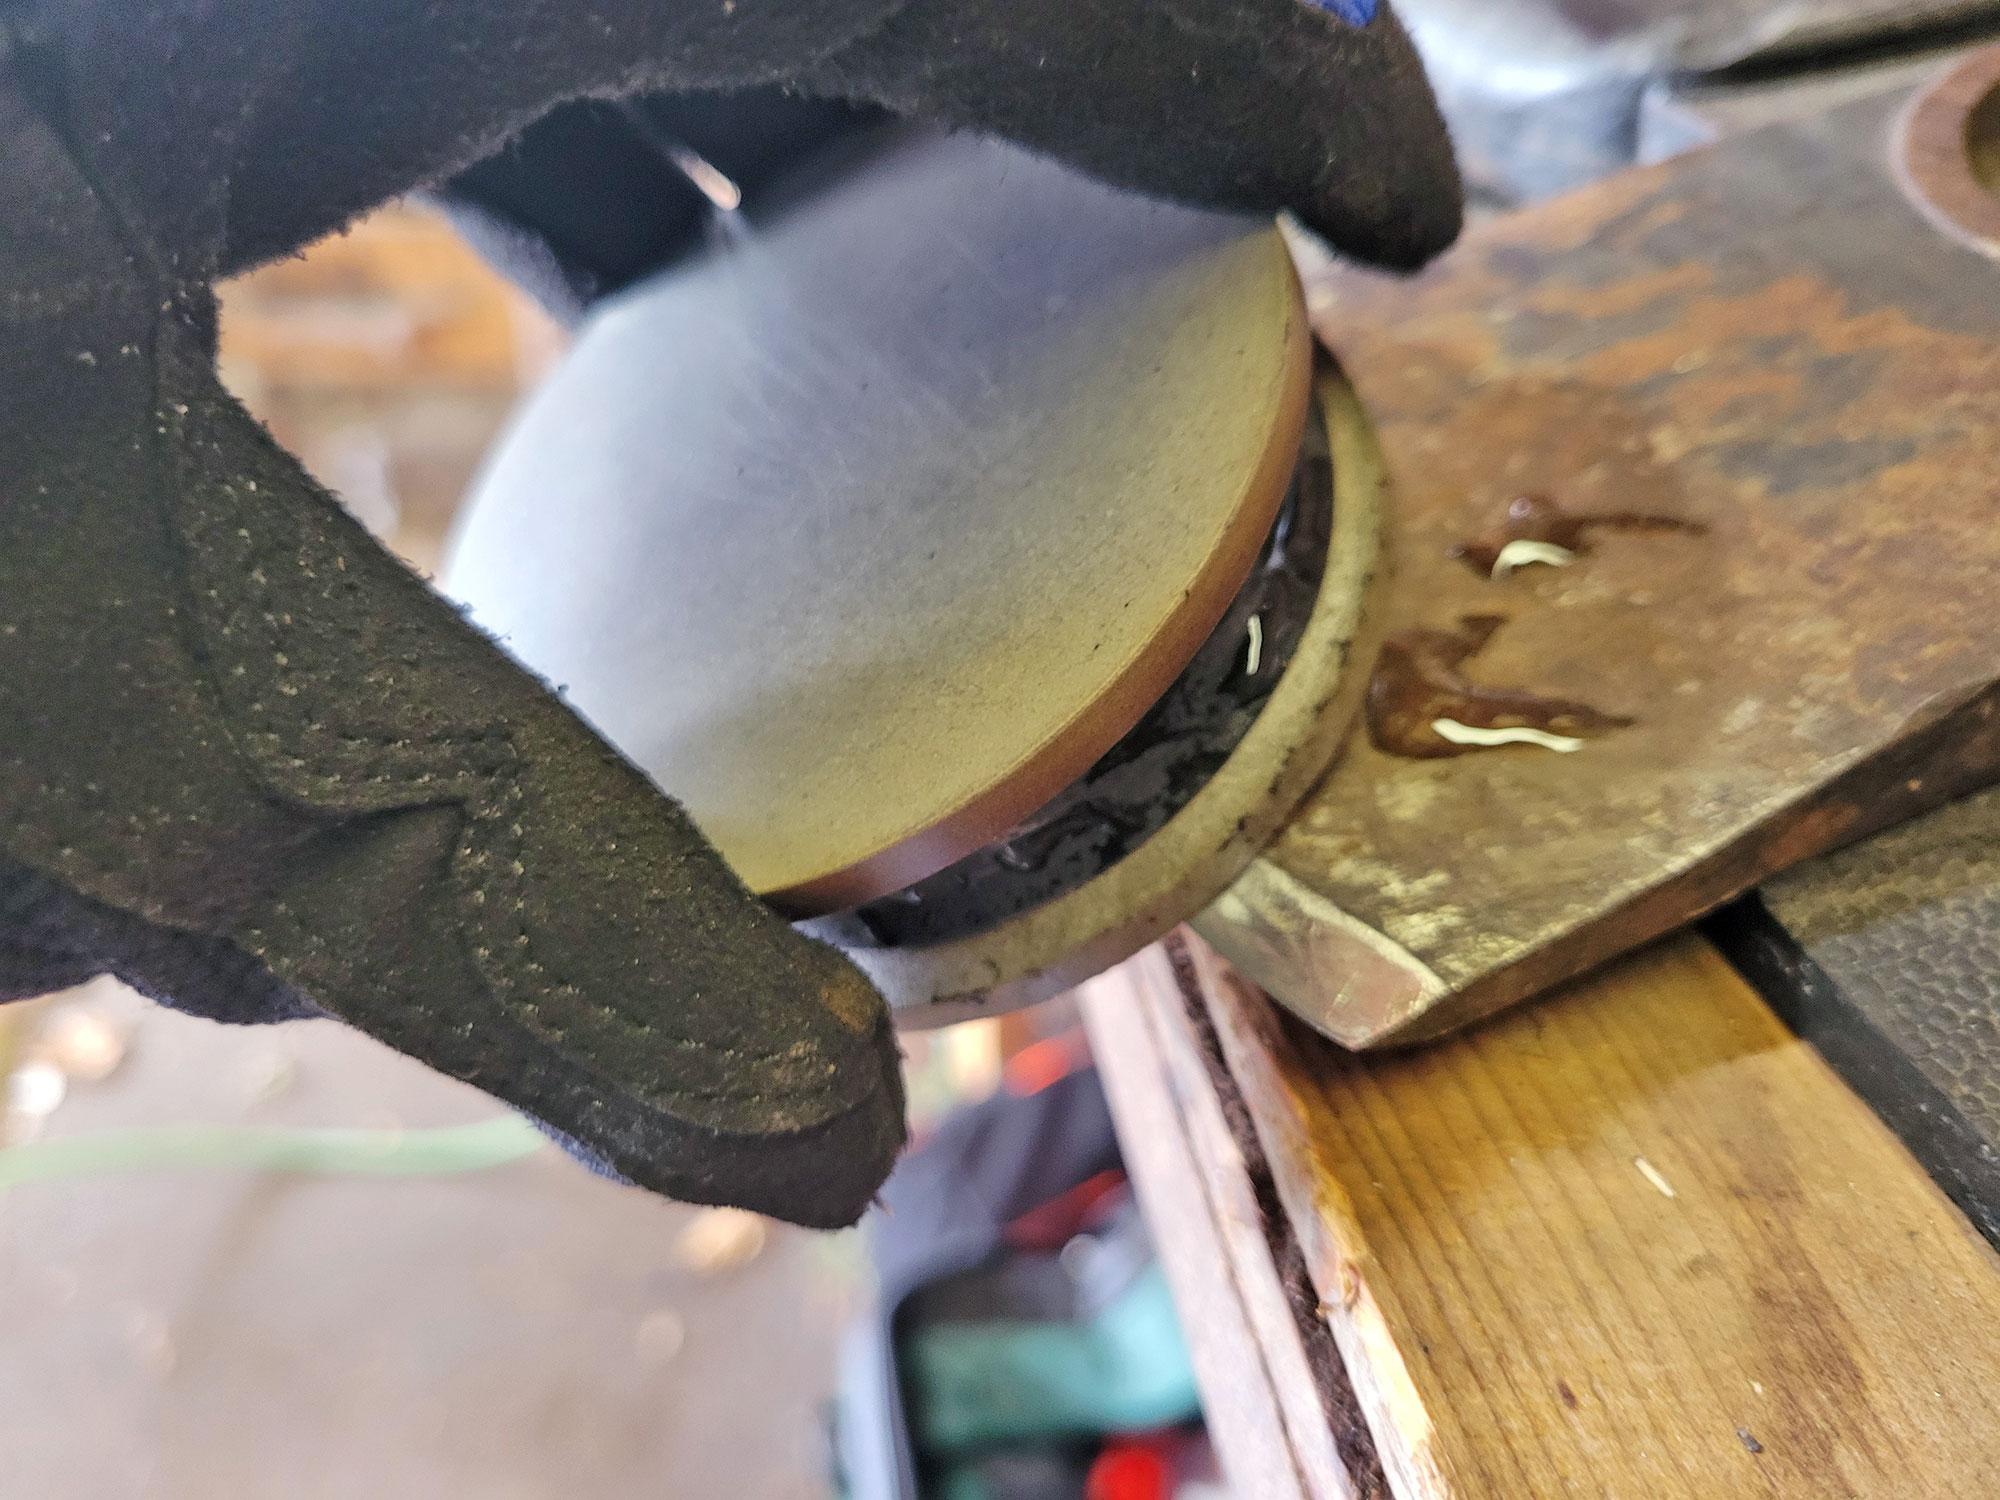
Step 2: Refine the edge with puck stones
Drew Conover
Once you have removed the heavy damage and re-profiled the edge with your file, you can refine the edge with progressively finer grit stones. If you don’t have a file, you can use a coarse stone to profile the edge, but it will generally take more time, especially if there are some deeper chips or rolls in the edge.
After your stones have soaked in the water a bit, “scrub” the entire beveled edge with the puck using small circular motions to refine it. Hold the puck with your fingertips and keep them away from the edge. You will see the scratch pattern from the stone taking away the tooling marks from the file.
Give your stone a dip in the water every so often to keep it clean. When you have removed the marks from the file on the whole edge, repeat for the other side. Then, get the next grit stone, and repeat this process on each side. Scrub until the scratch pattern from the previous grit stone is gone. I usually use the medium grit after the file work and progress to a fine grit. Straight Grain Supply makes two-sided stones in 80/220 grit, 220/400 grit, and 220/600 grit. I use the 220 grit and then progress to my 400 grit side. I have used the 80 grit side for damage before, and it will remove material fairly quickly, but I still prefer a file for initial shaping. After you have done both sides with medium and fine grit, your axe should be ready to go, and will be taking on a nice shiny, somewhat polished appearance. If you have a leather strop, you could make a few passes on that just to remove any small burr that might remain and further polish and refine the edge, but the bur will be gone on the first chop or two anyway. I strop mine because I have one, and I like the edge to be shiny after I’m done. If you want the best edge possible, take your time with these steps. It will be worth it when you start chopping.
Step 3: Maintain your edge

Drew Conover
Once you profile and remove damage on an axe, maintaining that sharp edge shouldn’t take much effort at all. After each use, take a minute or so and hone each side with your finest grit puck stone before you put the axe away, and you will generally be able to go a long time before you have to sharpen it again. Now, if you happen to hit a rock or nail or something else that damages the edge beyond small nicks, then you will have to go through the whole process again. A little maintenance after each use will keep your axe cutting well between sharpening, and prolong the life of the axe head. If you maintain it with a file every time, you will remove more material than needed and wear out the bit of the axe sooner. An ounce of prevention is better than a pound of cure.
Read Next: Best Camping Axes, Tested and Reviewed
Tips for Sharpening an Axe
- Wear gloves. When you’re filing or scrubbing with the puck, your fingertips and knuckles are very close to the edge. Wearing some decent work gloves could save you from a serious cut. Ask me how I know.
- Get a good grip. The Straight Grain Pucks have a rubber band in the groove between the grits that makes an excellent indexing point for your fingers and thumb. If you are always on the band, you won’t be on the blade. Most puck-style stones will have a groove to keep your fingers in, but if they don’t, just be mindful of where your fingertips are because I’m guessing you want to keep them.
- Keep your stones clean. When you finish with your puck stones, a vigorous scrub with an old toothbrush in your bowl of water will remove most of the metal in the pores and keep your stones working properly and give them longer useful life. After you give them a quick clean, set them in a spot where they can dry out.
- Make a consistent edge. When you are filing with the rag or t-shirt as a pivot, keep an eye on the edge and adjust the rag as needed. They tend to flatten out with pressure and repeated passes. You will probably find it necessary to refold or re-wad the material every so often to keep a consistent angle.
- Don’t saw with your file. When filing, remember that files aren’t supposed to be “sawed” back and forth. They will only cut material in the direction the teeth face. Sawing a file with downward pressure in both directions can prematurely dull the file. Also, it is usually beneficial to brush the material out of the file teeth periodically to keep them from clogging up and cutting slower. A few taps on your workbench can also knock the shavings out of the teeth and accomplish the same goal. Don’t slam the file, just some taps on wood. Files are very hard and somewhat brittle and will snap if you hit them too hard on metal or concrete or try to pry with them.
Final Thoughts on How to Sharpen an Axe

Drew Conover
A little time spent learning how to sharpen an axe will pay dividends when it comes time for chopping. For me, few things are as frustrating as a tool not performing the way it is supposed to. The thing is, you might not think your axe is even dull, but if you take the time to sharpen it, you will be amazed at the difference in cutting performance. Invest a little in sharpening and save a bunch of hard work down the road. Keep your axes sharp.