Every outdoorsmen wants to quickly master high-level survival skills that can save their life and the lives of others when faced with a perilous situation. Starting a fire with one strike of a ferro rod or building a shelter in the middle of the wilderness are both essential skills if you plan to hunt or hike into the backcountry.
But, you also have to take care of the little things, like knowing where your closest water source is, sharpening a dull blade, and finding your way back to camp without relying on GPS.
Here are 10 basic outdoor skills you must know before heading into the wild.
1. Pick a Safe Campsite

We’ve probably all done it. You get out into the backcountry and plop down your tent on the first patch of dirt that doesn’t have a bear standing on it. Good enough, right? Well, not really. When I teach shelter building during my survival classes, we have a long chat about camp location before anything gets built. You’ll want to look up, to scan for hazards that might fall on you (like loose rock and dead tree branches). You’ll also want to look for water drainage issues that could flood your camp (choosing the high ground is always ideal). Finally, check the ground for pests, poison ivy, and other dangers. The time you spend choosing a practical camp site is time well spent. Just don’t spend forever making your decision. You won’t find a perfect camp site every day, so select one that works well enough before you lose daylight.
2. Have a Plan

Carefully choosing each piece of gear, picking your travel route for an outing, and marking the date on your calendar are all necessary tasks to ensure your safety in the backcountry. Planning is an activity that rarely gets the credit it is due. Maybe you’ve heard about the six Ps: Proper Planning Prevents Piss Poor Performance. It’s a memorable credo and very true. If you’re the type of person who just dumps a bunch of supplies in a bag and races out the door, eventually you will find yourself in a situation where you need a specific piece of gear but don’t have it because you didn’t take the time to plan out your adventure. If you haven’t planned a route and return time, no one back home will know where to look for you or that they should look for you in the event that you are injured or lost, and don’t have a phone signal to call for help. Your plans should include the gear, the route, and the timetable for your trip—even if its just for the day. Have a responsible person at home who can contact the authorities when you don’t come back or call by the appointed hour.
3. Locate a Water Source

When there’s no running water on demand, there are still plenty of ways to locate water. Some of these ways are obvious, and others are not. Heading downhill is a smart tactic for finding water though sometimes these waterways dry up as they snake through arid terrain. You can also look for green vegetation. They need water to survive and so it’s likely there is water at the surface or just below the dirt. Listen for the calls of aquatic animals (frogs are a good one), as a guide in the right direction.
4. Sharpening A Knife

Knife sharpening is a little bit like cooking. Not everyone wants to do it, and some folks aren’t good at it. That’s probably because they haven’t spent much time working on the skill. Since your knife is one of the premier tools in the wilderness, it makes sense to keep it in top condition. That means keeping it stowed away safely when it’s not in use, and sharpening it after any use that would dull the edge. I’ve really enjoyed learning how to work with round river cobbles as improvised sharpening surfaces. After all, the first sharpening stones were actual stones, and you’ll just need to find the right “grit” for the sharpening task.
If you’re just touching up an edge that’s still relatively sharp, a very smooth stone may provide all the abrasion you need. For more intensive work, you’ll need several different stones with different surface textures (mimicking store-bought stones that are coarse, medium and fine). Everyone has a little different style when it comes to moving the blade against a stone, but I’m a firm believer in making little circles in equal numbers (on each side of the blade). I also like to keep water on the stone. That’s not why it’s called a whet stone (different spelling – not “wet”), but it’s a good reminder to keep it wet. This keeps the stone dust and steel particles from clogging up the abrasive surface of the stone cobble.
5. Handling Your Knife Safely

Every time you use your trusty EDC blade or belt knife you should be handling it safely. Whether you are packing a pocketknife or survival blade that would make Rambo blush, this part of your kit can perform many remarkable tasks as long as you use it properly. It can also cut you to the bone. Trust me, you’ll have enough problems in a survival situation. You don’t need to add a knife wound to the list. You can minimize this risk by understanding knife safety. Always cut away from yourself and away from your neighbors in camp. Keep your folders closed and your sheath knives tucked into their sheaths when you’re not using them. Never rush when carving (keep each move slow and controlled). Use your situational awareness and stop carving if anyone comes within reach of your blade. Finally, keep your knife sharp. A dull knife takes much more pressure to slice and this extra effort can cause you to slip and injure yourself.
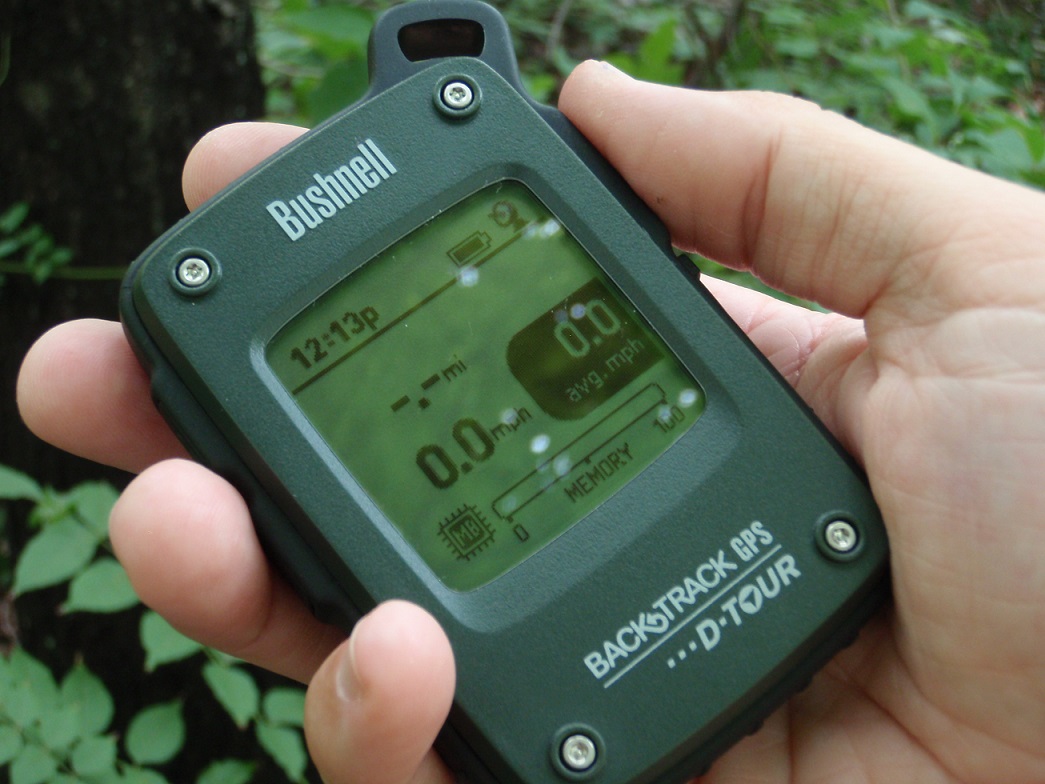
6. Navigating Without GPS
The number one reason for Search and Rescue callout is that someone has become lost. A GPS can prevent this common misfortune, so you should use one. That being said, it’s also smart to cultivate a back-up plan for navigation. Forget about the nonsense, like moss grows on the north side of the tree or geese always flying toward water. Take the time to learn map and compass navigation, and supplement those skills with celestial navigation knowledge. Learn where the sun and moon rise and set. Find out how to spot the constellations that spin around the North Star. Pay attention to the orientation of ridges, valleys, and rivers in the area. Learn how to make a sun compass. These can all be used to provide general bearings and keep you from getting lost.
7. Forage for Food

Foraging is important, but so few people take the time to learn how to do it properly. It’s not just berry picking during the summer. Foraging can be done in any season and in some of the bleakest environments, if you take the time to learn about more than blueberries. Many roots, shoots, and greens make excellent vegetables. Various twigs and leaves can create tasty and healthful teas. Edible tree nuts can provide enough calories to sustain us, even in cold weather with a heavy workload. There’s wild food all around us if we are wise enough to embrace this skill.
8. Signaling for Help

This skill set won’t boost your ego. After all, you are asking for help and admitting that you can’t do it alone. It is, however, the skill set most likely to get you rescued. Modern technology can do a lot for us when we carry and use locator beacons and even our mobile phone. There are some other signaling tools that aren’t so “push button” in their operation and require practice. Just one example is the use of a signal mirror. The beam of sunlight redirected from a mirror may be noticeable up to 10 miles away, but it’s quite a challenge to hit a target with that beam even when it’s just a few hundred yards away. These skills require practice, and that’s best done before you run into trouble (not while you’re in trouble).
9. Learn to Tie Multiple Knots

As kids, we all learned how to tie our shoes. For a massive segment of the population, however, knot-tying skills stopped there. It’s a shame, really. There are so many interesting and useful knots that we could all master. In all fairness, the average day job doesn’t require much knot tying anymore, but I would still consider this a knowledge gap. Besides the overhand knot, which most people know, just a few other knots can serve us well in many situations. The square knot, the sheet bend, and the bowline are fastenings that I use very often. Two half hitches and the taut line hitch are also in heavy rotation for me. It’s been estimated that there are somewhere between 3,500 and 5,000 knots, but just start with the knots I’ve mentioned.
Read Next: Personal Defense Tools and Weapons That Could Save Your Life in an Emergency
10. Learning First Aid

I shouldn’t have to twist any arms on this one—first-aid is an essential skill to master before heading afield or just attending to cuts and scrapes at home. You need to know how to patch yourself up (and help a friend in need) when an injury occurs. I’ve said for years that first-aid skills are the most likely “survival skills” than anyone will ever need. Acquire the skills and the gear before your next trip into the wild.