We may earn revenue from the products available on this page and participate in affiliate programs. Learn More ›
A knife is perhaps the most useful tool for anyone who loves the outdoors, and learning how to sharpen a knife is an important skill that will take time to perfect. But with some practice and concentration, anyone can learn to keep their knives sharp and ready for the next cutting task. Through years of experience in my knife sharpening business, I’ve developed a system for quickly getting a sharp edge that I’ll share with you in this article. I’m going to give you a step-by-step guide for two methods of knife sharpening: First, with a traditional sharpening stone. Second, with sandpaper and a mousepad. Yes, you read that correctly, a mouse pad sharpener.
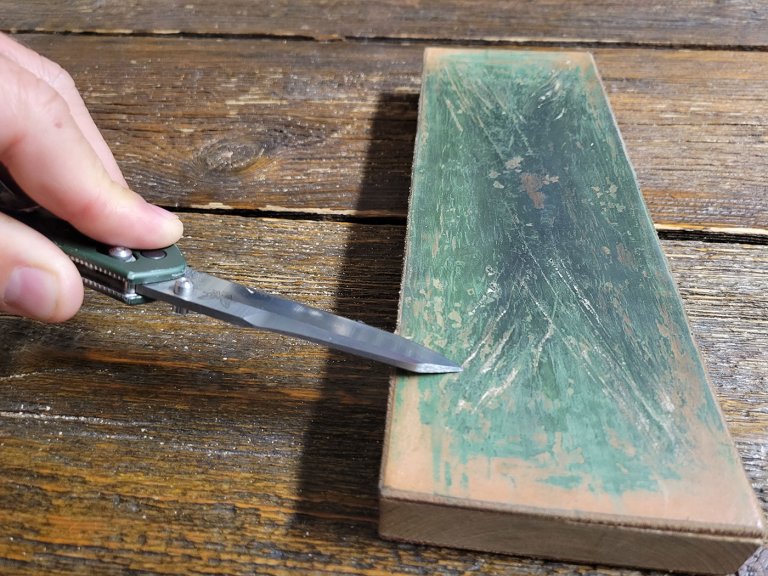
How to Sharpen a Knife with a Stone
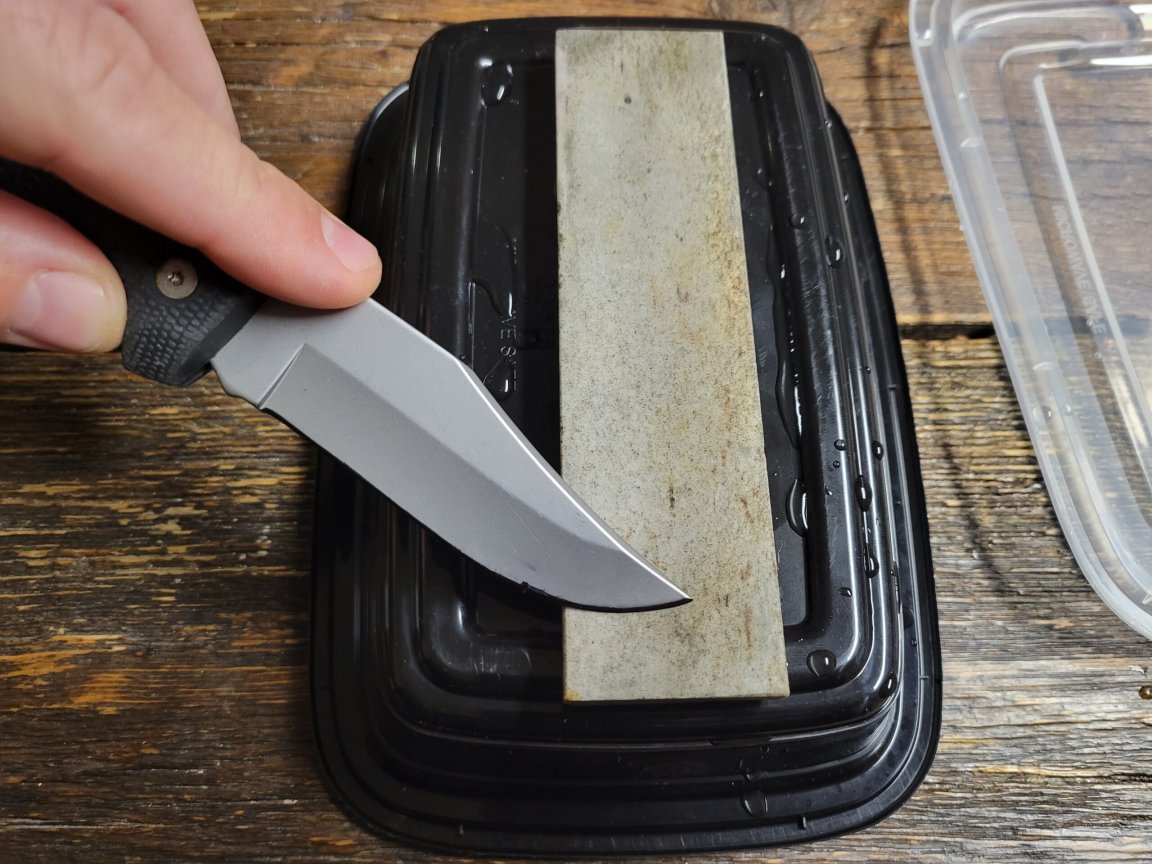
There are many great knife sharpeners on the market that are easy to use and effective. But, learning how to sharpen a knife with a stone is a skill everyone should know. Now, there are many options out there for stones which range from cheap synthetic stones that wear out with one or two uses, all the way to high-end Japanese water stones that cost hundreds for each grit. For this knife sharpening tutorial, I’ll be using an inexpensive, but effective, medium natural Arkansas stone that I’ve had for years.
Read Next: Best Sharpening Stones
What You’ll Need
- Sharpening stone of your choice. Smith’s and Work Sharp offer quality stones at a fair price.
- Permanent marker
- Water or a light mineral oil (some stones require oil)
Step 1: Water
I like to use water on my stones, so I begin by submerging my stone in a Tupperware container filled with water while I prepare everything else. It’s not a good idea to use a stone dry because the metal shavings will “clog up” the stone and make it ineffective. During the sharpening process you may rinse the stone and soak it again. Too much water being drizzled on the stone during the process won’t be a problem, but too little can be. Make sure your stone has plenty of water on it during the entire process.
Step 2: Marker
Take your marker and color the sharpening bevel. This will allow you to see where the stone is contacting the edge so that you don’t go too shallow or too deep. When the marker is gone, you’ll know that you’ve gotten to the apex of the edge.
Step 3: Find the Angle
Hold your knife close to the blade and lay it on the stone with the edge facing you. Place the fingers of your free hand on the spine (back/non-sharpened) of the knife and let the tips hang over and rest on the stone. Keeping your fingers on the same spot and letting them barely drag across the stone will help you keep a consistent angle until you really get the feel for it.
Hold the knife’s spine off the stone at about a 20-degree angle. Only the edge should touch as you make a light pass starting from the knife’s tip then moving across and away on the stone until the heel touches the stone.
Then check where the marker is worn off. If only a narrow line is worn off right at the very edge, your angle was too steep, and you need to lay the blade slightly lower to the stone. If the marker is only worn on the other side of the bevel, you were too shallow, and you need to bring the blade a little higher off the stone. Make a few passes until you find the sweet spot where the entire edge is contacting the stone, then go to Step 4.
Tip: Finding and maintaining a consistent angle is the most difficult part of sharpening with a stone. An angle guide is a handy accessory to buy with your sharpening stone. The guide will keep your angle consistent and act as training wheels as you get used to freehand sharpening.
Step 4: Raise a Burr
Now that you have your angle, make passes on the stone until you feel a burr on the edge. Carefully (and lightly) “wipe” your thumb or finger across the edge. Make sure the motion is perpendicular to the edge, not parallel to it. One will allow you to feel the burr, and one will likely slice you.
It should feel “rough” going from one direction and smoother from the opposite direction. Sometimes you can see the burr. It may just look like a micro-bevel that will catch the light, but it’s a tiny “flap” of metal that has been folded over the edge.
When the whole edge has a burr, you can go back to Step 3, and do the same thing on the other side. (When you raise the burr on the other side, the burr may begin to come off and look like a super fine piece of wire as it detaches from the edge.) For most people, the hardest thing about this process is switching hands with the knife. Training your non-dominant hand may take some time. If you can’t get the hang of switching hands, you can flip the knife over so that the edge is facing away from you, and keep it in the same hand. But this will require that you learn the motion backwards. Either way works fine as long as you keep the angle consistent.
Step 5: Refine
After you raise a burr on each side of the bevel, you will want to refine the edge. Make alternating passes on the stone, always with the blade’s edge trailing the spine. I usually do ten passes on the left, then ten on the right, then five, three, two, and one pass on each side. After that, I’ll check the sharpness by slicing a piece of paper. If it goes through it cleanly, then you’re all done. If there are some hang-ups or it won’t slice well, it may need some more refining, or you may not have raised the burr correctly.
Sharpening with a stone will definitely take some practice, and you will mess up more than once. But this is a great skill to develop that will absolutely be worth the time it takes to learn. One last note on using stones: Some people will progress through several stones to go finer and finer. If you do that, just raise a burr on both sides on each stone until your final stone. When the final grit is reached, you can raise your burrs, then refine the edge. Don’t bother refining on any stones other than your final grit.
How to Sharpen a Knife with a DIY Sharpener: Sandpaper and Mousepad

Sharpening a knife with this sandpaper method will give you a convex edge on your knife. The good news is learning how to sharpen a knife will be easier since you don’t have to keep the angle perfect the entire time. As for the Sandpaper, I recommend the automotive wet/dry type. You can buy them in variety packs with a range of grits that will suit sharpening quite well.
What You’ll Need
- Wet/dry sandpaper ranging from 320 to at least 1000 grit
- Permanent marker
- Mousepad (bigger is better)
- Scrap of wood and glue (you’ll need a saw to trim the wood)
Step 1: Prep
Cut your scrap of wood to 3- to 4-inches wide, and as long as your mousepad. Cut the mousepad to fit the width of the wood and glue the fabric side (the surface the mouse moves on) to the wood. You can do this to both sides of the wood so it won’t slide around on your table. Having the rubber side out helps hold the sandpaper in place. I have used a general spray adhesive and had good results.
Step 2: Marker
Just as with the sharpening stone method, I recommend using a permanent marker to mark the edge bevel on your knife. Color the whole edge bevel so that you can easily see where the paper is removing material. This will help you determine the correct angle in the next step.
Step 3: Find the Angle

The angle is slightly less important with a convex edge because the edge has a curve to it due to the flex in the mousepad base. Even if you are off by a couple of degrees, the pad’s give will cover your mistakes. Lay a piece of 600-grit paper on the block, and hold it in place with your fingertips at the bottom. Hold the knife with the edge facing you and at a 15- to 20-degree angle off the paper. Starting with the tip at the bottom corner, push the knife away from you while sweeping towards the opposite upper corner of the block. Now look at your marker to see where you’re removing material. The same adjustments apply here that I described in the sharpening stone method.
Step 4: Raise a Burr
Just as with the stone method, once you find your angle, you will make passes on one side until you raise a burr, then switch sides and raise a burr again. Don’t start with any grit lower than 320 unless you have deep chips or rolls in the blade. The lower grits will remove material quite fast, and you can mess up your blade if you aren’t careful. Also, you don’t need a lot of pressure for this method. Too much will cause a lot of deformation to the pad, and make your convex too steep. A lighter touch works best. Remember to be careful with your fingers that hold the paper.
Step 5: Refine

Once you have raised a burr on both sides, you can change the grit and begin to refine your edge. Take the next grit and do ten passes per side (or until you have removed the scratches from the previous grit), then move up and do the same until you’ve reached your final grit, then do ten strokes on each side, and reduce the number as described in the stone method. If you go up to 2000 grit, you will start to get a mirror-polished finish on your blade. If you are diligent about maintaining your angle and hitting the apex, you will have a very sharp knife by the time you reach 2000+ grit. You can get grits of 6000 and above, which will really polish and refine your edge and I can easily get an edge that will whittle hair with this method.
Remember that using this method always requires the edge to be trailing the spine. You can’t make passes where the edge is going into the paper. That can work on a stone, but not here. Also, the paper can be taped to the edges of the wood so that you don’t have to hold it with your off-hand. I generally just hold the paper myself, but you just have to stay aware of where the blade and your fingers are. Although this method is more forgiving than a stone, a consistent angle will yield the best results.
Read Next: Best Pocket Knives
How to Use a Honing Rod
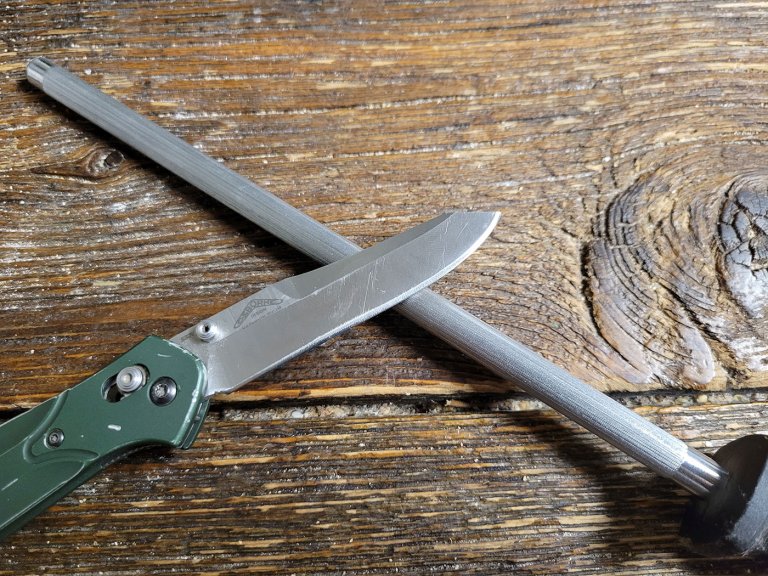
This method should really be called “How to maintain and touch up a knife with a honing rod,” because a honing rod is best for, well, honing an edge. Whether the honing rod is metal (think butcher shop) or ceramic, it’s designed for keeping an edge sharp. They are best when used frequently, between uses of the knife. There are better options for sharpening a dull knife with a damaged edge.
Step 1: Choose Your Style
Honing rods can be handheld, or mounted in a tabletop holder. If you’re new to sharpening, or not very confident with holding the knife and hone at the same time, it’s best to go with a tabletop version.
Step 2: Find Your Angle
As you make a pass on the hone, you will start off very shallow and gradually increase the angle until you feel the edge just begin to “bite.” This means you have reached the apex, and you will actually be refining the edge, not the material behind it. Repeat this for the other side of the knife, and take note. Keeping the angle consistent is very important.
Step 3: Hone Your Edge
Once you have found the correct angle, make alternating strokes on either side of the blade. Be sure that as you make your stroke, you are beginning at the heel of the blade, and finishing at the tip. For a handheld hone, your stroke will begin at the far end of the hone, with the heel of the edge, and as you move toward the handle of the hone, you will be pulling the blade back to get to the tip. The motion will be down and outward. Then bring your blade back up, cant it the opposite way, and make a stroke the same way for the other side. Take your time and move slowly. With experience will come speed. For a horizontal table mounted hone, the motion will be very similar. Away from you and outward, heel to tip, then flip the knife so the edge is pointing toward you, and make a stroke toward you from heel to tip.
Step 4: Check Your Results
If you are finding that your blade has lost some sharpness, you may have gone too steep with your angle, or you may be “rolling” your wrist during the motion, which changes the angle. If you have gone too shallow with your angle, there will be no change to the sharpness, because you weren’t reaching the apex of the edge. If you aren’t getting the results you want, try making small changes to the angle you’re using. If you aren’t sure which way to go with the angle, color the edge with a marker, and make a few strokes. You will see where the marker is worn off, and that will let you know how to change the angle. If you have chips or damage to the edge, you may need to use a stone or other method before honing.
How to Sharpen a Knife with a Worksharp Knife Sharpener
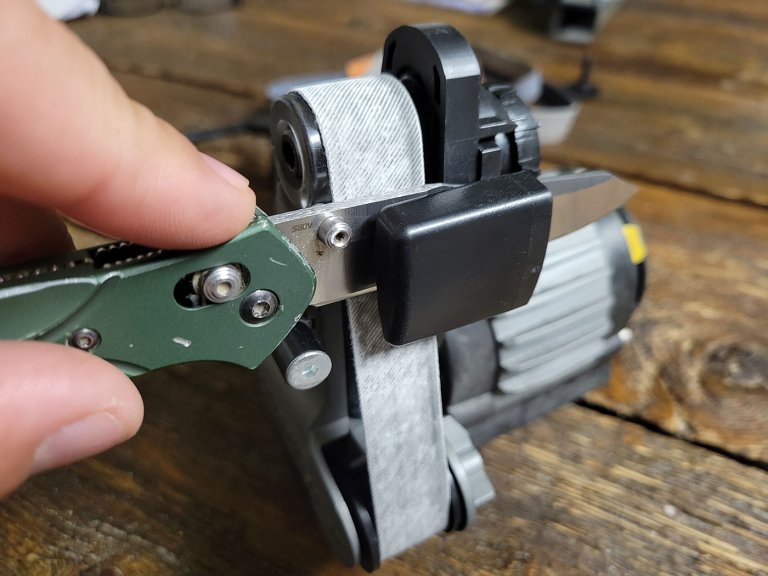
Worksharp makes a wide variety of sharpeners, but this will cover how to sharpen with one of their belt style sharpeners. Using the Worksharp will give you a convex edge. This is a great way to go as long as you get your technique down. When done properly, it’s not hard to get a near mirror finish on your edge with one of these versatile tools.
Step 1: Choose Your Angle.
Depending on the model you have, you will be able to select from a few different preset guides that will determine the angle of your edge. For thinner knives, like kitchen or filet knives, choose a lower angle in the 15- to 18-degree range. For pocket knives and general use blades, 20 degrees is my favorite. If you plan on using a bigger blade for heavy chopping or just want a really strong edge, 22- to 25-degrees will work well. Select the guide that will suit you best and clip it on, or rotate it into place, depending on the model.
Step 2: Choose Your Grit
Is your blade still pretty sharp, but just needs a touch up? A fine grit belt should be your choice. Do you have some small knicks in the edge? Maybe a slightly blunted tip? Start with a medium belt. Does the edge look like you chop rocks for fun? Start with the coarse belt to get those repairs done more quickly. Wherever you start, you will progress through the belts getting finer and finer until you finish.
Step 3: Make a Pass
Turn your Worksharp on, and if there are different speeds available, select the lowest speed while you are learning. Going too fast, especially with a coarse belt, can remove a lot of material in a hurry, and end up making a mess of your knife. Choose a side of the belt, set your blade against the angle guide, and lower the knife until it contacts the belt. Starting at the heel, pull the knife back toward you, and as you get toward the tip, raise the back of the knife up to keep the belly of the blade parallel to the ground. Be careful though—raising the back too high can result in rounding the tip of the knife. Avoid putting more pressure near the tip than you do at the heel. Go lightly, and let the belt do the work.
Step 4: Check for a Burr
It may take a few passes on the same side before you raise a burr. You will be able to feel it with a fingernail, and usually see it on the edge. Once the whole edge has a burr, you’re ready to raise one on the other side of the edge. Repeat Step 3 on the other side of the edge until you have raised a burr.
Step 5: Alternate Sides, Progress Through the Belts
Once you have raised a burr on both sides of the edge, you can change the belt to the next grit higher (finer). Begin alternating strokes, one per side. Make several passes on each side until you begin to see the scratch pattern from the previous grit disappear. When all you see are the finer scratches, move to the next belt, and repeat. By the time you are done making these alternating passes, and you have worked through the grits, you should have one very sharp knife, with a durable convex edge.
Read Next: Best Knife Sharpeners
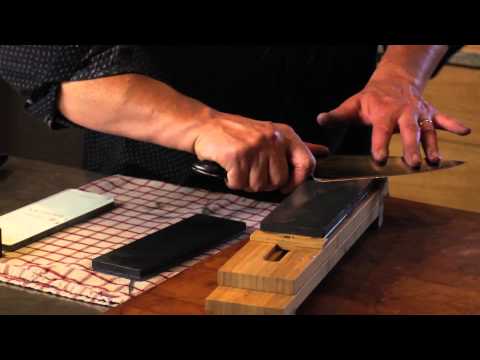
How to Strop a Knife
Stropping a knife is the final step in really getting your blade super sharp, and it’s also a great way to maintain your edge between sharpenings. Most strops are made of leather, but there are some cotton and even paper strops available, too. Since a wood block mounted leather is the most common, and, in my opinion, the most effective strop, here’s how to use one to get the most out of your edge.
Step 1: Compound
There are many different compounds available for strops. Like sandpaper, they are rated by their grit. When you buy a leather strop, it’s usually bare, and has no polishing compound in it. You will need to “load” the strop before you use it. There are tons of choices ranging from paste, to bars of compound, to diamond emulsion sprays to load your strop. I generally use the bars, and rub each strop with a different compound from coarsest to finest. You don’t need multiple strops, but most have two sides for a coarse and fine compound. Load your strop with some compound by rubbing it in, or spraying it on, then grab your knife and get ready.
Step 2: Get Your Technique
While it’s fine to use a sharpening stone with the edge “biting” into it, strops can only be used with the edge trailing in your stroke. Otherwise, you end up with a sliced up piece of leather and a duller knife. Start with the edge facing you and the heel of the blade fully on the strop. Push the knife away from you and move it outward so that you finish your pass with just the last inch or so of the knife on the strop. Be careful not to roll your wrist as you do this because it will increase the angle and dull the end of the blade. Keep the angle the same as how you sharpened it. After your first pass, lay the blade flat on the strop, roll it over the spine of the blade so that the other side of the edge is now on the strop. Then make a pass with the knife moving toward you, with the edge trailing behind. Be sure to move from heel to tip as you make the pass. This will keep the tip from biting into the strop and damaging it.
Step 3: Strop Until Sharp
When you figure out the motion of stropping, and you see how it takes your edge to the next level, you may get addicted to it. I like to listen to podcasts while stropping my knives. Take your time, and make alternating passes, back and forth and back and forth. You will begin to see that edge really shine, and you can get a near perfect mirror polish on there with good compound, and a little elbow grease. Don’t use too much pressure, maybe slightly more than you do when you’re writing. Let the compound do the work, and enjoy the results. Remember that stropping is also a great way to keep your blades sharp. After each use, hit the strops for a minute or two, and you can go a long, long time between actually having to sharpen the blade, provided you don’t damage the edge too badly while cutting. A few minutes on a good strop can usually straighten out minor edge rolls and get your blade back in shape so you don’t have to remove material by sharpening.
Six Knife Sharpening Tips
Now that you know the basics of how to sharpen a knife, here are some tips that will help you master the skill.
1: Don’t Let Your Knife Get Dull

Letting your knife get to the point where it will hardly cut will make a lot more work for you. If you take a minute every week (or every day, depending on use) to make a few passes and keep your knife honed, you will rarely have to sharpen it. I use a leather strop once or twice a week to keep my knives in shape, and they rarely need a full sharpening like I have described here. Use a strop just like you would the sandpaper method.
2: Angle Guides Are Your Friend
A few companies have small angle guides that come with their stones that look like little wedges. These wedges are meant to help you get a feel for the angle. Most come in 17, 20, or 25 degrees. For a beginner, these can really speed up the learning process. Once you get a feel for it, you most likely won’t keep using them, but they are great aids in learning.
3: Don’t Forget the Belly
It can be difficult to get a consistent angle on the belly (curved portion near the tip). I overcome this by always keeping the edge parallel with the bottom of the stone. At the beginning of the pass, the knife handle will be pointing away from you so that the tip is parallel to the bottom (side of the stone closest to you). As your pass progresses, the handle will end up parallel to the bottom of the stone as you reach the straight part of the edge.
4: Take Your Time
Don’t sit down and try to learn this if you have a lot of other stuff to do. Set aside some time to practice this skill so you can slowly work through it and absorb what you’re doing. Trying to rush through this will frustrate you, and likely yield poor results, or injury.
5: Practice on a Cheap Knife
Everyone has one of those gas station knives kicking around, and they are perfect to practice on. Most come with a terrible edge anyway. If you slip and scratch the surface, you won’t be heartbroken, and if you foul up the edge, you won’t lose sleep. Once you’ve got some confidence, move up to the stuff that matters.
6: Don’t “Roll” Your Knife
One of the most common mistakes I see is people rolling the knife at the end of a pass on the stone or paper. This will change the angle and prevent you from getting a good edge. At the end of the pass, keep the knife at the same angle and lift straight up to come back for another pass. Your wrist shouldn’t look like you’re twisting a throttle on a motorcycle at the end of the pass. Keep your wrist still. Lift your arm at the end, don’t twist or roll the knife.
Final Thoughts on Knife Sharpening
Although the examples used here were Arkansas Stones and Sandpaper, the same basic steps and principles can be applied to most sharpening techniques, whether they be sharpening a knife with a guided system, like a Work Sharp Knife and Tool Sharpener or a ceramic rod. You still have to establish an angle, raise a burr, and refine the edge. Learning how to sharpen a pocket knife or kitchen knife shouldn’t feel like a mystery, even if there is some art to it. Remember that perfect practice makes perfect, so take your time and focus on getting angle and technique correct, and you’ll be enjoying a sharp edge before you know it.