


We may earn revenue from the products available on this page and participate in affiliate programs. Learn More ›
No, I can’t shove your water bottle back into your backpack after every water break. If you’re constantly stopping on trail to dig out your water bottle or asking your hiking partner to put it away for you, it’s time to try a hydration bladder. It’s easier and more efficient to stay hydrated with the accessibility and speed of a water source on your shoulder at all times. Hydration reservoirs are also typically lighter than water bottles in ounces per liter.
The complaints against hydration bladders are that they taste like plastic or leak, but I tested the top hydration reservoirs to see how the water tasted after hours of hiking, if they leaked under abuse, and if they are easy to clean. After drinking gallons of water, here are my picks for five of the best hydration bladders for backpacking, hiking, and other outdoor adventures.
- Best Overall: CamelBak Fusion
- Best for Hiking: CamelBak Crux
- Best for Backpacking: Platypus Big Zip Evo
- Best for Camping: MSR DromLite Bag and Hydration Kit
- Easiest to Clean: Osprey Hydraulics Reservoir
How I Tested the Best Hydration Bladders
Nothing is worse than setting up a tent after dark because you mismanaged your miles for the day and rolled into camp later than expected. Long stops that break up momentum can turn a day hike into a night hike. I like to keep speed and save energy by always having water handy in the form of the best hydration bladder. As a long time reservoir user, I wanted to test which is actually the most efficient for on-trail and around town.

I took these bladders hiking, snowshoeing, and skiing to test how they performed in the real world. I also froze them all to be sure they can hold up to the elements, and freezing a bit of water in your reservoir can be a good way to keep your water cold in the summertime. During testing I paid special attention to the taste, how they opened/closed, the valve, and how easy they were to clean. All of the best hydration bladders are BPA-free.
Best Hydration Bladders: Reviews and Recommendations
Best Overall: CamelBak Fusion
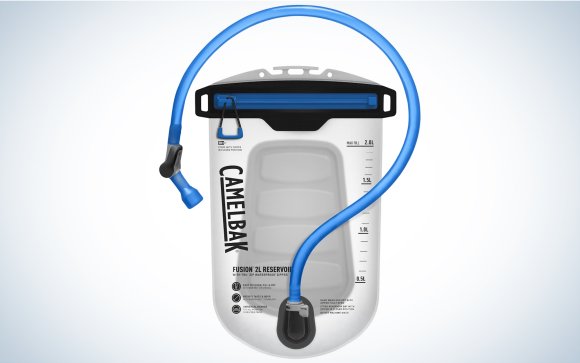
Best Overall
CamelBak Fusion

Pros
- Backplate eliminates the need for inner baffling
- Slimmer handle
- Pinchable for easy pouring
- Made with safer chemicals
Cons
- Pricey
Key Features
- Sizes Available: 2, 3, 6, and 10 liters
- Closure Mechanism: Zipper
- Hose Length: 39 inches
CamelBak is synonymous with the best hydration bladders for good reason. The Fusion is the newest upgrade to the Crux model. At 5.5 ounces for the 3 liter size, compared to 3.75 ounces for a 1 liter Nalgene, this is a lightweight way to transport water while running or in the backcountry. The streamlined pinch-grip handle allows for easy pouring and the hard plastic rim still enables me to hold the bag between my knees for two-handed filtering with one of the best backpacking water filters. The zipper is extremely convenient; though in my experience, zippers are often the first fail point on gear so it could affect longevity.
The Fusion does not have the same plastic baffling inside the bladder as the Crux thanks to the rigid backplate. This makes cleaning and drying easier. I left water in the Fusion for 24 hours, and it tasted just as clean as the mountain stream I filtered it from. With a lifetime warranty against product failures, this streamlined and easy to clean bladder is best for runners, but also the best hydration bladder overall.
Best for Hiking: CamelBak Crux
Best for Hiking
CamelBak Crux

Pros
- Ergonomic handle for refilling
- Self-sealing bite valve and lever
- HydroGuard technology protects against bacteria growth
Cons
- Can be tedious to ensure screw cap is lined up and closed properly
- Inner baffling
Key Features
- Sizes Available: 1.5, 2, and 3 liters
- Closure Mechanism: Screw on cap
- Hose Length: 36 inches
The Crux is the reservoir CamelBak includes in their hydration backpacks. It’s a classic design with an easily removable hose so that you don’t have to disentangle it from your backpack to refill. The screw top lid is also connected to the pack by a plastic ring around the lid so that you can’t accidentally drop it in the dirt. The wide opening and plastic handle make filling simple. The rigid opening is nice for filling the reservoir in the backcountry because it allows me to easily hold the Crux in between my knees while filtering water into the reservoir.

There is an option on some to attach a LifeStraw water filtration system to your hose so that it filters as you suck. Personally, I don’t like to store dirty water in case of a filter failure like a clog or leak, or in case of an emergency where I need clean water. But if you go this route, once you’re at camp you can turn the Crux into a gravity bag for communal cooking and cleaning water.
While I am a fan of the hard plastic rim of this bladder, you do have to be sure that the threads on the screw cap are perfectly lined up to prevent leaking, which sometimes requires multiple tries. There is no plastic taste associated with this reservoir and it hasn’t leaked in the nearly four years I’ve owned it, so long as the top is screwed on correctly. It’s relatively easy to clean though it is more annoying to dry due to the inner baffling. You’ll probably want to use a towel to dry the inside before storing it closed.
Best for Backpacking: Platypus Big Zip Evo
Best for Backpacking
Platypus Big Zip Evo

Pros
- Embedded silver-ion (known bacteria-killer) protects from mold
- High mount quick link to refill bladder without digging into pack
- Made in USA
Cons
- Inner baffling
Key Features
- Sizes Available: 1.5, 2, 3
- Closure Mechanism: Slide lock
- Hose Length: 41 inches
Platypus’ Big Zip Evo is a slim bladder with no plastic taste even with only a quick rinse before its first use. This low-profile design features a sealable top and a slide lock that works from either direction. The high-mount disconnect is a great feature when you don’t want to dig through your bag to remove the hose for a refill. Just remember to blow air through your tube first so no residual water in the hose spills into your bag upon removal.

The sealing top does tend to work a little too well and requires another hand to separate to utilize the pinchable grip for filling or pouring. After separating you can refill one handed but each time I expect the bag to open at my pinch and it doesn’t, so something to get used to.
Best for Camping: MSR DromLite Bag and Hydration Kit
Best for Camping
MSR DromLite Bag and Hydration Kit

Pros
- Made in USA
- Packs down small when empty
Cons
- Plastic taste
Key Features
- Sizes Available: 2, 4, and 6 liters
- Closure Mechanism: Screw on cap
- Hose Length: 39.5 inches
MSR’s DromLite bag is for storing or hauling water and comes with a multi-utility cap that can either open fully or partially or function as a spout. You can purchase the MSR hydration kit separately to convert the DromLite into a hydration bladder with a new cap that features a hose attachment.
There are perks to converting a storage bag into your hiking hydration bladder. If empty, it packs down to the size of the cap. And once you return to camp you can easily convert this bag into group water for cooking and cleaning thanks to the multi-utility cap, hanging strap, and durable material.
At first, I thought the hydration kit was a hose that attached to the bag’s original cap. However, contrary to the image, an entirely new cap is necessary (just another thing to lose and carry). The cap with the hose feature also forces the hose to stick out aggressively. Depending on your pack, you might be able to feel it poking you in the back. The fabric loop for hanging won’t keep it upright in some hydration backpacks where you’re met with another fabric loop. The rest of the best hydration bladders feature a plastic fixture instead. This reservoir also had a plastic taste that will go away over time or perhaps with a lemon juice treatment (warm water and soap didn’t do the trick).
Easiest to Clean: Osprey Hydraulics Reservoir
Easiest to Clean
Osprey Hydraulics Reservoir

Pros
- High mount quick link to refill bladder without digging into pack
- Back plate to easily slide bladder into a full pack
Cons
- Plastic taste
Key Features
- Sizes Available: 2 and 3 liters
- Closure Mechanism: Slide lock
- Hose Length: 39.5 inches
I rinsed the Osprey Hydraulics Reservoir with water and then filled it up to go skiing. On the mountain I took a sip and was taken aback by the aggressive plastic flavor. I barely drank any of it because of the taste, but instead of wasting all that water I dumped it into the Brita filter I keep in my fridge. I figured that the filter and the water already in my dispenser would dissipate the taste. However, this made the entire four liter dispenser taste like plastic and I dumped the whole thing out and actually had to clean the Brita container with warm soap and water to get rid of the contagious plastic taste. Osprey recommends that you fill your reservoir with fresh lemon juice and water and then proceed to freeze, thaw, and rinse the bladder to take care of this taste. Seems like a lot. Luckily, this bladder is easy to clean thanks to it’s open mouth and lack of inner baffling. Warm water and soap did the trick.
Otherwise, the bladder functions as it should with a sturdy backplate and no inner baffling. The pour shield extends farther than other bladders to provide greater control when pouring water. It also folds over underneath the slide lock to securely close. The mouthpiece doesn’t have a lever to easily shut on/off the valve. Instead you turn the mouthpiece to completely seal the hose, which isn’t as intuitive as the levers on the other packs.
How to Choose the Best Hydration Bladder

Size
The best hydration bladders come in a variety of sizes, the most popular of which is 2 liters. The amount of water you need depends on personal preference, weather, terrain, activity, and your next water source. However, 2 liters is a good starting point for the average individual on a moderate day hike. If you don’t need the entire bladder full, you can partially fill it, turn the bladder upside down so that any air trapped inside is where your hose connects. Then gently suck or squeeze the excess air out so that your reservoir isn’t sloshing around making noise all day.
Insulated vs. Non-Insulated
If you’re frequently in frigid temps or dedicated to icy water all day long, investing in an insulated option makes sense. These include the Four-Seasons Insulation Kit from Osprey and CamelBak’s Stoaway reservoir. However, while skiing, my mouthpiece can still freeze even when wrapped in Osprey’s insulated cover. Insulation also adds weight and there are ways to keep your water flowing in winter and cool in the summer without buying extra stuff.
In the winter, you should blow air back through your mouthpiece and hose so that water doesn’t freeze there. If it does, you can tuck the mouthpiece inside your layers to warm it up or take off the nozzle completely and drink directly from the hose (be careful not to spill water on yourself). In extreme temperatures try starting with hot water in your bladder to delay the freeze time.
During the summertime, start with a partially frozen bladder so that it thaws as the day goes on. Water in your hose will heat up faster than in your bladder so this is another opportunity to blow air into the hose to avoid a gulp of hot water on an already toasty day.
How To Clean a Hydration Bladder
Remove Plastic Taste
While bladders that initially taste like plastic are annoying, the flavor does go away. To speed along that process I recommend first giving your bladder a wash. While I just gave these a quick rinse, they could all benefit from warm soapy water before use. If this doesn’t take care of the problem, there are some simple DIY solutions like lemon juice or white vinegar/bleach and baking soda. Fill with warm water and add either lemon juice, bleach, or vinegar and give it a swish. You can freeze the lemon juice water mixture then thaw and rinse. If you opted for the vinegar or bleach mixture, add baking soda and swish some more before rinsing.
Cleaning tablets or denture cleaner can also do the trick. In my opinion, the lemon juice treatment is best because if you get some residual flavors, at least it’s citrus and not vinegar or bleach.
Maintain Your Hydration Bladder

It’s easy to forget a bladder in your bag, after all it’s usually in a separate pocket and out of sight, out of mind. But you should at least rinse and dry your bladder after every use to ensure it stays clean and sanitary. Be sure to release any water in the hose, too. I coil the hose and insert it into the bladder to prop it open for optimal air-drying, but any method of keeping the reservoir open to air flow will work. Removing the mouthpiece can help dry out the inside of the hose as well. CamelBak recommends freezing your reservoir if you don’t have time to dry it completely to avoid bacteria growth.
Clean a Dirty Bladder
Warm, not boiling, water with dish soap can provide a deeper clean. While most companies selling the best hydration bladders also sell a cleaning kit featuring a sanitizing solution, hanger, and special brushes, if you’re buying a cleaning kit you’ve already messed up. With proper everyday cleaning, drying, and care, you should be able to maintain a sanitary hydration bladder with what you already have at home. If you’ve let it go too long, and you’re looking at the possibility of throwing away a funky reservoir, then a cleaning kit might be for you. Or refer back to the removing plastic taste section.
Read Next: The Best Hydration Packs of 2023, Tested and Reviewed
FAQs
The most efficient way to dry a reservoir is to hang it upside down with the hose, a clip, or other object (I have a friend who uses a whisk) stuck inside to keep the sides from sticking and trapping water. This method is exactly what you get if you purchase a cleaning kit with a hanger and clip. If you don’t have time to air dry, then use a towel (annoying but effective) or store it in the freezer to prevent mold.
The easiest way to clean a hydration bladder is with dish soap and water. If your reservoir is excessively dirty or needs sanitation, get out a scrub brush and utilize a disinfectant like lemon juice, vinegar, bleach, or baking soda.
If you plan to cover a lot of mileage backpacking, tend to need more water than your hiking buddies, or spend a lot of time in hot and dry climates, go with a 3 liter bladder. You can always carry less water than the bladder can hold. For most other instances a 2 liter should be enough. On occasions where you need more water, carry a supplemental water bottle or filter.
The Osprey Hydraulics Reservoir is the easiest to clean because it has no inner baffling to trap water or inhibit towel drying. And the top opens completely for optimal drainage as opposed to others that have a zipper or cap that allows water to pool beyond the closure mechanism.
Final Thoughts on the Best Hydration Bladders
Hydration reservoirs are a polarizing topic amongst hikers (almost as heated a debate as backcountry water purification methods or lack thereof). But I think after trying one of the best hydration bladders that don’t leak or taste like plastic, users will find that the convenience and weight savings is worth the investment. I hike, backpack, hunt, ski, and run exclusively using hydration bladders so I know what features are necessary and which aren’t worth it. CamelBak had the top two bladders in my testing because they’re reliable and lightweight. If you’re running or using your bag daily, the Fusion is worth the extra money. However, the Crux works perfectly well and might even perform better while backpacking thanks to the wide, hard rim for hands-free filtering and refilling.
- Best Overall: CamelBak Fusion
- Best for Hiking: CamelBak Crux
- Best for Backpacking: Platypus Big Zip Evo
- Best for Camping: MSR DromLite Bag and Hydration Kit
- Easiest to Clean: Osprey Hydraulics Reservoir