The best way to keep everything together during the moment of truth is to use a practiced pre-shot routine. When an animal I want to take approaches, my mind races through a series of methodical steps. I use this same sequence every time I practice. It’s so ingrained into my shooting style that I don’t think I could shoot without going through the steps that are listed below.
BEFORE A BUCK IS SPOTTED, YOU SHOULD DO THE FOLLOWING:
1. Cut shooting lanes
Ideally, you should have done this months ago. If you have just switched your position to take advantage of changing deer patterns, you should cut openings with a pair of shears or a pole saw. When cutting shooting lanes during the season, keep the cutting to a minimum and be careful to keep your scent off the brush.
2. Use a range finder
You can’t wait until an animal is passing through your shooting lane to zap it with a laser. When you get in your stand, check the yardage to different points all around. That way, when a buck bursts in, all you have to do is look at some of the markers to judge how far away he is.
3. Assess the wind
If the wind is blowing hard you’ll have to compensate for it on any shot beyond 20 yards. Hopefully you have learned your arrow’s flight in various winds while practicing. As a general rule, allow about 2 inches at 30 yards for every 10 mph of crosswind speed.
ALL RIGHT, HERE COMES A GIANT. NOW FOLLOW THESE STEPS:
4. Decide when to draw
If the pace and course of the animal is unpredictable, wait until it is within bow range before drawing. This way you won’t get stuck at full draw waiting for a shot. On the other hand, if you’re a compound bow shooter and the animal is moving your way at a moderate and consistent pace, you can (and should) draw while it is still well out of range and wait. This way there’s much less chance of the deer seeing or hearing you.
5. Pick your opening
Gauge the animal’s course and determine the closest point that allows an open shot. If a buck is moving in a straight line at a steady pace, this should be easy. If he’s chasing a doe or feeding you’ll have to keep recalculating until he’s in range.
6. Choose a pin
If you didn’t have time to use the range finder and check any reference points beforehand, you have to make a quick estimate of the distance. Pick the right pin and take a couple of seconds to get settled mentally.
7. Check the clearance
With the proper pin aimed at the opening, check any pins above it. If there is brush, limbs or leaves in line with these pins, you have a problem. Move to open up a clear lane. I’ve missed some really big animals because I didn’t learn this lesson early enough.
8. Stop the deer or not?
I don’t like to stop walking game when the shooting lanes are narrow. Instead, I aim at the center of the opening and shoot as soon as the animal’s shoulder appears beyond my pin. As long as the animal’s pace is leisurely and the distance short (20 yards or less), this timing results in a double-lung hit.
On the other hand, consider stopping a moving animal in each of the following situations: 1) When you have wide shooting lanes; 2) When the deer is moving faster than a walk; 3) When the range is more than 20 yards; 4) When, for lack of practice, you don’t have the confidence to time the shot.
9. Pick a spot
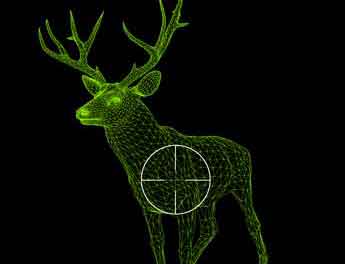
Your best shots will occur when you pick a specific spot (one single hair or a discoloration on the side of the animal) and focus on it.
10. Don’t rush the release
I don’t think about the release, but some hunters concentrate on a slow, surprise release whenever time permits. The best advice I can offer is: Don’t rush the release and it will take care of itself.
11. Hold your aim
Unless the situation changes because of something beyond your control, never second-guess a decision once you’ve made it. If you are going to think about a form tip during the shot, keep it simple. I recommend reminding yourself to stay locked on the spot you want to hit until the arrow arrives. This will focus your concentration on the target and will give you a better idea of the arrow’s impact.
Practice your pre-shot routine on every shot you take during the weeks leading up to the hunting season. It will soon become second nature and you won’t have to think about it when the chips are down. Through practice and preparation, your decision-making will become automatic and you’ll become deadly on game.
Is Everything A-OK?
Some mistakes you make during the moment of truth result from equipment-related problems that could have been avoided had you detected them earlier. Every time you enter a stand and prepare to hunt, check your equipment thoroughly.
1. PEEP SIGHT: Make sure it’s clear of obstructions and is turning properly. Draw the bow with an arrow on the string to be sure.
2. NOCKS: Inspect them for damage and to make sure they aren’t blocked with dirt.
3. REST: Make sure your arrow is resting properly before a shot. Some bowhunters take a practice shot as soon as they get on stand.
4. FLETCHING: Fletchings must be solidly anchored to the shaft. Give them a tug. If one feels loose, switch to a different arrow.
5. SIGHT: Check for damaged or missing pins. Consider keeping a second, pre-set sight body in your fanny pack in case of problems.
6. BROADHEAD: If you’re using mechanical broadheads, check to make sure the rubber bands holding them closed are still intact.
7. RELEASE AID: Grit can jam a release’s mechanism. A test shot will reveal any problems.

