Hunting geese with consistent success is one of the toughest challenges in waterfowling. Honkers, the big geese that weigh 10 pounds or more, are inherently anti-social birds. They do not like each other for the most part and are only landing in the same field because that’s where the best feed is. Lessers, a smaller sub-species of Canada geese found mostly in the Central and Pacific flyways, are getting smarter. A decade ago, you could have gone to Kansas or Oklahoma and killed limits if you knew how to set a big spread of silhouettes and socks. It’s not so easy anymore. But the challenge is what makes goose hunting fun.
Sure, some populations of geese are getting hard to hunt, but it’s still incredibly satisfying when the birds do what they’re supposed to and a hunt comes together. We’ve had the good fortune to hunt with and interview some of the most knowledgeable Canada goose hunters in North America. Here’s some of the best goose hunting tips and tactics we’ve learned. Plus, the gear you need to get in the game.

Table of Contents
- Goose Hunting Basics
- Goose Hunting Tips
- Goose Hunting Gear
- Hunting Geese in Fields
- Hunting Geese Over Water
- Final Thoughts on Goose Hunting
Goose Hunting Basics
Goose hunting can be pretty complicated. Oftentimes 10 or more hunters will work together for a big shoot with hundreds of decoys. But it doesn’t have to be this way. Those big field shoots are effective, but you can also hunt geese solo or with just a few buddies. No matter how big or small your goose mission will be, you’ll want to have a good handle on the following skills and gear.
Scouting
The most successful goose hunters spend more time scouting than hunting. The most simple way to scout is to drive around likely feeding areas (cut agricultural fields) in the morning and evening. Look for geese in fields and in the air. If you see a flock flying low, headed for a field, follow them to the feed. If you find a promising feed, you’ll likely have to get permission from the landowner to hunt it. (Read our guide on how to get hunting permission).
But you can also hunt geese on public waters. Simply drive or boat around looking for geese in public hunting areas. Make sure to check your local regulations so you know which waters are huntable.
Once you find birds, note what time you saw them, how they were positioned, and how they entered and exited the area. (Learn more about scouting for geese and ducks here).
Hiding
New waterfowl hunters often don’t put enough effort into concealment. Geese that have experienced hunting pressure can be extremely wary. You need to spend serious effort figuring out a good hide before any successful goose hunt. That could mean a brushy fenceline, a riverbank of head-high cattails, or a layout blind tucked into the grass. Always try to hide in the shadows. Always plan for geese flying 360 degrees around you and directly over you. You need to be concealed from every direction.
Decoy Spreads
Geese have keen eyesight and will be drawn to a realistic-looking decoy spread from hundreds of yards away. Realism is key. It’s better to hunt with a small spread that looks real than with a giant spread that looks like junk in a field. Decoying in geese is a real art that takes a lifetime to master. But there are some ground rules. In any spread you want realistic motion. You want to avoid unnatural glare off your decoys. The spread should be visible from a good distance, so the geese have enough space to work. You also want to give them space to land.
Read Next: The Best Goose Decoys, Tested and Reviewed
Calling
If learning to decoy geese is an art, then calling geese is like learning an instrument. It takes practice and field experience to become proficient. The best way to learn is to hunt with a good caller and mimic what they do. Practicing before the season is key, too. Below is a solid video on calling geese for beginners. (And here are more tips on calling geese and ducks).
Goose Hunting Tips
- Think beyond layout blinds. Layout blinds are great for some situations, but they’re not a silver bullet for hiding. Unless you’re hunting from a massive spread, targeting uneducated geese, layouts won’t hide you well in a totally clean field. Use any cover available, even if it means being slightly off the “X”.
- Consider early season hunts. Many states have an early goose hunt. During these September or August hunts you’re targeting local birds in warm weather. These hunts aren’t necessarily easy, but the barrier of entry is usually a little lower than big migration hunts.
- Use digital scouting tools. If you plan on scouting geese on private ag fields and then asking for hunting permission, make sure you’ve got a digital mapping tool like onX. These tools make it infinitely easier to find the right landowners.
- Fix the hide before tweaking the spread. When geese aren’t finishing properly, hunters tend to want to mess with the spread. However it’s more likely that something is off with the hide. So tend to your hide first, if geese still aren’t working properly then mess with the spread.

- Be still when geese are working. Hunters need to be ultra-still, with their faces covered when geese are working. Likewise hunting dogs need to be still and covered.
- Shoot one goose at a time. When a big flock of honkers commits, new hunters tend to flock shoot. Shooting at all of them is a good way to hit none of them. Pick out a single goose, in your lane, and shoot at that specific honker until it folds. Only then move on to a second bird.
- Bring your call, even if you’re no good at calling geese. If you can make simple, realistic honks or moans, then you can back up the main caller on the hunt. This will help you learn how to call. Listen to how a good caller works geese and then practice more — at home, not in the field.
- Keep shots inside 40 yards. It’s a good idea to bring a rangefinder and range a decoy at the 40-yard distance. Don’t shoot beyond that.
- Don’t forget to lead them. Geese are big birds so it seems like they’re flying slowly. But that’s not the case on crossing shots or when geese are making a fast escape. On these shots, swing past their heads, don’t aim for the body.
Goose Hunting Gear
Some experienced hunters haul a double-axle trailer full of goose decoys and gear. Others get by with a bag full of silhouette decoys, a call, and a shotgun. The point is that you can go minimalist or gear intensive and be successful either way. It all depends on your approach. Here’s some starter gear to consider:
- Best Waterfowl Shotguns
- Best Layout Blinds
- Best Goose Calls
- Best Waders
- Waterfowl Hunting Jackets
- Waterfowl Hunting Boats
- Full Body Decoys
- Silhouette Decoys
- Floater Decoys

Hunting Geese in Fields
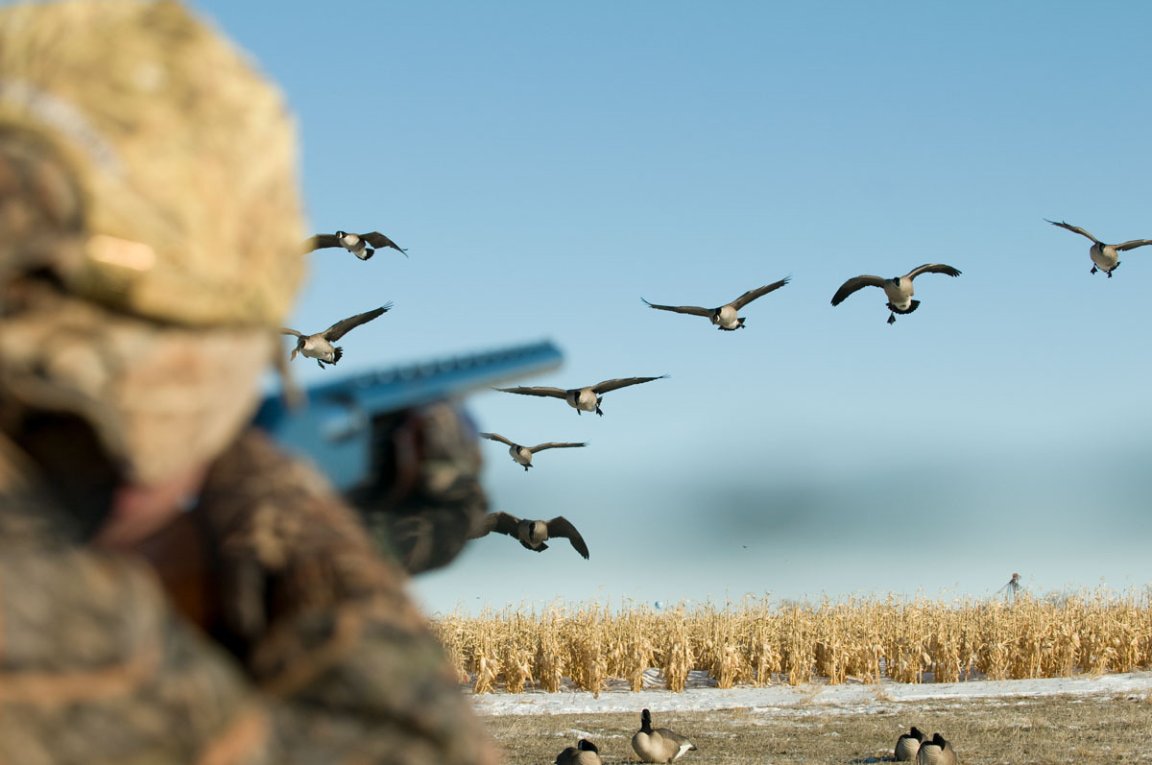
All waterfowl hunters should have the experience of a good field hunt. When it works out properly, geese come in low and hot, cruising down into the decoys before someone yells “take’em!” and all hell breaks loose. Here are some key tips for hunting geese in fields.
Calling Field Geese

Most modern hunters use short-reed calls with broke-in gut systems. They are easier to blow and more versatile than any other style call, which is why they have become popular. But just because you can blow a short-reed well doesn’t mean you will kill geese. You have to be able to read birds and know when they want to be called to and when to stay quiet.
- Call easy early. During the early August and September resident goose seasons, be careful to not show off your entire calling repertoire. Local birds are used to flying the same routes each morning, so if you have done your scouting and are on the X, call as little as possible to get them to commit. Plus, juvenile birds—geese hatched in the spring—can’t fly very well. They will want to fly from the roost to the feed on a string if they can. And no amount of calling is likely to pull them off that route.
“Remember a lot of early geese are young and don’t fly far or well,” says Jordan Keil, a goose guide in Hutchinson, Minnesota. “I like to make it easy on them and me. Just set up a small spread of decoys on a straight line from the roost and let them come. I hardly call at all. Why show them any of my tricks if I don’t have to?”
- Welcome them in. One of the biggest mistakes hunters make when finishing big geese in the decoys is going silent. That’s actually when you should be getting on the call, according to Molt Gear owner and three-time world live goose calling champ Scott Threinen. Geese on the ground cluck excitedly when other birds are circling above. “The last 100 yards is when you should call more aggressively,” Threinen says. “You don’t go quiet. That’s the opposite of what they do.”
- Keep calling simple. If you’re not a great caller, mastering the “moan” is the best way to kill geese. Elite callers like Keil and Threinen have an extensive catalog of sounds to choose from. Most of us are not as skilled. However, if you can make different variations of the moan—simply by pushing air through the call from your diaphragm—using different amounts of back pressure, you can bring in geese. In fact, one of the best meat callers I’ve hunted with, Randy Hill of Ottawa, Ill., has switched to an old-school tube-style call, and uses a similar, simple calling method. He just hits birds with clucks and moans. And though his calls sound much more authentic than mine, I can still mimic a few of them on a single-reed to fool wary late-season birds.
Decoying Field Geese

Curiosity has killed a lot of geese. So, you need to show Canadas different spreads all throughout the season to pique their interest. Keep things fresh, and you’ll have more birds committing to your set up.
- Mix it up. If you have the money to buy seven dozen Dave Smith full-bodies or the time to make stuffers (plastic molds with goose skins affixed to them), do it. Because realism kills geese. The rest of us have to use every trick there is to fool birds. One of the best ways to accomplish that is by never setting the same spread twice in the same season. Buy different brands of full-body decoys, or goose shells of all sizes, silhouette decoys of different varieties, and always change up your spread. Most of your neighbors are going to have the same blob of Bigfoots their grandad handed down to them.
- Match your spread to the size of the feed. If you’re hunting a feed, the spread should have at least 25 percent as many decoys to the number of live birds in the field the night before. Most flocks are seeing other geese on the ground before they land. “Make sure you place your decoys where the birds landed the previous evening if you’re hunting big honkers,” says Travis Mueller, a long-time Iowa goose killer. “You can traffic lessers, but to kill honkers regularly, I put a pop can on the ground where the birds were in the field during our scouting.”
- Hunt the swing. Most waterfowl hunters want birds to finish into the wind, and set their decoys such that the birds will be shot in front of the blinds. There are a couple issues with that. The first is that smart birds are on the lookout for this setup. Another issue could be that the wind is blowing from the east or west, which means the sun could be right in your face depending on what time of day you are hunting. In both scenarios birds are looking directly at hunters on approach—definitely not ideal. That can cause them to flare, regardless of whether you are chasing big honkers or lessers, especially with large hunting groups. To avoid this, you need to shoot geese “on the swing.”
Here is an example: When I was a kid my dad’s hunting buddies would set up in standing corn or a hedge row and face into the wind with the decoys about 40 yards behind them. Sometimes they would place the decoys slightly off their left shoulder, other times off their right, depending on wind direction. The geese naturally dropped altitude and began to circle. When the birds hooked over the corn or hedgerow, all the hunters stood up with their 10 gauges and shot them straight up.

Hiding in Fields
It’s easier to hide five hunters than it is to hide 10. So though you may see some outfitters running big numbers of hunters, I wouldn’t recommend it. You need to disappear into a hedgerow or become invisible if you’re hunting in the decoys. It’s easier to hunt with smaller crews, especially when you’re starting out.
- Use the 1 to 10 rule. Threinen first rates the hide on a sliding scale: 1 is very good; 10 is awful. He starts with the decoys at 25 yards and for every increasing number on that scale the blinds get moved 3 yards from the decoys. So if the hide is a 3, the blinds have to be 34 yards from the spread. There are a few reasons why Threinen does this, but the main one is geese have 360-degree vision. So they see a lot more than you think. And the closer you are to where they want to land (the spread), the more likely birds are to bust you. “We don’t get that technical with our blinds out here in New Jersey,” says John Walls, who has also won a world goose-calling title.
“But I get why he does it. I pile as many cut cedars or Christmas trees on our A-Frames as I can and tell my buddies to hold still when geese get close. Any little movement, they will see it and be gone.”
- Hide in the decoys. On sunny days, decoys that are raised off the ground will cast shadows to conceal hunters. If it’s cloudy, they don’t do as good of a job, but will at least obstruct the view of geese flying overhead. Tanglefree makes a 20-inch full-body stake that will elevate decoys. You can also dig the blinds into the field and place full-bodies on top of milk crates spray-painted black (just don’t use a high gloss finish). If you use windsocks, Tanglefree also makes a 28-inch Slammer Sock, which will provide a better hide. But you likely will only be able to use the socks when hunting lessers. Honkers tend to shy away from them.
Hunting Geese Over Water
Decoying geese into a water spread is an underrated tactic. The real benefit here is that in many states there’s a lot of available public water that’s open to hunting. If you’re planning to hunt geese over water, these tips will get you started.
Get’em Coming Back to the Roost
It’s a long-standing no-no to shoot the roost, but it’s the most successful way to consistently kill geese over water. The trick is sleeping in. Get to the roost at about 8 a.m., and then wait for a majority of the birds to fly out to feed. If it’s an early-season resident Canada goose hunt and there are just 100 birds, let them all get off the water. With so few birds, you can’t afford to push any off (they probably won’t come back). When it’s January in Kansas and there are 10,000 lessers, snows, and specks on a few acres of water, let about 90 percent of them leave before you go in and set the decoys.
- Go with a small spread for small ponds. For big honkers on small ponds, you don’t need to bring more than two-dozen floaters and another dozen field full-bodies to put on the bank.
- Go big for big roosts. With large roosts of lessers, specks, and snows you want to deploy as many decoys as you need in order to land birds in shotgun range. When we hunt roosts of 10,000 birds or more with a large group of hunters, we set between 15- and 40-dozen floaters, plus another 10-dozen field decoys, and a truck bed full of silhouettes. It’s likely going to take more flocks to shoot limits, so it’s better to deploy the big rig because you want to emulate what the later birds returning from the feed are used to seeing.
Running Traffic
If you can’t get on the roost, traffic hunting lesser Canada geese on water typically takes a trailer full of decoys. Get all your buddies (and their decoys) together, so you can make as big a footprint as possible. Silhouettes are the best (and cheapest) way to make that footprint when added with floaters. Stick them in the shallows and on the banks, and don’t be afraid to add snows and specklebellies (they will probably be mixed in). On windy/sunny days, socks are a great option too. You can hide better in them because they cast a shadow over the blinds and create more movement.
- Hit them after they feed. You can try hunting birds when they are coming from the roost (on the way to the feed), but I’ve always had more success when they are returning from the feed, particularly when it’s cold.
- Set your rig after most of the birds have left. It might seem overcautious, but if you set up too early, pressured geese will see your spread as they come off the roost. When they go back to water they’ll see the same spread, and are smart enough to know something is off.
Target Rivers in the Late-Season

When the first blast of winter hits and freezes marshes and ponds, geese flock to rivers to roost and loaf, opening miles and miles of opportunity to the public-water hunter. This is Cabela’s pro staffer and waterfowl nut Jonathan Lewis’ favorite time to chase honkers on his home turf in New York and Pennsylvania.
A quick side note: Check local water-access laws (they can be complicated) because many states allow you to hunt from a boat if it can be concealed by vegetation, or from shore if you stay below the normal water-level line.
- Target gravel bars. Lewis keys in on island gravel bars or points that create a pool of slow-moving water with enough space between shorelines to allow the birds to work. Geese love to use these spots to rest as they migrate south. Big rivers draw geese, but also search tributaries of major rivers (like Pennsylvania’s Delaware, for example), which are migration highways for waterfowl.
- Wait for a front. He waits for a strong cold front that will bring down migrators and prefers to hunt on the tail end of those winter storms. That’s when the river will fill up with fresh birds. “When I find a spot I like, I scout the weather more than the birds,” Lewis says.
- Set a river spread. He runs about three dozen floaters in the water, and a mix of sleeper decoys, full-bodies, and windsocks (because they are packable) set tightly together on the gravel bar and in the shallow water around it. The goal is to mimic a large flock of resting geese.
- Play the wind. Lewis will settle for a wind at his back, but a crosswind is even better. Ideally, he’ll hide in a layout blind in knee-high cover on the gravel bar. But he’ll also hunt from a boat blind or natural cover along the shore if there’s not enough cover on the bar itself. —Alex Robinson
READ NEXT: How to Cook Wild Goose
Final Thoughts on Goose Hunting

Those Canada geese loafing in your local park might not seem like elusive game animals. But wild migrating geese represent one of the biggest challenges in waterfowling. They fly for hundreds or even thousands of miles every fall and have survived for decades. They’ve flown over countless decoy spreads and avoided them all. So if you’re going to consistently kill geese, you need to hunt smart and hunt hard. You’ve got to outsmart the birds and outcompete other hunters. It’s a true challenge, but that’s what makes it so rewarding.