We may earn revenue from the products available on this page and participate in affiliate programs. Learn More ›
Some shooters like to let a professional gunsmith mount a new scope, but you can mount it yourself without any fear of ruing the precision of your rifle. Mounting your scope yourself also means you can fit it to your exact measurements, matching it up to your shoulder for that bespoke fitment.
Before you touch any tools to your gun or scope, read the steps below to make sure you’re not creating more work for yourself, or committing a common fitment error. Once your new scope is mounted, it’s time to head to the range or the field to have a look at the view for yourself.
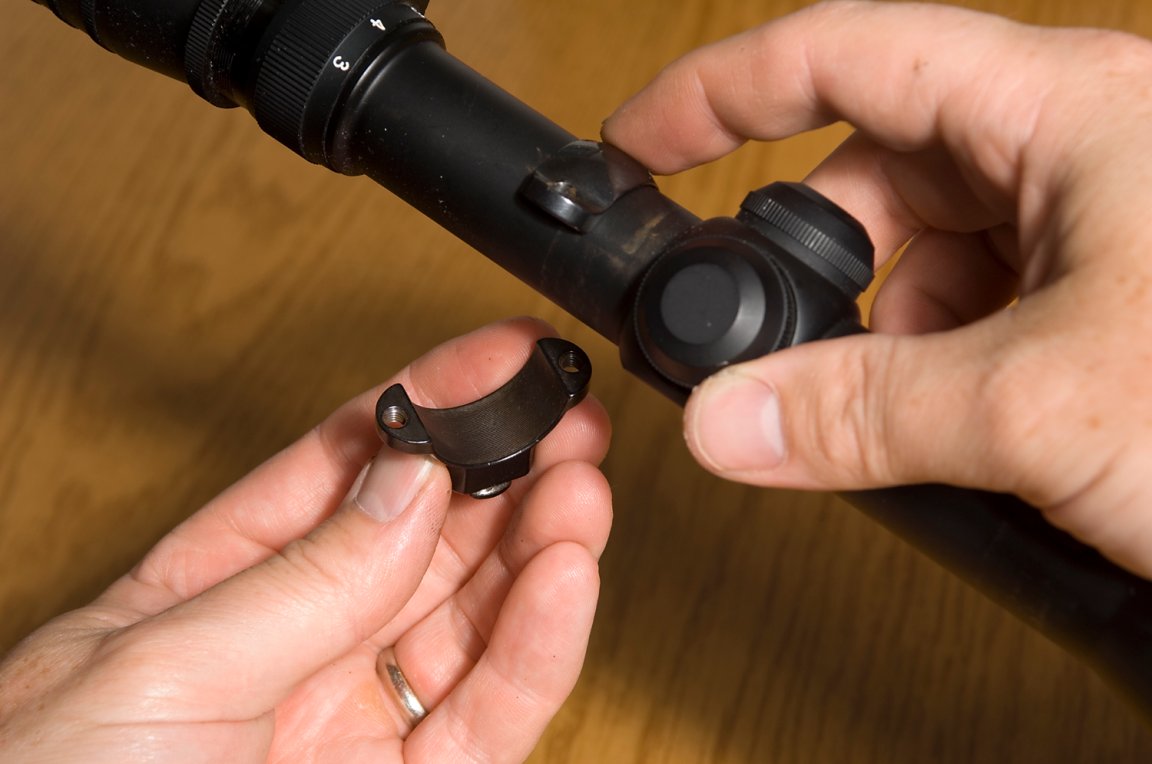
Virtually all modern rifles are either pre-drilled and tapped for scope bases or grooved for the appropriate mounting attachments, so the first step is simply to make sure that the mounting system you select is the proper fit for your rifle and that the rings are of the right diameter and height for properly positioning your scope. Certain types of scope rings fit only certain types of scope bases, so make sure the components match. Scope rings also come in different heights, which might cause confusion.

It’s usually best to mount the scope as low on the rifle as possible without the objective bell touching the barrel, and allowing clearance at the eyepiece for free operation of the bolt. Ask a savvy gun shop operator for advice. Most bases and rings are attached with screws by using socket heads or Torx wrenches.
Begin attaching the bases by wiping the attaching surfaces dry and clean and then applying a thin coat of oil or rust preventive. Check that the bases are properly aligned and that you’re not attaching them backwards.

For maximum security, apply a small drop of a thread-freezing compound such as Loctite (the semi-permanent Blue is best for scope mounting). Ensure an even fit by alternately tightening the screws. If you use rings that attach to the front base by a rotating socket system, do not use the scope as a lever to pivot the ring into position. Use a wooden dowel or something of similar diameter instead.

With the bottom half of the rings in place, position the scope and tighten the top halves of the rings only enough to allow the scope to rotate and move back and forth. With the rifle held level, rotate the scope until the reticle is precisely vertical and horizontal.

Position the scope forward enough to ensure your eye is safe from recoil. As a rule of thumb, move the scope about an inch farther forward than you think it ought to be.

Double-check the scope’s position and tighten the ring screws. Alternately tighten the screws for even spacing between the ring halves.

Insert a bore sight using the proper insertion pin for the caliber you’re using, then adjust the vertical and horizontal axis to your desired point of aim.
Note: Bore sighting is only a means of getting your rifle to print on paper at 100 yards. To properly sight-in your rifle, you’ll need to fire test groups at the range.
Why Your Rifle Keeps Missing
It may be that your rifle is improperly calibrated, or it may be the one pulling the trigger. There’s only one way to find out: testing at the range. When you take out the human factor and leave only the technical alibis, there are so few it’s almost comical. Of these technical reasons for missing a shot, the biggest culprit has to be improper or nonexistent sight adjustment. In other words, if your scope isn’t adjusted so that the bullet hits where you aim, you are certain to either botch the shot or miss completely.
A bullet traveling at more than twice the speed of sound is an astonishingly deadly missile, but only if it hits where intended. This is why smart big-game guides begin each hunt with a sight-checking session at a shooting bench. This shows the guide how familiar his hunters are with their rifles, their degree of marksmanship, and, most importantly, whether the scopes are zeroed so that bullets hit where they’re aimed. I’ve observed dozens of such sighting sessions and have seen sights so far off you couldn’t hit a moose at 60 paces.
Sometimes this is excusable. Some scoped rifles, like some wines, don’t travel well. And there’s no question that some airline baggage handlers are convinced they haven’t rendered an honest day’s labor unless they drop, stomp and otherwise mangle every gun case they see. More often, however, rifles that aren’t on the mark simply weren’t sighted-in to begin with. The excuses generally run something like “Well, my rifle was just right last year” or “I borrowed it from a buddy who says he never misses with it” or “The store where I bought it said it was ready to go hunting.”
To my mind, these excuses are no excuse at all and are even something of a mystery. I, along with most hunters I know, consider sighting-in a rifle before the hunt to be not only essential but actually part of the total hunting experience. On the other hand, I’m aware that many hunters (especially beginners) are rather baffled by the scope/rifle relationship, confused by conflicting advice from other hunters or gun-shop keepers and mystified by instructions that speak in a strange jargon of clicks and minutes of angle.

Outdoor life’s One-Shot Sight-In Method
All you need is a target and a solid rest. By solid I mean at least firm sandbags under the forend and butt. Benchrest-type rests are better yet. “Bouncy” rests, such as pillows and rolled-up sleeping bags, won’t do. Though you can use this sight-in method by yourself, it’s usually easier to work in a two-man team-at least until you get the hang of it. Here’s how to do it.
1. Fire a Sighting Shot
Before firing your sighting shot, make sure your rifle is unloaded and solidly positioned on the rest. You can check this by aiming and “dry-firing” a couple of times and noting any crosshair “jump” on the target. This also helps you refine the smoothness of your trigger pull. If you’re using a variable-power scope, crank it up to top magnification so you’ll have the best look at the target and be better able to see the bullet hole. Unlessour scope has been bore-sighted or pre-sighted with a collimator, it’s a good idea to use a target at least 18 inches square, because it’s vital that your shot hits somewhere on the paper. When everything is ready, and you’re wearing eye and ear protection, load a single round, aim carefully, caress the trigger and give it your best shot.
2. Find the Sighting Hole
With a good scope of 6X or more and decent light, a .25-caliber or larger bullet hole can usually be seen at 100 yards. If you can’t see the hole through the scope, walk to the target and mark the hole with a black circle large enough to be seen from your shooting position. The next step is where a partner comes in handy.
3. Adjust the Crosshairs
With the rifle unloaded, simply aim again at exactly the same point on the target that you used for your sighting shot. As you hold the rifle firmly on target, have your shooting pal turn the scope’s adjustments until the crosshairs intersect the bullet hole. This is best done in two stages-first the vertical or horizontal adjustment and then the other-as trying to move both at once might be confusing.
Let’s say the hole made by your shot is somewhere high and left of your point of aim. (It doesn’t matter how far because measuring and counting scope clicks isn’t necessary with the one-shot method. You skip all that.) While you hold the rifle steady, your pal turns the windage adjustment in the R (right) direction. As he does so you’ll actually see the vertical wire marching over to the hole. The elevation adjustment is then made. If you want your rifle sighted so that it hits, say, 2 inches high at 100 yards, you simply adjust the wire so it is 2 inches below the bullet hole in your target.
4. Fire to Confirm
Now fire another shot to confirm your zero and the job is finished. If you shoot from a rest that supports your rifle solidly, it’s easy to sight-in alone by holding the rifle with one hand and adjusting the scope with the other.