We may earn revenue from the products available on this page and participate in affiliate programs. Learn More ›
Consider the ways that modern Global Positioning System technology and chart plotters could have changed the course of world history. To start with, Columbus wouldn’t have gotten lost and the Vikings would likely have opted for warm weather and colonized Key West rather than Greenland. And had he been packing a GPS, poor Odysseus would have made it home a whole lot faster after the Trojan war, though we’d have missed out on one of the best adventure yarns of all time. Today, few truly serious young fishermen want to think about life without a GPS receiver, both for its safety benefits and for the way it enhances their angling enjoyment.
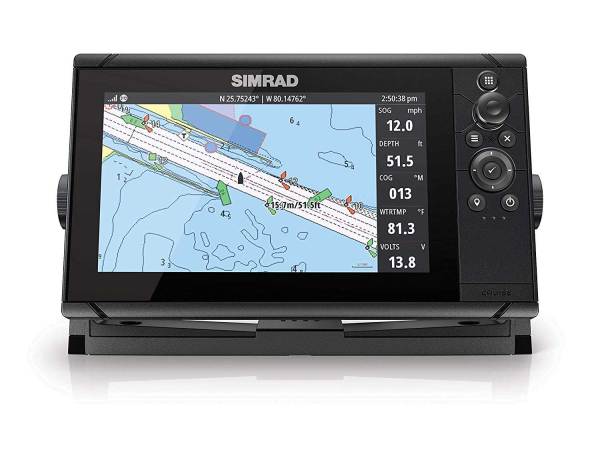
Technology such as GPS maximizes our success by increasing our knowledge of a fishing area while decreasing the time needed to learn it. The best fishing electronics combine a GPS unit with map-reading capability and a sounder (aka a fish finder). Many companies offer accessory map-building software, enabling the user to produce custom maps on a computer and move them to a GPS unit, or vice versa. Such combo units are expensive (and worth it), but you can ease into things with a less pricey unit to which you can add advanced mapping capabilities later.
For example, the Lowrance LCX 19C I’ve been using comes as a stand-alone color sounder that has a built-in background map. I can go to Staples or Radio Shack for a secure digital card (or obtain an MMC multimedia card elsewhere), stick it into the unit and record and play back sonar pictures of interesting areas. I could use an inexpensive handheld GPS I have to mark interesting spots I’ve found using the sounder. Later, to enable chart-plotting with the sounder unit, I could simply add the GPS receiver/antenna. For the whole nine yards, I might decide to employ the Mapping Accessory Pack, which includes the antenna plus mapmaking software, a multimedia card reader/writer, an MMC card and the ability to download updates from the company. Here are some ways in which I use GPS and mapping.
A TYPICAL SCENARIO
Imagine that I’ve managed to locate some hot fishing after exploring my way into a new area through a confusing labyrinth of islands, passes and backwaters on some huge lake or coastal area. Getting back home and returning again is no problem. I’ve left an electronic “trail” in my machine as I’ve moved, even if I’ve not been letting it display on the screen. That trail is made of dots or points the receiver drops automatically and will guide me home. On returning I’ll zoom out the overall picture so I won’t re-run all the turnoffs I made exploring on my way in. As I run home, I’ll place waypoints (electronic markers) periodically, especially at key turns. Later I’ll connect the waypoints to create a route that I can run in reverse back to that hot spot, even on a foggy morning.
Trolling speed is critical, especially when you’re fishing for walleyes. A slow speed of 1 to 1 1/2 miles per hour is typical. A GPS will give you that speed data. The unit’s menus will walk you through, placing digital speed info on your sonar screen. Even with that information, it’s often hard to visualize your progress in open-water trolling or controlled drifting up or downwind. Set your unit to display your electronic trail for a picture of the progress you’re making. You might want to speed up or slow down.
Walleye pros Keith Kavajecz, Gary Parsons and Mark Martin pioneered the use of GPS for working offshore fish schools. Basically they used the plot trails to form grids showing areas they had already worked. At the end of a drift or troll pass, they cranked in their gear, ran back and started a new sweep. Of course, when fish were contacted, they placed fish icons on the screen. A similar method can be used to trace cover or structure.
PLOTTING A FISHING PLAN
You can “draw” electronic pictures of different bottom structures, including channels, humps, points, reefs and the like, and also outline major cover such as a large weed bed. Set your unit to an appropriate scale. For example, you wouldn’t use an 8-mile scale to trace a structure encompassing a few hundred feet. A .15- or even .1-mile scale would be best to enlarge the area for more detail. You’ll temporarily lose the overview background map, but any icons or waypoints you placed will remain. Use your sonar to run the weed edge or structure. Your GPS will automatically trace the object. Drop icons (I use an “X” icon) at significant spots like turns or changes in bottom. When you’ve finished mapping, save your trail (the outline) and name it on the machine. Go back and concentrate on fishing the outlined area. Turn off the plotter trail view to avoid confusing, overlapping lines. When you get a bite, drop fish icons to complete the data bank for the spot.
To capture the finest detail of a traced structure or cover, your unit should be set to drop its trail points at the shortest time intervals it can. You’ll use up available trail points faster that way, but it’s not as though you’ll be tracing big offshore drifts.
Most units have a function called Navigate Trail (or a similar name) that tells the bearing and distance from your boat to each point on the trail. I can command my machine to run a trail backward if the wind has shifted and a reverse run would be advantageous. If I’ve left the area I’ve outlined with a trail and want to return quickly to a specific place on it, I run my cursor crosshairs there for the direct bearing and distance.
When first learning to use your GPS with mapping, it’s sometimes easier to work a visible shoreline with the machine in Track Up mode. This way the screen rotates with your course changes, keeping your travel direction to the top, which corresponds to what you can see in front of you.
Each GPS manufacturer has its own background and auxiliary maps on miniature data cards. Many support electronic maps for the Great Lakes, coastal waters and more popular inland waters. No matter what maps you use, the personal waypoints, icons, trails and routes that you enter are not embedded onto those maps. Think of them as being applied in overlays. Thus, you can transfer that personal data stored in the machine to the proper format memory card.
PRACTICE TO LEARN
If Santa Claus brings you a GPS/mapping unit for Christmas and it has a simulator mode, you can familiarize yourself with the unit by using many functions without being connected to an antenna. A 12-volt battery will let you practice dropping icons, making routes and working the cursor, among other things. When fishing season comes around, you’ll be ready.
While maps for inland waters from major makers provide great detail, including navigational markers, precise shoreline configurations, tributaries, bridges and more, some lack depth-contour information. Navionics (800-848-5896) provides that information for many popular U.S. lakes in its HotMaps series and its XL coastal and Great Lakes charts, which also include real-time tide and current data.
Adjusting A Sounder
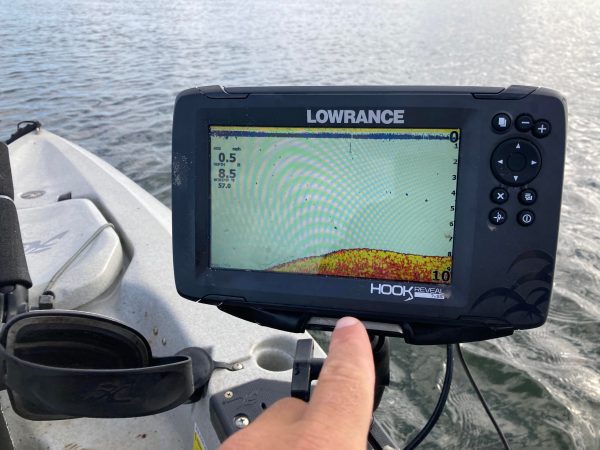
In shallow water, crank the sensitivity down until you lose the bottom signal. Then slowly increase sensitivity for a sharp bottom line, but don’t overdo it. Learn to read bottom signal subtleties. Broader bands (or brighter colors on color units), indicate harder bottoms, which fish usually prefer. Also look for depressions, ditches, rocks, stumps and low grass–all fish magnets.
Auto depth-range mode can be confusing when you’re working the boundary where depth ranges switch, say from 0 to 10 feet to 0 to 20 feet. Try manually locking in one depth zone and get used to reading subtleties in the picture you get there. If you need to use the deeper range, yet want more detail, use the zoom mode.
Use shallow and deep alarms when you’re running fast, looking for structure or cover such as drop-offs or weed beds. This is especially helpful when you get a tip or have discovered that fish are hitting on specific types of structure at certain depths. Use zone alarms to alert you to fish signals within specific depth ranges.
JERRY SAYS… SHY FISH: Don’t expect gamefish signals on a sonar when fishing in water less than 10 feet deep. Nervous shallow fish often move out due to the boat’s presence or detection of sonar transducer signals. Although manufacturers claim that transducer signals don’t spook fish, many anglers turn off sonar units for a stealthier approach in the shallows.
For more fishing information, go to www.outdoorlife.com/fishing

