We may earn revenue from the products available on this page and participate in affiliate programs. Learn More ›
I have an edged tool obsession. I collect and use everything from carving knives to axes to everyday carry blades. That also means I have a lot of edge maintenance to do, and I’m currently using a wide variety of sharpening systems to keep things sharp.
I use a TSPROF K03 for most of my knives, a series of stones for kitchen knives, and a WorkSharp Ken Onion for Axes. But what if I could sharpen everything in one system? That’s why I now own a Tormek T4 Bushcraft.
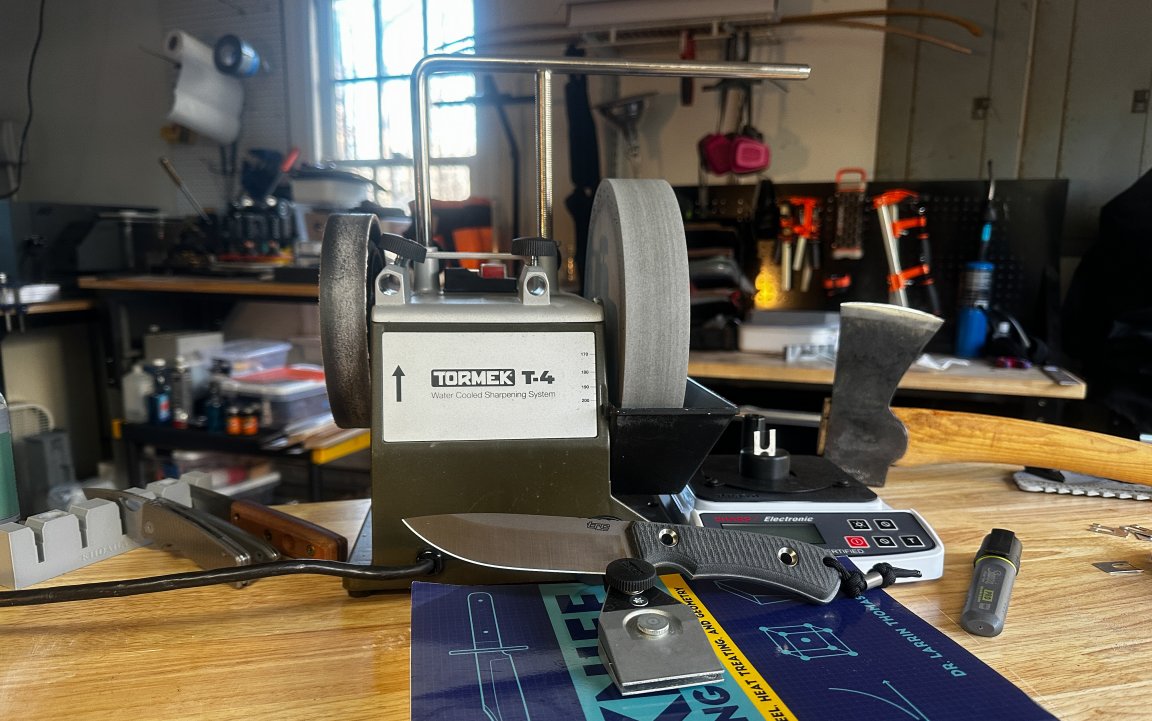
To see how my new sharpener performs, I grabbed a Gransfors Bruks Scandinavian Forest Axe, a CRKT Soldotna, a TRC Freedom Classic, and a White River Knives Adventure Craft. I recorded a starting sharpness reading using a BESS tester, sharpened the knives, and then took an after-sharpening reading. Here’s how the sharpener performed in the hands of a complete Tormek newb.
Tormek T-4 Bushcraft Specs and Features
Pros
- Fast
- Versatile
- Can produce toothy or polished edges
- Can produce a convex edge
- Vast amount of jigs, accessories, and video support
Cons
- Will splash water
- Learning curve
What It’ll Sharpen
- Knives
- Axes and hatchets
- Chisels
- Scissors
- Drill bits
Key Features
- 220 and 1000 grit stone
- 8-inch sharpening stone
- Water cooled
- 8-year warranty for personal use
- Weight: 17.6 lbs
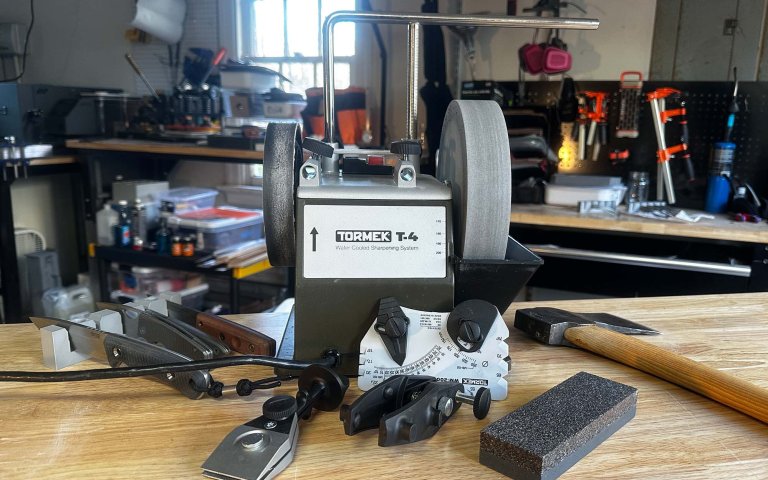
- Included Accessories: Sharpening jigs, flattening stone, angle guide, honing compound, marker, and bandaids.
- Price: $535
How It Works
The Tormek T4 uses a round water stone and a leather honing wheel that spins at a preset rpm. It includes a stone grader, which transforms the stone from 220 grit to 1000 grit (and back again) by laying it flat on the spinning stone for just a few seconds. It’s a fantastically simple system for going from a course to fine stone. The Bushcraft model includes a knife jig and an axe jig. There are a ton of YouTube tutorials from Tormek and pro knife sharpeners on how to use the system. The basic idea is this: Clamp the knife to the jig. Adjust the guide’s height until you find the right angle. Slide the jig smoothly across the guide. Then freehand on the leather hone.
T-4 vs T-8
If you’re looking at the Tormek, you’re inevitably going to decide between the Tormek T4 and T8. The T8 is a true professional knife-sharpening system that can run for hours and is built to handle a high volume of work. That heavy-duty build also makes it heavier (32.6 lbs versus the T4 at 17.6 lbs) and more expensive ($1,045). The T8 uses stones that are larger in diameter and a little wider, which some people prefer. The bottom line is that if you want to start a knife-sharpening side hustle or you do a lot of sharpening, the T8 is the way to go. If you’re using the sharpener for personal use, the T4 provides excellent function for less money and is far more portable.
Testing the T-4 Bushscraft


The first knife I decided to sharpen was a CRKT Soldotna, which had a very dull edge. It required 632 grams of force to cut the filament on my Edge-On-Up BESS tester. The BESS tester is an objective way to measure a blade’s sharpness. It uses a calibrated filament and measures the amount of force required to cut the filament in grams.
I started by clamping the knife in the jig. The Soldtona has a full flat grind with no flat to camp onto, but the Tormek jig self-centers the knife. That makes for an easy and repeatable setup. I marked the edge of the knife with a Sharpie and adjusted the height of the guide until the wheel evenly removed the marker. I like this method of setting the sharpening angle because it removes the least amount of metal compared to reprofiling to a specific angle.
It didn’t take long to raise a burr and then refine the burr. The main challenge I had was getting an even bevel around the blade’s belly and point. I also struggled keeping the edge flat on the stone.
Even though I butchered the sharpening job, I was still able to make the knife 2.5 times sharper. The Soldotna finished out requiring 256 grams of force on the BESS tester, which is just OK. It’ll slice copy paper and be functionally sharp for most tasks.

With a little experience under my belt and a rewatching of the YouTube tutorial, I grabbed my Exodus 3 (aka Adventure Craft). This time, I produced a clean, even edge that was very sharp. It easily glided through thin catalog paper, and I decided to leave it with a toothier edge produced by the coarse 220-grit stone.
After the Exodus 3 I was feeling really comfortable sharpening with the Tormek. I proceed to put incredible edges on a TRC Classic Freedom and a Gransfors Bruks axe. While sharpening the axe, I moved the jig forward and back to create a convex edge.
| Knife | Before Sharpening | After Sharpening |
| CRKT Soldotna | 632 grams | 256 grams |
| Exodus 3 | 437 grams | 224 grams |
| TRC Freedom Classic | 214 grams | 145 grams |
| Grasfors Bruks Axe | 736 grams | 201 grams |
What It Does Best
The strength of the Tormek over other sharpening systems is its speed and versatility. You can sharpen just about anything and go from dull to sharp in minutes. Pairing a Tormek with a belt grinder or coarse stones for thinning primary bevels would make for a complete system.
There is a massive ecosystem of Tormek accessories and YouTube tutorials. That means you can add more versatility to your Tormek and learn helpful tips on how to make your edges even better.
Some accessories I’m looking at adding:
Where It Can Improve
The Tormek T4 will make a mess, so it’s best used in a garage, over a kitchen sink, or outdoors. It also requires practice to master. I recommend starting with your least expensive knives before moving on to your favorite custom.
Final Thoughts
After sharpening just a handful of knives on the Tormek T-4 I was able to go from a so-so result to good edges. It’ll likely take me many more knives before I can get professional results, and the elusive under 100 grams BESS score. That’s a standard that I’m committed to hitting with this sharpener because of its speed and versatility.