For every American whitetail hunter, Western elk hunting is aspirational, calling to them the way Cooperstown calls to a Little Leaguer. The impossibly heavy and branching antlers of bulls are as alluring as the soaring mountains where they live, and the mythology of elk is filled with Western romance: canvas wall tents, the creaking leather of pack trains, and frosty mornings at timberline. And thanks to reintroductions and range expansion, elk are doing well across much of their range. But elk hunting in the West is not necessarily easy, or even affordable for many hunters. Just as Major League Baseball remains stubbornly out of reach for most of us.
So if you’re planning your first elk hunt or if you’re a new elk hunter hoping to find success, you should read our elk hunting guide. We’ve rounded up the tips, tactics, and knowledge you’ll need to at least get in the game.
Table of Contents
You can read this article straight through, or you can tap on a topic below to jump straight to it. Most of the topics listed here dig into related topics. So for instance, if you’re wondering about OTC tags vs outfitters, you’ll want to jump to the general section on elk tags.
- How to Get an Elk Hunting Tag
- Elk Hunting Resources
- Elk Hunting Gear
- General Elk Hunting Tips
- Tips for Hunting Public Land Elk
- How to Call Elk
- Get into Elk Hunting Shape
- Q&A: Answers to Your Elk Hunting Questions
How to Get an Elk Hunting Tag
Though there are millions of acres of public land throughout elk country, attaining a quality elk tag is not all that simple. There are three routes an elk hunter can go. You can buy an over-the-counter tag, you can apply for limited draw hunts (ideally in multiple Western states each year), or you can hire an outfitter and get your tag through them. Each of these routes has its own set of pros and cons. Here’s what you should know about each.
Over the Counter Tags

This type of tag is what it sounds like. You simply show up at the sporting goods store counter (or more likely, the state wildlife department website) and buy your license and tag. It’s similar to what deer hunters in the East are used to when buying deer tags. However there are fewer and fewer OTC elk hunting opportunities for non-resident hunters.
Pros
- No waiting period
- You can obtain a tag every year
- Realistic goals can lead to success
- Most OTC units have lots of public lands
Cons
- High hunting pressure
- Lower quality bulls
- Significant investment for low odds
- Demanding physical hunt
I have been hunting elk for 25 years, and in all but five of those years, I’ve gone the OTC public land DIY route. This type of elk hunting is hard to beat. You buy an elk tag at Walmart, show up to an area, hope the trailhead isn’t too crowded, and get after it. Most OTC tags are archery tags.
It’s essential to stay on top of each state’s OTC language, as it varies. Some western states have OTC tags with caps, which means tags go on sale on a particular day dictated by the state’s wildlife commission, and then they are gone. OTC tags with caps sell out quickly, so know your dates and make a plan.
Expect heavy hunt pressure, even far off the beaten path, and set realistic goals. When hunting elk in an OTC area, I shoot the first legal bull that gives me an opportunity. Remember that success rates in these areas are usually in the single digits. Those willing to wander (and with horses) can still find pockets of public-land elk nirvana, but it’s getting harder and harder to come by.
Read Next: Why Everybody Loves to Hate Nonresident Elk Hunters
OTC Elk Hunting Tip
Don’t overlook areas close to access roads. I don’t go deep too often anymore. Unless I know the area well, I camp close to my truck each night and stay ultra mobile. I prefer diving into deep holes close to access roads that most hunters pass by.
Limited Entry and Lottery Tags

This type of application is essentially putting your name in the hat and hoping it gets picked. Each year you don’t get picked helps you build preference points, which increase your chances of getting picked next season. States vary in how they run their limited entry hunts, so this route requires lots of good research. It also requires patience as many of the top areas require years of putting in before you actually draw.
Pros
- Less hunt pressure
- Better animal quality
- Better bull-to-cow ratio
Cons
- Increased pressure to succeed
- Requires researching odds
- Drawing keeps getting more competitive
- Long-term investment that can become expensive
I had limited entry tags in my pocket for the five years I didn’t hunt OTC. Some took two years to draw, and one took ten. The quality of the animals in the unit often dictates how difficult the tag is to draw. You can hunt OTC in some states and still put in for the annual limited drawing, and I encourage this practice and the building of preference points each year.
You should have different goals and expectations when you pull a limited entry or lottery tag. Do the research, find out what class of bulls the unit is known for, and set your sights on a good one. Be sure to network with other hunters, primarily if you draw a premium unit that took ten years or more. Most hunters will share intel on these units because they know they won’t be hunting it again anytime soon. Social media has its downfalls, but it’s excellent for networking.
It’s important to remember the easier the tag was to draw, the more hunting pressure there will be, so plan accordingly. It’s also important to understand that you’ll likely have to wait years before drawing. It costs money to apply each year. Once you start putting in with a state, you’ll want to continue entering the lottery until you draw so that you finally cash in on your investment. Because of this, you’ll want to do deep research about which states to apply with and which season and unit to focus on. Memberships like Go Hunt and Rolling Bones are useful for cutting down the research time.
Limited Draw and Lottery Tip
Time will be your best friend. Do whatever you must do ahead of the hunt to ensure you get as much time in the field as possible. I have seen hunters wait 20 years to draw a tag and expect the hunt will be a cakewalk. Then they encounter a drought or low elk density due to winter mortality, and need more time to find a quality bull.
Hiring an Outfitter

Some outfitters are guaranteed a certain number of tags, so you can buy your whole hunt (including the tag) from them. Other outfitters will guide you after you draw a limited entry tag on your own. Some outfitters guide on private ranches, others in public wilderness. The public-land outfitters often utilize horses to pack their hunters in deep, beyond where most other public-land hunters can travel on their own.
Pros
- Access to private ground most of the time
- Quality animals
- Outfitter knows the country, and the elk
- Improved success rate
- Not as physical most of the time
- Outfitter packs the animal out (often on horses)
Cons
- Expensive
- Outfitter quality varies greatly
I have gone on several guided elk hunts, and I love them. Many fantastic elk outfitters across the West exist if you research and sift through the weeds. Most quality outfitted elk hunts will cost over $10K, and that cost will only continue to increase. If you have the means, go for it. If you don’t, another option is to work with an outfitter to make a down payment, and lock in their current price. Then pay them each year until you can make the hunt a reality.
I spend over $2,000 elk hunting DIY-style each year in Colorado and live in the state. Most out-of-state hunters will spend close to $4,000. In reality, almost all elk hunting is going to be expensive. Going with a good outfitter, doesn’t guarantee success, but you’re much more likely to be in elk, learn a lot, and have a heck of a good time. If you save for three or four years, you can make an outfitted or semi-outfitted hunt happen.
Tip for Choosing an Outfitter
Ask lots of questions and ask for references. You are the customer. Any good outfitter can answer all your questions and provide a list of references a mile long.
Read Next: What to Look for in a Hunting Outfitter
Elk Hunting Resources
When you think about the planning stage for your elk hunt, you probably imagine practicing with your gun or bow. You might also imagine loading up a backpack and doing some hill training. These are good and important elements of the process. But if you have your heart set on a DIY hunt and you’re traveling from out of state, you should also plan on a good amount of screen time.
The best out-of-state elk hunters are good researchers. They dig into which units are improving and which are declining. They use tools for assessing draw odds. And they are pros at using digital mapping programs like onX for scouting online.
Luckily, there are a ton of good online resources out there that can help the aspiring hunter get in the game. Here are some of the ones we like.
Hunt Planning: Go Hunt
Go hunt is a subscription-based app that will help you identify the units that offer the type of hunting you’re interested in. It filters draw odds, success rates, trophy potential and much more. It costs about $150 for a year, which isn’t cheap, but if you’re serious about a DIY out-of-state hunt, that’s well worth it.
Mapping App: onX
If you’re a public land hunter, you probably already have onX. This digital mapping app is all but a requirement for backcountry hunts these days. But now onX also has a powerful research tool that can help you apply for the right type of elk hunts for you. This is offered through the Elite membership.
Online Course: Randy Newberg’s Outdoor Class
Randy Newberg is a veteran hunter and a public lands advocate. He has a handful of subscription-based instructional courses for elk hunters. These courses focus on specific types of hunts, so choose the one that fits your mission.
YouTube: Cliff Gary

Cliff Gary is a former outfitter and current Youtuber who produces a ton of valuable content for DIY western hunters. His stuff is entertaining but also super useful. Watch his videos on e-scouting and hunt planning.
Elk Hunting Gear

Expert elk hunters rely on a lot of specialized gear when they backpack deep into the backcountry. But the truth is, much of the gear you use for deer hunting will work fine on an elk hunt. However there are some things you need to consider. Read our full roundup on the best elk hunting gear.
Boots
You’ll want boots that allow you to hike steep country without getting blisters or rolling an ankle. Likewise, you’ll need boots that support you when you’re loaded down with a heavy pack. Here’s our guide to the best elk hunting boots.
Packs
The backpack you choose depends on the type of elk hunt you’re planning to do. If you’re backpacking in, you’ll need a large pack to carry your gear and (hopefully) lots of meat on the way out. If you’re camping and hunting closer to the truck, you can get away with a smaller pack, but it still needs to be a capable meat hauler. Read our review of the best hunting backpacks.
Rifles & Ammo
There’s a good chance that your favorite deer rifle and load will work just fine on an elk hunt. But if you’re dying to have a new setup, read our guide to the best elk hunting rifles and best elk calibers.
Broadheads
Broadhead selection depends on the bow you’re shooting. In general, archers shooting a heavier draw weight can opt for mechanical broadheads while hunters shooting a lower draw weight should shoot a fixed-blade head. Read our review of the best broadheads for elk.
General Elk Hunting Tips

Four distinct subspecies of elk currently roam North America. By far the most numerous and widely distributed of them is the Rocky Mountain elk, which can be found in mountains and adjacent habitats from Arizona north to the Yukon. The Roosevelt elk lives in the rainy forests of the Cascades and Washington’s Olympic Peninsula. California’s interior valleys and remnant swamps are home to the rare tule elk, which is creeping back from the brink of extinction. And the Manitoba elk lives in the northern woodlands of the Canadian shield and the St. Lawrence River.
No matter where they live, elk like open meadows but can tolerate dense forest—and they will flee to the densest, most remote timbered pockets whenever they feel threatened. Hunters should key on these edge habitats, where elk emerge to feed at twilight.
Setting up on meadows is a good plan, assuming the animals arrive as scripted. If you prefer a more active type of hunting, climb to a lookout and use optics to find elk and then work out a stalk that gets you within range. Pay careful attention to the wind, always keeping it in your face. Shifting winds have saved the lives of more elk than all the habitat conservationists together.
Especially in the mountains, elk migrate along ancient corridors that deliver them from higher-elevation summer ranges to more hospitable winter ranges. Once snow piles up, intercept elk along these routes. Or you can bowhunt during the rut and call bugling bulls into bow range.
There’s a sound reason most archery seasons for elk open in early September. These short-range hunting opportunities are timed to coincide with the rut, the breeding season when mature bulls gather and defend large breeding harems of cows from interlopers.
In practice, it’s not quite so easy. Sometimes calling spooks elk, other times it attracts only immature bulls (called spikes or raghorns). But when it works, calling a bull into bow range is like conjuring a cage fighter. I know of nothing else in hunting that compares to having an 800-pound (363-kg) bull come running to your call, wild-eyed and heaving, thrashing brush with his remarkable antlers, calling you out to fight. —Andrew McKean
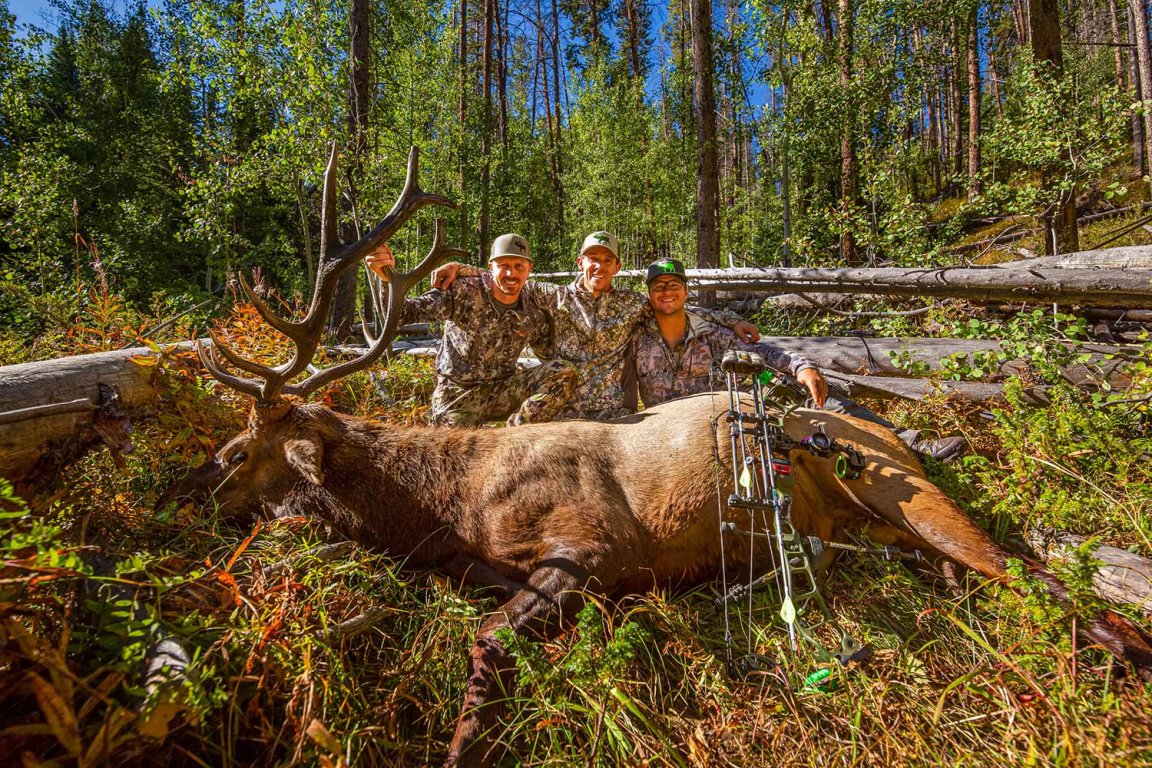
Tips for Hunting Public Land Elk

The mission was a Colorado/Wyoming public-land archery elk hunt with over-the-counter tags. There were three of us — two with Colorado tags and one with a stamp from the Cowboy state. Hunting on Colorado’s northcentral border was our best option, since it would cut down on drive time between states and give us more time in the field. The planning was done. Now it was time to execute. Here’s what we learned. —Jace Bauserman
Always be Ready to Find New Ground
One thing we’ve learned, especially when chasing public-land elk in heavily pressured OTC units, is to not get married to a spot just because it’s produced in the past. Check it again? Possibly, but only if there’s a logical reason to do so. Time is precious. Don’t be afraid to strike out and look at new country. On the flipside, just because you don’t hear elk and don’t see any shooters, don’t write an area off. If the sign says elk are in the area, trust it. Elusive bulls tend to go quiet when hunting pressure ramps up.
Set Up In Front of Cover, Not Behind It
Too many bowhunters hinder themselves by setting up behind cover. Get in front of cover and give yourself shooting options. Don’t be satisfied to get a bugle and setup. Unless the bull is right on top of you, get yourself in a position where you can execute a shot. If possible, get parallel with the bull on even ground.
Be Prepared for a Frontal Shot
I only recommend taking this shot if you’ve done a good study of an elk’s anatomy and you’re super confident in your equipment. I will not take this shot beyond 20 yards. (Read where to shoot an elk).
Public-land OTC elk tend to move to heavily timbered areas, and often when they come to investigate a call, they will simply stick their front half through cover. Being able to execute this shot is often the difference between meat for the grill and a sob story.
Learn the Landscape
Don’t be a unit jumper. It takes time, often years, to learn a unit. As long as the unit holds elk, keep investing time. The more deeply you know a unit, the more success you’ll have.

Know Where the Elk Will Go
Pressured elk love deep drainages, benches (flat spots that give way to steep vertical terrain) and locations where seemingly impenetrable timber gives way to small open meadows where they can feed.
Learn a Diaphragm Call
Be able to make realistic cow and bull vocalizations. Watch YouTube videos of top callers like Corey Jacobsen, and then try and mimic his sounds. Record your calling and be honest with yourself about how you sound. Being able to truly sound like an elk will set you apart from the masses.
Be Unselfish
I highly recommend going into the elk woods with a three-man group of pals. Killing a bull is a team effort. Even when you’re not behind the bow, be engaged. Unless you’re looking at a map, get off your phone. Instagram can wait! Your job is to be scanning the timber, calling, working the decoy, checking the wind (and being a pack mule after the hunt is successful).
Be Prepared for the Packout
Elk are big-bodied animals. If you plan to pack them out on your back, be sure you have a backpack capable of the job. Also, know how to bone-out meat. You don’t want to pack unnecessary weight. Distribute meat into game bags. No one person should be hauling more weight than another.
Conserve Your Energy
When there is downtime in the woods … sleep. Running into town to shower and do laundry is a nice midday relief, and it’s another benefit of not packing in deep.
Always Believe
Elk hunting is tough. If there’s one tip I can give to the public-land OTC bowhunter, it’s this: Never quit. Just keep going and good things will happen.
How to Call Elk

In another lifetime, Wayne Carlton might have been a carnival barker. He has that way of hooking you, yodeling or catcalling to catch your attention in a crowd and then keeping it with a slightly ribald joke or curious turn of phrase. You might recognize Carlton from his career as a pitchman for Hunter Specialties, his Southern accent purring from beneath a cowboy hat as he describes how his latest call will turn trophy bulls inside out and bring turkeys running from the next township. He’s back in business with his Native by Carlton brand, and he still has plenty to say.
Outdoor Life: You have talked about setting the stage for a conversation with elk. What do you mean by that?
Wayne Carlton: When you blow a call, you’d better have some idea of what you expect the answer to be. You can’t stumble through the woods blowing a call and expect to create a conversation. One of the first bulls I ever called in was on Red Mountain Pass in Colorado. I walked in the dark to the crest, about 12,000 feet above sea level, and I waited for the wind to turn from blowing downhill to blowing uphill before I blew a call. I knew that any bull below me couldn’t smell me, and that they couldn’t resist answering an elk uphill of them. It worked. I had a bull start raking trees, and I was able to spot him and home in on him.
OL: So how do you advance the conversation?
WC: With that Colorado bull or any animal you are calling to, don’t wait between their call and your call. The second they stop responding, you blow another call so that they don’t have time to think or to doubt. You just get them to respond instinctively by getting in their head. That Red Mountain bull would rake that tree and bugle, and I’d already be ready to blow a bugle on top of his. It just revved him up to the point where he had to react by coming to me. That’s the essence of game calling. With bears, as long as you keep calling, they keep coming. But if you ever stop, they do too.
OL: But what about pressured animals who have heard weeks of calling? Don’t you risk overcalling?
WC: Pressured bulls may have heard all the wimpy bugles and reedy cow calls that everybody else blows, but I’ll light up an area with very high-pitched calls, just squeaky-thin screams, and I’ll get responses from mature bulls. If in doubt, just torque the pitch. High-pitched calling works with turkeys, predators, hogs…

OL: How much emotion do you build into a call? Or is it just hitting the right note at the right time?
WC: Have you ever heard an electronic caller? Those digital sound files are exactly the right sound. But they don’t have any intonation or cadence. The perfect note delivered without emotion is useless. You can blow the wrong note on a diaphragm or tube call, but if you do it with intensity and feeling, and quicken the cadence, you can get to animals that might not respond to 80 to 90 percent of “canned” calls. The difference is that you sound urgent. If in doubt, call faster and with more feeling, and you’ll get animals to respond.
OL: Okay, but even you have to admit that there are some animals that are simply uncallable. Right?
WC: I hate to admit it, but yes. We hunters think the world revolves around us. We have a good night in a comfortable bed and then go hunting after a cup of coffee, and we expect the world to be in the same situation. But a big herd bull may have been rutting and fighting all night, and we show up at dawn and expect him to play according to our rules? You never know what sort of night the animal you are interested in had before you showed up with your perfect call. Some animals are never going to come to your call, and it’s simply because they have other priorities.
OL: What’s the biggest mistake elk callers make?
WC: They keep blowing their single perfect call. You might have the world’s sweetest cow chirp or the best immature bull chuckle on the planet, but it’s not what a big, mature bull wants to hear. You need to have a whole range at your disposal so if one call doesn’t work, another one might, and you need the courage to try it. That, and you need to pour emotion and cadence into any calls. If you do that, have a wide range of calls at your disposal, and can make them sound urgent and good, you’ll call in elk and any other animal that decides to hold a conversation with you. You just have to be a good conversationalist. If you don’t have anything to say, why on earth would they come to you?
Read Next: Best Elk Hunting Calls
Get into Elk Hunting Shape
Many new elk hunters severely underestimate the physical challenge of a DIY elk hunt (or even a guided hunt for that matter). If successful, you’ll have to pack hundreds of pounds of meat off the mountain. If the weather is hot, you’ll have to do this quickly or the meat will likely spoil. So it’s critical for elk hunters to be physically fit. The bottom line is this: You need to be capable of hiking steep terrain (possibly with a heavy pack), at elevation, for days on end.
The best way to train for this is simply to hike the hills with a backpack. Beyond that, here’s our step-by-step guide for getting into elk hunting shape.
Q&A: Answers to Your Elk Hunting Questions

When is elk hunting season?
In most places, archery elk hunting season starts in early September. Depending on the state and unit, the season can run into November or even December.
What states have elk hunting?
All Western states have elk hunting seasons. However many of these states require hunters to draw a tag. Some Eastern states with reintroduced elk herds also have elk hunts, prime examples being Pennsylvania and Tennessee.
How much does it cost to go elk hunting?
Fully guided elk hunts can cost from about $8,000 up to $15,000 or more. Guided hunts continue to get more expensive each year. DIY hunts are more affordable. A resident elk license in Colorado costs about $63. However, once you add in food, gear, gas, and other expenses, you can expect to spend at least $1,000 to $3,000 on a DIY hunt.
What rifle to use for elk hunting?
First and foremost, use a rifle you can shoot accurately. Medium-sized calibers like the .270 Winchester or 6.5 Creedmoor are fine choices for elk hunting. Many hunters prefer shooting a larger .30-caliber rifle for elk. Ideally, the rifle will be light enough to carry in the mountains and maneuverable when stalking through the timber.

Final Thoughts on Elk Hunting
Competition for elk tags is tough these days. You could spend a lifetime waiting to win that special limited entry tag, or you could hunt over-the-counter every year (albeit with low odds for successfully punching that OTC tag) while you wait for that special tag. A smart bet for most non-resident elk hunters is to apply for units that have relatively high odds of drawing every few years. That way you get to hunt every few seasons and learn more about elk hunting in general. There’s also the excellent option of cow-only hunts. Then one day, when you do draw that coveted limited-entry tag, you’ll be ready to put all that elk hunting knowledge to use.