We may earn revenue from the products available on this page and participate in affiliate programs. Learn More ›
How to draw a compound bow? Simply grab the grip and yank back on the string until you can’t pull any farther, right? Unfortunately, or maybe happily, drawing and shooting a compound bow is more complicated than that. You need to develop a routine made up of specific steps and then follow that routine every time you draw a compound bow. The more time you put into creating a shot routine and mastering each step within that routine, the more successful you’ll be at bowhunting. Here’s how to get started.
The Compound Bow Grip
It’s natural for a new archer to not know how to hold a compound bow. They typically get their hand as far into the bow’s grip as possible and then squeeze until their knuckles turn white. This is because shooting a compound can seem like an intimidating task, and the new archer believes the more hand they have on the bow and the tighter their grip, the more control they will have. Many also think a tight grip will keep the bow from jumping out of their hand. But this is not what you want to do. Step one in learning how to draw a compound bow is mastering the grip.

The first thing you need to do is develop a grip that is repeatable. Take your bow arm (your left arm for righties) and hold it out in front of you like you’re making the stop signal. You’ll notice your thumb will be at a 45-degree angle. This is the perfect position to put your hand into your bow’s grip. Hold your bowstring with your non-grip hand and let the bow’s bottom cam rest on your thigh. Now practice setting your grip hand properly into place. Keep the 45-degree angle, but make sure you don’t get too far into the grip. You want the bow’s grip to sit outside your hand’s lifeline in the palm swell area.
Once you can grip the bow the same way every time and it feels comfortable, let go of the bowstring and raise the bow up out in front of you. While doing this, keep a light grip. The more you squeeze the grip, the more torque you transfer into the riser, and that torque will negatively impact arrow flight. Your grip should be light and airy. Let your index, middle, and ring fingers rest gently on the front of the grip. The bow will not jump out of your hand, I promise. If you’re still worried about this, add a wrist sling.

Bow Position, D-Loop Clip, Focus
Step two in how to draw a compound bow is all about the d-loop. This step gets overlooked, especially when you’re bowhunting, but remember, we are building a repeatable routine on the range that we’ll execute in the field. With your bow’s bottom cam resting on your thigh and your grip perfect, hook up to your d-loop with your bow release. Just as you did with your grip, practice this step often. These moments and steps are critical to proper visualization. After hooking onto your d-loop, fix your gaze on your target. See the arrow impacting the exact spot you want it to hit. Control your breathing and block the world out.
How to Draw a Compound Bow and Anchor
Now it’s time to draw your compound bow and ease into anchor position (the point at which the string touches your face). This step should never be practiced or performed without an arrow loaded. Dry fires can wreck your bow (without an arrow loaded, the bow’s riser, limbs, and cams take the brunt of all the bow’s energy).
Raise your bow straight out in front of you and pull the string straight back. If you can’t do this and have to tip the bow up or down, your bow’s draw weight is too heavy. Too much weight leads to a lousy draw cycle and shoulder problems. Shooting a bow should be fun. You can always increase draw weight as you shoot more and build strength. Until then, shoot a comfortable draw weight that allows you to pull the string straight back.

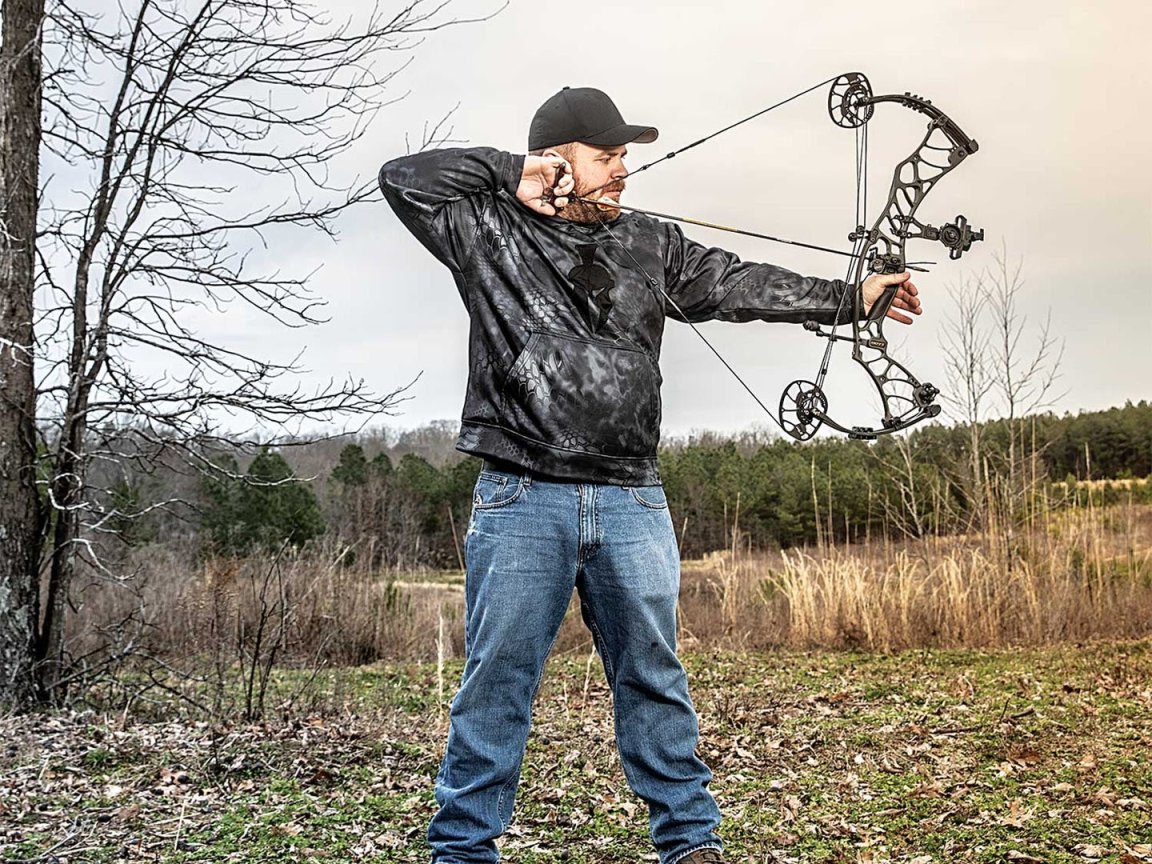
The draw process should be silky smooth. Don’t get jerky. Bring the string straight back and pull into a repeatable two-point anchor. For me, this is with the string touching the tip of my nose and the V shape formed by my index and middle finger resting on the bottom of my jawline. The index finger goes below the jawline, and the middle finger goes above. This is a great anchor for any handheld release shooter. If you’re shooting an index-finger release, the string should rest on the tip of the nose, but the knuckle of your index finger should be near the base of your ear lobe. Find a 2-position anchor point that feels comfortable to you and get there every time.
Be sure your peep and sight housing line up perfectly when you find your perfect two-point anchor. If they don’t, you’ll need to adjust the peep sight or have a bow shop professional do it for you.
Read Next: Bowhunting Prep: 5 Drills to Prepare You for Your Best Bow Season Ever
Let the Bow Release Fire the Bow
The shot is near now. Your job is not to get in a rush or anticipate the shot. Your job is to keep breathing and stay relaxed. Let the pin float on the target while pushing into the target with your bow hand. Trust your pin to float over the target. The best archer in the world can’t hold their pin dead still on a target. Your subconscious mind constantly drags that pin back and forth across the spot you want the arrow to impact.

I imagine pushing the riser into the spot I want the arrow to impact. While driving into the riser with your bow hand, pull into the bow’s back wall (which is the end of the draw cycle, meaning you can pull the string any further) with your release hand. Imagine someone standing behind you and wanting to push the point of your elbow into their nose. The most important thing during all of this is to stay relaxed. Don’t squeeze the grip tighter, and don’t have a death hold on the release. You’re simply pushing into the riser with your bow hand while driving the elbow back on the release arm. The more relaxed you are, the easier the shot will break.
It’s not your job to fire the bow; that’s not how to draw a compound bow correctly. It’s the job of the bow release. If you’re firing your bow, you anticipate the shot, and you’ll never be as accurate as you could be. Learn to let your release fire the bow from the start, and your archery life won’t be plagued with poor form, target panic, and inconsistent shooting.
I recommend building a shooting device so you can practice shot execution regularly without ever firing an arrow. The process is easy. Get an old bow grip from an archery shop and run a string measured to your draw length through the grip. It’s a simple training device that will make you a better archer.
Follow-Through
There’s only one more step in how to draw a compound bow. If you let the release fire the bow, the shot should be a surprise. If this is the case, your bow will naturally fall forward, and the elbow of your release arm will fall backward. Your head will stay in the same spot, and your gaze will hold on to the location you wanted your arrow to impact until the shaft hits home. Don’t exaggerate the follow-through. If you’re doing your job of letting the release fire the bow, it will happen naturally.

An excellent way to check shot execution and proper follow-through is to have a friend take a few videos of you shooting. You’ll be able to see your entire shot process and identify areas where the process may be breaking down. You’ll also quickly be able to diagnose a punchy thumb or index finger. If you jab and punch at the release, your follow-through will never be as good as it should be.
Remember, these are steps for how to draw a compound bow. Stay patient and don’t expect immediate mastery. The best way to become a great archer is to take your time. I recommend designing a shooting plan like you would a workout plan. Break down what you want to work on each day. I also recommend keeping a shooting journal to note your progress.